Creamy Cheesecake Crescent Rolls Casserole
- A Beginner's Guide to Essential Ingredients for Your Kitchen
- Elevating Your Kitchen Game with Professional Cooking Methods
- Pro Tips & Secrets for a Winning Casserole
- Perfect Presentation
- Storage & Make-Ahead Ideas
- Creative Variations
- Complete Nutrition Guide
- Closing Thoughts
- Frequently Asked Questions
- 📝 Recipe Card
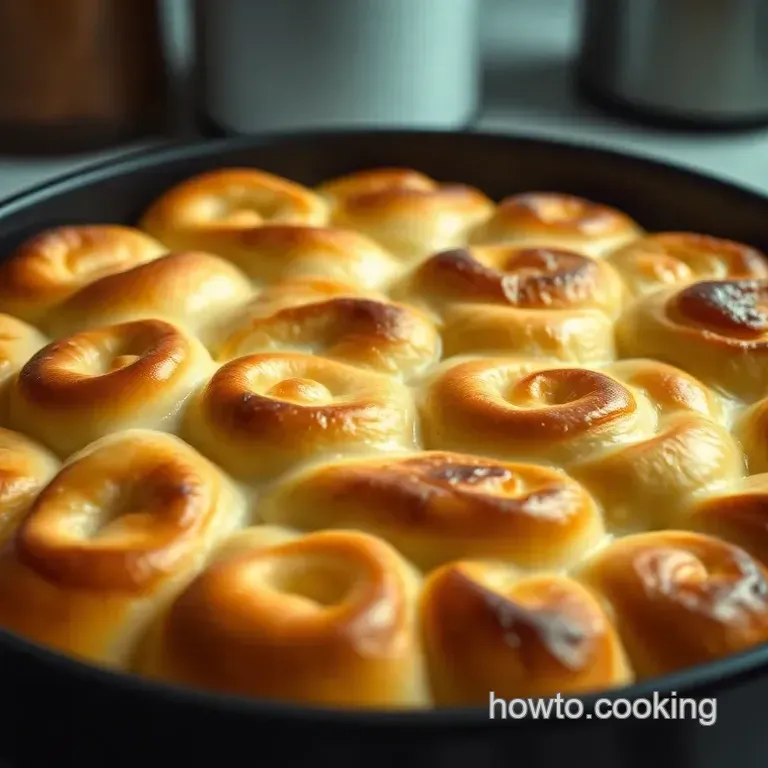
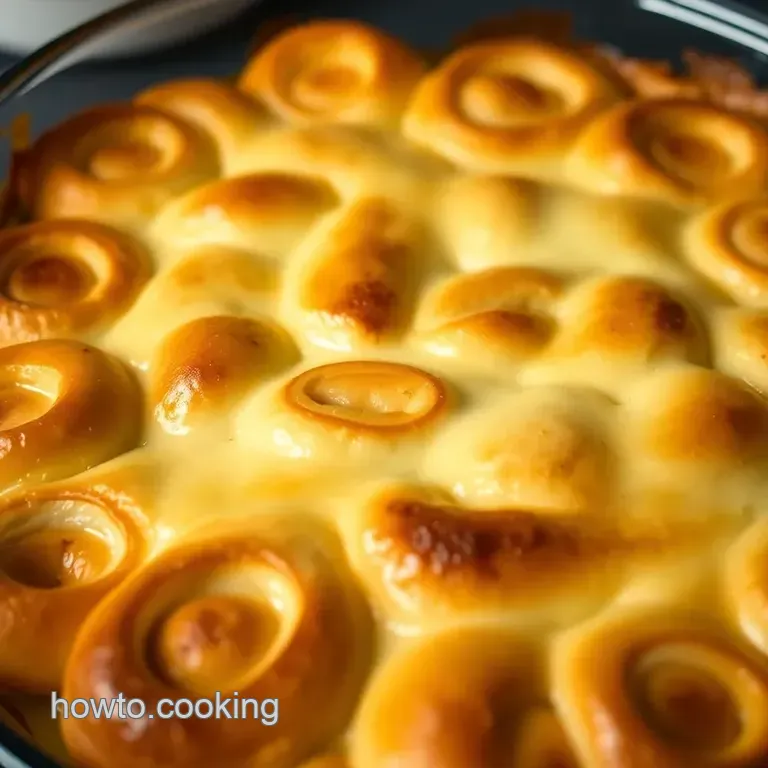
Have you ever stumbled upon a recipe that simply makes your heart skip a beat? well, that’s how i felt when i first tried my cheesecake crescent rolls casserole .
Picture this: golden, flaky crescent rolls hugging a velvety cheesecake filling, all topped with sweet cinnamon sugar. it was like a warm hug on a chilly sunday morning.
Honestly, who wouldn’t want to dive into that? this casserole isn’t just for dessert; it’s perfect for breakfast too! talk about versatility!
Sweet History Behind a Sweet Dish
Now, let’s chat about where this delightful dish came from. the crescent roll dough has been around for ages, hailing from the ‘booming’ kitchen culture of the 19th century in austria.
But combining it with creamy cheesiness? that’s a more recent love affair in american kitchens. fast forward to today, and this easy cheesecake dessert is everywhere from brunch gatherings to potlucks.
It’s no wonder families love it. it’s easy, quick, and scream worthy delicious!
You’d think a casserole like this would be time consuming, right? well, fear not! with just about 15 minutes of prep and 30- 35 minutes in the oven, you’re ready to impress even the pickiest of eaters.
And the best part? it serves 8-10, so it’s perfect for a crowd. plus, your wallet will thank you because it doesn’t break the bank.
Score!
Why You’ll Love This Recipe
So, what are the perks of whipping up this creamy cheesecake crescent rolls casserole ? first off, let’s talk about health benefits.
While this dish might feel indulgent, cream cheese packs in calcium and good fats when enjoyed in moderation. it hits that sweet spot of satisfying comfort food without being overly heavy.
Not to mention, it’s a show stopper for special occasions! planning a brunch for your gal pals or a cozy family dinner? this casserole is a crowd pleasing option .
You can even dress it up with whipped cream or a scoop of ice cream for a sumptuous dessert at gatherings.
And did i mention it’s customizable ? swap in your favorite fruits for a pop of color and flavor, or mix in chocolate chips if you’re feeling wild.
This recipe can morph into whatever you make it! oh, and quick baking tip: if you want to prep ahead, you can assemble the casserole and pop it in the fridge.
When you’re ready to bake, just slide it into the preheated oven!
All About the Ingredients
With minimal ingredients like crescent roll dough, cream cheese, sugar, and cinnamon, you’re just a few steps away from culinary bliss.
Get ready for a dish that’s creamy yet flaky, sweet yet comforting. it’s the perfect fit for breakfast or dessert, making sure every family member leaves the table happy.
Now that you’re all fired up to make this masterpiece, let’s jump into the ingredients you’ll need. Trust me, this is one recipe you won't want to miss!
A Beginner's Guide to Essential Ingredients for Your Kitchen
Oh man, cooking is such an art! but before you can master that art, you have to start with some essential ingredients.
We all want our dishes to pop with flavor, right? so, let’s break things down into easy bits, focusing on ingredients and spices that’ll have your meals singin’.
Premium Core Components
When tackling any recipe, quality matters . Here's what you should look for:
- Detailed Measurements: Whether you prefer the classic cups and tablespoons or are feeling fancy with grams and milliliters, make sure you know what you're working with. For those Crescent Rolls Recipes or that creamy casserole, keeping measurements precise can turn good into show stopping!
- Quality Indicators: Not all ingredients are created equal. Look for vibrant colors , fresh aromas , and labels that scream, "I’m fresh!" For example, soft cream cheese should be smooth and slightly tangy, not rubbery or dry.
- Storage Guidelines: No one likes spoiled ingredients! Most spices last years, but fresh herbs? They'll start wilting in a week. Keep them in a cool, dry place for longer shelf life.
- Freshness Tips: Always give your ingredients the sniff test. Stale spices? No thanks. Choose fresh, local produce when possible to pack maximum flavor into your creations!
Signature Seasoning Blend
Spice it up! Finding the right spice combination can really transform a dish into something magical.
- Essential Spice Combinations: You’ll want a solid base of salt, pepper, garlic powder, and onion powder . Sprinkle these like you own the place!
- Herb Selections: Think basil, thyme, or cilantro. Experimenting with combinations can elevate even the simplest meals. Ever tried rosemary with roasted potatoes? Yum!
- Flavor Enhancers: Don't forget about the basics like lemon juice, balsamic vinegar, or even a touch of honey. These can brighten and deepen flavors in your dishes.
- Regional Variations: Be bold! Use spices native to parts of the world that inspire you. Think cardamom for East Asian flavors or cumin for a little South American twist!
Smart Substitutions
Sometimes, life gets in the way and you don't have that perfect ingredient in hand. But that's okay!
- Common Alternatives: Don’t let that missing ingredient get you down. Almond milk works when you’re out of regular milk, and Greek yogurt can replace sour cream. Win-win!
- Dietary Modifications: If gluten’s not your friend, look for gluten-free substitutes for that buttery crescent roll dough.
- Emergency Replacements: Out of eggs? Flaxseed meal mixed with water can often work wonders in baked goods.
- Seasonal Options: Use what’s fresh in your area. Peaches in the summer for recipes (or breakfast casserole ideas!) or butternut squash in the fall it's all good!
Kitchen Equipment Essentials
Alright, let’s tackle the tools!
- Must Have Tools: You don’t need a fancy kitchen; a good mixing bowl, measuring cups, and a whisk can take you far. Honestly, I started with just those!
- Alternative Equipment Options: Don’t stress! A fork can do the job of a whisk in a pinch. Creative solutions will make you a kitchen pro.
- Preparation Tips: Take time to prep before you dive in. Chop your veggies, gather all your ingredients this whole “mise en place” thing isn’t just for chefs!
- Storage Solutions: Keep your spices in jars that seal tightly. You don’t want them losing their punch.
Now that you’ve got the scoop on essential ingredients , it's time to dive into making those tasty recipes. How about giving that Cheesecake Crescent Rolls Casserole a try? You’ve got the skills now, and trust me, this sweet breakfast treat is going to wow everyone at the table!
Grab those crescent rolls, cream cheese, and let’s get baking!
Elevating Your Kitchen Game with Professional Cooking Methods
When you step into the kitchen, you want to get things done smoothly, right? well, professional cooking methods can make that happen! whether you're a newbie or a seasoned home cook, mastering the fundamentals can change the game.
Let's dive into some essential preparation steps that’ll have you cooking like a pro in no time.
Essential Preparation Steps
Mise en place it's a fancy french term that simply means “everything in its place.” before you even think of hitting the stove, gather all your ingredients.
Chop your veggies, measure your spices, and have everything organized. this not only cuts down on chaos but helps with time management too!
Speaking of time, managing it effectively is a skill you want to hone. think of each dish as a chorus to a song you love.
Know when to add ingredients, what needs more cooking time, and when to clean as you go. that way, once the cooking starts, you won’t be scrambling like you forgot your lines in the middle of karaoke night.
And let’s chat about organization strategies . keep your workspace tidy trust me, a clutter free counter makes a world of difference.
Use bowls and containers to keep everything neat. it’ll save you from the heart pounding, sink-or-swim moments when you’re racing against the clock clock icon .
Don’t forget about safety considerations! always keep one hand clean when working with raw ingredients. you're not on a reality cooking show where you'd be judged for using your phone while chopping.
Trust me, no one wants a trip to the er! and speaking of safety, don’t touch a hot surface unless you want a nasty burn.
step-by-step Process
Now that we have the prep down, let’s explore the step-by-step process of professional cooking.
Temperature control points are crucial. for meats, make sure your chicken hits at least 165° f ( 74° c) to avoid any foodborne illnesses.
Fish should be about 145° f ( 63° c) .
Precision timing can be the difference between dinner and a disaster. use a timer even if it feels a bit old school.
If a recipe says bake for 20- 25 minutes , set it for 20 and check! better safe than sorry!
Watch for visual cues for doneness . It’s not just about temperature; trust your senses! Meat should be golden, and veggies should be vibrant and crisp.
Expert Techniques
Now let’s take it to the next level with some expert techniques .
Don’t be afraid to get experimental! Learn professional methods like sautéing, braising, or poaching . Each technique enhances flavors it’s like adding a new note to that favorite song!
Critical steps include tasting your food as you go. what? yes! your palate is your best guide. just remember to use a clean spoon, alright? nobody wants a flavor mishap because of double dipping.
Have a quality checkpoint . before serving, do a quick smell check. if it smells so good you could eat it raw, you’re on the right track! and if something’s off, troubleshoot.
Maybe a splash more acid (like lemon juice) can rescue the dish.
Success Strategies
Ah, here comes the good stuff success strategies ! avoid common mistakes like overcooking by setting timers and sticking to the recipe.
It’s worth it to follow along like a loyal fan at a concert.
If your dish doesn’t turn out ideal, consider quality assurance tips. did you measure all the ingredients? fess up what went wrong? record keep, my friend! jot down anything you’d change for next time.
Want to make things even easier? think about make-ahead options . a lot of these casserole baking techniques can be done a day in advance.
Need a dessert to wow your friends? try my cheesecake crescent rolls casserole ! it’s like a warm embrace on a plate and perfect for any gathering.
Additional Information...
From cooking tips to recipes, there's so much to explore. Remember, cooking is all about having fun and sharing what you love! Stay tuned as I navigate through more delicious options, and let’s keep this culinary adventure rolling!
Pro Tips & Secrets for a Winning Casserole
When it comes to whipping up this crescent rolls recipe , i’ve got a few insider tips to ensure your easy cheesecake dessert turns out perfect every single time.
For starters, let’s talk cream cheese . you want it soft and at room temperature. trust me, this makes mixing a breeze.
If you’re in a rush, pop it in the microwave for about 10 seconds . just watch it nobody wants melted cheese, right?
Now, for the time saving techniques : prepping the ingredients beforehand will save you loads of time. measure out your sugar and cinnamon, and have your dough ready to go.
Less chaos means a smoother baking experience, and we all know that’s what we want when we’re trying to impress family or friends!
Flavor enhancement? oh my gosh, drizzle that melted butter generously don’t skimp! that’s gonna give you that rich, buttery flavor that makes this dish sing.
And don’t forget about that cinnamon sugar topping it makes every bite feel like a warm hug.
For presentation, try slicing your casserole into neat squares before serving, and serve it warm, ideally with a dollop of whipped cream or a scoop of ice cream on the side.
Trust me, your guests will oooh and ahhh!
Perfect Presentation
Let’s be honest; we eat with our eyes first. so, when serving your creamy casserole desserts , take a minute to make it look pretty! plating can make all the difference.
Use a nice square plate and place your slice off-center, leaving some room for decoration.
For garnishes, fresh fruit is a winner think strawberries, blueberries, or even a few mint leaves for that pop of color.
Mixing colors can elevate your dish: you’ve got the golden brown from the baked rolls, the creaminess of the filling, and some vibrant fruit to brighten things up.
You can also sprinkle a bit of powdered sugar on top before serving. it adds that sweet finishing touch and makes your casserole look pretty fancy.
It’ll have everyone thinking you slaved away in the kitchen when, really, you just layered stuff together!
Storage & make-ahead Ideas
Okay, real talk. this casserole is perfect for making ahead, especially with all the make-ahead casseroles i’ve encountered. you can prep it the night before and keep it stored in the fridge until you’re ready to bake it the next day.
Just follow the same steps up to baking, then pop it in the oven straight from the fridge so easy!
For storage, cover it well with aluminum foil or plastic wrap. this will keep it fresh for about 3 days if kept in the fridge.
And hey, if you want to keep it a little longer, this recipe is freezer friendly . you can freeze slices individually and just reheat them when you're ready for some sweet goodness.
Just pop them in the microwave or a warm oven until nice and heated through.
Creative Variations
If you want to mix things up and who doesn’t? there are tons of ways to customize this dish. you could add fresh fruit between the layers for a refreshing twist or throw in some mini chocolate chips for a delightful surprise.
Want to wow your guests at a gathering? try a fruit swirl using mashed strawberries or blueberries right in the cream cheese filling.
My sister loves to switch things up with nutty flavors: chopped pecans or walnuts sprinkled on top before the last bake adds this fabulous crunch.
And for those who keep an eye on their diets, you can sub the sugar with coconut sugar or a sweetener of choice.
The beauty of this baking with crescent dough recipe is its flexibility.
Complete Nutrition Guide
So, if you’re wondering about the health aspects here’s the scoop. each serving has around 350 calories , with some protein and fats thrown in there.
Of course, if you start adding tons of toppings and sides, those numbers can change, but hey, it’s a treat!
This casserole is a great balance of sweetness and creaminess, definitely fitting into the realm of comfort food recipes . it’s perfect as a breakfast treat or a dessert after dinner.
Just keep an eye on portion sizes, especially since it’s so easy to eat a second slice!
Closing Thoughts
Honestly, don’t be intimidated by this easy sweet treat . it’s simple, and with a few personal touches, it can really shine! stick to these tips, and you’ll end up with a crowd pleasing casserole that everyone will love.
Whether you’re serving it at brunch, a family gathering, or just treating yourself this cheesecake crescent rolls casserole is an unbeatable combination of flavors and textures.
Go ahead get baking! you'll be so glad you did!
Frequently Asked Questions
Can I make the Cheesecake Crescent Rolls Casserole ahead of time?
Yes, you can prepare the casserole in advance! Assemble it in the baking dish, cover it, and store it in the refrigerator for up to 24 hours before baking. This allows the flavors to meld nicely, making it even more delicious.
How do I store leftovers from the Cheesecake Crescent Rolls Casserole?
Leftovers can be covered and stored in the refrigerator for 2 to 3 days. Just reheat individual slices in the microwave or in the oven until warmed through. You can also freeze slices for later enjoyment just wrap them tightly in plastic wrap and store them in a freezer safe container.
What can I add to customize my Cheesecake Crescent Rolls Casserole?
There are plenty of ways to customize this casserole! Consider adding fresh fruits such as strawberries, blueberries, or peaches between the layers for added flavor. You could also mix in chocolate chips into the cream cheese filling for a sweet twist, or sprinkle nuts on top for extra crunch.
Is the Cheesecake Crescent Rolls Casserole suitable for freezing?
Absolutely! This casserole freezes well. Allow it to cool completely, then wrap it tightly and store it in the freezer for up to 2 months. To reheat, thaw in the refrigerator overnight and then warm in the oven until heated through.
Can I substitute ingredients in the Cheesecake Crescent Rolls Casserole?
Yes, you can make several substitutions! For the crescent roll dough, you might use puff pastry instead, though you may need to adjust baking times. If you're looking for a lighter option, Neufchâtel cheese can replace cream cheese. Feel free to use granulated sugar substitutes if you want a lower calorie dish.
What do you recommend serving with the Cheesecake Crescent Rolls Casserole?
This casserole is delicious on its own, but you can enhance it by serving with whipped cream, a scoop of ice cream, or a light fruit salad on the side. A dusting of powdered sugar adds an elegant touch, especially for a brunch or special occasion.
Creamy Cheesecake Crescent Rolls Casserole

Ingredients:
Instructions:
Nutrition Facts:
| Calories | 350 |
|---|---|
| Protein | 5g |
| Fat | 20g |
| Carbs | 38g |
| Fiber | 1g |
| Sugar | 15g |
| Sodium | 250mg |
