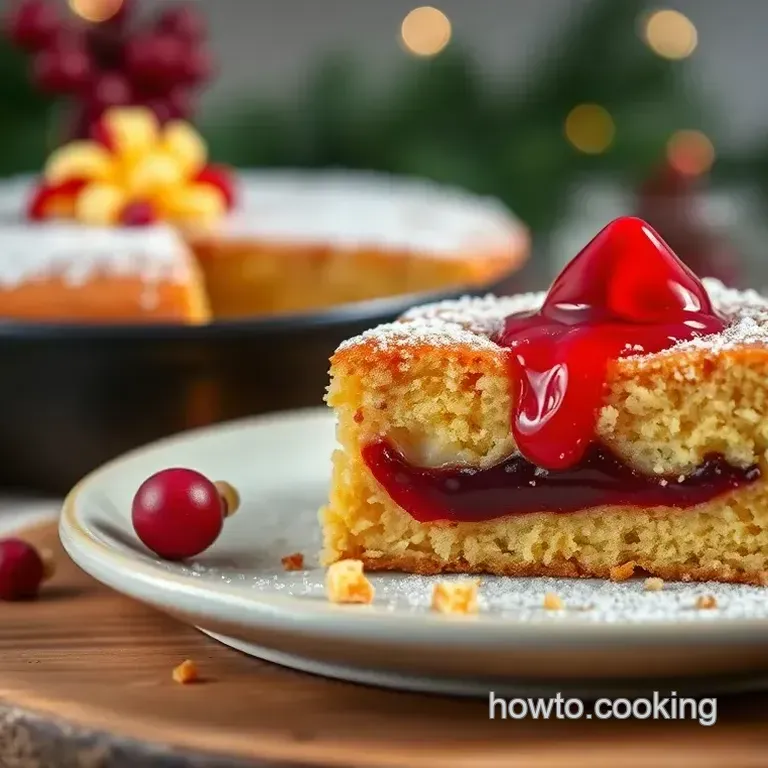
Vibrant Poke Cake with Jello Filling
Jumping Into the World of Poke Cake
Oh my gosh, have you ever had a dessert that just screams fun? a few years ago, i hosted a barbecue, and i wanted to wow my friends with something colorful .
That’s when i discovered the poke cake with jello filling - festive treat . i remember watching my buddies’ eyes widen when they saw that vibrant slice.
It's like a cake party on a plate! this recipe is not just easy; it’s a full-on crowd pleaser. just imagine the delightful layers of fluffy cake and jiggly jello so good!
Let’s take a little time to appreciate where this magic comes from. the poke cake trend started back in the 70s and quickly stuck around at potlucks, birthdays, and basically any reason to celebrate.
Fast forward to today, and it’s still a popular choice because who wouldn’t love that combination of cake and a soft, fruity filling? you can whip this up in about 1 hour and 15 minutes total, and i promise, it’s easy as pie (okay, cake!).
It makes 12 servings , so it’s perfect for gatherings without breaking the bank.
Why You Need This Cake in Your Life
Now, let’s talk benefits! first up, the health angles. this poke cake is a great light and refreshing dessert option, especially with the fruity jello adding some zing.
Plus, if you’re looking to impress at a summer picnic or a birthday bash, this cake is a total showstopper.
People love that it’s light, but you can still get creative! you can easily switch up flavors depending on what jello you choose; maybe you want to mix it up with some seasonal cake recipes or fun birthday cake ideas .
No rules here just follow your heart!
And let’s not ignore the party potential . this isn’t just dessert; it’s a fun centerpiece! bright colors and layers mean it stands out, and trust me, it makes for some gorgeous instagram snaps.
Just picture it: on a sunny day, with your friends, laughing, and enjoying bright dessert ideas this cake fits perfectly! plus, it’s a great fit for special occasions , whether that’s a graduation, a holiday, or even just a tuesday that needs brightening.
Keeping It Simple and Fun
You know, the best part about this poke cake with jello filling is its simplicity. no complex techniques needed here! even if you’re new to baking, this recipe is a no-fail cake recipe .
Just a little mixing, baking, and poking, and you’re golden! the colorful cake recipes are practically a breeze and you won’t need a culinary degree to impress your friends.
And for those of you mindful of dietary preferences, don’t worry! you can easily adapt this cake to be gluten-free or use dairy-free cake alternatives .
Everyone gets a piece of this action!
So, are you ready to dive in? let's talk about what you'll need to make this jello dessert recipe a reality.
Whether it’s a gathering with friends or just a “today’s tuesday” kind of vibe, this cake speaks to the sweet tooth in all of us! get your ingredients ready and let’s make some magic!
The Essential Ingredients Guide: Making Your Poke Cake Shine!
So, let’s talk about what really makes a poke cake with jello filling - festive treat a showstopper! just like a great party needs the right vibes, a cake needs the perfect ingredients to hit all the right notes.
Here’s your backstage pass to the essentials!
Premium Core Components
When it comes to crafting your cake, you wanna start with quality ingredients . Stick with what you know, and make those choices count!
Measurements: for my fellow bakers here in the u.s., grab that trusty measuring cup because you'll need 1 ½ cups (190g) of all-purpose flour and 1 cup (200g) of granulated sugar.
If you’re in the metric world, don’t fret; the numbers still work just as beautifully!
Quality Indicators: Get that all-purpose flour that feels fine and smooth, and your sugar should sparkle. The fresher your eggs, the fluffier your cake will be!
Storage Guidelines: Keep that flour in a cool, dry place. Once opened, it should last 6-8 months if airtight. Sugar can hang tight for years, so no worries there!
Freshness Tips: When you crack those eggs, give ‘em a sniff! If they smell funky, toss 'em. Fresh produce is key for any dessert!
Signature Seasoning Blend
You might think we’re just whipping up a simple cake, but oh honey, it’s all about layering those flavors. Let’s spice it up!
Essential Spice Combinations: While traditional isn’t bad, sprinkle in a touch of cinnamon or nutmeg for a twist, especially if you layer with fruit toppings later!
Herb Selections: If you're feeling adventurous, fresh mint could add a pop of freshness when served with that oozing Jello filling!
Regional Variations: From peach Jello in the South to lime Jello in the North, you can make this cake your own!
Smart Substitutions
Sometimes, life throws curveballs, and that's okay! We all need those handy swaps.
Common Alternatives: No milk? Use almond or oat milk! Baking is all about being creative.
Dietary Modifications: Got friends who are gluten-free? Swap out standard flour for a gluten-free blend.
Emergency Replacements: Out of eggs? Mix 1 tablespoon of ground flaxseed with 2.5 tablespoons of water . Seriously, it works like magic.
Kitchen Equipment Essentials
Now, let’s chat tools! You don’t need a fancy kitchen to whip up a delicious Poke Cake, but having the right stuff can make life easier.
Must Have Tools: A 9x13-inch baking pan is your go-to. And don't forget your mixing bowls and a whisk they’re the real stars here!
Alternative Equipment Options: If you only have a round pan, just bake smaller cakes and stack ‘em it’s all good!
Storage Solutions: Keep your cakes covered in the fridge to keep ‘em fresh. A party cake deserves nothing less.
Wrapping It Up for Your Festive Occasion
With all this knowledge packed in your back pocket, you’re ready to bake up a storm! remember, making a poke cake with jello filling isn’t just about following a recipe; it’s about creating memories.
Whether it's a summer bbq, a birthday bash, or just because it’s tuesday, this colorful cake is bound to impress.
So roll up those sleeves and get ready for some fun! We’ll have step-by-step instructions coming up next. Let’s make this cake come to life and wow everyone with not just how it looks, but how it tastes!
The excitement is real, and I can’t wait to see you dive into the world of Jello dessert recipes and easy dessert treats !
Mastering the Art of Professional Cooking: Your Go-To Guide
Cooking can feel like standing in the middle of a bustling freeway so many routes to take! but fear not, my friend! with professional cooking methods, you can streamline your time in the kitchen like a pro! let’s dive into techniques that'll make you a kitchen superstar.
Essential Preparation Steps
Before diving into the kitchen chaos, let’s chat about mise en place . this fancy french term just means “everything in its place.
” gather all your ingredients beforehand. chop those veggies and have your sauces at the ready. trust me; this makes cooking smoother.
Next is time management . ever burned something because you weren’t paying attention? guilty as charged! set timers on your phone.
Your oven and stovetop will thank you. plus, it helps you multitask without turning into a frazzled mess.
Knowing where everything is and organizing your workspace is key. maybe even use specific spots for ingredients. a little organization goes a long way! and let’s not skip over safety.
Keep that first aid kit nearby, folks! knife cuts and slips can happen. stay alert and always use oven mitts when touching hot pans.
step-by-step Process
Alright, let’s get down to the nitty gritty. Here’s a clear, numbered guide for professional cooking:
- Preheat the Oven : Set that oven to 350° F ( 175° C) . Get it nice and toasty while you prep.
- Mix It Up : Combine dry ingredients first flour, sugar, baking powder, etc. Mix ‘em well in a bowl.
- Wet It Down : Add melted butter, eggs, and milk to the dry mix. Stir until smooth.
- Baking Magic : Pour the batter into a baking pan. Bake for 25- 30 minutes . You’re looking for a toothpick to come out clean.
- Cool Down : Let the cake chill for about 10 minutes before transferring it to a wire rack. 30 minutes more to cool completely.
- Poke Holes : Use a toothpick or skewer to poke holes all over the top once it’s cool. This is key for infusing your cake with that tasty Jello filling!
Just remember, temperature and timing are everything. Consistently check your oven temp. Too hot? Your cake might dome up. Too cool? It's a raw disaster!
Expert Techniques
Now, let’s step it up with some expert techniques. Want to create a Poke Cake with Jello Filling - Festive Treat that impresses?
A huge part is knowing quality checkpoints . look for that golden brown color on your cake. if you see it, you’re probably close to perfection! and let’s not forget to avoid those common mistakes like overmixing the batter.
Nobody likes a tough cake!
If your cake crumbles, no worries! crumble it into a trifle and layer it with whipped cream and berries instant dessert heaven.
Plus, you can keep the audience guessing with creative cake decorating . get those sprinkles, and even some fruit toppings. use what you have handy!
Success Strategies
Success in the kitchen calls for a few tricks up your sleeve. avoid common pitfalls like forgetting to let your cake cool completely before adding filling.
That jello needs time to seep in beautifully!
Always do a taste test. is it sweet enough? too bland? fixing it on the spot is much easier than serving a ho-hum dessert later.
Feeling adventurous? try make-ahead options by prepping the cake a day in advance!
Life’s about the fun, right? So when making easy poke cake ideas like this, keep it breezy!
And there you have it! with these professional cooking methods, you’re ready to tackle any recipe, even some delightful jello dessert recipes .
Trust me; you’ll impress your friends with vibrant, fun birthday cake ideas, like that dazzling poke cake with jello filling - festive treat that’ll make any gathering just a little more special.
Stay tuned for our next section where we’ll chat about Additional Information on using seasonal ingredients and other tasty variations you can try for your next dessert masterpiece!
Pro Tips & Secrets
Alright, let’s dive into some pro tips for making your poke cake with jello filling - festive treat truly pop! first off, when you’re mixing your cake batter, go easy on the mixing.
Just combine everything until it’s smooth, but don’t overdo it. honestly, it’s a no-fail cake recipe if you don’t beat it into submission!
Now, let’s talk about that jello filling. the secret here is to use boiling water to dissolve the jello first , then add the cold water.
This keeps it vibrant and colorful, crucial for those colorful cake recipes you’re aiming for. and for time savers? make that cake one day and let the flavors meld overnight in the fridge.
Trust me, you'll taste the difference!
Perfect Presentation
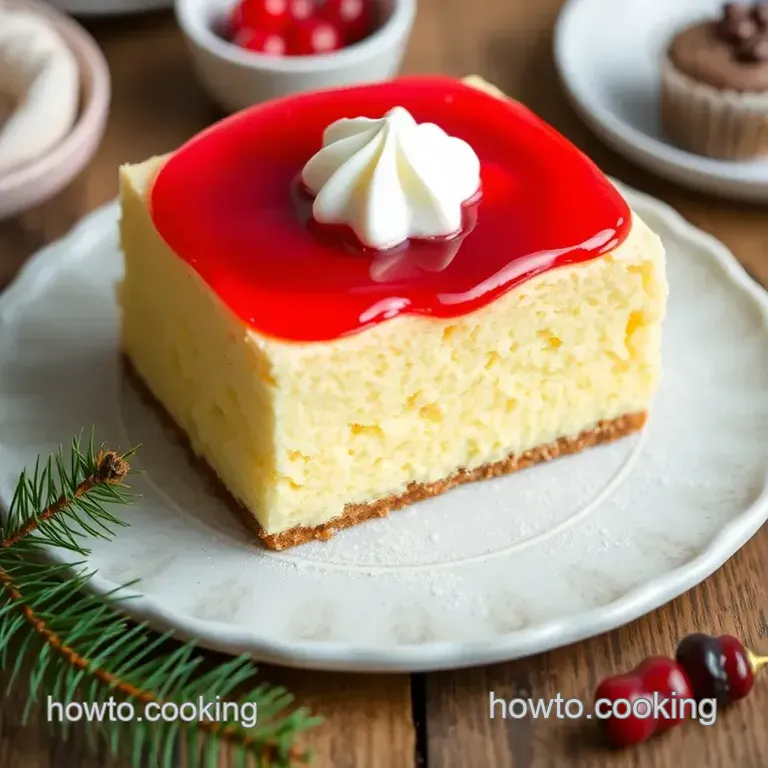
I can’t stress enough: presentation matters ! when it comes to plating your cake, don’t just dump it on a plate.
Slice it into neat squares, and considering serving with a light and refreshing dessert backdrop maybe a mint leaf or some fresh berries on the side.
Garnish ideas? go classic with sprinkles or try chocolate shavings for a classy vibe. the color combos with the jello peeking through holes in the cake? pure magic! you've got a cake that's bright and inviting, perfect for birthday parties or summer gatherings.
Storage & make-ahead
Now, let’s get real about storage. your poke cake can sit in the fridge for about 3-4 days . make sure it's covered tightly to keep it moist.
Nobody likes dry cake, ugh! if you make it ahead of time, just do your topping right before serving to maintain its freshness.
And reheating? just a quick zap in the microwave will do, but you don’t want it hot keep that sweetness intact.
Creative Variations
Feeling adventurous? there are plenty of ways to switch up your easy poke cake ideas ! for fruity zest, throw in some fresh fruit toppings like strawberries or blueberries on your whipped cream.
The contrast of flavors is chef's kiss .
Want to cater to different diets? try using almond milk for a dairy-free version or swap out regular flour for gluten-free options.
And for a seasonal twist? lemon jello for spring or pumpkin spice with cinnamon for fall can be game changers. get creative!
Complete Nutrition Guide
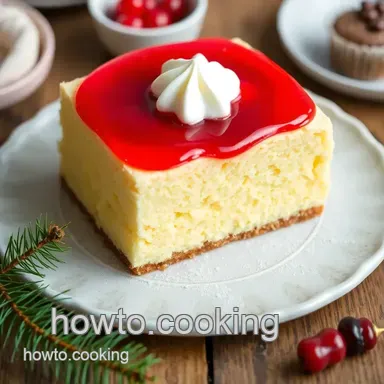
Okay, let’s break down the nitty gritty of this deliciousness. per square, you’re looking at around 220 calories . it’s a sweet party treat that fits well into the occasional indulgence during a party.
Plus, the whipped cream topping adds an element of mouthwatering creaminess that keeps it kid-friendly, too! just remember to watch your portions, especially with those creamy toppings.
Expert FAQ Solutions
So, what if things don’t go as planned? common questions are usually around the texture of the cake or the jello not setting right.
Here’s the deal: always poke holes deep enough but not too hard just right! if your jello isn’t soaking in, your cake might not be cool enough.
Here’s a pro tip: when everything’s cooled down that jello will seep in beautifully!
Wrapping It Up
Bringing this all together, creating a show stopping poke cake with jello filling - festive treat is about embracing both the fun and the flavor! with these easy techniques and creative variations, you’ll make a dessert that’s not just tasty but also a hit at every gathering.
Remember, the key isn’t just in the baking; it’s in enjoying every step of the process, and of course, in the awesome memories you’ll create while sharing it with loved ones.
By knocking out your own spin on this classic, you’re creating something truly memorable that’ll have everyone buzzing about your skills.
Seriously, go ahead and show off that unique twist of yours! happy baking, my friend!
Poke Cake With Jello Filling Festive Treat
Ingredients:
Instructions:
Nutrition Facts:
| Calories | 220 |
|---|---|
| Protein | 2g |
| Fat | 10g |
| Carbs | 30g |
| Fiber | 0g |
| Sugar | 18g |
| Sodium | 150mg |
