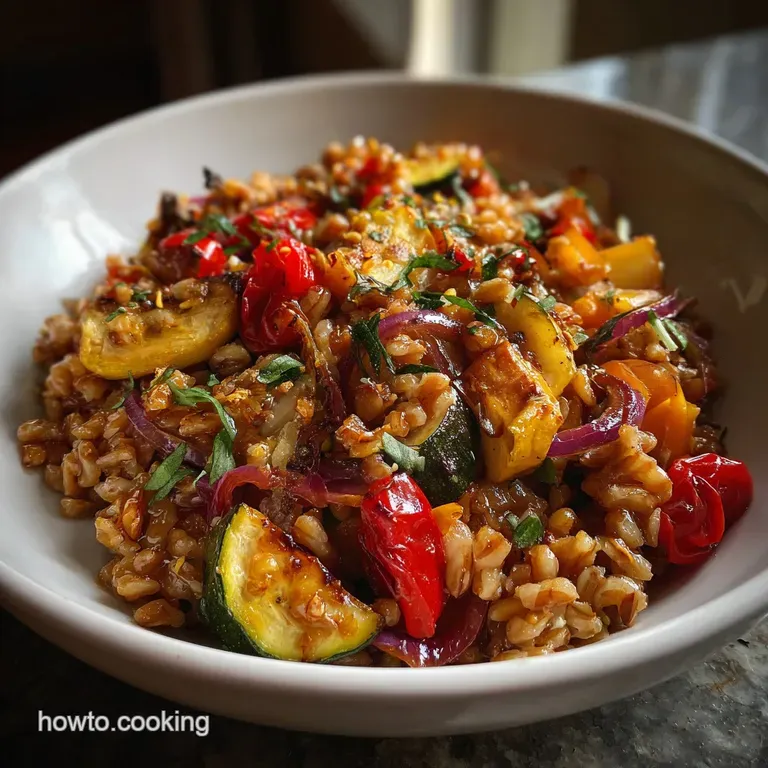
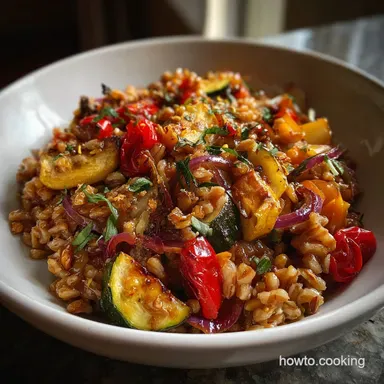
Farro: Tuscan Sunset Roasted Veggie Bowl

- Introducing The Tuscan Sunset Farro Bowl
- The Science of Satisfaction: Why This Recipe Excels
- Essential Components & Ingredient Prep
- Step-by-Step Guide: Crafting Your Farro Bowl
- Mastering the Method: Expert Grain Tips & Troubleshooting
- Keeping It Fresh: Storage, Make-Ahead, and Freezing
- Culinary Pairings and Serving Inspiration
- Recipe Farro FAQs
- 📝 Recipe Card
Introducing The Tuscan Sunset Farro Bowl
You know that scent? That warm, earthy, nutty aroma that fills your kitchen when ancient grains start simmering? That, my friend, is the smell of perfectly cooked Farro .
It’s the satisfying, slightly chewy Italian Farro grain that makes you wonder why you ever bothered with plain rice. Seriously, once you taste real Farro , its subtle, deep flavor is completely addictive.
This recipe is a lifesaver because it’s a brilliant way to handle weeknight chaos. It’s cheap, incredibly filling, and the active cooking time is minimal. I often make a massive batch of Farro on Sunday, roast the vegetables while the grain simmers, and boom lunch is handled for four days.
You’ll find that using Farro makes meal prep exciting, not tedious.
So let’s get this gorgeous, vibrant bowl put together. We are pairing that chewy Farro base with sweet, caramelized root vegetables and a punchy lemon herb dressing. If you’ve ever wondered how to make Farro taste like pure sunshine, stick with me.
This is the Farro recipe you’ll keep coming back to.
The Science of Satisfaction: Why This Recipe Excels
Every recipe on this blog has a secret weapon, and for this one, it’s balance. We're not just throwing things in a bowl; we are strategically matching the soft, earthy textures with high acidity and sweet caramelized notes.
The History and Heart of Ancient Grains
Why do I love Farro so much? It’s been feeding people since Roman times, and there's something genuinely comforting about cooking a grain with that much history.
Modern versions of Farro (like semi pearled) are fantastic because they cook relatively quickly without losing that crucial structural integrity. When you seek out Farro recipes side dishes that truly satisfy, the grain itself must be the star.
What Makes This Roasted Vegetable Combination Shine
The magic here is simple: heat. By roasting the butternut squash and red onion at a high temperature, we activate the natural sugars. They turn jammy and sweet, creating a deep contrast to the brightness of the vinaigrette.
This intentional caramelization transforms the whole dish from a simple side into a hearty, main dish worthy bowl. This is what sets great Farro salad recipes apart texture diversity.
Farro’s Role in Modern Mediterranean Cuisine
Italian Farro is a staple for a reason. It handles liquid and dressing beautifully without falling apart, making it ideal for robust salads like this one. While rice can go mushy when dressed too early, Farro absorbs the zesty dressing, deepening its flavor without sacrificing its signature chew.
When you think about easy Farro recipes healthy and filling, the Mediterranean approach is always best.
Achieving the Perfect Chewy Texture (Al Dente Grains)
The single biggest mistake people make is treating Farro like rice. You shouldn't. We are boiling the Farro in excess liquid, much like pasta, and then draining it. This technique, which I detail in my post, Cooked Farro: How To Cook Farro Perfectly Every Time , guarantees a firm, al dente finish every time. You want structure!
The Maillard Reaction and Caramelizing Root Vegetables
Roasting isn't just about cooking; it’s about the Maillard reaction. That beautiful brown crust on the squash edges? That's complex, savory flavor creation. Ensuring the vegetables are spread in a single layer on your baking sheet is non-negotiable.
If they steam in a pile, you lose the opportunity for that incredible sweetness.
Balancing Acidity and Earthiness for Depth of Flavor
A great bowl needs zing. The slightly earthy flavor of the Farro and the sweetness of the squash absolutely need that sharp, acidic lift from the lemon and red wine vinegar. Without that zingy vinaigrette, the dish falls flat.
The small addition of honey or maple syrup cuts the sharp edges of the vinegar just enough to make the dressing irresistible.
Essential Components & Ingredient Prep
Preparation is key for this Tuscan Farro Bowl. Get your chopping done before you even preheat the oven.
Full List of Tuscan Bowl Ingredients
| Component | Key Ingredients | Notes |
|---|---|---|
| Farro Base | Semi pearled Farro, Vegetable Stock | Using stock adds massive flavour upfront. |
| Roasted Veg | Butternut Squash, Red Onion, Oregano | Chop uniformly for even cooking. |
| Vinaigrette | Lemon Juice, Olive Oil, Dijon, R.W. Vinegar | Must taste bright and sharp. |
| Finishing | Feta, Parsley, Mint | Adds saltiness, freshness, and texture. |
Selecting and Dicing Your Root Vegetables
Use dense, firm squash and cut everything into roughly one-inch cubes. Uniformity is crucial here! If you have large chunks and small slivers, the small pieces will burn before the large pieces are tender. When peeling the butternut squash, use a sturdy vegetable peeler, and please watch your fingers.
That stuff can be tough!
Smart Substitutions for the Dressing Base
If you’re out of the specifics, don’t stress. We want maximum tang and depth.
| Missing Ingredient | Substitution | Why it Works |
|---|---|---|
| Red Wine Vinegar | Sherry Vinegar or Apple Cider Vinegar | Provides necessary sharp acidity. |
| Dijon Mustard | Whole Grain Mustard or a pinch of Turmeric | Acts as an emulsifier to bind the oil and acid. |
| Honey/Maple Syrup | Pinch of Brown Sugar or Agave | Balances the high acid level. |
step-by-step Guide: Crafting Your Farro Bowl
Let’s crack on. This is where we combine two processes the roasting and the simmering for maximum efficiency.
Roasting the Vegetables for Maximum Sweetness
Get that oven hot, 400°F (200°C) is ideal. Toss the squash and onions with oil, salt, pepper, and dried oregano right on the pan. Spread them out! I made the mistake once of overloading my pan, and instead of roasting, the vegetables steamed into pathetic, gray lumps.
Roast until the edges are dark golden brown and slightly crispy; that usually takes 30- 35 minutes.
The Optimal Method for Cooking Semi Pearled Farro
You must rinse the Farro first. Always. This removes the surface starches and helps prevent mushiness. Bring your stock (or water, but stock is way better) and salt to a rolling boil, then add the rinsed Farro .
Reduce it to a gentle simmer, partially cover, and cook for 30– 35 minutes. You are looking for a tender, yet decidedly chewy bite. Once cooked, drain it immediately like pasta.
Return the Farro to the pot, cover it tightly, and let it steam for five minutes. This final steam step gives you beautiful separation.
Assembling and Tossing the Salad (Warm vs. Cold)
Make the vinaigrette whisking slowly is key for that lovely emulsification. Now, here is the secret for truly flavourful Farro : dress it while it’s still warm.
Transfer the warm, fluffy grain to your big mixing bowl and pour about two-thirds of the dressing over it. Toss, toss, toss. The warm Farro grain absorbs the lemon and garlic, making every bite incredibly flavorful.
Once the Farro is dressed, gently fold in the roasted squash, red onion, crumbled feta, parsley, and mint.
Chef’s Note: Taste the assembled salad before adding the rest of the dressing. The feta adds salt, so you might not need to adjust anything but the overall tartness and moisture level.
Mastering the Method: Expert Grain Tips & Troubleshooting
Cooking a simple grain like Farro seems easy, but tiny adjustments make all the difference between good and sublime. This is How to Cook Farro Perfectly.
Preventing Mushy Farro: The Soak vs. Simmer Debate
Mushy Farro happens when you use too little liquid and try to cook it like traditional absorption rice, or when you use whole Farro and don't soak it first. Since this recipe uses semi pearled Farro , no soaking is required phew!
But we must use the boiling and draining method. Always check your package instructions, but if you treat your Farro like pasta, you avoid the mush factor completely.
Adjusting Seasoning Before Serving
After the salad has sat for 10- 15 minutes, the Farro will continue to absorb the dressing. Always give it a final taste. Does it need more salt from the feta? More brightness from a final squeeze of lemon juice?
Don't be shy; great cooking is all about tasting and adjusting at the end.
Fixing Under Roasted or Tough Vegetables
If your squash is tough after 30 minutes, it means your cubes were too big or your oven temperature was off. Pop the pan back in for another 5– 10 minutes, but check on the onions they may need to be pulled off early if they look like they’re burning.
There’s no fixing truly tough vegetables after the fact, so trust your internal oven thermometer.
Keeping It Fresh: Storage, make-ahead, and Freezing
This is truly one of the best Farro recipes for preparing ahead of time. It holds up beautifully!
Preparing the Grain and Veggies Ahead of Time
You can absolutely cook the Farro and roast the vegetables up to two days in advance. Cool them completely, then store them separately in airtight containers in the fridge. Do not add the dressing, feta, or fresh herbs until about an hour before you plan to serve.
If you dress the Farro too far in advance, the fresh herbs will wilt and turn dark.
Storing Leftovers for Best Texture
Once dressed, this Tuscan Farro bowl is fantastic stored in an airtight container in the fridge for 3 to 4 days. The flavors actually marry and deepen overnight.
If the salad seems a little dry when you pull it out for lunch the next day, simply add another teaspoon of olive oil and a tiny splash of lemon juice to revive it.
Freezing Cooked Farro (The Do's and Don'ts)
Can you freeze cooked Farro ? Yes! It freezes beautifully, much better than most rice varieties. Cook the Farro completely, let it cool entirely, and then transfer it to freezer safe bags or containers, squeezing out all the air. It will last for up to 3 months.
Do not freeze the finished salad (the feta and roasted squash texture suffers severely). Reheat the frozen Farro by either stirring it into boiling broth or microwaving with a tablespoon of water until fluffy.
Culinary Pairings and Serving Inspiration
I love serving this Farro dish as a hearty side, or bulked up with protein for a complete meal.
For a lighter twist, try using this recipe as a base and swapping in the flavors from my Mediterranean Farro Salad A Burst of Sunshine on Your Plate . It shows just how flexible Farro can be.
This substantial Farro salad pairs beautifully with simple grilled foods. Think of a simple, flaky white fish or a perfectly seared pork tenderloin. Since the salad provides all the starch and vegetable components, keep your main protein preparation minimal.
Ultimately, cooking and enjoying amazing food should be fun, and incorporating flavorful ancient grains like Farro is the easiest way to elevate your everyday cooking. You now have everything you need to make Farro the star of your next meal!

Recipe Farro FAQs
My farro is still extremely hard after cooking. What went wrong?
Hard farro is often a result of using insufficient liquid or the wrong type of grain for the cooking time. Ensure you used the standard 3:1 ratio of liquid to grain for semi pearled farro.
If you accidentally used whole farro, it requires soaking overnight or 45-60 minutes of cooking time, much longer than the recipe indicates.
Can I use whole farro or pearled farro instead of semi pearled farro?
Yes, but you must adjust the cooking time significantly. Pearled farro cooks the fastest (about 15-20 minutes) and yields a less chewy texture. Whole farro retains the most nutrients but requires soaking overnight and then cooking for 40-60 minutes to achieve tenderness.
How do I prevent the assembled farro salad from becoming soggy?
Sogginess usually occurs when the farro is over dressed too early. Wait until 15-30 minutes before serving to add the dressing, allowing the grains just enough time to absorb the flavors without becoming saturated.
Additionally, make sure the roasted vegetables are fully drained of any excess liquid or oil before mixing.
Can I freeze leftover cooked farro?
Yes, cooked farro freezes beautifully. Allow it to cool completely, then portion it into airtight, freezer safe zipper bags, laying them flat for quick thawing. Frozen farro will keep for up to three months and can be reheated directly in a pot of boiling water or thawed overnight in the refrigerator.
What is the best liquid to cook farro in for maximum flavor?
Using a low-sodium vegetable or chicken broth instead of plain water significantly enhances the overall depth and savoriness of the grain. For a richer, more complex flavor, you can try simmering the farro in dry white wine for the first five minutes before adding the measured broth.
Can I make this "Tuscan Sunset" bowl gluten-free or vegan?
Since farro is an ancient wheat, it naturally contains gluten and cannot be made gluten-free; substitute with quinoa or brown rice for a similar texture. The recipe is naturally vegan if you ensure the cooking liquid is vegetable broth and omit any garnish that contains dairy, such as Feta or Parmesan cheese.
Tuscan Sunset Farro Salad
Ingredients:
Instructions:
Nutrition Facts:
| Calories | 652 kcal |
|---|---|
| Protein | 18.1 g |
| Fat | 29.9 g |
| Carbs | 72.3 g |
