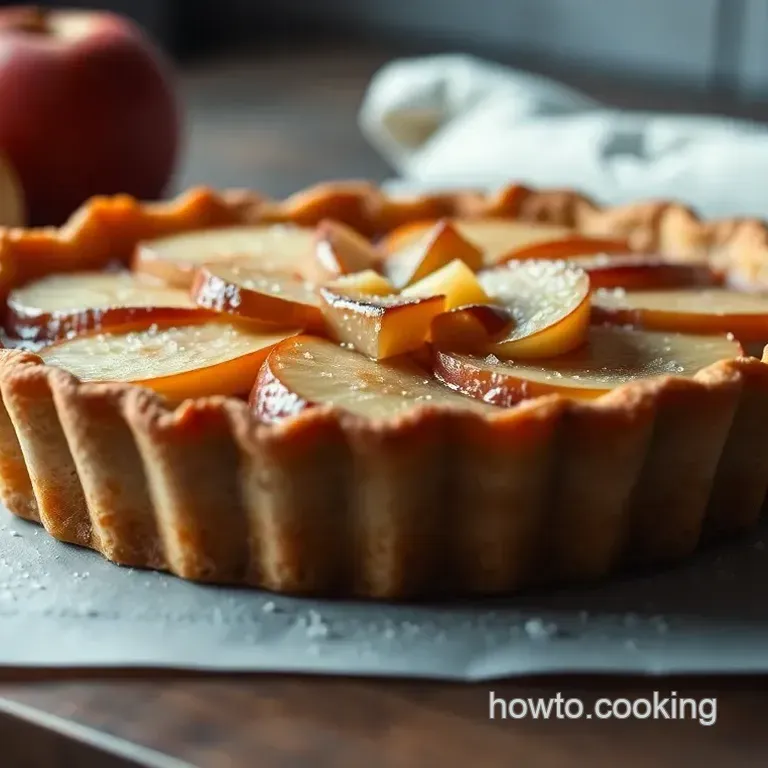
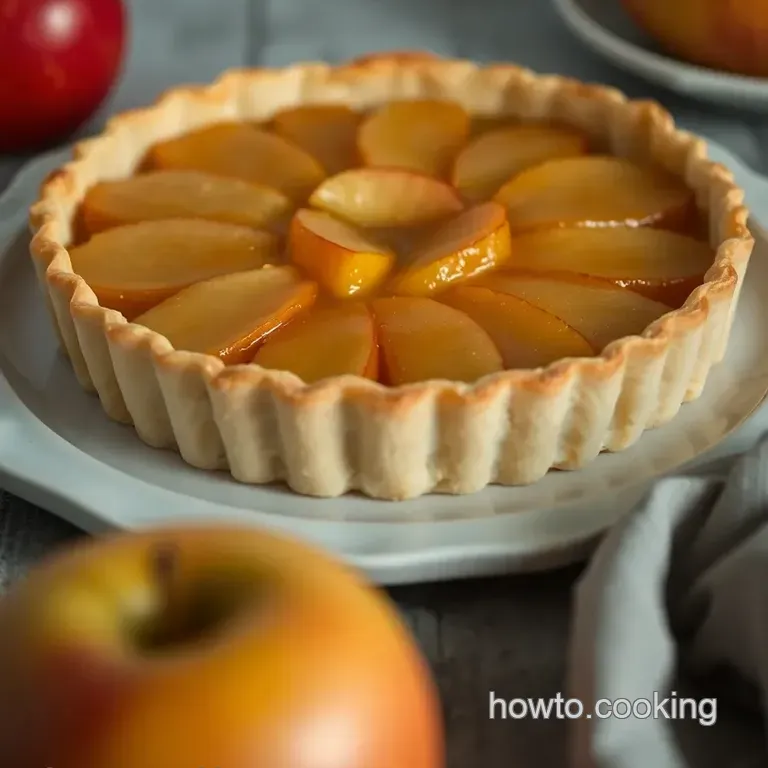
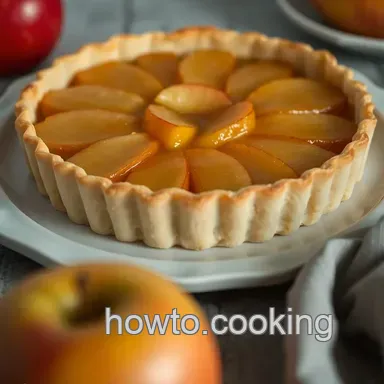
Apple Jelly Tart with Apple Filling
An Apple a Day The Tart Way!
You know, there’s something magic about turning everyday fruits into desserts. i mean, who doesn’t love a sweet treat that’s also got a hint of nostalgia? some of my fondest memories are from grandma’s kitchen, where the air was thick with the smell of baked apples.
One day, she decided to shake things up with an apple jelly tart . oh my gosh, that crunchy buttery pastry crust topped with tender apples and a shiny layer of homemade apple jelly it was pure bliss!
ever since, apple desserts have held a special place in my heart, especially the ones that combine that sweet and tangy combo.
Let’s dive into the world of the apple jelly tart with apple filling !
A Slice of History
The apple jelly tart goes way back an old-school classic that’s been delighting taste buds for generations. originally, fruit tarts were a way to celebrate harvests and special occasions, particularly in the fall when apples are at their peak.
Now? you’ll find tarts like these popping up everywhere, from family gatherings to dinner parties. this classic tart recipe isn’t just about nostalgia; it’s about enjoying a slice of heaven that can bring everyone together!
Cook time? total of 1 hour and 35 minutes . it sounds daunting, right? but honestly, it’s broken down into easy steps.
You’ll need about 20 minutes to prep , a chill out period for your pastry while you handle the apple filling, and then just pop it in the oven for about 35- 40 minutes .
Perfect for those weekend baking sessions or even holiday fun! and let’s talk costs most of the ingredients are basic pantry staples, making this a budget friendly treat that yields enough to serve about 8 hungry folks !
Sweet Reasons to Indulge
Now, let’s get to the good stuff the benefits and why this tart rocks your dessert table.
First up, health benefits ! apples are not just tasty; they’re a powerhouse of nutrients. packed with fiber and vitamin c, they add a touch of health to any apple dessert recipe .
Plus, when you slather on a little bit of homemade jelly, you’re getting all that fruity goodness without the artificial junk found in store-bought options.
What’s great about this tart is its versatility. you can whip it up for casual weekend family gatherings or fancy it up for holidays think thanksgiving or christmas.
Pair it with a scoop of vanilla ice cream, and you've got a dessert that’ll wow your guests without breaking a sweat!
And unlike your typical apple pie alternatives , this tart presents beautifully and is a crowd pleaser. the combination of the tart with fruit filling and that glossy jelly glaze makes it a stunner on any dessert table.
Let’s Get Baking!
So, now that you’re craving that incredible sweet and tangy flavor, let’s talk ingredients. you’ll need apples of course but don’t forget about that tart zing from the lemon juice!
the best apple varieties for baking are granny smith and honeycrisp; they give that perfect balance of sweet and tart.
We’ll also whip up a simple jelly. ever wondered how to make jelly? well, it’s not as tricky as it might seem.
Just mix up some apple juice, sugar, and pectin, and voila! you’ve got your shiny jelly topping to elevate the tart.
Get ready to roll that chilling pastry for your tart , layer on your apple filling , and watch how the magic unfolds.
This tart isn’t just a dessert; it’s a comforting hug in food form.
I can’t wait for you to give this a try. your friends and family will definitely love this twist on the classic apple desserts.
So, are you ready to grab those apples and let’s get baking? stay tuned for the ingredients that’ll help you make this sweet treat happen!
Essential Ingredients Guide
When it comes to whipping up deliciousness in your own kitchen, having the right ingredients is key. so, let’s dive into the basics of what makes every great dish tick starting with those premium core components that pull it all together.
Premium Core Components
First off, having precise measurements is super crucial for success. for today's recipes, you’ll want 1 ½ cups (180g) of all-purpose flour, ½ tsp salt , and ½ cup (115g) of cold, cubed unsalted butter for that buttery pastry crust.
And don’t forget about those apples! we’ll use 4 medium apples (about 2 lbs or 900g) , peeled and sliced.
Now, when it comes to quality indicators, look for apples that are firm and not bruised. i always raise an eyebrow at squishy apples no thanks! and for your jelly, aim for a vibrant color and no lumps for a smooth finish.
Storage guidelines? keep your apples in the fridge to prolong freshness, ideally up to two weeks . as for jelly, it can last for several months if sealed properly.
I mean, who wouldn't want some homemade apple jelly on standby?
Signature Seasoning Blend
Next, let's chat about the magic of herbs and spices. honestly, these guys can make or break a dish. for our apple tart, classic flavors like cinnamon and a hint of lemon juice add that great depth.
You can’t go wrong with a cozy sprinkle of cinnamon sugar on top either!
Now, if you want to get adventurous, try adding nutmeg or even ginger to excite your taste buds! and when it comes to flavor enhancers, a splash of vanilla really takes the apple filling to another level.
Trust me, it’s a game changer.
Smart Substitutions
Alright, what happens when you’re missing an ingredient? don't sweat it! we all have those days, right? if you're out of butter, you can sub in coconut oil for the crust (just chill it!).
And if you’re going gluten-free, almond flour works wonders for a great gluten-free apple tart!
You can also play around with your apple choices. wanna make a tart with berry filling? you can always swap out for some tart berries.
And when you feel a craving for homemade apple jelly , you can make it from any juice try peach or pear for a nice twist!
Kitchen Equipment Essentials
Now, let’s not forget about the tools of the trade! a 9 inch tart pan is a must have for our tart, and don't skimp on a good rolling pin.
Got an old one? dust it off and give it some love! if you're in a pinch, a pie dish can work too.
Just adjust cooking time according to your equipment gotta keep an eye on that crust!
For assembling the tart, a rubber spatula will help you spread that lusciously tasty apple filling evenly. and when you think you’re ready to bake, keep an eye on that cook time around 35- 40 minutes until everything is beautifully golden.
A Sweet Ending Before the Recipe
So, whether you're creating a classic apple dessert recipe or experimenting with your own seasonal dessert ideas , remember that your ingredients and tools set the stage for something special.
Now, if you're ready to dive right in, let's not waste any time. next, i’ll walk you through step-by-step instructions to make this heavenly apple jelly tart with apple filling .
Stay tuned, and let’s get that oven preheating!
Professional Cooking Method
Whether you're a seasoned chef or just someone who finds joy in whipping up a homemade apple jelly tart, understanding some professional cooking methods can really up your game in the kitchen.
Let’s dive into this, and trust me, it’ll make your cooking way easier and your desserts way more delicious!
Essential Preparation Steps
Mise en place is key. it’s just a fancy way of saying “everything in its place.” before i ever think about mixing my buttery pastry crust for that apple jelly tart , i line up all my ingredients and tools.
That means having my flour, sugar, apples, and all those delicious toppings ready to go. this way, i’m not scrambling around while my tart is in the oven.
It saves time and sanity.
Speaking of time, time management tips are crucial! if you’re like me, you might have a million things on your mind.
Try focusing on tasks. for this tart, make your jelly first while your pastry is chilling. that way, when it’s time to assemble everything, you're not stressed and can actually enjoy the process.
Organization strategies come into play too. use a timer! set it for 35- 40 minutes once your tart is in the oven.
I always forget how long things take, and a timer really helps. and let’s not forget about safety considerations : always keep your workspace clean.
Throw away any wrappers, and be cautious of hot pans. you don’t want any kitchen accidents, especially when you're about to delight people with an amazing dessert!
step-by-step Process
Now, let’s get into the nitty gritty with a clear, numbered step-by-step process. I promise, once you get the hang of it, making that jelly tart won't stress you out!
Prepare the pastry crust: combine 1 ½ cups of flour , ½ tsp salt , and ¼ cup sugar in a bowl.
Cut in ½ cup of cold butter until it resembles crumbs. then mix in one egg yolk and a few splashes of cold water.
Chill for 30 minutes.
Make your apple filling: toss 4 peeled and sliced apples with ½ cup granulated sugar , a teaspoon of cinnamon , and a squirt of 1 tbsp fresh lemon juice to marinate.
Give it about 15 minutes for the flavors to come together.
Make the jelly: in a saucepan, bring 2 cups apple juice , ¼ cup sugar , and 1 ½ tsp pectin to a boil.
Stir for 1 minute , then add your 1 tbsp lemon juice and remove from heat.
Assemble the tart: preheat that oven to 350° f ( 175° c) . roll out the pastry, fill the tart pan, and layer in your apples.
Now, pour a thin layer of that gloriously glossy apple jelly over the top.
Bake the Tart: Place your tart in the oven for 35- 40 minutes . Look for that golden brown crust. The apples should be tender but not mushy.
Cool and Serve: Give it some time to cool before you dive in. It’s like letting a good movie simmer trust me, it’s worth it.
Expert Techniques
Let’s talk about some expert techniques! for that stellar crust, make sure you chill your pastry before rolling it out.
If your dough is warm, it can get tough. nobody wants a problematic crust!
Watch for those critical steps like keeping an eye on your baking time. and since we’re making an apple dessert , make sure to pick the best apple varieties for baking .
Mixing sweet ones like honeycrisp with tart ones like granny smith adds depth to your apple filling .
Do you ever hit a snag? Here’s a troubleshooting tip: if your jelly doesn’t set, simmer it a bit longer before integrating it with the apples.
Success Strategies
Avoiding common mistakes can save your day! don’t rush the dough making process it's crucial for the flaky texture. and remember to keep checking on your tart.
A golden top is what you want, not a burnt offering!
For quality assurance, always taste as you go. not enough sweetness in your apple filling ? add a pinch more sugar.
Planning ahead? making the tart a day early and letting it sit in the fridge usually enhances the flavors.
So, you’ve got your tart ready for a gathering? serve it with a scoop of vanilla ice cream or a bit of whipped cream on top.
Trust me, it elevates your sweet and tangy dessert to a whole new level.
As we conclude this delicious journey, there’s always more to explore in baking. next, let’s dive into additional information that’ll really set your apple desserts apart.
From fun variations to seasonal baking inspiration, there’s so much more to discover!
Secrets and Pro Tips for the Perfect Apple Jelly Tart
Let’s dive into the juicy details of making the apple jelly tart with apple filling . this ain't your ordinary tart, folks.
It’s a blend of flavors that'll give your taste buds a tickle and make you wanna dive right back for seconds.
Pro Tips & Secrets
Start with the best apples : honestly, choosing the best apple varieties for baking can make all the difference. i love mixing sweet and tart apples like granny smith and fuji.
It adds a depth you won’t forget!
Time saving tricks : making the homemade apple jelly can feel a bit daunting. but let me tell you, it’s totally doable! set up your apple juice and pectin before jumping into your pastry crust.
This way, everything is streamlined, and you’ll be baking in no time!
Amp up the flavor : a sprinkle of cinnamon is a game changer. it brings out the natural sweetness in the apples.
Also, don’t skip the lemon juice ; it balances the flavors beautifully, making every bite sweet and tangy.
Presentation tips : a little extra love goes a long way. after baking, brush on some melted butter over your tart for that golden glow.
Plating it up with a scoop of vanilla ice cream or a dollop of whipped cream? yes, please!
Making It Look Good
Plating Techniques : Don’t just throw it on a plate; make it shine! Slice the tart into wedges and arrange them on a plate.
Garnish ideas : fresh mint leaves or a sprinkle of powdered sugar after baking will catch the eye. or go bold with a drizzle of the same homemade apple jelly you made earlier.
Talk about classy!
Color combinations : remember that color is key. the golden crust against the vibrant apple slices makes the tart pop.
A little green from mint or even a drizzle of caramel can enhance those colors even further.
Storing and Preparation Tips
Storage guidelines : if you've got leftovers (which is rare, because it's that good!), store the tart in the fridge.
It'll last about 3 days . cover it lightly with foil to keep it moist.
make-ahead Magic : You can definitely whip up the pastry crust a day or two ahead. Just chill it well! You can also make the jelly ahead of time, and boom, you’re halfway there!
Reheating instructions : to enjoy those leftovers, pop it in the oven at 350° f ( 175° c) for about 10- 15 minutes.
You want it warm, but not too hot to burn your tongue!
Creative Variations
Flavor Adaptations : For a seasonal twist, try adding cranberries or pears along with the apples for a delightful mix.
Dietary Modifications : If you or someone you know has gluten issues, swap the all-purpose flour with a gluten-free flour blend. It holds up well, I promise!
Regional Variations : Why not channel some Southern charm? Adding a pinch of nutmeg might just give it that “Mom’s comfort food” vibe.
Let’s Not Forget Nutrition!
Here’s the rundown: This tart packs around 250 calories per serving . Is it the most nutritious dessert? No, but enjoy it in moderation, and you’ll certainly be feeling good!
Dietary Considerations : It’s always good to remember dietary needs. This tart isn’t just tasty but also has fiber from the apples, making it a step up from many other sugar loaded desserts.
Time to look into In
Making the apple jelly tart with apple filling isn’t just a cooking task; it’s a blast! whether you’re whipping it up for a family gathering or just treating yourself, don’t stress about perfection.
Add your personal touch, mix in some fun, and make it yours.
So, gather your ingredients, roll up your sleeves, and let’s bake! who knows, this could become one of your favorite family dessert ideas .
Trust me; once you nail this tart, you’ll always be known as the one who brings the good stuff. happy baking!
Frequently Asked Questions
What type of apples should I use for the apple and jelly tart?
For the best results, use a mix of sweet and tart apples. Varieties like Granny Smith and Honeycrisp work wonderfully together, providing a balanced flavor in both the filling and jelly. This combination enhances the overall taste and texture of the tart.
Can I use store-bought apple jelly instead of making my own?
Absolutely! Using pre-made apple jelly is a great time saver and can still deliver delicious results. Just pour the store-bought jelly over the apple filling after baking to save time while creating a lovely glossy finish.
How do I store leftover apple and jelly tart?
Store any leftover tart in an airtight container at room temperature for up to 2 days, or in the refrigerator for longer freshness, up to a week. You can reheat it gently in the oven before serving, to revive the crust's crispness.
What can I serve with my apple and jelly tart?
This tart pairs beautifully with a scoop of vanilla ice cream or a dollop of whipped cream for a classic dessert experience. You can also enjoy it with a glass of iced apple cider or a light salad for a refreshing contrast.
Are there any nutritional tips I should be aware of for this recipe?
The apple and jelly tart is relatively moderate in calories but contains sugars from the fruit and added sugars. To make it a bit healthier, consider reducing the added sugar or using whole wheat flour instead of all-purpose flour for added fiber.
Can I make the pastry crust ahead of time?
Yes, you can prepare the pastry crust in advance! After making the dough, wrap it tightly in plastic wrap and refrigerate for up to 2 days or freeze for up to a month. This makes for a quicker assembly when you're ready to make your tart.
Apple Jelly Tart With Apple Filling
Ingredients:
Instructions:
Nutrition Facts:
| Calories | 250 |
|---|---|
| Fat | 11g |
| Fiber | 2g |
