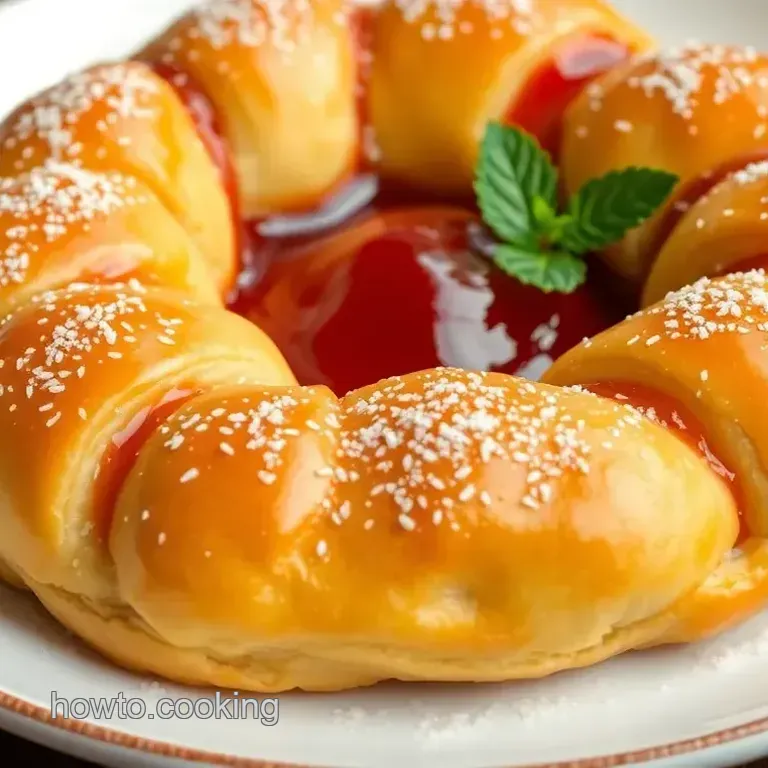
Ring-Shaped Pastries Filled with Sweet Jelly Joy
- The Magic of Ring-Shaped Pastries
- A Little History
- Why You’ll Love This Pastry
- Can't Wait to Start? Here’s What You’ll Need!
- Essential Ingredients Guide for Pastry Lovers
- Bake Ring-Shaped Pastry with Sweet Jelly Joy: A Culinary Adventure
- Essential Tips for Baking Like a Pro
- Frequently Asked Questions
- 📝 Recipe Card
The Magic of Ring Shaped Pastries
Oh my gosh, the first time i baked these bake ring shaped pastry with sweet jelly joy , it was an absolute game changer.
Picture it: a chilly sunday morning, i’m scrolling through a cooking blog and i see those golden, flaky pastries practically calling my name.
I thought, “can i really make these?” spoiler alert: i totally could! this recipe blends buttery, flaky pastry dough with a tart, fruity filling, and trust me, it’s like a hug in pastry form.
So let’s dive into these delightful pastries and see why they’re perfect for brunch, afternoon tea, or honestly, any time you need a quick pick-me-up.
A Little History
Ring shaped pastries have deep roots in european pastry traditions . they’ve graced tables for centuries, often serving as festive treats. but let’s be real, who needs a reason to enjoy a pastry? modern times have seen these baked beauties explode in popularity.
Whether it’s a fancy brunch pastry idea or a quick sweet treat, everyone is getting in on the flaky goodness.
Now let's talk time! you’ll need about 15 minutes active prep and 30 minutes for chilling , followed by 20- 25 minutes in the oven.
So, in about an hour and 15 minutes, you could be indulging in a plate of these sweet, ring shaped pastries.
Not too shabby, right?
Why You’ll Love This Pastry
First off, let’s not overlook the health benefits . while they’re obviously a treat, you can customize these pastries with high-quality fruit preserves made from real fruits, giving you a little nutritional boost with all that sweetness.
Not to mention they’re kinda perfect for special occasions. think brunch with friends or an afternoon tea that needs a show stopper.
Plus, they’re versatile! you can swap out fillings as you please. whether you want chocolate filled pastries or a rich cream cheese version, the options are endless.
You’ll get twelve delightful pastries from this recipe, making it ideal for sharing or for hoarding all to yourself... no judgment here!
Can't Wait to Start? Here’s What You’ll Need!
Before we dive more into those yummy ingredients, just remember that perfecting the art of baking ring pastries does take a smidge of practice.
Don’t stress too much! use my dough chilling tips to keep your pastry cold; cold dough equals a flaky pastry dream come true.
And an egg wash for pastries ? a must for that beautiful golden color.
So grab your mixing bowls, and let’s start gathering those ingredients! you’re gonna want to feel the joy of baking with fresh ingredients while you whip these beauties up.
Trust me; it’s worth every minute spent in the kitchen.
As you get ready to bake, just think about how amazing it will feel to serve these rich, flaky creations to family and friends, or maybe just to treat yourself while you sip your morning coffee.
What could be better than that?
Stay tuned we’re about to get into the nitty gritty of how to create your own ring shaped pastry with ease!
Essential Ingredients Guide for Pastry Lovers
Hey there, fellow bakers! let’s dive into the magical world of perf pastries . just the thought of creating a ring shaped pastry with a sweet jelly filling makes my heart sing.
There’s just something about the buttery, flaky dough and that fruity burst that takes you back to the best afternoon teas or sunday brunches, right?
Premium Core Components
Let’s start with the basics. You'll want to make sure you have quality ingredients to achieve that perfect pastry.
Measurements matter: for our recipe, you need 2 cups (250 g) of all-purpose flour. get it right, and your pastry will rise like a dream! if you’re measuring in ounces, that’s about 8.
8 ounces.
Quality counts: look for unsalted butter you can squeeze between your fingers it should feel cool and firm, not too soft.
Also, fresh eggs are a must! and let’s not forget that high-quality fruit preserves that will be your sweet jelly joy! you don’t want some grocery store brand that tastes like sugar water.
Storage Guidelines: Flour should be stored in a cool, dry place, and butter can hang out in the fridge. Fruit preserves last a long time but check the label for expiration we want freshness!
Choosing the Right Ingredients: I always say, “You get what you pay for.” So grab those organic ingredients when you can! When fresh fruits are in season, it’s a perfect time to whip up your own fillings, making those homemade fruit pastries even more delightful!
Signature Seasoning Blend
Now, let’s jazz it up! While baking isn’t always about spices, a pinch of something extra can turn that simple pastry into a star.
Essential combos: Think about mixing a dash of cinnamon or nutmeg into the dough for a warm, inviting flavor that pairs beautifully with fruit.
Herb Selections: Adding a hint of lemon zest can elevate your sweet jelly filling. Trust me, once you taste that brightness, you won’t go back!
Flavor Enhancers: A splash of vanilla extract in the dough can make a world of difference. You’ll thank me later!
Smart Substitutions
Sometimes, life doesn’t give you all the right ingredients. No worries!
Common Alternatives: If you’re out of butter, coconut oil or any dairy-free butter works wonders. You could even try using ricotta cheese for a creamier dough!
Emergency Replacements: No jelly? Use homemade jam or even Nutella for a chocolate filled pastry twist!
Seasonal Fruits: When berries are in season, fresh fruit can be mashed into a sauce or used whole as a delicious filling. It’s like a fruit preserves pastry but fresher!
Kitchen Equipment Essentials
Alright, let’s chat tools! You don’t need a fancy kitchen to make great pastries, but there are some must haves.
Must Have Tools: A good rolling pin is a game changer. A set of measuring cups is super helpful, too. But honestly? I’ve rolled dough with a wine bottle before it works!
Alternative Equipment: If you don't have cookie cutters, a round glass works in a pinch.
Prep Tips: Keep everything cold when handling dough. Chill your mixing bowls if you have to!
Storage Solutions: Pop those leftover pastries in an airtight container. They should last a few days (if you can resist eating them all at once).
So, now that you’re equipped and ready to bake, don’t forget to get messy and have fun while tackling that Bake Ring Shaped Pastry with Sweet Jelly Joy .
It's all about taking your time, learning how to make those flaky pastries , and enjoying the journey. Shall we move on to how to create those scrumptious pastries step-by-step? Let’s get baking!
Bake Ring Shaped Pastry with Sweet Jelly Joy: A Culinary Adventure
When it comes to baking, there’s something magical about pastries. seriously, who can resist a fresh out-of-the-oven treat? today, we’re diving into the world of flaky goodness with my favorite ring shaped pastry recipe : bake ring shaped pastry with sweet jelly joy .
Think buttery layers filled with vibrant fruit preserves it’s like a taste of european pastry traditions right in your kitchen.
Perfect for brunch, afternoon tea, or just because, let’s get baking!
Essential Preparation Steps
First things first, let’s talk mise en place . this is a fancy french term that just means “putting in place,” and honestly, it’s a lifesaver.
Gather all your ingredients beforehand: flour, butter, sugar, and that sweet jelly. trust me, you don’t want to be scrambling for the jelly while the dough is chilling.
Now, about time management preheat your oven to 375° f ( 190° c) while you prep. this saves time later.
Try to have everything ready to go in about 15 minutes, then start chilling that dough for 30 minutes . it's so worth it for keeping that flaky pastry dough just right!
Don't forget safety considerations —keep your workspace tidy and watch those fingers around sharp objects. When you're rolling out dough, that can get slippery!
step-by-step Process
Alright, let's break it down into simple steps:
Prepare the dough : in a mixing bowl, mix 2 cups of flour , 1/4 cup of sugar , and 1/2 tsp of salt .
Add 1/2 cup of cold butter , mixing until you see coarse crumbs. stir in 1 large egg and add 1/4 cup of cold water until it forms a dough.
Chill the Dough : Shape it into a ball, wrap it in plastic, and let it chill for 30 minutes . This is vital for that perfect texture!
Roll Out the Dough : After chilling, roll it out on a floured surface to about 1/4 inch thick .
Cut the Pastry Shapes : Use a round cutter for circles, then a smaller cutter for the center of half to make them ring shaped.
Add the filling : spoon in your sweet jelly or fruit preserves (around 3/4 cup ) into the center of half the rings, then top with the others.
A little egg wash adds shine and stick.
Bake : Place them on a parchment lined baking sheet, brush with beaten egg, and bake for about 20- 25 minutes , or until they’re a golden brown pastry heaven!
Cool & Dust : Let those beauties cool on a rack, then dust with powdered sugar before serving. They’re that much better when the flavors meld!
Expert Techniques
Here’s where we get serious! For perfect pastries, remember:
Maintain a Cool Dough : The colder the butter, the flakier your pastry. This is crucial!
Dough Chilling Tips : Don’t skip chill time. Seriously, the longer you can chill it, the better your pastry will be.
Quality Checkpoints : Check for that golden brown hue and the smell wafting through your kitchen that’s success!
If the dough doesn’t come together, a splash more water might help, but not too much! You want it just right.
Success Strategies
Everyone makes mistakes we’re only human. Here are some common slip ups to avoid:
Overworking the Dough : Handle it gently, folks! Overworking makes for tough pastry instead of a light and airy delight.
Ingredient Quality : Use high-quality fruit preserves . The better the ingredients, the better your pastries will taste.
Perfect Results Guide : Aim for that golden color, and trust your nose! If it smells amazing, it’s probably ready.
And if you’re thinking ahead, make the pastry a day in advance and bake just before your gathering. Voila, stress free baking!
Additional Information
So there you have it! making the bake ring shaped pastry with sweet jelly joy is both fun and rewarding. whether you whip these up for a festive brunch, a cozy afternoon tea, or a quick sweet treat for the family, you’ll find that baking can be both an art and an adventure.
Plus, they pair beautifully with coffee or tea perfect for those moments of relaxation after a long day.
I can’t wait for you to try this recipe. Every bite is a burst of flavor just waiting to happen. Happy baking, my friend!
Essential Tips for Baking Like a Pro
Alright, let’s dive into this journey of making the bake ring shaped pastry with sweet jelly joy . you’re gonna love how these twisted little pastries come out.
It’s not just about the taste; it’s also about how you put it all together. here are some pro tips that'll make your baking game strong!
Pro Tips & Secrets
Chef’s Personal Insights
You know how sometimes you bite into a pastry and it’s just magic? that’s all about the flaky pastry dough .
Here’s a little secret: keep your butter ice-cold ! i mean, like straight from the freezer cold. this step is crucial for that flaky texture we all crave.
Trust me, you want to avoid room temperature butter here.
Time Saving Techniques
If you’re in a hurry, you can prepare the dough a day ahead. just wrap it up tightly and stash it in the fridge.
When you’re ready to bake, just roll it out and go! talk about an easy pastry recipe, am i right?
Flavor Enhancement Tips
Now, about that sweet jelly filling feel free to get creative! use high-quality fruit preserves or experiment with chocolate for a totally different vibe.
I once tried using a mix of raspberry and dark chocolate, and oh boy was it heavenly.
Presentation Advice
Let’s get real how a dish looks is just as important as how it tastes. once they come out golden brown, brush them with an egg wash for that perfect shine.
Dust with powdered sugar right before serving to make ‘em look extra fancy!
Perfect Presentation
Plating Techniques
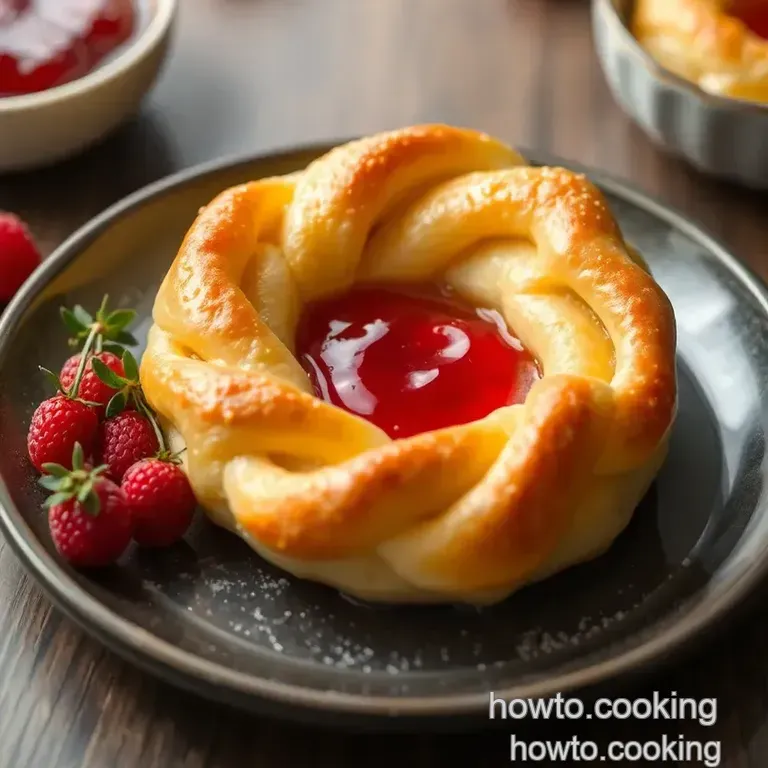
Serve these beauties on a rustic wooden board or a pretty cake stand to elevate that brunch vibe. you can even cut some fresh fruit to surround the pastries, adding a pop of color.
Garnish Ideas
A sprig of mint or a dollop of whipped cream can take these pastries over the top. Simple additions make for stunning results!
Color Combinations
With bright fruit fillings, think about using contrasting colors for garnishes. Vibrant strawberries or blueberries can really make your dish pop.
Visual Appeal Tips
When you plate, don’t just stack them! Aim for a nice arrangement that invites people to dig in. Trust me, your friends will appreciate the eye candy.
Storage & make-ahead
Storage Guidelines
Got leftovers? No worries! These pastries can be stored in an airtight container for up to three days. Keep them at room temperature, and they’ll be just fine.
Preservation Methods
If you want to save some for later, consider freezing them before baking. They hold up nicely and when you’re ready, pop them in the oven from frozen for a fresh treat!
Reheating Instructions
When it’s time to enjoy the leftovers, simply reheat them in the oven for about 5- 10 minutes at 350° F. They’ll crisp up beautifully.
Freshness Duration
Freshly baked pastries are always best enjoyed on the same day. But let’s face it who can resist that first warm bite, right?
Creative Variations
Flavor Adaptations
Swap out the sweet jelly for some rich cream cheese pastries if you want a savory twist! The possibilities are endless, from apple cinnamon to chocolate filled pastries.
Dietary Modifications
If you or your peeps are avoiding dairy, coconut oil works like a charm! You can also use dairy-free pastries for a healthier twist.
Seasonal Twists
Take advantage of seasonal fruits! Blueberry jam in summer or spiced apple jelly in fall can change everything. What’s in season can really uplift the flavors.
Regional Variations
Try adding spices like cardamom or nutmeg a nod to both European pastry traditions and American flavors. They can give your pastries a unique flair that will surprise and delight!
Complete Nutrition Guide
Detailed Breakdown
Just a heads up, each pastry is about 180 calories . Not too shabby for a sweet treat, right?
Health Benefits
Let’s face it; baked goodies aren’t health food, but you can use fresh ingredients to make them a little less guilty. Plus, fruit preserves have vitamins!
Dietary Considerations
gluten-free flours can be used for a quick pastry swap if you have to watch those gluten levels. There’s always a way to indulge!
Portion Guidance
These pastries make the perfect addition to brunch! Try serving 2-3 each for a balanced snack along with a cup of coffee or tea.
Conclusion
So, are you ready to roll up those sleeves and give this bake ring shaped pastry with sweet jelly joy a whirl? it's all about the experience, and believe me, the joy you’ll bring to your friends or family will be worth every minute.
Plus, there’s something so rewarding about baking from scratch. you get all the bragging rights at your next brunch gathering! happy baking, my friend!
Frequently Asked Questions
What is the best type of jelly to use for the Bake Ring Shaped Pastry with Sweet Jelly Joy?
For the Bake Ring Shaped Pastry with Sweet Jelly Joy, fruit preserves like raspberry, apricot, or strawberry work wonderfully due to their balance of sweetness and flavor. You can also experiment with seasonal jellies or even mix different flavors for a unique twist!
Can I prepare the dough in advance for the Bake Ring Shaped Pastry with Sweet Jelly Joy?
Yes, you can prepare the dough ahead of time! Once mixed, wrap it tightly in plastic wrap and store it in the refrigerator for up to two days. Just be sure to let it rest at room temperature for a few minutes before rolling it out.
How do I store leftover Bake Ring Shaped Pastry with Sweet Jelly Joy?
Store leftover pastries in an airtight container at room temperature for up to 3 days. For longer storage, you can freeze them in a single layer for up to a month. Just remember to let them cool completely before freezing.
What tips can you provide for beginners making Bake Ring Shaped Pastry with Sweet Jelly Joy?
For beginners, make sure your butter is very cold to achieve a flaky texture. Additionally, don’t skip the chilling step; it helps maintain the dough's structure. Lastly, take your time when cutting and sealing to ensure even shapes and avoid leaks while baking!
Can I make any substitutions for the ingredients in the Bake Ring Shaped Pastry with Sweet Jelly Joy?
Absolutely! You can use coconut oil as a substitute for unsalted butter for a dairy-free version. If you don’t have jelly, try filling them with thick custard or even a chocolate spread for a delicious alternative.
What are some variations I can try with the Bake Ring Shaped Pastry with Sweet Jelly Joy?
There are plenty of delicious variations! You can fill the pastries with cream cheese mixed with fruit for a richer flavor, or add spices like cinnamon to the dough for warmth. Another fun idea is to top them with a chocolate drizzle after baking for an extra sweet treat!
Bake Ring Shaped Pastry With Sweet Jelly Joy

Ingredients:
Instructions:
Nutrition Facts:
| Calories | 180 |
|---|---|
| Protein | 3 g |
| Fat | 9 g |
| Carbs | 25 g |
| Fiber | 0 g |
