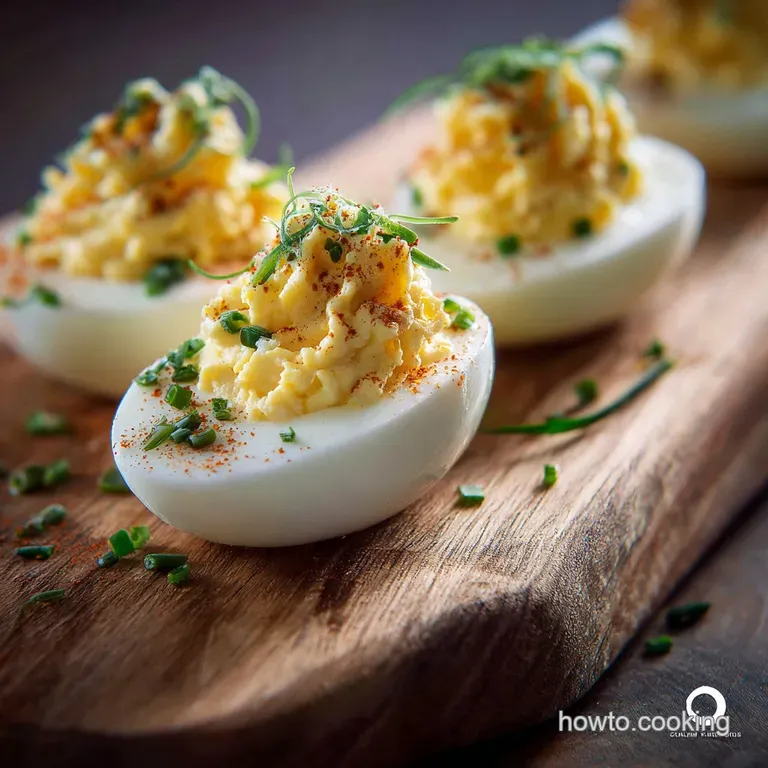
Deviled Eggs: the Perfect Picnic Staple with Classic Creamy Filling
- The Science of the Silkiest Filling: Why Technique Matters
- Essential Components for Championship Deviled Eggs
- Mastering the Peel: Flawless Hard and Boiled Eggs Every Time
- Crafting the Filling: A Step and by-Step Guide to Maximum Creaminess
- Planning Ahead: Storage and Preparation Secrets
- Recipe FAQs
- 📝 Recipe Card
The Science of the Silkiest Filling: Why Technique Matters
Deviled Eggs. They are the single most underrated party food in the universe. Seriously. If you think they’re boring, you’ve been eating the wrong kind. You’ve been eating that grainy, dry, sad stuff that tastes vaguely of chalk and cheap salad dressing. We are not doing that here.
Making Classic Creamy Deviled Eggs isn't about some secret ingredient you buy at a fancy shop. It’s about mechanics. The two biggest hurdles people face are peeling the egg and achieving that cloud and like filling texture.
If you nail the technique on those two things, you transform a basic snack into the Best Deviled Eggs you’ve ever had. We’re aiming for filling that feels like whipped butter. Trust me.
This deviled eggs recipe easy approach focuses entirely on eliminating texture flaws.
Eliminating the Gritty Yolk Texture Forever
This is the hill I will die on. You cannot, I repeat, cannot achieve true silkiness by mashing yolks with a fork. You can try until your arm falls off, but you will always have tiny, annoying little lumps.
I used to fork mash. I thought I was clever. Then one day, I saw a chef on TV gently pushing his yolks through a fine and mesh sieve. It looked like an unnecessary amount of work, but I tried it once. Game changer.
When you press the cooked yolks through the sieve, they essentially get pulverized into a powder. When you add the mayonnaise and acid, this fine powder dissolves instantly, creating an emulsion that is impossibly smooth. It’s the difference between sandpaper and satin. Don’t skip this.
It takes maybe an extra minute of effort, but it’s the defining factor of a championship and level Deviled Egg.
Why Aged Eggs Are Best (And How to Test Freshness)
Ever tried to peel an egg you just bought from the farmer’s market? It’s a total disaster. You end up with half the white still stuck to the shell, and you’re left with cratered, ugly egg boats.
The fresher the egg, the stronger the membrane holding the shell to the white. As an egg ages (about 5 to 7 days in the fridge is perfect), the air pocket inside expands slightly and the internal pH changes, causing the membrane to weaken and pull away from the white.
Crucial Note: If you only have very fresh eggs, steaming them (instead of boiling) often helps, but the safest bet for easy peeling is definitely using eggs that have been sitting in your fridge for a week.
If you aren't sure how old your eggs are, you can do the float test. Gently place the egg in a bowl of water: if it sinks horizontally, it’s super fresh. If it stands on its end but still touches the bottom, it's about 1 2 weeks old (perfect). If it floats completely, throw it away.
Essential Components for Championship Deviled Eggs
Anyone can throw mayo and mustard onto a yolk. But great Devilled Eggs require balance. They need richness, yes, but they also desperately need sharp counterpoints to cut through that fat. Otherwise, they just taste heavy.
The Four Core Flavor Agents You Cannot Skip
Forget the complicated add and ins for a moment. If you want the quintessential, perfect Extra and special Deviled Eggs , you need these four flavor pillars working together:
- High and Quality Fat (Mayonnaise): This is the carrier. It has to be full and fat. Honestly, don't even bother with low and fat stuff here. You need the richness.
- Pungent Punch (Dijon Mustard): Dijon is key because it adds an incredible layer of tang and spiciness without being overwhelming. It’s sophisticated.
- Sharp Acid (Vinegar or Brine): The acidity is non and negotiable. I prefer using a tiny splash of white wine vinegar, but if you have excellent dill pickle brine sitting in the fridge? Use that! That brine is liquid gold and adds an extra layer of savory depth to the deviled eggs ingredients .
- Salt & Pepper: Use fine sea salt so it dissolves easily, and don't be shy with freshly cracked black pepper.
Beyond the Whisk: Essential Tools for a Smooth Puree
You don't need much, but a couple of tools will make your life significantly easier and improve your texture.
| Tool Name | Why We Need It |
|---|---|
| Fine and Mesh Sieve | Obliterates lumps in the yolk (Non and negotiable for silky texture). |
| Piping Bag & Star Tip | Makes assembly fast and provides a professional presentation swirl. |
| Slotted Spoon | Essential for moving eggs quickly from boiling water to ice bath. |
If you don't have a star tip for piping, literally just use a plastic zip and top bag and snip off one of the bottom corners. It works perfectly for creating a nice dome shape.
Detailed Shopping List and Ingredient Substitutions
When looking at the deviled eggs recipe southern style, you often see sweet relish, but for this classic approach, we keep it tangy. Here are quick notes on swaps:
- Mayonnaise: If you really need to swap, use Crème Fraîche or Greek yogurt mixed with a bit of olive oil. If you go this route, cut the vinegar quantity in half.
- Mustard: Yellow mustard works in a pinch, but it tends to make the filling too yellow and slightly less complex.
- Vinegar: Lemon juice is too overpowering. Stick to white wine vinegar, apple cider vinegar, or that pickle brine we talked about.
- Paprika: Smoked paprika is best, adding a subtle campfire flavour. Don’t just use regular sweet paprika; it adds colour but no flavour depth.
Related Recipes Worth Trying
- Classic Deviled Eggs Recipe: Ultra Creamy, Tangy, Easy Appetizer — Our Classic Deviled Eggs Recipe guarantees perfection every time. Learn the secret to flawlessly cooked eggs and a velvety smooth filling that makes the...
- Mississippi Sin Deviled Eggs The Creamy Cheesy Naughty Secret Ingredient — Our Mississippi Sin Deviled Eggs recipe transforms picnic fare into an elegant appetizer Rich smoky and creamy these different deviled egg recipes are...
- Best Keto Jalapeno Popper Deviled Eggs Recipe — Make the best Keto Jalapeno Popper Deviled Eggsa spicy creamy keto appetizer that steals the show This low carb recipe is foolproof and partyready
- Jalapeño Popper Deviled Eggs Recipe Spice Up Your Party — Spice up your next bash with Jalapeño Popper Deviled Eggs Easy cheesy and packed with a kick the ultimate party appetizer Get the recipe now
- Eggs Benny Fiesta My Chorizo Hollandaise Brunch Recipe — Spice up your weekend brunch This Eggs Benedict recipe features a vibrant smoky chorizo hollandaise Its a flavour fiesta you wont forget Get the easy brunch...
- Eggs Benedict Royale Smoked Salmon with Dill Hollandaise — Elevate your brunch with Eggs Benedict Royale Smoked salmon creamy dill hollandaise make this egg dish a showstopper Restaurantworthy surprisingly easy
Mastering the Peel: Flawless Hard and Boiled Eggs Every Time

If you want those beautiful, perfect halves for your Classic Creamy Deviled Eggs , you need a perfect peel. We aren’t boiling these eggs into oblivion; we are simply setting the proteins perfectly. This technique avoids the ugly grey and green ring around the yolk.
- The Starting Line: Place your eggs in a saucepan. Cover them generously with cold water. Starting with cold water allows the eggs to heat up slowly and evenly, preventing them from cracking (most of the time).
- The Sprint: Turn the heat up to high and bring the water to a rapid, rolling boil.
- The Waiting Game: As soon as the water is boiling, take the pan off the heat immediately. Put the lid on. Set a timer for 10 minutes. Seriously, set a timer. Don't peek.
- The Shock: When the timer buzzes, get those eggs out of the hot water and straight into a massive bowl of ice water. The shock treatment halts the cooking process, ensuring the yolks are perfectly cooked through but still bright yellow. Leave them for 5 minutes, or until cool enough to handle.
To peel them easily, give the egg a gentle tap all over the shell, then roll it between your palm and the counter. The shell should slide right off, often in one big piece, especially if you peel them under cool running water.
Crafting the Filling: A Step and by-Step Guide to Maximum Creaminess
The Perfect Heat Transfer: From Boiling Water to Ice Bath
The reason we rush the eggs into that ice bath is twofold: safety and aesthetics. The sudden cooling prevents the grey ring (ferrous sulfide) from forming where the yolk meets the white. That ring is harmless, but it looks like you overcooked the daylights out of the egg. We want vibrant yellow yolks for our filling.
Separating and Prepping the Yolks Like a Pro
Slice each egg clean in half, lengthwise. I like using a slightly damp knife to make sure the yolk doesn't stick. Carefully scoop the yolks out using a small spoon and transfer them to a mixing bowl. Now, grab that fine and mesh sieve.
Use a rubber spatula or the back of a spoon to gently press the yolks through the sieve into a clean bowl. What you get looks like fluffy, yellow snow. This is the base for true creaminess.
Assembling the Filling: Consistency Checkpoints
Once the yolks are powdered, it’s time for the fun part. Add your mayonnaise, Dijon, vinegar/brine, salt, pepper, and any optional hot sauce. Mix this very thoroughly with a spoon or spatula until it’s perfectly unified.
The consistency should be thick, maybe even a little stiffer than you think it should be. It needs to hold its shape when piped. If it seems too dry, add a tiny splash more mayo or brine, just a quarter teaspoon at a time. The real checkpoint here is tasting. Does it need more salt? More tang? Be brave.
Seasoning makes all the difference in Deviled Eggs .
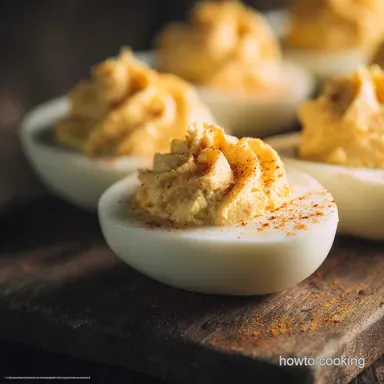
Piping vs. Scooping: Achieving the Signature Swirl
Look, if you're just making these for your Tuesday lunch, a spoon is totally fine. But if you want that beautiful, celebratory presentation and frankly, if you’re blogging about the Best Deviled Eggs you need the swirl.
Pop the filling into your piping bag fitted with a star tip (or your Ziploc bag). Hold the bag vertically over the egg white cavity and gently squeeze, swirling upward to create a high, neat dome. Filling them high makes them look substantial and fancy.
Planning Ahead: Storage and Preparation Secrets
How Far in Advance Can I Prepare My Filled Eggs?
This is where planning saves your sanity. If you fill the egg whites too early, the filling starts to dry out, and the cut edges of the whites can get a bit rubbery.
- The Best Strategy: Cook and peel the eggs up to 2 days in advance. Store the whole peeled eggs in a covered container in the fridge. Prepare the filling (steps 5 8) up to 24 hours in advance and store it in an airtight container (or still in the piping bag) in the fridge.
- Assembly: Do not assemble and garnish until 1– 4 hours before serving. This keeps everything looking pristine.
Elevate Your Dish: Creative Garnish Ideas Beyond Paprika
We love paprika, but let’s be honest, it’s the default setting. Here are ways to make your deviled eggs recipe stand out:
- Finely crumbled, crispy bacon (bacon makes everything better, obviously).
- A dusting of finely chopped fresh chives or dill.
- A tiny sprinkle of celery salt for a savoury crunch.
- A microscopic sliver of pickled jalapeño centered on the swirl.
- A pinch of smoked sea salt flakes.
Spicy Sriracha Deviled Eggs Variation
Want a kick? Me too. For a fun, spicy twist on this deviled eggs recipe easy classic, simply adjust the filling phase:
- Reduce the regular mayonnaise by 1 tablespoon.
- Add 2 tablespoons of Sriracha mayonnaise (or 1 tbsp regular mayo + 1 tsp Sriracha).
- Add 1/4 teaspoon of garlic powder to the yolk mix.
- Garnish the top with a tiny single drop of Sriracha sauce just before serving. They look gorgeous and pack a gentle heat.
Calculating Serving Portions and Nutritional Snapshot
I hate talking calories, but if you’re worried about how many people six eggs will feed (12 halves), generally assume people will eat two halves each. They are deceptively filling!
A standard two and half serving of these Classic Creamy Deviled Eggs is rich, yes, but they are absolutely packed with protein, making them a much healthier appetizer choice than, say, a plate of crisps. They are mostly good fat and protein, and that is a win in my book.
Go forth and conquer the picnic table!

Recipe FAQs
Why do my hard boiled eggs always get that awful grey ring around the yolk?
That grey ring (ferrous sulfide) means they overcooked! Use an ice bath immediately after your 10 minutes of covered simmering to halt the cooking process and ensure easy peeling.
How long are homemade Deviled Eggs safe to eat if they're sitting out at a garden party?
Due to the mayonnaise, they must be chilled until serving. Never leave these classic Deviled Eggs out for more than two hours, especially on a warm British summer afternoon.
What's the secret to a perfectly smooth, non-lumpy filling no grit allowed!
Push the cooked yolks through a fine mesh sieve before mixing; it’s a bit of faff but guarantees a professional, cloud like texture, far smoother than just using a fork.
I fancy a twist; are there any simple, show stopping flavour variations I can try?
Try mixing in 1/2 tsp of mild curry powder and chutney for a great Coronation twist, or fold in smoked salmon and fresh dill for an elegant flavour upgrade.
Can I prep the egg filling the day before a big family gathering?
Absolutely! Keep the filling separate from the whites, stored airtight in the fridge. Assemble and garnish just before serving to maintain the best freshness and piping structure.
Classic Creamy Deviled Eggs Recipe
Ingredients:
Instructions:
Nutrition Facts:
| Calories | 140 calories |
|---|---|
| Fat | 12 g |
| Fiber | 0 g |
