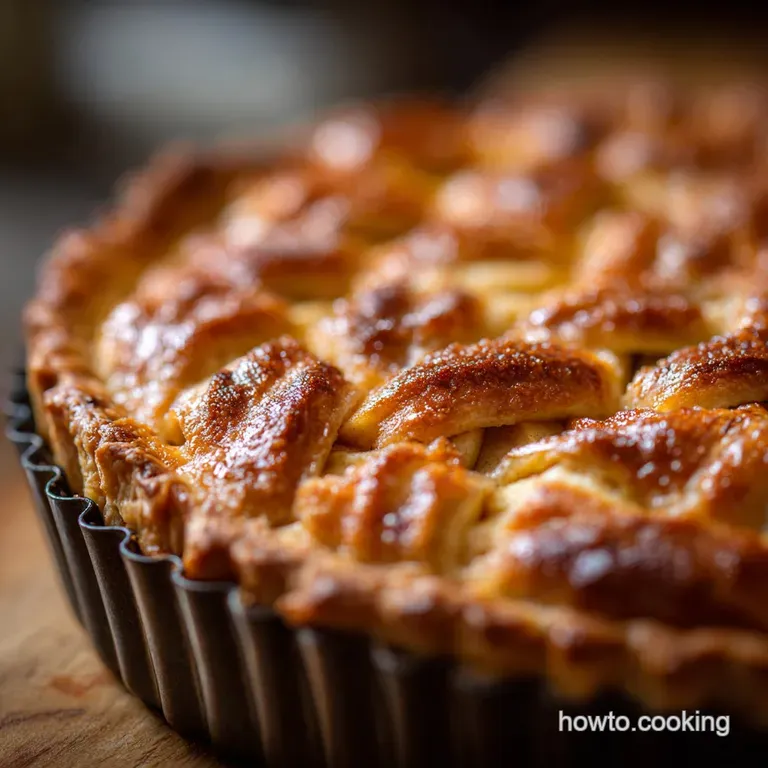
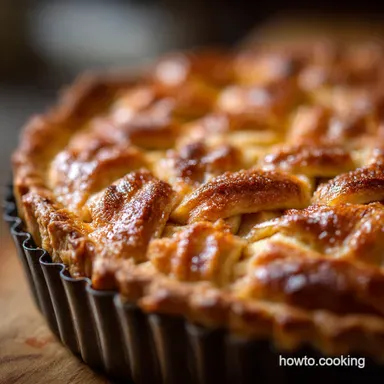
Apple Pie: the Classic English Deep-Dish Recipe with Flaky Crust

- Heralding the Perfect Pie: Why This Flaky Apple Pie Recipe is the Ultimate Classic
- The Science of Flakiness: Achieving the Ideal Texture and Filling Consistency
- Essential Ingredients and Perfect Substitutions for Your Pie
- Method: Constructing the Deep-Dish Apple Pie from Scratch
- Troubleshooting and Expert Hacks for Perfect Home Baking
- Preservation Guide: Storing, Refrigerating, and Freezing Techniques
- Presentation and Pairings: How to Serve Your Warm Apple Pie
- Recipe FAQs
- 📝 Recipe Card
Heralding the Perfect Pie: Why This Flaky Apple Pie Recipe is the Ultimate Classic
The scent, you guys. The second that butter starts melting into the flour and those spiced apple slices begin to bubble, your kitchen transforms into a hug you can actually eat.
Forget expensive candles; this aroma is the only home fragrance you’ll ever need, signaling pure comfort and deliciousness.
I used to think homemade apple pie was reserved for grandmothers and professional bakers, but that’s total rubbish. This recipe is the ultimate lifesaver because it relies on two basic truths: cold butter and hot temperatures.
It's surprisingly fast to assemble once you conquer the simple simple apple pie crust recipe , and it's always cheap if apples are in season.
This isn’t just an apple pie; this is the classic. We are focusing on maximum flakiness and deep, rich flavor, avoiding any of the common pitfalls that lead to sad, soggy bottoms.
Grab your apron, put on some music, and let’s crack on with the Best Apple Pie Recipe Ever .
A Deep Dish Masterpiece: Defining the Classic English Style
We’re going deep, literally. This approach uses a 9 inch deep dish plate, allowing us to pack in almost three pounds of beautifully spiced fruit. Trust me, you need this deep dish action.
It totally changes the game, giving you enough filling to properly celebrate the season, which is exactly how I learned to bake from my great aunt Betsy.
A deep pie ensures every slice is a generous portion. Plus, the ratio of crust to filling becomes absolutely perfect. We want thick, molten filling, not just a thin layer of sadness inside a massive pastry dome.
The Magic of the Cold Butter Crust Technique
Flaky pastry is basically just water vapor trying to escape butter pockets. That’s the entire magic trick, nothing fancy required! We cut the butter into the flour until there are still distinct, cold pieces (pea-sized is the goal).
When that chilled dough hits the high heat of the oven, those cold butter pieces release steam, which violently pushes apart the layers of gluten. That lift is what gives you that shattering, flaky bite. Warm butter leads to chewy, tough pastry a baking crime, frankly.
The Essential Aromatics: Cinnamon and Nutmeg Harmony
Sure, you could just throw in some store-bought "apple pie spice," but we are better than that. We demand complexity and warmth. Cinnamon is the anchor here, but freshly grated nutmeg is the secret weapon you must deploy.
Grating nutmeg right before you use it releases volatile oils that deliver a depth of flavor that is truly unparalleled. It instantly makes your filling smell and taste more professional, so please ditch that dusty old jar of pre-ground stuff.
The Science of Flakiness: Achieving the Ideal Texture and Filling Consistency
Thermal Shock: The Secret to a Truly Short Pastry
The initial 15 minute blast at 425°F (220°C) is not an accident; it's physics at work. We call this "thermal shock." This super hot start solidifies the fat and structure of the crust almost instantly, preventing the butter from just melting out before it can steam.
Once the crust is set, we immediately drop the temperature to 375°F (190°C). This allows the interior to cook through completely without the top getting too dark. It’s the dual temperature bake that delivers the golden crust and tender filling simultaneously.
Starch Control: Preventing a Soggy Apple Pie Bottom
A soggy bottom is the ultimate defeat for a pie baker, and thankfully, it’s entirely preventable. Our first line of defense is the hot baking sheet we place the pie onto when it goes into the oven. The immediate contact heat starts crisping the bottom crust right away.
Second, we use cornstarch in the filling, which is essential for managing the sheer amount of liquid released by the fruit. The cornstarch activates around 203°F, turning the apple juices into a thick, syrupy glaze that coats the apples beautifully, stopping the juice from soaking the bottom pastry.
Balancing Sweetness and Tartness in the Filling
If you only use sweet apples (like Gala or Fuji), the final product will be cloyingly sweet and a bit flat. The absolute best apple pie filling recipe uses a mix. You need a sturdy, tart apple, like a Granny Smith, to provide structure and acidity.
Then you complement that tartness with a softer, sweeter apple, such as a Honeycrisp or a Pink Lady. The lemon juice in our recipe acts as a critical counterbalance, brightening the rich flavors and cutting through the brown sugar.
Essential Ingredients and Perfect Substitutions for Your Pie
Baking demands accuracy, but sometimes you just don't have exactly what the recipe calls for. Don't worry about running to the store, we have alternatives that will save the day.
| Ingredient | Role | Viable Substitute | Notes on Swapping |
|---|---|---|---|
| All-Purpose Flour | Structure | Bread Flour (use 1 Tbsp less) | Bread flour is higher in protein and can make the dough tougher if overmixed. |
| Unsalted Butter | Flakiness, Flavor | Vegetable Shortening (Crisco) or Lard | Shortening/Lard results in maximum flakiness but less flavor. Use 1:1 ratio. |
| Granulated Sugar | Sweetener | Maple Syrup (reduce other liquid) | Maple syrup works but introduces more moisture, so adjust the cornstarch accordingly. |
| Cornstarch | Thickener | Tapioca Starch or All-Purpose Flour | Use 4 Tbsp of flour or 4 Tbsp of tapioca starch (which gives a glossier finish). |
| Mixed Apples | Filling | Pears or Quince (mixed with lemon) | Pears are softer; you may need to reduce the sugar slightly. |
Method: Constructing the Deep Dish Apple Pie from Scratch
The Definitive Guide to Pie Apples: Crispness and Flavor Profiles
When slicing your apples for this homemade apple pie , aim for 1/4 inch thickness. This ensures they cook through simultaneously without turning into mush. My personal favorite blend is a 50/50 mix of Granny Smith and Honeycrisp.
If you happen to be making something similar, like my Apple Crisp Mini Cheesecakes: Creamy, Crispy Autumn Dessert Recipe , you’ll notice that crispness is key there too. Never use mushy apples like Red Delicious; they just dissolve into sauce.
Fat Choices: Butter vs. Lard for the Ultimate Crust
I am a butter purist in my soul, and that rich, milky flavour is non-negotiable for a truly classic dessert. However, I’ve tried the combination of half butter and half lard, and honestly, the textural results are stunning. If you want maximum lift and flakiness, try the blend!
For those who are aiming for the richest flavor possible, stick with 100% butter just make sure it’s seriously cold. If you want to dive deeper into the science of fat ratios for pastry, check out my recipe for the Homemade Apple Pie: The Flakiest All-Butter Classic Recipe .
Sweeteners and Spices: Customizing the Filling Intensity
The combination of white sugar (for clean sweetness) and brown sugar (for molasses depth) creates a beautiful caramelization inside the pie. If you like a much tarter pie, feel free to reduce the total sugar amount by about 1/4 cup.
I usually sneak in a tiny pinch of ground cardamom alongside the nutmeg and cinnamon; it adds a sophisticated, floral note. Don't go overboard, though; we still want this to taste like the comforting classic apple pie recipe .
Phase I: Preparing and Chilling the Flaky Dough
Remember the rule: keep everything cold. I cube the butter and stick it back in the freezer for ten minutes before I even start mixing. When adding the ice water, use it sparingly. The dough should just barely hold together.
Chef's Note: Stop mixing the dough the second it comes together. I made the mistake of overmixing my first few attempts, convinced it needed to be smooth. It does not! Overworked dough equals tough, sad crust.
Phase II: Slicing the Apples and Mixing the Filling
After you slice the apples, they need a proper rest with the sugar and starch. That 15 minute rest period is called maceration, and it draws out excess moisture. This is crucial for preventing soup.
Once the liquid has been drawn out, give the filling a vigorous stir. You should see the cornstarch (or flour) dissolving beautifully into that syrupy liquid. This ensures even thickening as the pie bakes.
Phase III: Assembling and Crimping the Vented Crust
When you roll the bottom crust, make sure it drapes easily into the pie dish without stretching it. If you stretch the dough, it will snap back when baked and cause the sides to shrink dramatically. I always roll my dough out and let it rest for 5 minutes before placing it in the dish.
Load the apples high, mounding them slightly in the center since they will collapse during baking. Seal the edges firmly and cut at least five distinct vents in the top crust. These vents are critical for steam release, keeping your crust crisp and dry.
Finish with the egg wash and a generous sprinkle of turbinado sugar for a lovely crunch.
Troubleshooting and Expert Hacks for Perfect Home Baking
The Blind Baking Debate: To Par-Bake or Not to Par-Bake
Some bakers insist on blind baking (par-baking) the bottom crust to prevent sogginess. I usually skip it for a double crust pie because the bottom crust can become tough and crack easily when pressed down by the heavy filling.
Instead of blind baking, use the hot baking sheet method outlined in the instructions and ensure your pie is sitting on the lowest rack. If you prefer the extra security of par-baking, I suggest checking out my recipe for a Simple Apple Pie: The Classic Farmhouse Recipe for a Flaky Crust which utilizes that technique.
Why Your Crust Shrinks (and How to Stop It)
Your crust is shrinking because the gluten strands are too tight! This usually happens due to two things: too much handling or not enough chilling time.
Fix: After you line the bottom of your pie plate, trim the dough, and before you fill it, stick the entire pie plate back into the freezer for 20 minutes. This relaxes the gluten, ensuring the crust holds its shape perfectly during the bake.
Fixing a Runny Filling After Baking
You cut into the pie and juice runs everywhere disaster! This almost always means the pie did not cool long enough. The starch needs time to fully solidify into a gel, which takes a long time because the center is incredibly dense and hot.
Fix: Give the pie at least two hours (and ideally four hours) of cooling time on a wire rack. If you absolutely must serve it early, serve it with ice cream or custard to soak up the excess liquid.
Never bake apple pie a second time to fix a runny filling; you will dry out the apples.
Preservation Guide: Storing, Refrigerating, and Freezing Techniques
Handling Leftovers: When Does Apple Pie Need Refrigeration?
If your pie is covered and sitting at room temperature, it is perfectly fine for about 2 days, especially in cooler weather. Once you hit the 48 hour mark, or if your kitchen is particularly warm, move it to the fridge.
Chilled, this pie will last up to 5 days. Just make sure it is tightly wrapped in plastic wrap or kept in an airtight container to prevent the crust from drying out and absorbing fridge smells.
Freezing the Pie: Baked vs. Unbaked Storage Options
You can successfully freeze this pie, either baked or unbaked. If you freeze it unbaked , wrap it tightly (three layers of plastic wrap and one layer of foil) and freeze for up to three months.
Bake from frozen, adding 10- 20 minutes to the total baking time and shielding the edges early.
If you freeze it baked , cool it completely first. Wrap it well and freeze. Thaw overnight in the fridge and follow the reheating instructions below.
The Best Way to Reheat a Day-Old Slice
Microwaving heats the apples nicely but absolutely ruins the crust texture, turning it flabby. Don’t do it!
The Pro Move: Reheat slices in a toaster oven or standard oven set to 350°F (175°C) for 10 to 15 minutes. This low and slow heat crisps up the crust beautifully without drying out the filling, making the crust taste like it was freshly baked.
Presentation and Pairings: How to Serve Your Warm Apple Pie
Nothing beats a slice of warm sweet apple pie recipe . The temperature allows the aromas to really sing and the crust to maintain its delicate crispness.
The classic pairing, especially if you have a big crowd for Sunday dinner, is homemade custard. It’s creamy, simple, and the slightly vanilla flavor is divine against the spiced apples. Failing that, a huge scoop of high-quality vanilla bean ice cream (the cold contrast is marvelous) or a dollop of clotted cream will do the trick nicely. If you're hosting an autumnal party, maybe pair this with a selection of desserts, perhaps alongside your Mini Pumpkin Pies: Flaky Crust Individual Desserts for Fall for variety.

Recipe FAQs
Why is my pie crust tough instead of wonderfully flaky?
The primary culprit is usually overworking the dough, which develops the gluten too much, or using fat that isn't cold enough. Ensure your butter and water are intensely ice-cold, and only mix the dough until it just comes together, leaving visible pea-sized pieces of butter for steam pockets.
My apple filling is too runny. How do I fix a watery pie?
A runny filling often indicates that the thickening agent (flour, cornstarch, or tapioca) did not fully activate, which requires high heat and time. To prevent this, ensure the filling juices are bubbling vigorously through the top crust vents for at least the final 15 minutes of baking, confirming the starch has properly set.
What are the best apples to use, and can I mix varieties?
Absolutely, mixing varieties provides the best balance of structure and flavor; use 70% firm, tart apples like Granny Smith for structure, and 30% softer, sweeter types like Honeycrisp or Braeburn. Avoid using only soft apples, as they turn to a mushy applesauce texture during the long bake time.
Can I make this Classic Apple Pie recipe vegan?
Yes, the key substitutions are replacing dairy butter with a high-quality, solid vegan butter alternative or vegetable shortening in the crust recipe. Instead of an egg wash for browning, brush the top crust with a mixture of plant based milk (like almond or oat) and a pinch of sugar.
Why is it necessary to chill or “rest” the pie dough before rolling?
Resting the dough allows the gluten strands that were developed during mixing to fully relax and the butter pieces to firm up again. This resting period prevents the crust from shrinking excessively while it bakes and ensures the final texture remains tender and manageable.
How should I store the pie, and can I freeze it?
A fully baked pie can be stored covered at cool room temperature for up to two days, or refrigerated for up to four days. If you wish to freeze it, wrap the cooled pie tightly in plastic wrap and foil; it reheats best when thawed overnight in the refrigerator and warmed gently in a low oven.
My crust edges always burn before the pie is fully cooked what should I do?
This is a common issue due to the exposed edges baking faster than the interior filling. About halfway through the baking time, create a protective shield by gently wrapping the perimeter of the pie dish with strips of aluminum foil, which will deflect the direct oven heat.
Classic Flaky Crust Apple Pie
Ingredients:
Instructions:
Nutrition Facts:
| Calories | 420 kcal |
|---|---|
| Protein | 4.0 g |
| Fat | 18.0 g |
| Carbs | 63.0 g |
