Decadent Chocolate Covered Pretzels – Sweet, Salty, and Perfectly Crispy
- Let’s Talk About How to Make Chocolate Covered Pretzels —Your New Favorite Snack!
- Your Go-To Guide for Essential Ingredients: How to Nail Amazing Chocolate Covered Pretzels
- Mastering the Pro Cooking Method for Easy Chocolate Covered Pretzels
- Insider Tips & Chef Secrets for the Best Chocolate Covered Pretzels
- Next-Level Presentation Ideas for Your Covered Pretzels
- Storing & Prepping Chocolate Covered Pretzels Ahead of Time
- Fun Twists and Variations to Try Next Time
- The Lowdown on Nutrition & Serving
- Wrapping It Up: Your New Favorite Homemade Candy Treat
- Frequently Asked Questions
- 📝 Recipe Card
Let’s Talk About How to Make Chocolate Covered Pretzels —Your New Favorite Snack!
So, picture this: it’s the holidays, and i’m rummaging through the kitchen, desperate for a treat that’s sweet but not too much.
Suddenly, the idea hits me why not try making easy chocolate covered pretzels at home? honestly, it felt like magic combining that salty crunch with silky chocolate.
If you’ve ever wondered how to make chocolate covered pretzels that actually taste like the good stuff from those fancy candy stores, well, you’re in the right place!
This recipe is one of those diy easy recipes that’s super satisfying. plus, it hits all those right notes salty, sweet, crispy.
And the best part? anyone can make them, no kitchen ninja skills required. you’re basically just melting chocolate and dunking pretzels.
Even i, who usually burns toast, can nail this recipe.
The Sweet Story Behind Chocolate Covered Pretzels
Here’s a tiny history nugget for you: chocolate covered pretzels started popping up in american bakeries and candy shops decades ago, becoming a classic snack because of that perfect sweet salty combo.
It’s like the edible version of peanut butter and jelly simple but so darn good.
Nowadays, these treats are everywhere from christmas candy recipes to party platters. and trust me, covered pretzels have never been cooler.
Whether you want a quick candy treat or something special to dazzle at holiday parties, they hit the mark.
Plus, they’re a great gateway into homemade candy making. no fancy ovens or confusing steps needed. you can whip them up in about 40 minutes and end up with roughly 40 delicious pretzels to share or hide from family members.
Why You’ll Love This Recipe (And Honestly, Who Wouldn’t?)
First off, let’s talk health yeah, chocolate might not scream “super food,” but when paired with pretzels, which are low in fat and have a bit of fiber, you’re actually balancing sweetness with a little crunch that satisfies cravings without going overboard.
This recipe’s biggest win is how versatile it is. you can make it your own with different chocolate types milk, dark, or semi sweet.
Want extra flair? sprinkle some nuts, sea salt flakes, or even shredded coconut. you’re basically customizing christmas candies or any occasion treats without sweating it.
Another cool thing: these pretzels work for so many occasions. holiday gatherings, birthday parties, movie nights, or even a simple afternoon pick-me-up.
And if you ask me, homemade candy always tastes better because you made it with love (and hey, no weird preservatives)!
Compared to other snack recipes, these chocolate covered pretzels stand out because they’re quick, budget friendly, and yield a bunch of snacks at once.
No need to run out and buy expensive artisan sweets instead, you become the magic maker in your own kitchen.
Alright, now that you’re probably craving some crunchy, chocolaty goodness (i know i am just writing about it), let’s move on to the ingredients.
It’s honestly so simple you might already have most of what you need sitting in your pantry. trust me, once you start, you won’t want to stop.
Ready to get dipping? Here’s what you’ll need...
Your Go-To Guide for Essential Ingredients: How to Nail Amazing Chocolate Covered Pretzels
Alright, so you’re pumped to try out this easy chocolate covered pretzels recipe, right? before we jump into that chocolaty magic, let me spill the tea on the core stuff you’ll need.
Trust me, having the right ingredients on hand with a little know how makes all the difference between “meh” pretzels and omg candy treats that'll disappear in a blink!
Premium Core Components: Picking the Best for Your Candy Treats
First off, pretzels . you want those salty little twists or minis that have a nice crunch about 6 ounces or 170 grams is perfect for this recipe.
If you’re like me, you might get tempted to grab whatever’s cheapest at the store. don’t do it. look for pretzels that are dry and snap cleanly when broken.
Stale ones? no, thanks. they’ll mess with the texture.
Next up, chocolate the star of the show. use a good quality chocolate, about 8 ounces (227 grams), either semi sweet, milk, or dark.
Trust me, the chocolate’s quality shines through with every bite. i swear by chocolate chips or chopped bars from brands like ghirardelli or lindt for that smooth melt.
And here’s a tip from my kitchen mishaps: don’t burn your chocolate! melt it gently in the microwave in 30-second bursts , stirring in between.
Oh, and store your chocolate in a cool, dry place around 65- 70° f (18- 21° c) to keep it fresh.
Leftover chocolate can last a long time if kept dry and away from light.
Signature Seasoning Blend: Spice It Up or Keep It Classic
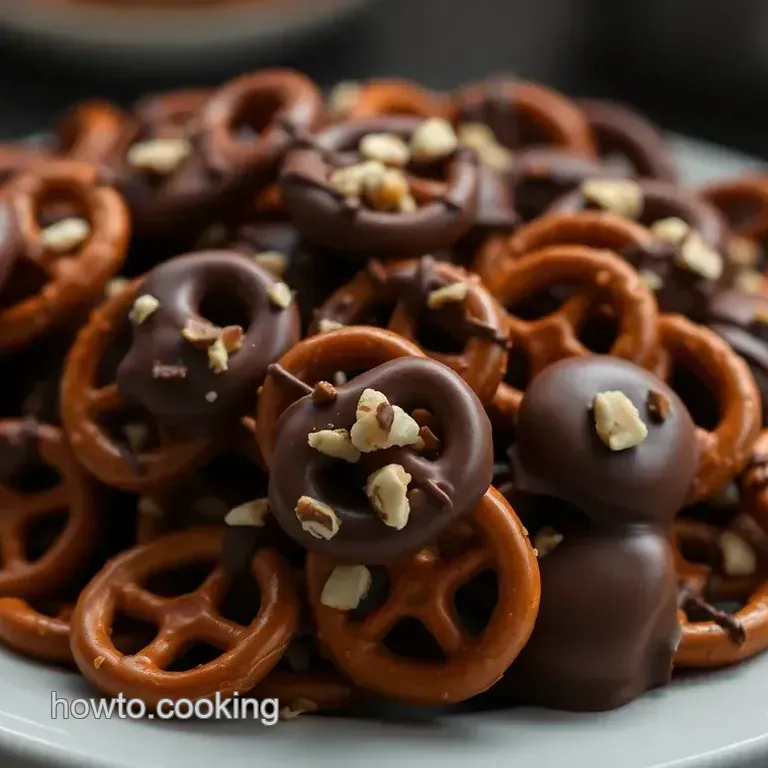
While the classic salted crunch is the og flavor, adding toppings can make your pretzels next level. i like sprinkling a pinch of sea salt flakes right after dipping trust me, it balances the sweetness like magic.
Nuts like chopped almonds or pecans also give a nice texture contrast.
For those feeling adventurous, try mixing in some rainbow sprinkles or even shredded coconut. just toss them right on the wet chocolate before it sets.
It’s like customizing your own christmas candy without the wait or mess from your grandma’s kitchen. honestly, finding your fave combo is part of the fun!
Smart Substitutions: Because Life Happens
No pretzels on hand? No problem. Pretzel rods or twists work just as well same salty crunch, different vibe.
If you can’t do nuts (‘cause allergies, ugh), crushed freeze dried fruits or even tiny bits of dried cranberries add a nice fruity pop.
Looking for a quick fix on chocolate? Candy melts or compound chocolate do the trick and are easier to work with, though the flavor isn’t quite as rich.
If you want to sneak in a dietary switch, like making it vegan, just grab some dairy-free chocolate chips and double check your pretzels for no butter or milk ingredients.
Kitchen Equipment Essentials: Keep It Simple, Folks
You seriously don’t need a high tech setup for these bad boys. A microwave safe bowl or a double boiler will do for melting your chocolate.
Get yourself a baking tray lined with parchment paper or a silicone mat. it’s a lifesaver easy cleanup, and your pretzels won’t stick and break apart.
Pro tip? a fork or specialized dipping tool helps get the chocolate coating just right without giving yourself a chocolate covered hand mess.
If you’re like me and sometimes forget where you put stuff, stash these essentials in a clear container or drawer, so everything’s quick to grab next time you wanna whip up a batch.
Also, working quickly makes your life easier chocolate sets fast once you dip, so have your toppings close by.
Honestly, i never thought how how to make chocolate covered pretzels could be so fun but getting these ingredients and gear right makes such a difference.
It’s kinda like prepping your jam session before the band kicks in. so, now that you have your pantry prepped and your tools ready, let’s move on to that step-by-step magic to create the best new recipes in homemade candy form.
Keep reading to discover how simple it is to turn these into your go-to christmas candy recipes or anytime snacks!
You’ll be amazed at how these sweet and salty bites turn out crisp, rich, and just right for any occasion. Ready to dive into the instructions? Let’s go!
Mastering the Pro Cooking Method for Easy Chocolate Covered Pretzels
Okay, let me spill the beans (or the chocolate) on what really goes behind making those dreamy easy chocolate covered pretzels that everyone raves about.
You know, the kind that perfectly balance salty crunch and that dreamy chocolate coating? yep, i totally get the feeling when you search for "how to make chocolate covered pretzels" you want something simple, foolproof, and, above all, tasty as heck.
So here goes my little insider scoop on how the pros handle it.
Essential Prep: Mise en Place Like a Boss
First off, mise en place. fancy french term, right? but honestly, it just means "everything in place." before you melt a single chip, get your pretzels lined up neatly on parchment paper (trust me, this saves so many headaches).
Separate your toppings maybe some nuts, sprinkles, or classy sea salt flakes nearby in tiny bowls.
One killer tip i swear by is managing your time like a pro. chocolate waits for no one, so plan to melt it only when you’re ready to dip.
I usually blast the chocolate in 30-second bursts in the microwave , stirring in between to avoid any burnt chunks.
Don’t crowd your workspace a tidy, organized area just feels way better and keeps your chocolate covered sanity intact.
Oh, and safety? Keep a cloth handy melted chocolate can be sneaky hot. Also, wipe up spills ASAP to avoid any slips or sticky disasters.
step-by-step to Chocolate Covered Perfection
Alright, here’s the no-nonsense rundown:
Melt your chocolate slowly microwave at medium power in 30-second intervals or gently use a double boiler until smooth.
Target temp? about 110° f to 115° f for melting, then cool slightly before dipping.
Grab a pretzel with a fork or your fingers (your call), dip it halfway or fully, and gently tap off the excess chocolate.
Sprinkle on toppings immediately, while that chocolate is still wet we want the toppings to stick , obviously.
Pop those pretzels on your prepared baking sheet. if you’re in a rush, slide them into the fridge for about 15 minutes to get set faster.
Otherwise, 20- 30 minutes at room temp works just fine.
For me, the visual cue to know they’re done is when the chocolate looks shiny and hard not dull or sticky.
Pro Tips and Techniques That Make a Difference
Here’s a little secret: i used to mess up by overheating the chocolate and getting that grainy, clumpy mess you don’t want.
Instead, keep stirring often and melt just enough until smooth and shiny.
A neat trick for that professional glossy finish? temper the chocolate this means cooling it down to around 82° f after melting and then gently warming it back to about 88° f before dipping.
It sounds wild, but if you like diy easy recipes with a fancy touch, it’s worth trying.
Always check for quality during your process: is your chocolate smooth? are your pretzels drying evenly? quick tip: if chocolate looks dull or develops white streaks after setting, it’s “bloomed” and still safe but less appealing.
Nail It Every Time: Success Strategies
I learned early on that one common mistake is rushing the chocolate setting phase. patience pays off setting your dipped pretzels in the fridge too long or in a humid environment causes melting or sweating.
Aim for a cool, dry spot instead.
If you want to prep ahead (life saver!), you can dip pretzels and store them in airtight containers for up to a week.
Just bring them to room temp before serving for that perfect texture.
Also, seriously, don’t overdo your toppings. Just enough to hint at the extra flavor overloading can make each bite messy and distracting from that lovely sweet salty harmony .
So, if you’ve ever wondered how to make chocolate covered pretzels look like you picked them up from a fancy christmas candies shop, following these steps will seriously bump you up from novice to pro in no time.
Ready for more insider info on variations and tweaks to turn basic covered pretzels into your personal candy treats? Let’s jump into some tasty additional information next!
Insider Tips & Chef Secrets for the Best Chocolate Covered Pretzels
Alright, real talk. when i first tried how to make chocolate covered pretzels , i thought it’d be a total breeze.
And yeah, dipping those lil’ salty sticks into melted chocolate is simple, but there are a few tricks that make a huuuge difference.
First off, use good chocolate like, don’t skimp here. i’m talking semi sweet or dark chocolate with a smooth melt. trust me, i once grabbed cheap chocolate chips, and guess what? the whole batch looked dull and tasted kinda waxy.
Use high-quality chocolate, and your pretzels will shine literally.
Here’s a quick time saver: melt your chocolate in short bursts in the microwave, stirring often. i learned this the hard way after nuking it too long, ending up with a grainy mess ugh .
Also, dip the pretzels quickly and work in small batches so the chocolate doesn’t firm up before you add your toppings.
Speaking of toppings, a sprinkle of sea salt on top is a game changer. it highlights the chocolate and balances the sweet and salty perfectly.
Oh! and if you want to get fancy, add some colorful sprinkles or crushed nuts. it’s christmas candy recipes magic in the making, y’know?
Next Level Presentation Ideas for Your Covered Pretzels
If you're gifting these or want to make wow moments on your dessert table, presentation is key.
Line up your pretzels neatly on parchment paper for drying. when ready to serve, arrange them on a simple white plate or festive tray.
The contrast makes those rich browns and toppings pop.
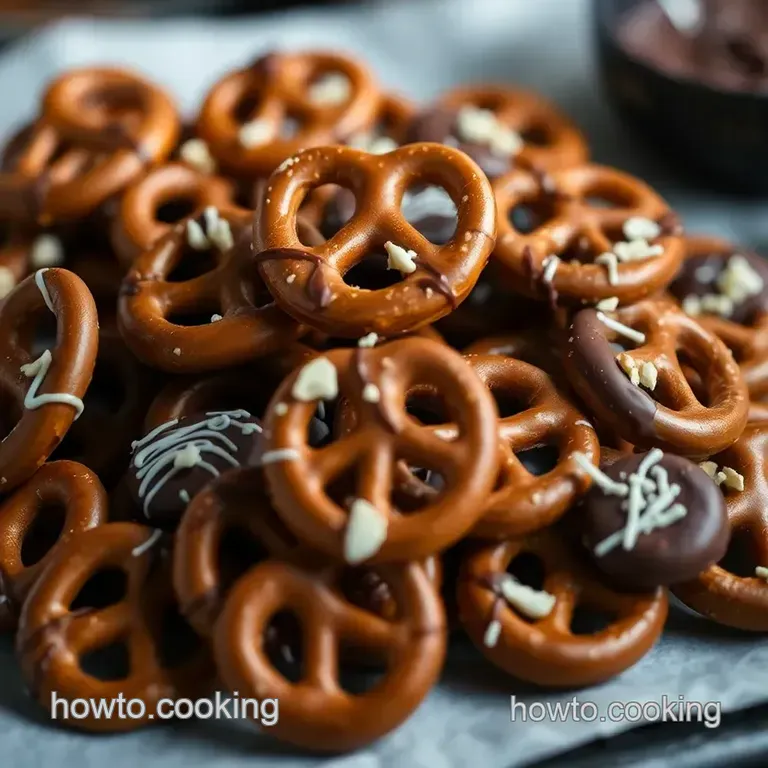
Try layering colors . for example, drizzle white chocolate over the dark dipped pretzels for a swirly, artsy look. it’s an easy way to mimic those fancy candy treats you see in bakeries without the fuss.
For garnish, a pinch of edible glitter or red-and-green sprinkles amps up that holiday vibe for Christmas candies. Honestly, when I did this for my family party, everyone thought I spent hours decorating… Nope, just some quick drizzle & sprinkle action!
Visual appeal isn’t just about the plate think about texture. let some pretzels show off their salty twist shape, and others get fully dipped for variety.
It keeps things interesting and definitely instagram worthy .
Storing & Prepping Chocolate Covered Pretzels Ahead of Time
One thing I love is making these treats ahead. They’re perfect for those last minute party surprises or DIY easy recipes stash.
Storing: pop them in an airtight container and keep them in a cool, dry place room temp is fine. if it’s warm, fridge is safe but be mindful, the chocolate can sweat (ew).
They stay fresh for about a week, which means you can prep early without stress.
Reheating? actually, you don’t need to heat them. just grab and munch! if you want that fresh crunch back after fridge chilling, leave them out for 15 minutes to lose chill and regain crispness.
Pro tip: If you want to store longer, freeze them in a single layer on a tray, then transfer to a sealed bag. Perfect for making Christmas candies in bulk.
Fun Twists and Variations to Try Next Time
Honestly, the sky’s the limit with this one. Since I started making Easy Chocolate Covered Pretzels , I’ve experimented a lot.
Flavor boosts? Mix peppermint oil in the melted chocolate for a festive peppermint candy feel. Or sprinkle with cinnamon sugar instead of salt for a cozy sweet spin.
Diet tweaks? Use dairy-free or vegan chocolate if you want this recipe to be allergy friendly. Crushed freeze dried strawberries instead of nuts provide a beautiful pop and are great for nut allergies.
Shape switch? Pretzel rods or twists work great if you want a different dipping experience. Plus, they look kinda fancy on a candy tray.
Seasonal ideas? Pumpkin spice chocolate covered pretzels in fall or adding edible gold dust for New Year’s Eve sparkle. It keeps the recipe feeling fresh and exciting!
The Lowdown on Nutrition & Serving
Alright, you might be wondering, what’s the damage per serving? well, roughly 5 pretzels have about 180 calories. they pack a bit of sugar and fat mostly from the chocolate but also protein and salt from pretzels.
This is definitely a treat, but hey, everything in moderation , right? i love sharing these as part of a snack spread where you balance out with fruit or nuts.
Portion wise, munch on a handful and savor it slowly so you feel satisfied.
The salty sweet combo actually helps control cravings better than just plain candy. So when you want an indulgent but balanced sweet snack, these win.
Wrapping It Up: Your New Favorite Homemade Candy Treat
Honestly, learning how to make chocolate covered pretzels changed my whole approach to quick, festive snacks. it’s simple but feels fancy.
Plus, it brings so much joy when you can customize toppings and flavors.
So, if you’re looking for the best new recipes for your holiday table or just a fun weekend project, give this a whirl.
Easy quick steps, no crazy ingredients, and everyone will ask where you got these candy treats.
Remember, don’t stress perfection a little imperfection makes them homemade and loved. Go on, dip a pretzel, sprinkle some magic, and enjoy this ridiculously good sweet, salty, crispy combo.
You’ve got this!
Frequently Asked Questions
What’s the easiest way to melt chocolate when making chocolate covered pretzels?
The simplest methods are using a microwave or a double boiler. For the microwave, heat chocolate in 30-second bursts, stirring in between to avoid burning. Alternatively, a double boiler gently melts chocolate over simmering water without direct heat, helping keep it smooth and glossy ideal for dipping your pretzels.
How do I prevent the chocolate from melting or getting sticky on chocolate covered pretzels?
Store your finished pretzels in a cool, dry place away from direct sunlight and humidity. Keeping them in an airtight container helps too. If your kitchen is warm, pop them in the fridge to set and keep firm, but bring them to room temperature before serving to avoid condensation making them soggy.
Can I customize toppings when learning how to make chocolate covered pretzels?
Absolutely! Feel free to experiment with different toppings like chopped nuts, rainbow sprinkles, sea salt flakes, or shredded coconut. For a nut-free twist, crushed freeze dried fruits or cinnamon sugar make tasty alternatives.
Adding toppings immediately after dipping ensures they stick well before the chocolate sets.
What variations can I try for a fun spin on chocolate covered pretzels?
You can drizzle white chocolate over dark or milk chocolate for a classic bicolour look, or use flavoured chocolates like peppermint or caramel for festive flair. Swapping mini pretzels for pretzel rods changes the snacking style, while dusting with cinnamon sugar offers a sweeter, less salty option.
Is making chocolate covered pretzels a beginner friendly recipe?
Definitely! How to make chocolate covered pretzels requires no baking skills just melting chocolate and dipping pretzels. The process is straightforward, and the recipe works well whether you’re new to cooking or a seasoned pro looking for a quick, delicious treat.
How long do homemade chocolate covered pretzels last, and how should I store them?
Stored in an airtight container at room temperature or in the fridge, chocolate covered pretzels stay fresh for up to one week. Avoid humid environments to prevent the chocolate from blooming or the pretzels from going soft perfect for prepping snacks ahead for parties or gift boxes.
Decadent Chocolate Covered Pretzels Sweet Salty

Ingredients:
Instructions:
Nutrition Facts:
| Calories | 180 kcal |
|---|---|
| Protein | 2 g |
| Fat | 9 g |
| Carbs | 22 g |
| Fiber | 1.5 g |
| Sugar | 14 g |
| Sodium | 150 mg |
