Nobake Peanut Butter Pie with Cream Cheese: the Ultimate Easy Dessert

- The Dreamy Decadent No-Bake Peanut Butter Cloud Pie: Your Effortless Dessert Champion
- The Science of Chill: Why This No-Bake Peanut Butter Pie Sets Perfectly
- Essential Components: Ingredients Checklist and Smart Swaps
- From Prep to Perfection: Step-by-Step Guide to Assembling Your Pie
- Troubleshooting Your Treat: Expert Tips for a Flawless Dessert
- Preserving the Perfection: Storing Your No-Bake Peanut Butter Pie
- Presentation Prowess: Decadent Toppings and Pairings
- Recipe FAQs
- 📝 Recipe Card
The Dreamy Decadent No-Bake Peanut Butter Cloud Pie: Your Effortless Dessert Champion
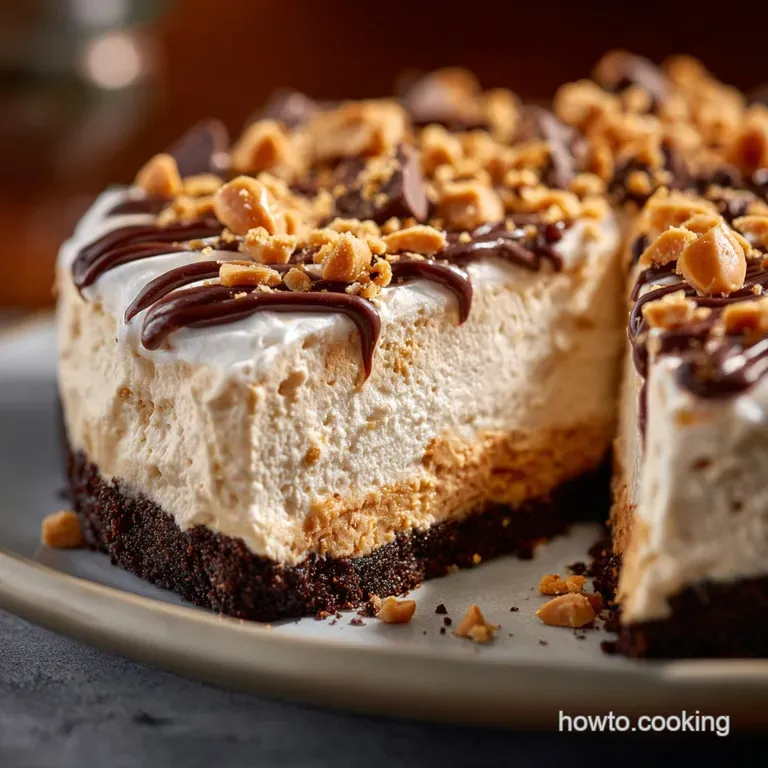
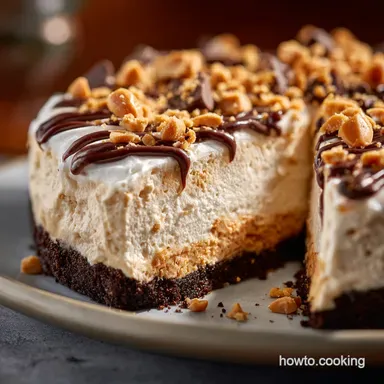
That first forkful is always a moment of pure bliss. You get the loud, satisfying crunch of the deeply chocolatey crust followed immediately by a filling that is impossibly creamy, ridiculously smooth, and balanced with that perfect salty sweet peanut hit.
The aroma alone rich peanut butter mixed with cold vanilla tells you this is going to be good.
I swear by this recipe when I just can't face turning the oven on, especially during those brutal summer months. It truly is the ultimate lifesaver dessert; it’s cheap, incredibly fast to assemble, and it looks like you spent hours slaving away.
Seriously, this recipe is proof that sometimes the simplest method yields the most spectacular results.
Ready to ditch the complicated pastry work and embrace the magic of refrigeration? This isn't just a recipe; it's a blueprint for guaranteed dessert success, built on a few smart tricks I learned the hard way. Trust me, once you make this No Bake Peanut Butter Pie, it’ll be a permanent fixture in your rotation.
The Science of Chill: Why This No-Bake Peanut Butter Pie Sets Perfectly
Why We Love the No-Oven Approach
The beauty of a no-bake pie is the controlled environment. We rely entirely on high fat ingredients cream cheese, heavy cream, and butter to act as the binding agents when they get cold. We’re basically engineering edible concrete using dairy fat instead of heat, which is genius.
It eliminates the risks of burning, undercooking, or structural collapse that come with baking.
A Quick History of the American Diner Pie Tradition
Cheesecakes and pies that relied on gelatin or intense chilling became wildly popular in America during the mid-20th century, specifically in diners. They needed desserts that could be prepped quickly, held well, and served fast.
The No-Bake Peanut Butter Pie is a direct descendant of that era a hearty, satisfying dessert perfect after a long day. It’s comforting, nostalgic, and totally retro in the best way possible.
Texture Profile: The Perfect Blend of Creamy and Crumbly
The contrast is everything here. We want a crust that doesn't shatter but holds its shape, achieved by binding the chocolate crumbs with melted butter and then chilling it hard. The filling must be light and airy, which we accomplish by aggressively whipping the heavy cream and then folding it gently into the denser cream cheese base.
If you nail the folding technique, you end up with a filling that tastes like a cloud.
Achieving Maximum Airiness: Mastering the Fold
This is the only tricky bit, honestly, and it’s where I messed up my first five pies. I used to just dump the whipped cream into the peanut butter mixture and stir it furiously, resulting in a dense, disappointing puck of filling.
The trick is to incorporate about a third of the whipped cream first; this "sacrificial" cream loosens the thick peanut butter base. Then, you gently fold in the rest of the cream, ensuring you don't crush all the beautiful air bubbles you just spent time creating.
The Critical Role of the Graham Cracker Crust Bind
We use melted butter to coat every single cookie crumb in the crust, turning dry dust into manageable wet sand. When that butter gets ice cold, it acts like glue, ensuring that when you slice the pie, the bottom stays put and doesn’t crumble all over the plate.
Don't skimp on pressing the crust use the bottom of a glass to make it rock solid.
Balancing Sweetness with Salty Peanut Notes
Because this is an American style dessert, it tends to be sweet. We counteract that heavy sweetness with two things: the slight bitterness of the chocolate cookie crust and the saltiness of the peanut butter.
I always add a tiny extra pinch of fine sea salt to the filling mixture; it dramatically enhances the peanut flavor and cuts through the powdered sugar perfectly.
Chef’s Note: Use stabilized peanut butter (like Jif or Skippy) for this recipe. Natural, oily, stir style peanut butter contains too much separated oil, which prevents the filling from setting properly and makes the whole pie weep. Learned that the hard way.
Essential Components: Ingredients Checklist and Smart Swaps
Choosing Your Peanut Butter: Creamy vs. Crunchy Debate
I am firmly in the creamy camp for the filling itself. Using creamy peanut butter ensures that incredibly smooth, melt-in-your mouth texture that defines this recipe. You can, however, use crunchy peanut butter for the garnish if you love the texture!
Crumb Foundation: Preparing the Chocolate or Graham Crust Base
While I adore the chocolate sandwich cookie crust (it’s just such a perfect pairing), you absolutely have options. Just remember the ratio of fat (butter) to crumb needs to be right so it binds.
Cool Whip Alternatives: Making Stabilized Homemade Whipped Cream
Many classic recipes call for Cool Whip, and while that works fine, using freshly whipped heavy cream makes this taste infinitely better and fresher. If you want true stability, chill your bowl and whisk attachment before whipping. Cold is your best friend when whipping dairy.
Dairy Options: Full Fat Cream Cheese vs. Neufchâtel
We rely on the fat content in full fat cream cheese for structure. If you try to use low-fat or Neufchâtel, you run the risk of having a filling that is too watery, resulting in a slightly soft, less rigid slice. Stick to the full fat block; it's worth it for the integrity of the pie.
| Ingredient | Why We Use It | Viable Substitution |
|---|---|---|
| Cream Cheese (Full Fat) | Structural stability and tang. | High fat Mascarpone (will be richer) or dairy-free cream cheese block. |
| Heavy Cream (Cold) | Creates the necessary airiness/volume. | Cool Whip (thawed), or very well chilled, full fat Coconut Cream (thick top layer only). |
| Peanut Butter (Smooth) | Core flavor and dense binder. | Almond butter or sunflower seed butter (ensure it’s the stabilized, non-stir variety). |
| Chocolate Sandwich Cookies | Rich, contrasting crust. | Graham cracker crumbs, Nilla Wafers, or shortbread cookies. |
From Prep to Perfection: step-by-step Guide to Assembling Your Pie
Phase I: Pressing and Chilling the Crust Foundation
First, grab those cookies and blitz them in the food processor until they are fine crumbs filling included! Then, pour in the melted butter and mix until everything looks uniformly damp, like sand after a wave recedes. Press this mixture firmly into your pie plate, ensuring the sides are sturdy.
Throw the whole thing into the freezer for 15 minutes. This quick chill dramatically reduces the risk of a soggy bottom later.
Phase II: Whipping the Light-as-Air Peanut Butter Filling
While the crust is chilling, get your filling components ready. Crucially, your cream cheese must be genuinely soft. I once tried to rush this, and my pie filling looked like it had measles because of the hard cream cheese chunks.
Beat the soft cream cheese and peanut butter together until it’s perfectly smooth and creamy. Gradually incorporate the sifted powdered sugar. Finally, gently fold in the already whipped, stiff peaked heavy cream.
Phase III: Layering, Smoothing, and the Final Chill Time
Spoon the glorious filling into your prepared, chilled crust. Use a spatula to smooth the top. Do you want a dramatic dome or a flat top for perfect garnishing? Either way, keep it tidy.
Cover the pie loosely with plastic wrap I usually stick two or three toothpicks in the surface first so the plastic doesn't touch the filling and let it rest. This pie needs a solid minimum of four hours to set, but trust me, overnight is always best for foolproof slicing.
Troubleshooting Your Treat: Expert Tips for a Flawless Dessert
Preventing a Soggy Bottom: The Secret Crust Layer
The freezer chill helps, but here’s another secret tip: brush the inside of your chilled crust with a very thin layer of melted chocolate or white chocolate. This creates a waterproof barrier between the moist filling and the crumb base.
Chill that barrier for five minutes, and then add your filling. Soggy bottoms, begone!
Why Is My Filling Not Setting? (Dealing with temperature issues)
If your filling is too runny after four hours, one of two things happened: A) Your heavy cream wasn't cold enough or wasn't whipped to stiff peaks, or B) You overmixed the filling after adding the whipped cream, deflating the structure. Don’t panic entirely!
Put it back in the fridge for another 6- 8 hours, or if you’re desperate, put it in the freezer for 90 minutes to firm up.
Cutting the Perfect Slice (For presentation)
Presentation matters, right? To get those beautiful, clean slices, fill a tall glass with hot water. Dip your knife into the water, wipe it completely dry, and then slice. Repeat this process for every single cut.
It sounds like a pain, but the heated, dry blade slices through the fat and crust without dragging the filling.
Preserving the Perfection: Storing Your No-Bake Peanut Butter Pie
Refrigeration Lifespan: How Long Does it Stay Fresh?
If you managed not to eat it all in one sitting, this pie keeps beautifully. Store it covered loosely in the refrigerator for up to 4 days. After that, the crust might start to get a bit soft, but the filling remains structurally sound.
Deep Freeze Instructions: The Best Way to Prepare for Later
Does it freeze well? You bet it does! This is perfect for making ahead. Assemble the entire pie, but skip the final garnish. Freeze the pie uncovered until solid (about 2 hours), then wrap it tightly in a layer of plastic wrap followed by aluminum foil.
It lasts beautifully in the deep freeze for up to 2 months. Thaw it overnight in the refrigerator before serving. Do not attempt to thaw this pie at room temperature.
Presentation Prowess: Decadent Toppings and Pairings
Garnish Game: Chocolate Shavings, Roasted Peanuts, or Ganache Drizzle
For maximum impact, melt a handful of good quality chocolate chips with a tablespoon of heavy cream to create a quick, glossy ganache drizzle. Scatter chopped roasted peanuts or use a vegetable peeler to shave dark chocolate over the top just before serving. A tiny sprinkle of flaky sea salt on top finishes the look.
This pie is rich, so I love to serve it alongside something slightly acidic. A strong cup of black coffee or even a tiny serving of fresh berries works wonders. If you are making this for a holiday gathering and need other pie ideas, these decadent dessert recipes are always huge hits, whether you’re into the depth of a traditional holiday sweet or something ultra buttery: Maple Pecan Pie Recipe with Brown Butter and No Corn Syrup and the classic Traditional Pecan Pie: The Best Homemade Holiday Baking Recipe . Enjoy!

Recipe FAQs
Why is my No-Bake Peanut Butter Pie filling runny and not setting properly?
The filling relies on stable fats and cold temperature for structure. Ensure your cream cheese and heavy whipping cream are very cold before mixing, and always whip the cream to stiff peaks before folding it into the peanut butter base.
Allow the pie the full recommended chilling time, usually 6-8 hours or overnight, to ensure it completely stabilizes.
Can I use natural or organic peanut butter instead of the standard processed variety?
Using natural, separated peanut butter is not recommended for this recipe. The oil separation and lack of stabilizers prevent the filling from achieving the necessary light, stable, and airy texture needed to set firmly. Stick to a classic processed peanut butter (like Jif or Skippy) for the best results and structure.
My chocolate crust crumbled when I tried to slice the pie. What did I do wrong?
A crumbling crust often means insufficient binding agent (melted butter) or improper chilling/packing. Ensure you firmly pack the crust mixture into the pan, applying pressure to the bottom and sides before chilling. If your crumbs feel too dry, slightly increase the melted butter by 1-2 tablespoons to improve binding.
How long does this No-Bake Pie last, and can I freeze it?
This pie keeps well covered in the refrigerator for up to 5 days. For long term storage, you can freeze the uncut pie (without any fresh toppings or drizzles) for up to 1 month. Wrap it tightly in plastic wrap followed by aluminum foil, and thaw overnight in the refrigerator before serving.
I want to make this dessert vegan or dairy-free. Are there effective substitutes?
Yes, you can substitute the dairy components with plant based alternatives. Use vegan cream cheese and replace the heavy whipping cream with a high fat coconut cream (scooping only the thick cream layer from a chilled can). Ensure the chocolate crust uses vegan butter or coconut oil instead of traditional dairy butter.
What can I use as a crust if I don't want to use chocolate sandwich cookies?
Any crunchy cookie or cracker crust works excellently here as a substitute. Graham cracker crust is traditional and highly recommended, but vanilla wafers (Nilla wafers) or even shortbread cookies make excellent bases. Just ensure the crumb-to-butter ratio is consistent to achieve a firm set.
My pie tastes too sweet. How can I balance the richness of the peanut butter filling?
Peanut butter fillings often skew sweet due to the powdered sugar content necessary for texture. To balance the flavor, incorporate a generous pinch of flaky sea salt directly into the filling mixture.
A small splash of pure vanilla extract or a dash of lemon juice can also help cut through the overall sweetness and richness.
Easy Nobake Peanut Butter Pie Recipe
Ingredients:
Instructions:
Nutrition Facts:
| Calories | 1359 kcal |
|---|---|
| Protein | 28.7 g |
| Fat | 101.5 g |
| Carbs | 98.0 g |
