Easy Nutter Butter Ghosts Recipe
- Time: Active 20 minutes, Passive 30 minutes, Total 50 minutes
- Flavor/Texture Hook: A snap of white chocolate followed by a creamy, salty peanut butter crunch.
- Perfect for: Last-minute Halloween parties, school bake sales, or beginner decorators.
- Crafting Spooky Easy Nutter Butter Ghosts
- The Magic of These Treats
- Cooking Times and Yield
- Ingredients for Success
- Essential Kitchen Gear
- How to Assemble Ghosts
- Solving Coating Problems
- Customizing Your Snacks
- Storage and Freshness
- Serving Your Ghosts
- Ghost Kitchen Myths
- Common Questions
- 📝 Recipe Card
Crafting Spooky Easy Nutter Butter Ghosts
We have all been there. It is two hours before the Halloween party, the kids are half dressed in costumes, and you realized you forgot the "festive treat" you promised to bring. You want something that looks like you spent all afternoon in the kitchen, but you actually need to be out the door in twenty minutes.
That is where these Easy Nutter Butter Ghosts save the day. They are the ultimate "low effort, high reward" snack that hits that perfect salty sweet note everyone craves.
I used to think that making dipped treats required a culinary degree or at least a very expensive tempering machine. Honestly, don't even bother with complicated setups. By using a few smart pantry staples, we can achieve a professional glow and a satisfying snap without the stress.
The peanut butter filling of the cookie provides a wholesome, rich base that balances the sweetness of the white chocolate.
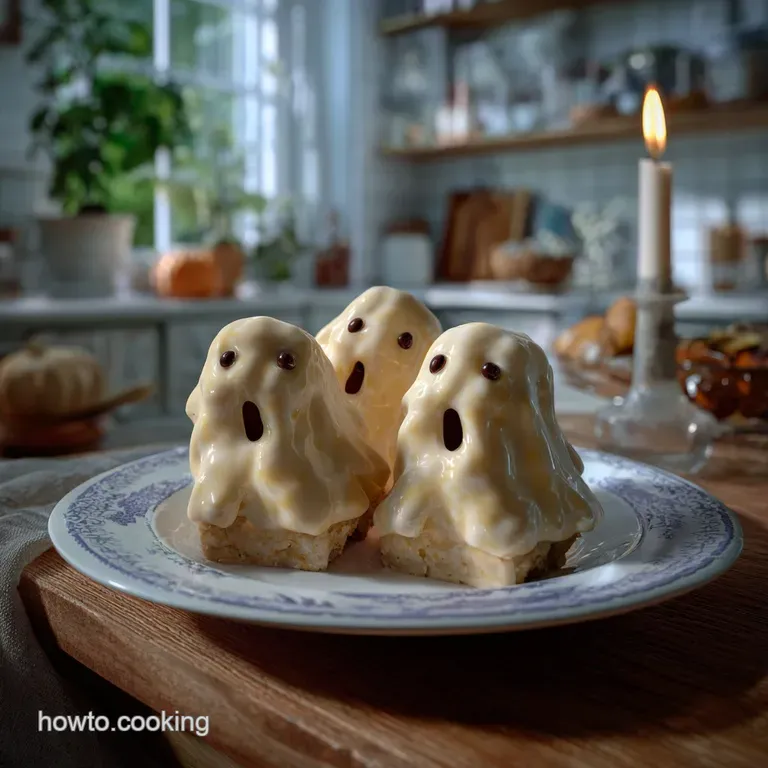
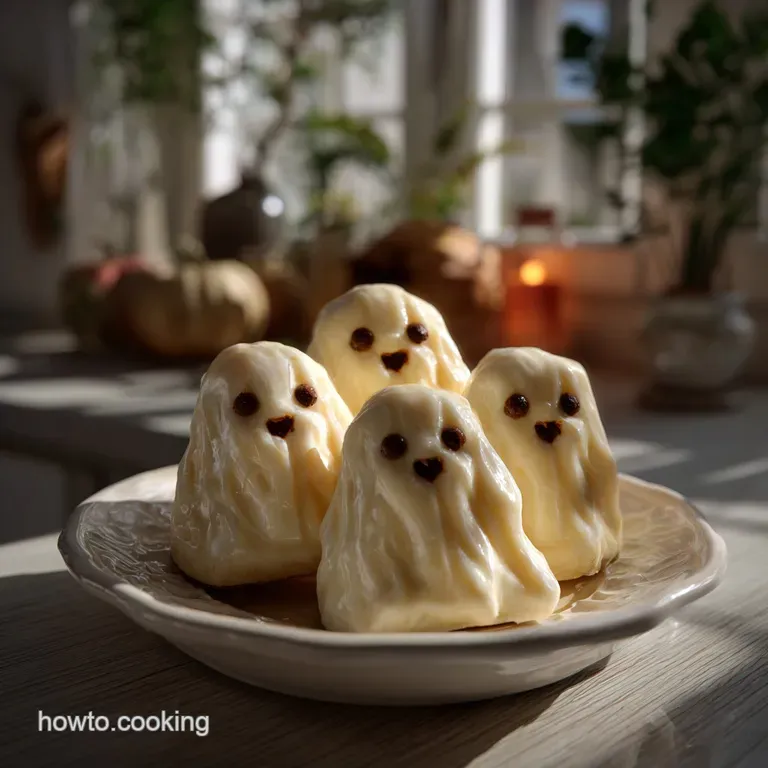
The secret here is all in the shape. The iconic figure eight of the cookie naturally mimics a flowing ghost gown. We are going to lean into that. We will transform a simple box of cookies into a platter of spooky spirits that will disappear faster than a phantom in the night.
Trust me on this, once you see how the white chocolate creates a velvety coating over the ridges of the cookie, you will never go back to basic sugar cookies again.
The Magic of These Treats
If you love that classic peanut butter flavor but want something warm from the oven, you should definitely try my Peanut Butter Cookies recipe. However, when the oven is full or time is tight, these ghosts are the way to go.
- Lipid Stability: The refined coconut oil lowers the viscosity of the white chocolate, allowing it to flow into every crevice of the cookie.
- Starch Structural Integrity: The pre-baked nature of the sandwich cookie ensures it won't crumble or soften when submerged in warm liquid chocolate.
- Surface Tension: White chocolate melting wafers are engineered with a specific fat-to-sugar ratio that encourages a smooth, even "curtain" as the excess drips off.
- Phase Transition: Rapidly cooling the coated cookies in the fridge forces the fats to crystallize quickly, giving the shell a brilliant shatter when you bite into it.
Cooking Times and Yield
This recipe is designed for efficiency. While the active work is fast, do not skip the cooling phase. That is where the magic happens and the "shatter" of the chocolate is finalized.
| Metric | Measurement |
|---|---|
| Active Prep Time | 20 minutes |
| Setting Time (Cook) | 30 minutes |
| Total Ready Time | 50 minutes |
| Final Yield | 16 Servings |
Ingredients for Success
Selecting your components is vital for a smooth finish. I always reach for Ghirardelli White Chocolate Melting Wafers because they melt more reliably than standard chips.
- 16 Nutter Butter Sandwich Cookies: The structural heart of the ghost. Why this? The peanut shape perfectly mimics a ghost body without any cutting.
- 16 oz high-quality white chocolate melting wafers: This provides the ghostly "skin." Why this? Wafers contain enough cocoa butter to melt smoothly without seizing.
- 2 tsp refined coconut oil: This is our secret weapon for shine. Why this? It thins the chocolate for a professional, non-clumpy dip.
- 0.25 cup mini semi sweet chocolate chips: These become the eyes and mouths. Why this? The small size keeps the ghost faces from looking overwhelmed.
Comparison of Methods
| Feature | Fresh Dipped | Shortcut Wafers |
|---|---|---|
| Preparation | Requires Tempering | Melt and Go |
| Texture | Very Hard Snap | Velvety Melt |
| Stability | Room Temp Stable | Best Kept Cool |
Essential Kitchen Gear
Having the right tools prevents a sticky mess on your counters. I recommend using a Nordic Ware Half Sheet Pan lined with a Silpat Silicone Mat or parchment paper. The silicone mat is a game changer because the ghosts will lift right off without leaving their "feet" behind.
You will also need a microwave safe glass bowl, like a Pyrex Prep Bowl, which holds heat better than plastic. For the actual dipping, a standard dinner fork works, but a Wilton Dipping Tool or a long skewer provides even more control.
Finally, a small toothpick is essential for precisely placing those tiny chocolate chip eyes.
How to Assemble Ghosts
Phase 1: Preparing the Coating
Start by placing your 16 oz of Ghirardelli melting wafers into your glass bowl. Add the 2 tsp of refined coconut oil directly on top. Microwave in 30 second bursts. Stop and stir thoroughly after every burst, even if the wafers still look solid. The residual heat does most of the work.
Once it is velvety and flows like heavy cream, you are ready.
Phase 2: The Perfect Dip
- Line your USA Pan cookie sheet with parchment paper.
- Drop one Nutter Butter cookie into the melted white chocolate.
- Use a fork to flip the cookie, ensuring total coverage.
- Lift the cookie out with the fork tines. Tap the fork gently against the side of the bowl to remove excess. Note: This prevents a large puddle from forming under your ghost.
- Slide the cookie onto the parchment paper using a toothpick or skewer.
- Repeat for all 16 cookies.
Phase 3: Bringing Ghosts to Life
- While the white chocolate is still wet, grab your mini semi sweet chocolate chips.
- Place two chips near the top for eyes.
- Place one chip below them for a "mouth" in an "O" shape.
- If the chocolate has started to set, dip the bottom of the chip in a tiny bit of melted chocolate to act as glue.
- Transfer the tray to the refrigerator for 30 minutes until the shells are firm and matte.
Solving Coating Problems
Nothing is more frustrating than chocolate that won't behave. Usually, it comes down to temperature or moisture.
Seizing White Chocolate
If your chocolate turns into a gritty, clumpy paste, it has likely "seized." This happens if even a single drop of water gets into the bowl or if you overheat it. White chocolate is more sensitive than dark chocolate because of its high milk solid content.
Coating Slips Off
If the chocolate isn't sticking, the cookies might be too cold or the chocolate too thin. Ensure your cookies are room temperature before you start dipping.
Preventing Puddles
The "foot" or puddle at the base of the ghost happens when too much chocolate is left on the cookie. The secret is the "tap and scrape" method. Tap the fork, then scrape the bottom of the fork tines against the lip of the bowl before placing the cookie down.
| Problem | Cause | Fix | Pro Tip |
|---|---|---|---|
| Gritty Texture | Water or Overheating | Add 1 tsp oil | Use a dry glass bowl |
| Translucent Coat | Too much oil | Add more wafers | Aim for heavy cream thickness |
| Dull Finish | Slow cooling | Fridge immediately | Use refined coconut oil |
Customizing Your Snacks
Making Nut-Free Options
If you have a peanut allergy in the house, you can use this same technique with oval shaped shortbread cookies or even long vanilla wafers. The "ghost" effect remains the same, but the internal flavor profile shifts to a buttery vanilla.
Giving Them Personalities
Don't feel limited to chocolate chip eyes. You can use black decorating gel to draw eyelashes, bowties, or even "scary" mouths. For a different texture, try Thumbprint Cookies recipe techniques by making a small indentation in the "forehead" of the ghost and filling it with a red "blood" jam.
Making Them Glow
You can actually buy edible neon powders. Dusting a tiny bit of lime green edible luster dust over the white chocolate gives them a radioactive look that kids absolutely love under party lights.
Oil Alternatives
If you don't have refined coconut oil, you can use vegetable shortening (like Crisco). It serves the same purpose of thinning the chocolate and adding shine. Avoid butter, as the water content in butter will cause the white chocolate to seize instantly.
Storage and Freshness
These ghosts are surprisingly hardy, but they do not like heat.
- Storage: Keep them in an airtight container in the refrigerator for up to 2 weeks. They are fine at room temperature for a party (about 4 6 hours), but they may soften if it is a warm day.
- Freezing: You can freeze these for up to 3 months. Place them in a single layer on a tray to freeze solid, then transfer to a freezer bag. Pro Tip: Thaw them in the fridge, not on the counter, to prevent condensation from ruining the shine.
- Zero Waste: If you have leftover melted white chocolate, stir in some pretzel pieces or nuts to make a "ghost bark." Never throw away good chocolate!
Serving Your Ghosts
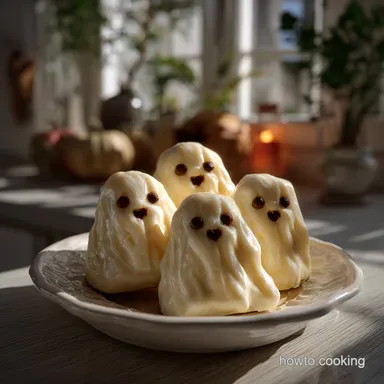
Presentation is everything for Halloween. I like to serve these on a dark slate board or a black ceramic platter to make the white "ghouls" pop. For those who like a sweet and spicy kick, serving these alongside a cheese board drizzled with a Hot Honey Recipe is a bold move that surprises adult guests.
Decision Shortcut: If you want a matte look, skip the coconut oil. If you want a thick shell, dip the cookies twice (letting them set between dips). If you want fast results, use the freezer for 10 minutes instead of the fridge.
Ghost Kitchen Myths
Myth: You must use a double boiler to melt white chocolate. Truth: A microwave is perfectly fine and often safer. Use 50% power and short intervals to prevent scorching.
Myth: Any white chocolate will work. Truth: Standard white chocolate chips are designed to hold their shape in the oven. They contain stabilizers that make them very difficult to melt into a smooth dipping sauce. Always look for "Melting Wafers" or "Couverture" for the best results.
Myth: The cookies will get soggy inside the chocolate. Truth: The chocolate actually acts as a moisture barrier. The Nutter Butter will stay crispy for weeks inside its ghostly shell.
Chef's Tip: For a deeper flavor profile, add a tiny pinch of fine sea salt to the melted white chocolate. It cuts through the sugar and makes the peanut butter taste even more "nutritious" and robust.
Also, try freezing your Nutter Butters for 10 minutes before dipping; the cold surface helps the chocolate set instantly, reducing the "puddle" effect.
Right then, you have everything you need to dominate the Halloween snack table. These Easy Nutter Butter Ghosts are flavorful, charming, and won't leave you frazzled. Get your dipping fork ready and let's crack on!

Common Questions
What type of chocolate should be used for the coating?
White chocolate melting wafers. Wafers contain engineered fat-to-sugar ratios ensuring a smooth, stable coating without complex tempering.
Can I substitute refined coconut oil with regular butter?
No. Butter introduces water content which seizes chocolate. Water contact forces milk solids to clump, ruining the smooth texture needed for dipping.
How long do these Nutter Butter Ghosts need to chill to set properly?
30 minutes. Rapid cooling ensures the fat crystallizes quickly for a crisp shell. If you skip the cooling, the shell will remain soft and sticky.
What is the best method to ensure the chocolate coating is thin and glossy?
Refined coconut oil thins the viscosity perfectly. This allows the chocolate to flow evenly over the cookie ridges, mimicking professional glazing techniques.
Why does my white chocolate coating look gritty or seize immediately?
- Remove from heat
- Add gradually
- Use fresh grated
Is this recipe suitable for making ahead of time?
Yes, they can be refrigerated for up to two weeks. Storing them in the fridge prevents softening, similar to how chilling dough improves the texture in our Homemade Apple Pie: The Flakiest All-Butter Classic Recipe.
Should I use frozen Nutter Butter cookies for dipping?
Myth: Freezing improves chocolate adherence. Reality: Condensation from freezer burn ruins the chocolate finish. Use room temperature cookies.
Easy Nutter Butter Ghosts
Ingredients:
Instructions:
Nutrition Facts:
| Calories | 238 kcal |
|---|---|
| Protein | 2.7 g |
| Fat | 13.4 g |
| Carbs | 27.6 g |
| Fiber | 0.8 g |
| Sugar | 18.1 g |
| Sodium | 105 mg |
