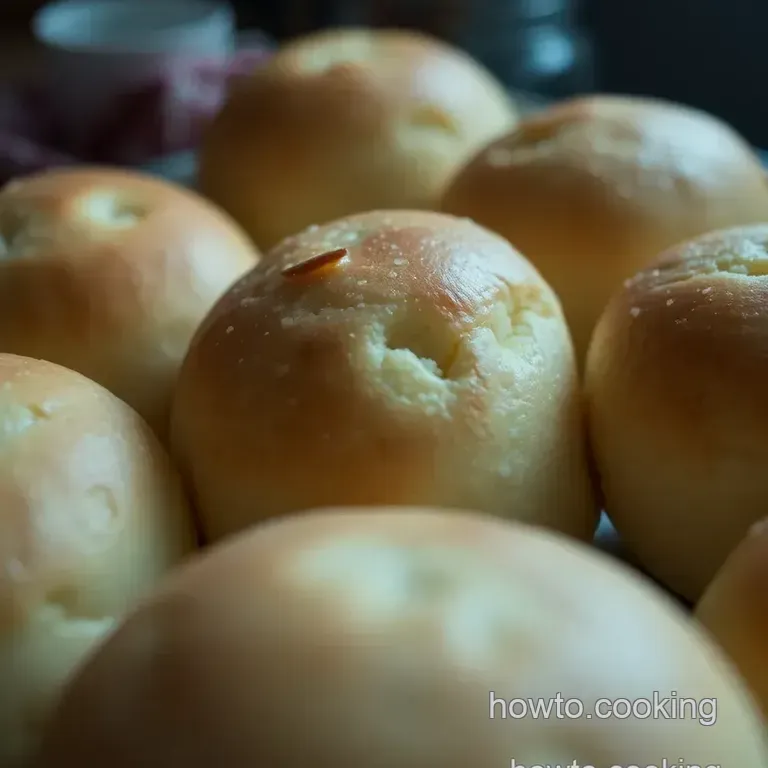
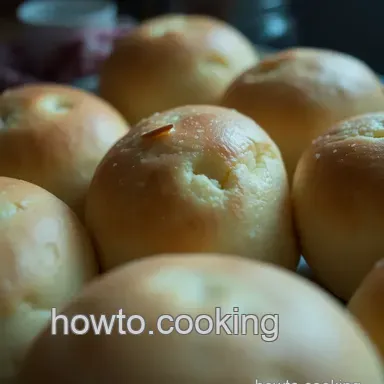
Fluffy Homemade Bread Rolls: a Simple Delight

- Let’s Talk Bread Rolls: A Cozy Introduction
- Essential Ingredients Guide: Crafting Your Perfect Bread Roll
- The Art of Professional Cooking Methods: Mastering Your Kitchen
- Pro Tips & Secrets
- Perfect Presentation
- Storage & Make-Ahead
- Creative Variations
- Complete Nutrition Guide
- Frequently Asked Questions
- 📝 Recipe Card
Let’s Talk Bread Rolls: A Cozy Introduction
Oh my gosh, have you ever had one of those perfect sunday dinners where everything just comes together? that golden brown roast chicken, savory mashed potatoes, and then, of course, the easy bread roll recipe that steals the show?
seriously, there’s something magical about a homemade bread roll that can elevate even the simplest meal.
It takes me back to my grandma's kitchen flour dust in the air, the sweet sound of laughter, and those delicious parmesan rolls rising in the oven.
They just hit different, you know?
A Bite of History
Now, let’s dive into a little history for the food nerds like me! bread rolls are a classic part of many cuisines, and they really shine in british cooking.
These fluffy little wonders have roots dating back centuries. they were often served during church meals or family gatherings, creating a warm sense of community.
Fast forward to today, and they’re just as popular great for festive occasions or casual dinners with your pals. seriously, who can resist freshly baked homemade breads ?
If you’re thinking about time, this easy bread roll recipe is a charm. total prep and cooking time? just about 1 hour and 35 minutes .
Don’t worry, the actual hands-on work is super easy. you’ll just need about 15 minutes to get those ingredients together.
That’s perfect for a relaxing afternoon where you can whip up something special without breaking a sweat!
Why You Should Make These Rolls
Let’s talk benefits, friends! first off, these rolls are downright healthy compared to store-bought options. you know exactly what’s going into your dough no weird preservatives! packed with carbs, they’re also a source of energy as the days get shorter and colder.
Plus, they’re perfect for any occasion. whether it’s a cozy dinner at home or a group gathering, serving these will make you the star of the show!
Now, let’s not forget their unique selling point . have you ever bitten into a roll that’s fluffy, warm, and just slightly crispy on the outside? that's what you're in for!
when you pull them out of the oven, you can either smear them with butter hello, heavenly flavor or pair them with your favorite stew or soup.
I mean, come on, what’s better than having a warm roll to soak up that delicious broth? these rolls make for excellent sunday supper ideas , and they definitely give other good dinner recipes a run for their money.
What’s more? think about special occasions! imagine serving these fluffy delights at thanksgiving. they’ll disappear in seconds! plus, you can customize them.
Add some herbs for a savory spin, or sprinkle in cheese for those cheesy parmesan dinner vibes. can you see it? it’s practically calling your name!
Let’s Bake Some Rolls!
Okay, now that we’ve set the stage, are you excited? i can’t wait for you to get your hands on this recipe.
Grab those ingredients and let’s make something lovely together! just remember: if there’s one thing we know about bread, it’s that it brings people together.
So let’s create those memories, starting with our list of ingredients.
You ready? Let’s start rolling!
Essential Ingredients Guide: Crafting Your Perfect Bread Roll
Alright, friends! Let’s dive into the magical world of baking. If you’ve ever wanted to whip up a batch of fluffy homemade bread rolls that would make anyone swoon (yup, the kind you can slather with butter and enjoy at a Sunday supper), then you’ve come to the right place!
Premium Core Components
First off, let’s talk about the essentials. You know, those magical ingredients that turn ordinary flour and water into gorgeous bread buns .
Detailed Measurements: For your rolls, you’ll need about 4 cups (500g) of all-purpose flour. Seriously, don’t skimp here. Measure it out! And if you’re more of a metric junkie, you’re covered too.
Quality indicators: always choose flour that feels fresh and smells great! it’s a game changer! check that expiration date, my friends.
To transform your meal into a fabulous parmesan dinner , opt for fresh, quality cheese.
Storage guidelines: keep those ingredients cool and dry. flour can be stored up to a year if you keep it airtight.
Your yeast? it’s best used within a few months for prime fluffiness.
Freshness Tips: When it comes to the yeast, you should see that froth after blooming. If it doesn't, toss it and start again. Trust me, no one likes dense rolls.
Signature Seasoning Blend
Now, let’s jazz up those rolls a bit. Remember, the devil's in the details.
Essential Spice Combinations: Think garlic powder or herbs like rosemary for a kick! Those flavors can elevate your bread from basic to fabulous; perfect for savory baking .
Herb Selection: Pair up fresh basil with your Italian dishes, and don’t forget about a sprinkle of grated Parmesan for that extra umami.
Flavor Enhancers: Olive oils or butters can enhance flavor profiles. Use them liberally!
Regional Variations: You can mix it up! Want a taste of Wisconsin? Try throwing in some cheese, and bam, you’ve got yourself a whole new vibe.
Smart Substitutions
Let’s get real. Sometimes we don’t have everything on hand. No biggie!
Common alternatives: if you run out of bread flour, all-purpose can work in a pinch. if you didn’t plan ahead, an egg can be replaced with a flaxseed or applesauce for a vegan twist.
Dietary Modifications: gluten-free? No problem! Look for alternatives made particularly for bread making. Plenty exist to satisfy those needs!
Emergency Replacements: No instant yeast at home? Use active dry, just activate it first.
Seasonal Options: If you want to switch it up for autumn, throw in pumpkin puree instead of milk for an unexpected surprise.
Kitchen Equipment Essentials
Here’s the deal: you don’t need fancy tools to make rockstar rolls!
Must Have Tools: Seriously, all you need is a mixing bowl, a wooden spoon, and a baking sheet. That's it!
Alternative Equipment: Got a stand mixer? Great! You can still ace this recipe, but it’s not necessary.
Preparation Tips: A clean workspace makes all the difference. Just go with the flow, and don’t stress about the mess.
Storage Solutions: After your rolls cool, store them in an airtight container. They’ll stay good for a couple of days, but good luck resisting them that long!
Before we get to that easy bread roll recipe , remember, baking is all about practicing and having fun. Each roll is an experience, a chance to add your flair! Are you ready to roll? Let’s get your kitchen warm and inviting with the aroma of fresh bread!
The Art of Professional Cooking Methods: Mastering Your Kitchen
So, you've decided to delve into the realm of professional cooking? nice! you’re in for a treat. professional cooking isn’t just about slapping ingredients together; it’s an art!
whether you’re whipping up an easy bread roll recipe or a fancy feast, there are some essential preparation steps that can make your time in the kitchen smoother.
Essential Preparation Steps
First and foremost, let’s talk about mise en place . fancy french term, right? it just means “everything in its place.
” picture this: you’re halfway through baking your parmesan rolls and realize you’re out of flour. no bueno! so, gather all your ingredients before you start.
It saves time and, let’s face it, stress.
Time Management Tips
Use a timer. seriously, it’s a game changer. set it for every step of your recipe. this helps you stay on track, especially when you're juggling multiple dishes like for a big sunday supper.
Organization Strategies
Keep your workspace tidy. a clean counter is a happy counter. it not only looks great but also allows you space to work your magic.
You can keep your ingredients grouped together, and trust me, you'll avoid a lot of last minute mad dashes.
Safety Considerations
Don't forget to follow safety rules. keep your kitchen free from slips, trips, and falls this means wipe up spills right away and keep those knives sharp.
A dull knife can be more dangerous than a sharp one!
step-by-step Process
Now onto the fun part! Here’s a breakdown of what to do in your cooking adventure let’s say you're making those fluffy homemade bread rolls .
Activate yeast: combine 1 ½ cups (360ml) warm milk at 110° f ( 43° c) with 2 ¼ teaspoons (7g) instant yeast and 1 tablespoon (12g) sugar .
Let it froth for about 5- 10 minutes .
Mix Dry Ingredients: In a bowl, whisk 4 cups (500g) all-purpose flour with 2 teaspoons (10g) salt .
Combine Wet & Dry: Pour your yeast mixture, along with 3 tablespoons (42g) melted butter and 1 egg , into the dry mix. Blend until it forms a dough.
Knead the Dough: Craft that dough for about 10 minutes . Make it smooth and elastic. Trust me, it’s worth it!
First Rise: Let your dough rise in a greased bowl, covered, for about 1 hour or until doubled in size. When it's all puffed up, you know you did it right!
Shape Rolls: Punch down the dough, divide it into 12 pieces, and roll 'em into cute little buns.
Second Rise: Let those rolls rest on a baking sheet for another 30 minutes .
Bake: Preheat your oven to 375° F ( 190° C) and bake for 20 minutes until they turn a lovely golden brown.
Cool and Serve: Let them cool a bit, then enjoy those beauties fresh outta the oven!
Expert Techniques
Let’s get pro for a second. kneading is key here. it's how you develop gluten for that fluffy texture. plus, check for doneness: tap the bottom of the roll; if it sounds hollow, bam! it's done.
Common mistakes to avoid? Don't over knead or under knead. Trust your instincts! Also, brush with melted butter after baking to make those rolls shine.
Success Strategies
Perfect results? yes, please! always read through the whole recipe before you start, so you won’t be that person trying to figure out how long to bake while your rolls are already in the oven.
Need to make-ahead? These bread buns can be shaped and frozen before the second rise. Just pop 'em into the oven when you're ready!
Wrapping it all up! Cooking is all about practice. The more you do it, the more natural it feels. So, put on your apron and channel your inner chef.
And if you're looking to explore even more, stay tuned for the last section: Additional Information! Let’s keep this culinary journey going strong!
Pro Tips & Secrets
Alright, my friend, time to dive into those kitchen secrets! when making this easy bread roll recipe , don't underestimate the joy of yeast it's like magic in a packet.
Each time i activate my yeast, it’s like watching a little science show at home. just combine that warm milk, yeast, and sugar, and give it some time to froth up; about 5- 10 minutes works wonders.
Trust me , you’ll feel like a baking wizard!
Now, if you’re a little strapped for time, here’s a nifty time saver: make your dough the night before ! let it rise in the fridge overnight.
The next day, just shape and bake. easy peasy!
But hey, let’s talk flavor enhancement. you ever try adding a sprinkle of garlic powder or some fresh herbs like rosemary? oh my gosh, it takes these rolls to another level! and last but not least, when it comes to presentation, don’t skip the finished touch .
A simple brush of melted butter right after they come out of the oven jazzes things up visually and gives them that glorious shine.
Perfect Presentation
Speaking of looks, plating is where you can really strut your stuff. for rolls that aren’t just tasty but visually stunning , think about color combinations.
A basket of golden brown rolls looks fabulous on the table. you could lay a few fresh herbs around them or even throw in some cherry tomatoes for a pop of color.
Just don’t forget the little touches ; garnishing with a light sprinkle of sea salt can add a gorgeous finishing crunch!
Storage & make-ahead
Now let’s chat storage. after baking your rolls, if there are any left (which, honestly, i sometimes doubt!), store them in an airtight container at room temp for about two days .
They stay fluffy and perfect for snacking. need to keep them longer? freeze them! just toss them in a zip-top bag, and they’ll be good for up to a month.
When you want a roll, pop it in the microwave or a warm oven for a couple of minutes; they'll taste almost freshly baked.
Creative Variations
Feel like shaking things up? have fun with creative variations ! if you're in need of savory baking , toss in some grated parmesan or try out a cheesy twist! you can also swap out half the flour for whole wheat for a little heartiness if you’re feeling healthy.
And when the holidays roll around, how about adding some cinnamon and sugar for a sweet treat? so versatile!
Complete Nutrition Guide
Alright, let’s get down to the nitty gritty: how good are these rolls for you? each roll packs about 150 calories , which isn’t half bad, right? with a good balance of carbs and protein (hello, 4g protein ), they make the perfect side for a hearty parmesan dinner .
Plus, if you load them up with wholesome ingredients, you’re onto something nutritious. just remember, it’s all about portion control.
Enjoy them freshly baked, savor every bite, but don’t go overboard!
In conclusion, this easy bread roll recipe truly is the kicker for any meal be it a cozy sunday supper or just your tuesday night dinner.
Plus, the joy of baking these fluffy delights is just the cherry on top. so grab your apron, put on that favorite playlist, and let’s get rolling! happy baking, folks!
Frequently Asked Questions
What if I don't have instant yeast for this easy bread roll recipe?
No worries! You can use active dry yeast instead. Just dissolve it in the warm milk first and let it sit for about 5-10 minutes until it’s frothy before proceeding with the recipe. It’ll work like a charm!
Can I make these bread rolls ahead of time?
Absolutely! You can prepare the dough and shape the rolls, then place them in the fridge overnight before the second rise. When you're ready to bake, just let them come to room temperature and rise for about 30 minutes before baking. Perfect for a lazy Sunday roast!
Do you have any tips for getting the best fluffy texture in my bread rolls?
Definitely! The key is to knead the dough thoroughly for at least 10 minutes; this develops the gluten, giving the rolls that lovely airy texture. Also, make sure the dough rises in a warm, draft free spot for the best results. And don’t forget to brush with butter right after baking!
How do I store leftover bread rolls from the easy bread roll recipe?
After they’ve cooled, store your bread rolls in an airtight container at room temperature for up to 2 days. If you want to keep them longer, you can freeze them for up to a month just pop them in the oven to reheat when you're ready!
Can I add ingredients to these rolls to make them more exciting?
Of course! Feel free to add herbs, like rosemary or thyme, for a lovely savoury twist. You can also mix in some cheese for a cheesy delight, or even a sprinkle of sugar and cinnamon for a sweet version. The options are endless be creative!
What are the nutritional values for these fluffy homemade bread rolls?
Each roll is estimated to have around 150 calories, along with 4g of protein and 3g of fat. If you’re keen on knowing the exact figures, the nutritional content can vary based on your specific ingredients, so be sure to check your labels if you're tracking.
They're perfect for pairing with a hearty soup or as a side for your Sunday roast!
Fluffy Homemade Bread Rolls A Simple Delight
Ingredients:
Instructions:
Nutrition Facts:
| Calories | 150 |
|---|---|
| Protein | 4g |
| Fat | 3g |
| Carbs | 27g |
| Fiber | 1g |
| Sodium | 120mg |
