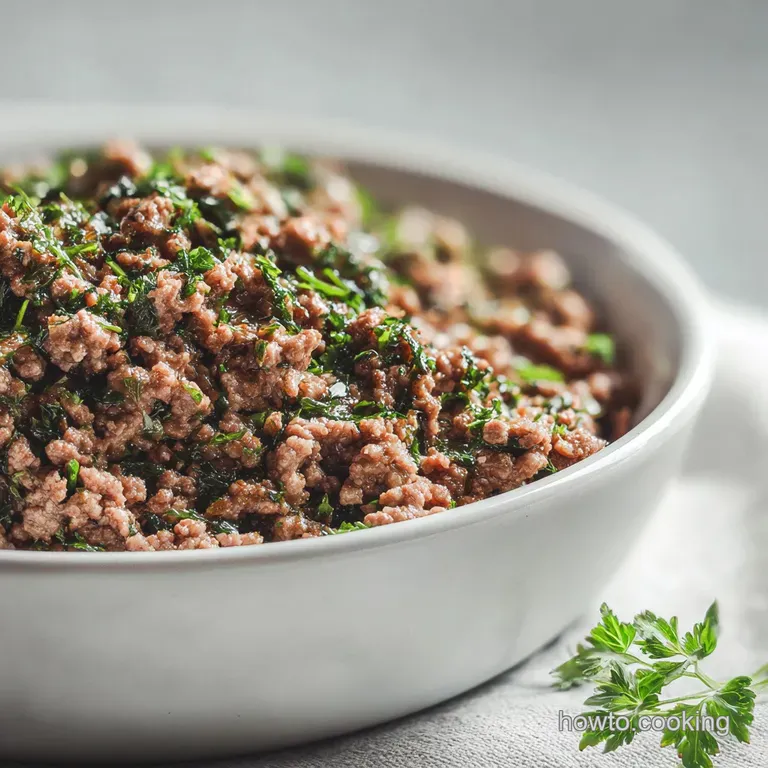
Ground Beef Recipe with Garlic and Herbs: Caramelized
- Time: Active 5 minutes, Passive 15 minutes, Total 20 minutes
- Flavor/Texture Hook: Savory, garlic forward crumble with a shatter crisp exterior and tender heart.
- Perfect for: Busy weeknight dinners, high protein meal prep, or a reliable base for family style bowls.
- Master This Ground Beef Recipe with Garlic and Herbs
- Essential Techniques for Wholesome Meat
- Component Analysis of Your Elements
- Essential Elements for This Meal
- Minimal Tools for Best Results
- Follow These Reliable Cooking Steps
- Solving Texture and Flavor Issues
- Creative Variations for New Flavors
- Adjusting Portions for Your Family
- Debunking Common Kitchen Legends
- Storing and Repurposing Your Leftovers
- Best Ways to Plate Beef
- Recipe FAQs
- 📝 Recipe Card
Master This Ground Beef Recipe with Garlic and Herbs
You know that specific sound? That aggressive sizzle the second the meat hits a hot pan, followed by the punchy, earthy aroma of rosemary and thyme hitting the fat? It is the kind of kitchen magic that makes everyone wander into the kitchen asking when dinner will be ready.
This ground beef recipe with garlic and herbs is a simple weeknight dinner you'll crave.
I used to struggle with ground beef that turned out gray and rubbery. It was frustrating because I wanted that deep mahogany color you get at a steakhouse, but it always ended up steaming in its own juices. After a lot of trial and error (and many mediocre tacos), I found a few simple tricks that changed everything.
This isn't just about frying meat; it is about building layers of flavor with fresh herbs and garlic. We are going to treat a humble pound of beef with the respect of a prime rib. Right then, let's get into how we make this happen with minimal tools and total confidence.
Essential Techniques for Wholesome Meat
The Science of Why it Works: Adding baking soda raises the meat's pH, which prevents proteins from bonding too tightly and squeezing out moisture. This also accelerates the Maillard reaction, giving you a deep brown crust without overcooking the center.
- Maillard Reaction: This chemical reaction between amino acids and reducing sugars gives browned food its distinctive savory flavor.
- Alkaline Buffering: The baking soda acts as a buffer, keeping the muscle fibers from contracting into a tough, dry knot.
- Aromatic Infusion: Fat is a flavor carrier; by adding the garlic and herbs at the end, we infuse the rendered beef fat without burning the delicate aromatics.
- Thermal Momentum: Using a heavy pan allows the beef to sear instantly, preventing the "boiling" effect that happens in thin, cold pans.
| Meat Thickness | Internal Temp | Rest Time | Visual Cue |
|---|---|---|---|
| Small Crumbles | 160°F | 2 mins | Evenly browned, no pink |
| Large Chunks | 160°F | 3 mins | Deep crust, clear juices |
| Thick Patties | 160°F | 5 mins | Firm touch, rich brown |
Success with this method relies on heat management. If you notice the pan getting too smoky, don't be afraid to pull it off the heat for a moment. This beef is incredibly versatile, and if you want something more saucy, it's a great base for a Beef and Rotini recipe.
Component Analysis of Your Elements
| Ingredient | Science Role | Chef Secret |
|---|---|---|
| Lean Ground Beef | Protein Base | Use 85/15 ratio for the best balance of flavor and nutrition. |
| Baking Soda | pH Modifier | Mix it with a teaspoon of water first to ensure even distribution. |
| Fresh Rosemary | Fat Soluble Flavor | Chop it extremely fine so you get the scent without the "pine needle" texture. |
| Garlic Cloves | Aromatic Depth | Smash them first to release the oils, then mince for maximum surface area. |
Choosing the right fat content is vital. While very lean beef seems healthier, the 85/15 ratio provides enough rendered fat to fry the garlic and herbs effectively. This creates a natural "sauce" that coats the meat crumbles, making them feel velvety rather than grainy.
Essential Elements for This Meal
To get started, gather these wholesome ingredients. I always recommend using fresh herbs here rather than dried. The difference in the final aroma is massive, and it makes the dish feel much more special.
- 1 lb lean ground beef (85/15 ratio) Why this? Provides enough fat for flavor without being greasy.
- 1/2 tsp baking soda Why this? The secret to tender, well browned beef.
- 1 tsp kosher salt Why this? Enhances the natural beefy notes.
- 1/2 tsp coarse black pepper Why this? Adds a subtle, warm bite.
- 4 cloves garlic, minced Why this? Provides a sharp, savory backbone.
- 1 tbsp fresh rosemary, finely chopped Why this? Deep, woody notes that pair perfectly with beef.
- 1 tbsp fresh thyme, leaves stripped Why this? Lighter, floral herbal notes.
- 1/4 cup fresh Italian parsley, chopped Why this? Brightens the dish and adds a pop of color.
- 1 tbsp olive oil Why this? Prevents sticking during the initial sear.
Substitutions for Every Pantry
| Original Ingredient | Substitute | Why It Works |
|---|---|---|
| Fresh Rosemary | Dried Rosemary (1 tsp) | Concentrated flavor. Note: Crush it between your fingers to release oils. |
| Kosher Salt | Sea Salt | Similar clean flavor profile and crystal size. |
| Olive Oil | Avocado Oil | Higher smoke point; very neutral flavor for searing. |
If you find yourself out of rosemary, don't panic. You can easily lean into the thyme or even add a bit of sage. Just remember that dried herbs are more potent than fresh, so you'll want to use about one third of the amount called for in the recipe.
Minimal Tools for Best Results
You do not need a kitchen full of gadgets for this. In fact, a simple, heavy skillet is your best friend here. I prefer a cast iron skillet because it holds heat like a champ, but a heavy bottomed stainless steel pan works wonders too.
- A heavy 12 inch skillet (Cast iron or stainless steel).
- A sturdy wooden spoon or meat masher to break up the crumbles.
- A small bowl to pre mix your salt, pepper, and baking soda.
- A sharp chef's knife for mincing the garlic and herbs.
Chef Tip: Freeze your butter for 10 minutes before grating it into the beef if you want an extra rich finish, though for this recipe, the olive oil and beef fat usually do the trick!
Follow These Reliable Cooking Steps
Before you start, make sure your beef is not straight from the fridge cold. Let it sit on the counter for about 10 minutes. This small step ensures the pan temperature doesn't plummet when you add the meat.
- Prep the Beef. Place the 1 lb ground beef in a bowl and sprinkle with 1/2 tsp baking soda, 1 tsp kosher salt, and 1/2 tsp black pepper. Note: This helps the seasoning penetrate deeply.
- Mix Gently. Use your hands or a fork to lightly toss the meat so the baking soda is distributed. Do not overwork it or the texture will become tough.
- Heat the Pan. Add 1 tbsp olive oil to your skillet over medium high heat. Cook until the oil shimmers and barely wisps with smoke.
- Sear the Meat. Place the beef in the pan in one large flat disc. Cook for 3 minutes without touching it until a dark brown crust forms on the bottom.
- Break it Up. Use your spoon to break the beef into bite sized chunks. Continue cooking for 5 minutes until the pink mostly disappears.
- Add Aromatics. Push the meat to the edges of the pan and drop the 4 cloves of minced garlic, 1 tbsp rosemary, and 1 tbsp thyme into the center.
- Bloom the Herbs. Let the garlic and herbs sizzle in the rendered fat for about 60 seconds until the kitchen smells fragrant.
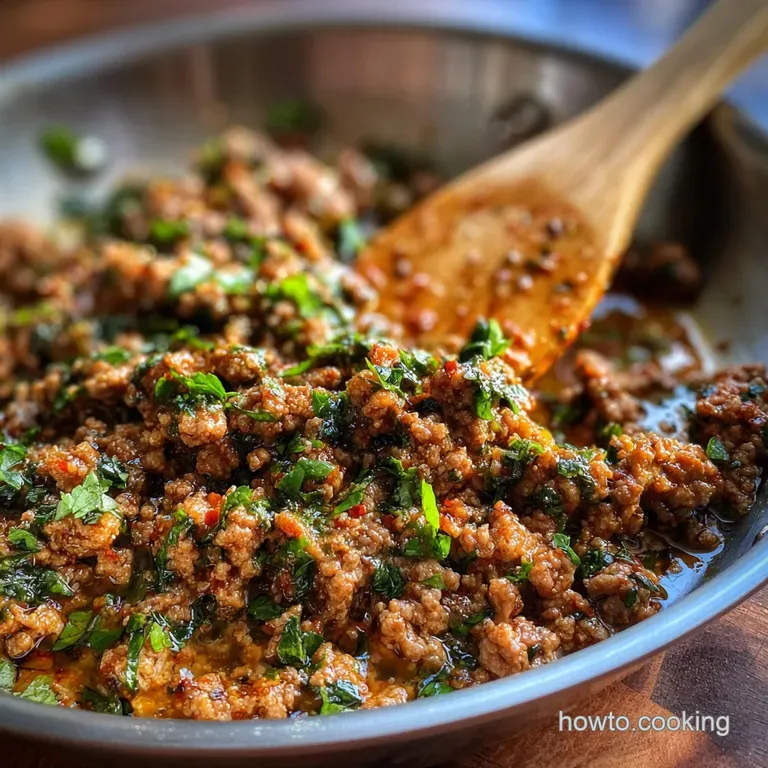
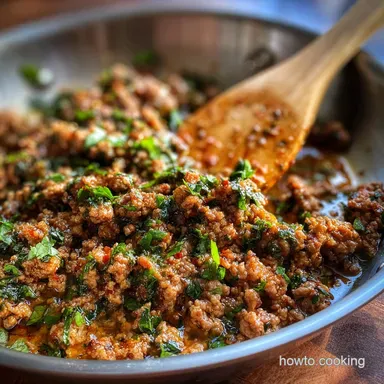
- Combine. Stir the herbs and garlic into the beef, coating every piece. Cook for another 2 minutes to let the flavors meld.
- Finish. Remove from heat and toss in the 1/4 cup fresh parsley. Stir until the parsley just starts to wilt.
- Rest. Let the meat sit in the pan for 2 minutes before serving. Note: This allows the juices to redistribute for maximum tenderness.
Solving Texture and Flavor Issues
Sometimes things go sideways in the kitchen, but most beef problems are easy to fix. The most common issue is the meat "steaming" rather than frying. This usually happens if the pan isn't hot enough or if the meat was too wet.
Why Your Beef Is Gray and Wet
If the meat is releasing a lot of liquid and looks gray, you likely overcrowded the pan. The moisture can't evaporate fast enough, so the meat boils instead of searing. To fix this, crank up the heat and move the meat to one side, or even drain off some of the excess liquid and continue browning in batches.
| Problem | Root Cause | Solution |
|---|---|---|
| Dry/Tough Meat | Overcooked or no baking soda | Use the baking soda trick and pull off heat at 160°F. |
| Burnt Garlic | Added too early | Only add garlic during the last 3 minutes of cooking. |
| Lack of Flavor | Under seasoned | Add a splash of soy sauce or another pinch of salt at the end. |
Common Mistakes Checklist
- ✓ Pat the beef dry with a paper towel if it looks wet before seasoning.
- ✓ Don't skip the baking soda; it is the difference between rubbery and velvety meat.
- ✓ Wait for the pan to be properly hot - the oil should shimmer.
- ✓ Leave the meat alone for the first few minutes to get that shatter crisp crust.
- ✓ Use fresh herbs for that bright, wholesome flavor profile.
Creative Variations for New Flavors
Once you have mastered this base recipe, you can take it in so many directions. It's a nutritious foundation for dozens of meals. Leftovers are especially fantastic when used in a Hearty Potato Soup recipe.
The Ginger Garlic Ground Beef Recipe Twist
For a more Asian inspired profile, swap the rosemary and thyme for 1 tbsp of fresh grated ginger and a splash of toasted sesame oil. Keep the garlic but add a handful of sliced green onions at the end. This version is incredible over steamed bok choy or rice noodles.
As a Ground Beef Recipe with Garlic and Herbs and Potatoes
This is my favorite way to serve it for a Sunday family lunch. Roast some cubed Yukon Gold potatoes with olive oil and salt until they are crispy. Toss the finished beef with the warm potatoes and maybe a handful of sautéed kale. The potatoes soak up the herb infused fat from the beef.
As a Ground Beef Recipe with Garlic and Herbs and Rice
For a quick bowl, serve the beef over fluffy jasmine rice. I like to add a dollop of Greek yogurt or some pickled red onions on top to cut through the richness of the meat. It's a balanced, flavorful meal that feels like a big hug in a bowl.
| Fast Method (This Recipe) | Classic Braised Method | Impact |
|---|---|---|
| 20 Minutes Total | 1.5 Hours Total | Fast is crispier; Classic is more "stew like". |
| High Heat Sear | Low and Slow Simmer | Fast preserves herb brightness; Classic deepens umami. |
| Minimal Liquid | Beef Stock/Wine Base | Fast is great for bowls; Classic is better for mash. |
Adjusting Portions for Your Family
Scaling this recipe is straightforward because it is cooked in a single pan. If you are cooking for one or two, you can easily halve the recipe. Just remember to use a smaller skillet so the meat still has enough contact with the heat to brown.
When doubling the recipe for a larger family gathering, I strongly suggest browning the meat in two separate batches. If you dump 2 lbs of beef into a standard skillet at once, the pan temperature will drop too low, and you'll end up with that gray, steamed meat we want to avoid.
Use two pans if you have them, or just do one pound at a time and keep the first batch warm in the oven.
For baking applications where you might want to double this and put it in a casserole, keep the herbs fresh. If you are doubling the recipe to use in something like Mom s Tater recipe, you can actually slightly undercook the beef since it will finish in the oven.
Debunking Common Kitchen Legends
One myth that refuses to die is that you shouldn't salt meat before cooking because it "draws out moisture." While salt does draw out moisture, if you let it sit for a few minutes (or cook it immediately), the salt actually helps dissolve some of the proteins, making the meat more tender.
Another common misconception is that ground beef needs to be rinsed. Please, never rinse your meat! It doesn't make it cleaner; it just spreads bacteria around your sink and ruins the texture of the beef. The heat of the pan is what kills the bacteria. Trust the sizzle!
Storing and Repurposing Your Leftovers
This beef is a meal prep dream. You can store it in an airtight container in the fridge for up to 4 days. When you are ready to reheat, I recommend using a skillet over medium heat with a tiny splash of water or beef broth. This helps "steam" the meat back to life without drying it out in the microwave.
For long term storage, this herb garlic beef freezes beautifully. Let it cool completely, then flat pack it in a freezer bag. It will stay flavorful for up to 3 months. To use it, just thaw it in the fridge overnight.
You can even use the frozen crumbles directly in a sauce or soup they will thaw and heat through in minutes.
Don't let the scraps go to waste, either. If you have a little bit of the seasoned meat left but not enough for a full meal, toss it into an omelet the next morning. The garlic and rosemary flavors are incredible with eggs and a bit of sharp cheddar cheese.
Best Ways to Plate Beef
Presentation is the final step in building confidence in the kitchen. Even a simple ground beef dish can look like a restaurant quality meal with a little care. I love serving this in wide, shallow bowls rather than flat plates. It keeps the heat in and allows all those flavorful juices to pool at the bottom.
Garnish is your best friend. Save a little bit of that fresh parsley to sprinkle on at the very last second. The bright green against the deep brown beef makes the dish look vibrant and wholesome.
If you're feeling fancy, a quick squeeze of fresh lemon juice right before serving will make the garlic and herbs absolutely sing.
- If you want a creamy finish, stir in a spoonful of crème fraîche or sour cream at the end.
- If you want more crunch, top the bowl with toasted pine nuts or slivered almonds.
- If you want a bit of heat, a pinch of red pepper flakes during the "aromatic bloom" phase is perfect.
This recipe is proof that you don't need a pantry full of rare ingredients or a professional kitchen to make something truly flavorful. It’s about understanding the science, trusting your senses, and having the confidence to let the ingredients shine. Enjoy your cooking!

Recipe FAQs
When should you add garlic to ground beef?
During the last few minutes of cooking. Adding garlic too early will cause it to burn and become bitter. Sautéing it for just 60 seconds in the rendered beef fat allows its aromatic oils to infuse the meat beautifully.
What herbs and spices go well with ground beef?
Rosemary, thyme, parsley, garlic powder, onion powder, and black pepper are excellent choices. For this recipe, fresh rosemary and thyme are bloomed in the pan with garlic to create a fragrant base. Fresh parsley is tossed in at the end for brightness.
What is the secret to flavorful ground beef?
Proper browning and fresh aromatics. The key is to achieve a deep, savory crust through high heat searing, avoiding overcrowding the pan so the beef fries rather than steams. Adding fresh garlic and herbs towards the end infuses the meat with vibrant flavor without burning them.
How can I spice my ground beef to make it taste good?
Season generously and use fresh aromatics. Start with salt and pepper, then incorporate minced garlic and finely chopped fresh herbs like rosemary and thyme in the final stages of cooking. If you enjoyed mastering the flavor infusion here, see how we use similar aromatic techniques in our Steakhouse Black Pepper Sauce at Home Easy Recipe.
Can I use dried herbs instead of fresh?
Yes, but use them differently. Dried herbs are more potent and should be added earlier in the cooking process, often with the initial seasoning, to allow their flavor to reconstitute and meld. Use about one-third the amount of dried herbs compared to fresh.
Why is my ground beef gray and mushy?
Likely due to overcrowding the pan or cooking at too low a temperature. When the pan is too full, the meat releases moisture that steams it instead of searing. Ensure your pan is hot and cook in batches if necessary to achieve a proper brown crust.
What's the role of baking soda in this recipe?
It tenderizes the meat and promotes browning. Baking soda raises the pH of the meat, preventing proteins from bonding too tightly and squeezing out moisture. This leads to a more tender texture and accelerates the Maillard reaction for a deeper color.
Garlic Herb Ground Beef
Ingredients:
Instructions:
Nutrition Facts:
| Calories | 278 kcal |
|---|---|
| Protein | 21g |
| Fat | 21g |
| Carbs | 1.2g |
| Fiber | 0.3g |
| Sugar | 0.1g |
| Sodium | 595mg |
