Mini Beef Wellington Bites: Posh Pockets of Party Perfection
- Why We Shrunk the Classic Wellington: The Appeal of the Mini
- Introducing the Decadent Mini Beef Wellington Bites
- Sourcing the Core Components for Perfect Flavour
- Essential Kitchen Gear for Precision Pastry Work
- Preparation Steps: Sealing the Beef and Cooling the Base
- Assembling the Mini Beef Wellington Bites: A Step and by-Step Guide
- Oven Temperatures and Achieving a Flaky Finish
- Customizing Your Bites: Swaps and Substitutions
- Planning Ahead: Make and Ahead, Storage, and Serving Tips
- Recipe FAQs
- 📝 Recipe Card
Why We Shrunk the Classic Wellington: The Appeal of the Mini
Look, I love a massive, triumphant Beef Wellington as much as the next home chef, but let’s be honest. It’s terrifying. It requires an expensive, perfect fillet, a huge amount of oven commitment, and the pressure of cutting into it in front of hungry guests just makes my hands shake. I’ve been there.
I’ve also been there when the bottom gets soggy, turning that beautiful, flaky pastry into a sad, greasy blanket. Never again.
That’s why we’re going miniature.
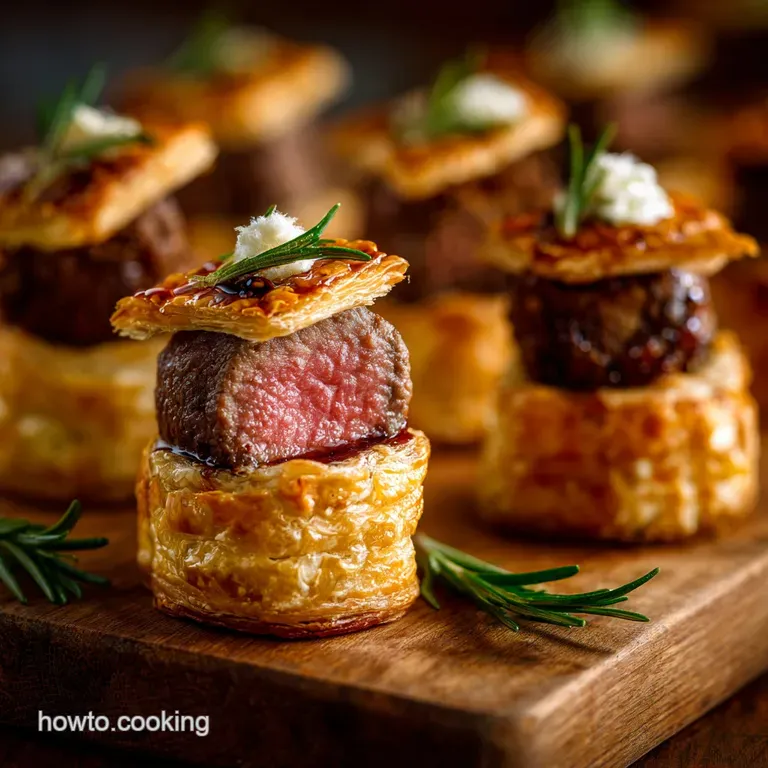
These Mini Beef Wellington Bites take all the luxurious flavor the tender beef, the earthy mushroom duxelles, the crisp, buttery puff pastry and package it into a perfect, two and bite parcel. It’s elegant party food, pure and simple.
It’s basically the culinary equivalent of an expensive jewelry box that you can eat. Plus, the smaller size means the cook time is short, and we get a far higher crust and to-filling ratio. That, my friends, is a win.
Introducing the Decadent Mini Beef Wellington Bites
I want you to think about these as tiny edible works of art. They are surprisingly robust once you get the technique right, and the flavour payoff is insane. This isn't just basic beef wrapped in pastry.
It's a symphony of textures: the delicate crackle of the golden shell giving way to the rich duxelles, the saltiness of the ham, and finally, the melt and in-your and mouth tenderloin.
From Centerpiece to Canapé: Mastering the Party Scale
Scaling down any classic dish can be tricky because you lose volume and sometimes flavor density, but not here. We’re actually enhancing the experience by focusing on individual portions.
Instead of worrying about getting the entire centerpiece to medium and rare evenly (a Herculean task), we’re searing small medallions. This guarantees that every single bite is perfectly cooked right in the sweet spot of medium and rare, or maybe medium, depending on your preferred level of poshness.
They look fantastic piled high on a platter, and you don't even need a fork. See? Effortless elegance.
The Essential Components of a Posh Pocket
There are four things that make this work, and you cannot skip any of them. First, the beef (duh). Second, the duxelles that concentrated mushroom paste which adds the necessary earthy depth. Third, the puff pastry, which provides the flaky crunch. And finally, the unsung hero: the moisture barrier.
In our case, that’s prosciutto or Parma ham. Without that thin layer, you might as well toss your puff pastry in a bowl of water. Right?
Elevating Appetizers: The Decadence of Duxelles
Duxelles (pronounced doo and SELL) sounds fancy, but it’s really just finely minced mushrooms cooked down until they are practically dry. This stuff is powerful. It’s concentrated mushroom flavor, and it’s what gives the Wellington its signature depth.
Honestly, it’s one of those techniques I resisted learning for years, thinking it was too much fuss. It isn't. It just requires patience the enemy of most home cooks (myself included, usually). But trust me, you need this step.
Sourcing the Core Components for Perfect Flavour
When you’re making something simple but luxurious, ingredient quality suddenly matters ten times more. Don't skimp on the beef. It's the star. We’re going for tenderness over size here. And speaking of mushrooms, the cremini offer a much deeper, richer flavor than standard white button mushrooms.
| Component | Must and Have Trait |
|---|---|
| Beef | Tenderloin (centre cut), well and trimmed, consistent shape. |
| Pastry | All and butter is vastly superior; it actually puffs better. |
Essential Kitchen Gear for Precision Pastry Work
You don’t need a massive commercial kitchen, thank goodness, but a couple of tools are non and negotiable for these Mini Beef Wellington Bites. A food processor is a lifesaver for the duxelles if you chop 12 ounces of mushrooms by hand, you'll be there all day. (I know, I did it once.
Never again.) You also absolutely need a heavy and bottomed skillet, preferably cast iron or high and quality stainless steel, for the sear. It needs to hold heat, serious heat, and transfer it immediately to the beef.
Selecting the Best Beef Fillet for Small Portions
This is where you bite the bullet and buy the good stuff. We want Beef Tenderloin (or Fillet Mignon). Why? Because it’s the most tender cut, meaning it will cook quickly and remain incredibly soft, even after being baked inside the pastry.
You only need about a pound for 16 pieces, so the overall cost isn't nearly as bad as buying a three and pound roast. If you ask the butcher nicely, they might even slice it into 1 inch thick medallions for you. That saves time, and time is money, or at least, time is more wine while cooking.
Crafting the Fungal Filling (Duxelles Recipe Breakdown)
Remember what I said about moisture? It’s the devil.
CRUCIAL WARNING: The single biggest mistake when making duxelles is not cooking it long enough. If it's weeping liquid in the pan, it will leak moisture into your pastry, rendering the base soggy. You must cook it until it’s a thick, clay and like paste that clings tightly to the spoon.
The sherry or Madeira (if you use it) is added at the very end and cooks off almost instantly. That shot of alcohol brings a wonderful savory depth that elevates the mushrooms beyond just "tasting like fungi." Spread this out onto a cold plate immediately after cooking and chill it. Seriously. Get it cold.
It’s non and negotiable.
The Ultimate Pairing: Creamy Horseradish Dip Recipe
A traditional jus is lovely, but when you’re dealing with quick party appetizers, sometimes you want something punchy and fast. We’re going with horseradish cream. Mix a few spoonfuls of prepared horseradish (the hot kind, please, not the creamed one from the jar) into a cup of sour cream or crème fraîche.
Add a splash of lemon juice, a little salt, and maybe a tiny bit of chopped chives. Done. It provides a sharp, cold counterpoint to the richness of the beef and pastry.
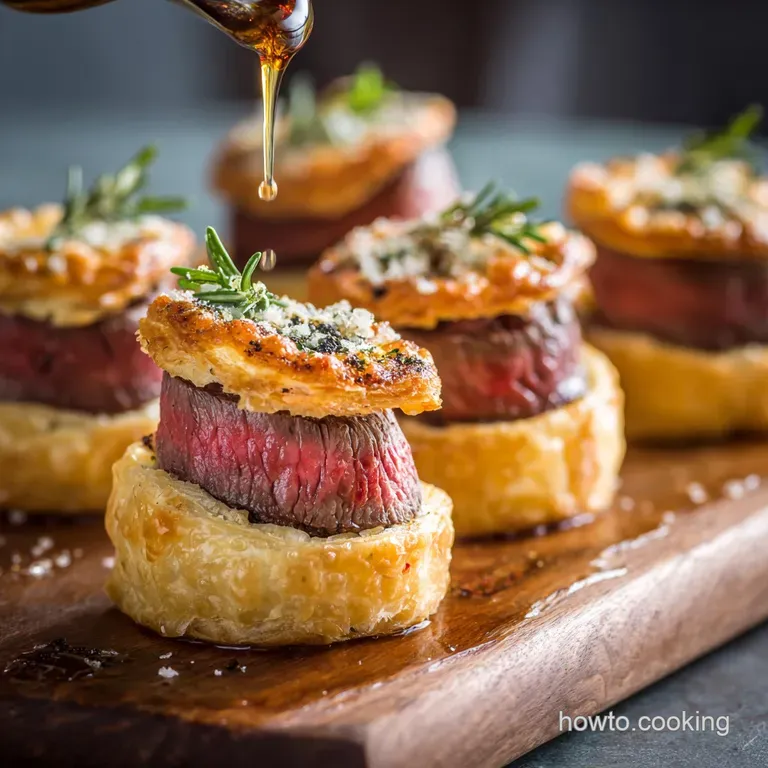
Quick Glazing Tips for Golden Puff Pastry
I used to think one layer of egg wash was enough. It isn’t. You need two layers for that deep, glossy, professional and looking golden finish.
- Brush the first layer right after assembly, before chilling.
- Chill the bites for 15 minutes.
- Apply the second layer right before they go into the oven.
A secret tip: if you add a tiny pinch of salt to your egg wash, it helps break down the proteins, giving you a smoother, streak and free shine.
Related Recipes Worth Trying
- Party Appetizer Elegant Ploughmans MiniRolls Easy Puff Pastry — This Party Appetizer recipe transforms the humble sausage roll into an Elegant Appetizer Entertaining choice They are the easiest party appetizers to make...
- Instant Pot Beef Stew Rich Hearty and Tender in 75 Minutes — This Instant Pot Beef Stew recipe delivers meltinyourmouth beef and a rich velvety sauce in just over an hour Follow our stepbystep beef stew recipe for a...
- Shredded Beef Enchiladas with Creamy Sauce The Best Poblano Recipe — Make amazing Shredded Beef Enchiladas with Creamy Sauce featuring a silky smoky Poblano white sauce This hearty shredded beef dinner is restaurantquality...
Preparation Steps: Sealing the Beef and Cooling the Base
Let's crack on with the hands and on part. Searing the beef is critical. We are not cooking the beef; we are sealing it. That dark, caramelized crust creates flavor depth and helps keep the juices inside the meat during the final bake. This sear should take less than 90 seconds total for all sides.
If you see smoke, you’re doing it right. Then, immediately off the heat, onto a wire rack, and straight into the fridge. I usually set a timer for 30 minutes.
The duxelles also needs to be completely cool. When I’m prepping for a party, I often make the duxelles the day before. It keeps beautifully, and cold duxelles are much easier to spread.
Assembling the Mini Beef Wellington Bites: A Step and by-Step Guide
This is where you need to move quickly but carefully. It’s like wrapping a very fancy, edible present. The biggest mistake here is getting the pastry too warm from your hands or the counter. If your pastry starts getting sticky, STOP. Put everything back in the fridge for ten minutes.
The Critical Step: Achieving a Proper Crust (The Sear)
You need to use that over high heat oil (canola, grapeseed, etc.) olive oil will burn. Get the pan screaming hot. The beef medallions go in, and they should sizzle loudly. 30 to 45 seconds per side. No peeking, no pushing. Just a quick, hard sear to get that beautiful, deep brown colour.
If you sear for longer, you risk partially cooking the beef, which means it will be tough and overdone by the time the pastry is baked. Remember, the internal temperature should still be cold from the fridge when it goes into the oven.
Rolling and Cutting the Pastry Shells to Size
Store and bought puff pastry is our friend. Don’t feel guilty. Roll it out slightly thinner than it comes in the box maybe 1/8 inch thick. Use a round cutter that is wide enough to cover the beef medallion and still give you about a half and inch overhang on all sides to seal the parcel.
I find a 2 inch cutter is perfect for a 1 inch thick medallion. Any scraps? Reroll them once or twice (gently!) and cut out tiny decorative shapes (like little stars or leaves) to put on top before the final egg wash. Total pro move.
Creating the Perfect Parcel: Wrapping Techniques
Take your cold pastry round. Place the mustard and duxelles coated, prosciutto and wrapped beef in the centre, prosciutto and side down. The pastry is the bottom and sides. Gather the edges up over the beef.
The key is to pinch and twist the pastry gently right at the top, sealing the seam tightly but making sure you don't stretch the pastry too much. We want those layers of butter to stay intact for maximum puff.
Tips for Handling Frozen Pastry Without Tears
If you’re using frozen pastry (which, let's be real, most of us are), you have to thaw it in the fridge overnight. Trying to speed and thaw it on the counter will give you tears and cracks usually right where you need it to stay sealed.
If you do get a crack during rolling, patch it quickly with a small piece of pastry and a tiny dab of water. Handle the pastry as little as possible. Warm hands melt butter, and melted butter ruins the puff.
Oven Temperatures and Achieving a Flaky Finish
We bake these at a relatively hot temperature, 400°F (200°C), because we need that pastry to rise quickly before the heat fully penetrates the beef. The high temperature rapidly sets the crust and ensures the beef cooks quickly but stays juicy.
If you are worried about achieving the perfect doneness (and who isn't?), use a meat thermometer inserted into the centre of one sacrificial bite. If you pull them out around 130°F (54°C), they will be a gorgeous medium and rare after resting.
Customizing Your Bites: Swaps and Substitutions
This recipe is rock solid, but sometimes you need to pivot based on what's in the fridge or what your guests prefer.
Replacing the Star: Poultry and Vegetarian Options
If someone doesn't eat red meat, you still want them to feel fancy.
- Poultry: Sear small, thick medallions of chicken breast or turkey tenderloin the exact same way you did the beef. You'll need to bake these slightly longer (22– 25 minutes) to ensure they are cooked through (165°F / 74°C).
- Vegetarian: This is easy. Use thick and cut Portobello mushroom caps that have been scored and deeply roasted first to remove internal moisture. Then treat them like the beef. You can also make a hearty filling out of lentils, walnuts, and thyme.
Troubleshooting Common Pastry Problems
Soggy bottoms, cracks, no puff these are the banes of my existence, and I've fought them all.
- No Puff: Usually means the pastry wasn't cold enough before it hit the oven. Chill longer next time.
- Soggy Bottom: Almost always too much moisture. Was the duxelles dry enough? Did you skip the prosciutto? Make sure your baking sheet is also hot (preheating the sheet sometimes helps).
- Cracks: The pastry was probably stretched too much during the wrap. Be gentle, and remember to score the top lightly before baking that controlled vent releases steam and stops random, uncontrolled explosions.
Planning Ahead: Make and Ahead, Storage, and Serving Tips
These Mini Beef Wellington Bites are actually fantastic for make and ahead prep. Seriously, if you're hosting, do as much as possible beforehand.
How to Prepare Mini Beef Wellington Bites Up to 24 Hours in Advance
You can assemble the entire bite beef, duxelles, ham, and pastry wrap up to 24 hours ahead of time. Place them on the parchment and lined baking sheet, give them the first egg wash, and cover the whole sheet loosely with cling film (plastic wrap).
Keep them refrigerated until about 15 minutes before baking. Pull them out, do the second egg wash, and into the oven they go. The quality won’t suffer one bit, and your stress levels will be minimal.
Safe Freezing and Reheating Instructions for Leftovers
If you have leftover assembled (but uncooked!) bites, they freeze beautifully. Place the assembled, egg and washed bites on a baking sheet and freeze until solid (about 2 hours). Transfer them to a freezer bag or airtight container.
To cook from frozen: Do not thaw. Preheat the oven to 375°F (190°C) and bake for 30– 35 minutes, or until deeply golden. This is a brilliant trick for unexpected guests.
If they are already cooked and chilled, reheat them briefly in a 300°F (150°C) oven for about 10– 12 minutes. Microwaving is a tragic waste of good pastry. Don't do it.
Ideal Serving Temperatures for Maximum Flavor
These are best served warm, not piping hot. If they come straight out of the oven, let them rest for 5 minutes. This allows the internal juices in the beef to redistribute, keeping the meat tender, and allows the puff pastry to set its shape completely.
Serving them slightly warm maximizes the flavour of the rich duxelles and the beef. Serve immediately with that sharp horseradish dip, and prepare for the compliments. You earned them!

Recipe FAQs
Right then, how do I stop the bottom of my wellington bites from getting a soggy bottom?
The key is moisture management: ensure your duxelles (mushroom filling) is cooked until it is bone dry and never skip the prosciutto or ham layer, as this acts as a crucial, essential moisture shield for the puff pastry.
Additionally, always bake them on a parchment lined baking sheet and ensure the assembled bites are thoroughly chilled before they go into the hot oven.
What temperature should the beef be inside, and will the pastry burn before the beef is done?
Aim for an internal temperature of 130 135°F (54 57°C) for a perfect medium rare centre; the high oven heat (400°F/200°C) and the pre-seared crust mean the pastry will typically puff and brown beautifully just as the beef hits that ideal temperature, provided you started with chilled
components.
Can I prepare these Mini Beef Wellington Bites in advance for a dinner party or special occasion?
Absolutely, they are brilliant for making ahead! Assemble the bites completely, brush with the first layer of egg wash, and then chill them, covered loosely, for up to 24 hours; you can then brush with the final egg wash and bake them directly from the fridge (though they may need an extra two or three minutes cook time).
I haven't got prosciutto is there a good alternative for the wrapping layer?
Yes, the prosciutto is vital as a moisture barrier; a classic, sophisticated substitution is a thin spread of smooth chicken liver pâté, or alternatively, you could use very thin slices of finely trimmed bacon or even a thin, plain crêpe in a pinch.
If I have any leftovers (unlikely, I know), how do I reheat these properly without losing the flaky texture?
To maintain their crispness and light texture, reheat them quickly in a 350°F (175°C) oven or an air fryer for about 8-10 minutes until warmed through; avoid the microwave at all costs, as it will instantly turn the pastry into something rather rubbery.
Mini Beef Wellington Appetizer Recipe

Ingredients:
Instructions:
Nutrition Facts:
| Calories | 399 kcal |
|---|---|
| Protein | 26.1 g |
| Fat | 25.8 g |
| Carbs | 15.8 g |
