The Ultimate Cereal Bar Recipe: 5-Minute No-Bake Perfection
- The Ultimate 5 Minute No-Bake Cereal Bar Recipe
- Why This Recipe Works: The Science of the Perfect Chewy Binder
- Core Ingredients and Healthy Substitutions
- Nutrition Information
- Step-by-Step: Making Your Cereal Bars in Under 5 Minutes
- Troubleshooting Common Cereal Bar Recipe Issues
- Storage, Shelf Life, and Freezing Instructions
- Recipe FAQs
- 📝 Recipe Card
The Ultimate 5 Minute No-Bake Cereal Bar Recipe
Forget everything you thought you knew about making bars. When that buttery, melting marshmallow aroma hits the pan, you know you’re 5 minutes away from chewy, shatteringly crisp perfection.
This is the definitive cereal bar recipe , perfected through years of sticky kitchen failures and endless testing.
I used to burn the butter, or overcook the marshmallows until the bars chipped teeth. But I finally cracked the code: it’s all about low heat, speed, and knowing exactly why the ingredients act the way they do.
This easy cereal bar recipe requires just five simple ingredients and five minutes of active prep time, making it the perfect emergency snack for busy parents or a great cereal bar recipe for kids to help make.
Seriously, once you taste this homemade version, you’ll never buy those cardboard boxes again.
If you’re hunting for the absolute best cereal bar recipe that stays soft, pliable, and perfectly structured (not too hard, not too crumbly), you found it. We're skipping the tedious baking and heading straight to the ultimate satisfying crunch.
Why This Recipe Works: The Science of the Perfect Chewy Binder
Most cereal bar recipes fail because the binder the melted marshmallow mixture is handled incorrectly. Here is the simple food science that guarantees success:
The Marshmallow Melting Point
Marshmallows are essentially a stabilized foam of sugar, corn syrup, and gelatin (or a vegan binder). When you heat them, the sugar crystal structure melts. If you overheat this mixture, the sugars caramelize and harden, creating a dense, brittle bar.
We keep the heat low and melt them just until they look velvety, minimizing the risk of a sugar burnout.
The Role of Fat vs. Sweetener in Bar Texture
We use 4 tablespoons of butter or coconut oil. This fat is essential for two reasons:
- Preventing Sticking: It lubricates the pan and prevents the super sticky marshmallows from welding themselves to the saucepan.
- Coating the Cereal: The fat coats the crisp cereal (like Rice Krispies). This coating acts as a moisture barrier, ensuring the cereal stays crisp and doesn’t get soggy when mixed with the hot binder. It's the secret weapon for avoiding a crumbly, dry outcome in your cereal bar recipe .
How to Achieve Optimal Stickiness Without Baking
The key to a perfectly bound, soft bar is the chilling time ( 8 hours 15 minutes total, mostly hands off waiting). When the mixture is hot, the sugars are liquid.
Once spread and compressed, placing the bars in the fridge (or even a cold counter) allows the sugar structure to resolidify slowly, ensuring a tight, chewy bond without the need for baking.
Core Ingredients and Healthy Substitutions
This cereal bar recipe relies on five core components that you probably already have in your pantry.
| Original Ingredient | Best Substitute | Scientific Function |
|---|---|---|
| Butter (4 Tbsp) | Coconut Oil (refined) | Provides fat necessary for coating cereal and preventing sticking. Refined oil has less coconut flavor. |
| Marshmallows (10 oz) | Vegan Marshmallows or Marshmallow Fluff (10 oz) | The main binder (sugar + gelatin/stabilizer). Vegan options work well but may require slightly more cooking time to fully dissolve. |
| Crisp Rice Cereal (4 cups) | Puffed Quinoa or Oaty Cheerios | Provides crunch and structure. Puffed quinoa is higher in protein but absorbs moisture faster work quickly! |
| Vanilla Extract (1 tsp) | Almond Extract (1/4 tsp) | Flavor enhancer. Use sparingly; almond extract is much stronger and can easily overpower the bars. |
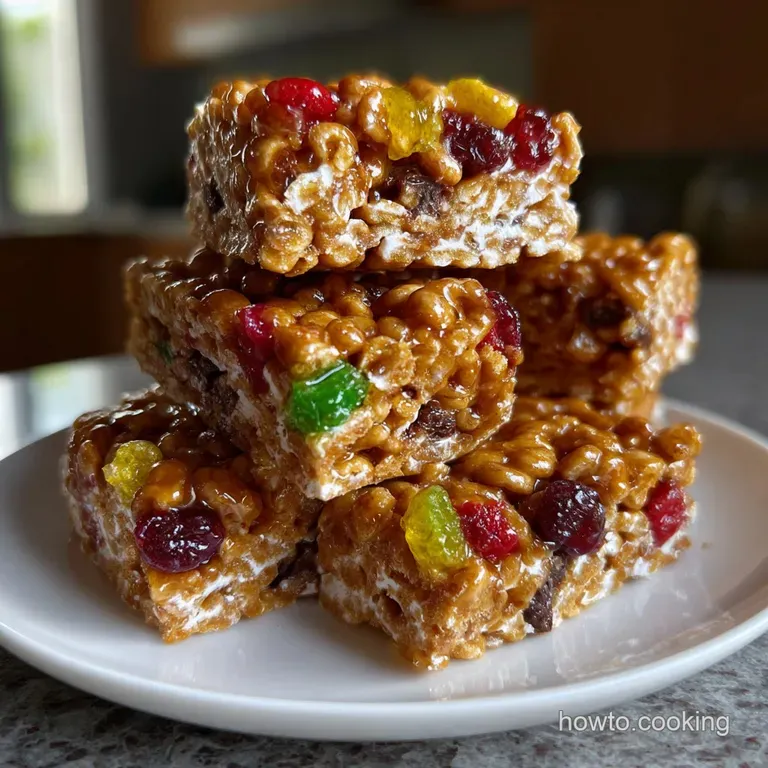
| Optional Mix-ins (1/2 cup) | Dried Cranberries or Pretzel Pieces | Adds textural contrast and flavor. Avoid fresh fruit as the moisture will make the bars soggy. |
Choosing the Best Cereal for Your Bars
While classic crisp rice cereal offers the ideal light structure for this homemade cereal bar recipe , feel free to get creative. Honey nut cereals, slightly crushed corn flakes, or even Oaty Banana Muffins style oats (though they will result in a denser bar) can work well.
Ingredient Prep Checklist
| Ingredient | Quantity | Notes |
|---|---|---|
| Crisp Rice Cereal | 4 cups / 100 g | Keep in a large bowl, ready for mixing. |
| Optional Mix-ins | 1/2 cup / 60 g | Chocolate chips, sprinkles, or nuts. |
| Butter or Coconut Oil | 4 tablespoons / 56 g | Don't skimp on the fat! |
| Marshmallows | 10 oz / 280 g | Use mini marshmallows for faster melting. |
| Vanilla Extract | 1 teaspoon / 5 ml | Adds a necessary depth of flavor. |
| Salt | Pinch | Critical for balancing the sweetness. |
Pro Tip on Mix-ins: If you're a fan of super easy, no-bake snacks, mix in some cocoa powder and crushed peanuts! It gives them that quick Peanut Butter Balls with Oats: The 10 Minute No-Bake Recipe vibe, but with the crunch of the cereal.
Nutrition Information

| Nutrient | Amount |
|---|---|
| Calories | 168 kcal |
| Protein | 1.4 g |
| Fat | 5.5 g |
| Carbs | 29.6 g |
| Sodium | 48 mg |
step-by-step: Making Your Cereal Bars in Under 5 Minutes
Yields: 12 large bars Prep Time: 5 minutes Chill Time: 8 hours minimum (or until firm) Total Time: 8 hours 5 minutes
1. Prep the Pan and Bowl (30 seconds)
Line a 9x13 inch baking pan with parchment paper, leaving an overhang on the two long sides this creates "handles" for easy removal. Spray the parchment lightly with cooking spray. Measure your 4 cups of crisp rice cereal and place it in your largest mixing bowl.
2. Melt the Foundation ( 2 minutes)
In a large, heavy bottomed saucepan, melt the 4 tablespoons of butter (or coconut oil) over LOW heat . Add the pinch of salt. Once melted and slightly fragrant, add the 10 oz of marshmallows. Stir constantly. The goal is low and slow melting.
When the marshmallows are about 80% melted meaning you still see a few solid lumps remove the pan from the heat entirely.
3. Stir and Flavor (1 minute)
Remove the binder from the heat and let the residual heat finish melting the remaining lumps while you stir. This prevents the sugar from scorching. Once smooth and glossy, stir in the 1 teaspoon of vanilla extract. It will sizzle slightly that's normal!
If you are using this cereal bar recipe no peanut butter , this is where the vanilla flavor truly shines.
4. Combine the Cereal (1 minute 30 seconds)
Pour the warm binder mixture over the crisp cereal in the large bowl. Working quickly, fold the mixture gently using a spatula coated lightly with oil. You need to mix just until the cereal is evenly coated. This is where you add your optional 1/2 cup mix-ins (chocolate chips, nuts, etc.).
Overmixing leads to crushed cereal and a tough bar.
5. Press and Chill (1 minute)
Dump the sticky mixture into your prepared pan. Do not use your hands unless they are greased (and even then, it's messy). Instead, use the parchment overhang or another piece of greased parchment paper to press the mixture firmly and evenly into the pan.
Press just enough to bind; excessive pressing will make the final bars dense and hard. Chill in the refrigerator for at least 8 hours (or overnight) until completely firm.
Troubleshooting Common Cereal Bar Recipe Issues
Even the simplest cereal bar recipe can go wrong. Here are the common pitfalls and exactly how to fix them.
| Common Mistake | Root Cause | The Fix |
|---|---|---|
| Bars are Rock Hard | Marshmallows were cooked too long or over high heat. The sugar structure hardened/caramelized. | Melt the marshmallows only until 80% dissolved, then remove from heat. Use residual heat to finish the melt. |
| Bars are Too Crumbly/Dry | Not enough binder, or the bars weren't pressed adequately, or the cereal was crushed during mixing. | Use slightly more fat (1/2 Tbsp extra butter) next time, and make sure to compress the bars evenly and firmly while the mixture is still warm. |
| Bars Stick to Hands/Tools | Lack of lubrication on your tools. | Before pressing, lightly coat your spatula or the second sheet of parchment paper with butter or cooking spray. |
Storage, Shelf Life, and Freezing Instructions
Because this cereal bar recipe doesn't use any preservatives, knowing how to store them properly is crucial for maintaining that perfect chewy crisp texture.
Optimal Storage Methods for Maximum Freshness
Once the bars are completely set and cut into 12 generous squares, store them in an airtight container at room temperature for the best texture (they should last 3 4 days).
- Avoid the fridge after cutting: While initial chilling is necessary for setting, storing cereal bars in the refrigerator causes the sugar to crystallize slightly, making them tougher and harder to bite.
- Layering: If stacking, place small sheets of parchment paper between the bars to prevent them from sticking together.
Can You Freeze Homemade Cereal Bars?
Absolutely! Freezing is a great option if you want a reliable protein cereal bar recipe prep strategy.
- Wrap each cut bar individually in plastic wrap, then foil.
- Place the wrapped bars in a freezer safe bag or container.
- They keep well for up to 3 months.
- To thaw, simply unwrap and let them sit at room temperature for about 30 minutes. Do not microwave.
Pairing Homemade Bars with Breakfast or Dessert
These homemade treats aren't just for lunchboxes. They make a fantastic, quick dessert (especially if you add a dark chocolate drizzle check out my Cracker Candy Recipe: Easy Saltine Toffee Christmas Crack for chocolate melting tips!).
These bars are simple, fast, and satisfying. If you've been looking for a reliable, perfectly chewy cereal bar recipe , look no further. This one delivers the nostalgic crunch every time.

Recipe FAQs
How to make cereal bars?
The core method involves gently melting butter and marshmallows until just combined, avoiding scorching, then quickly folding in your cereal before pressing the mixture firmly into a pan to set.
How to make cereal bars with marshmallows?
Yes, marshmallows are essential as they act as the primary binder, creating that chewy texture when mixed with melted butter and coating the cereal pieces.
How to make cereal bars at home?
It is very easy to make these bars at home using basic pantry staples like cereal, butter, and marshmallows, requiring only about five minutes of active preparation time before setting.
How to make cereal bars without marshmallows?
No, this specific 5-minute recipe relies entirely on the marshmallow butter matrix for structure and chewiness; attempting removal will result in loose, crumbly bars, although you could explore binding agents used in recipes like the Peanut Butter Oatmeal Bars Easy Healthy Peanut But: Ultimate Chewy Treat.
How to make cereal bars with milk?
No, you should avoid adding liquid ingredients like milk during the binding process as they will dilute the sugar content and prevent the marshmallow from achieving the necessary sticky consistency needed for a firm bar.
What is the key to preventing my bars from hardening too much?
The key is meticulous temperature control; never overheat the marshmallows, ensuring you pull the mixture off the heat immediately once fully melted, as overcooking causes the sugar structure to seize up and become brittle.
How should I store leftover cereal bars?
Store the bars tightly wrapped at room temperature in an airtight container; refrigeration can sometimes cause them to become overly firm, although this recipe is best enjoyed within 2-3 days for maximum chewiness.
No Bake Cereal Bar Recipe

Ingredients:
Instructions:
Nutrition Facts:
| Calories | 168 kcal |
|---|---|
| Protein | 1.4 g |
| Fat | 5.5 g |
| Carbs | 29.6 g |
| Sodium | 48 mg |
