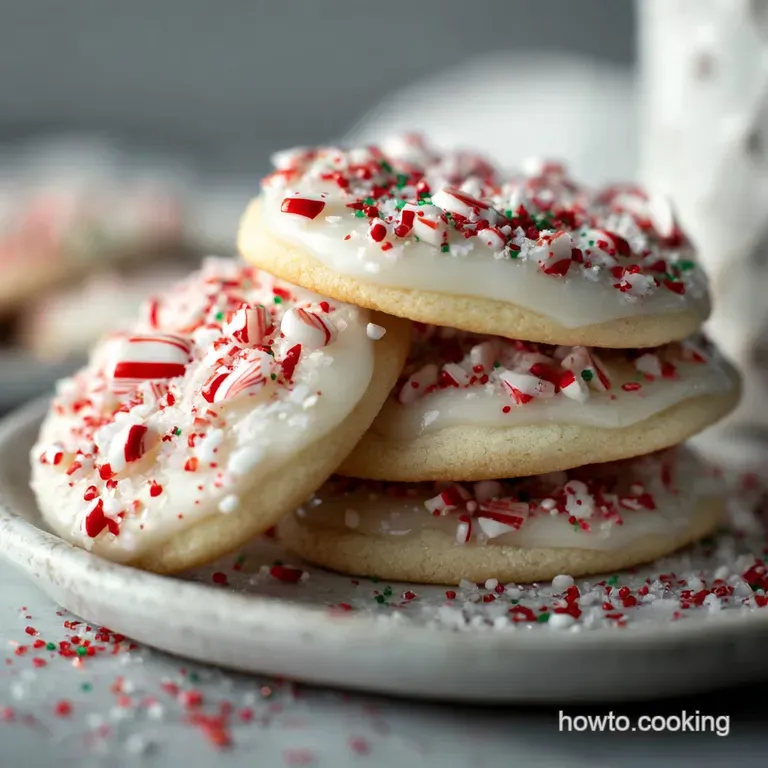
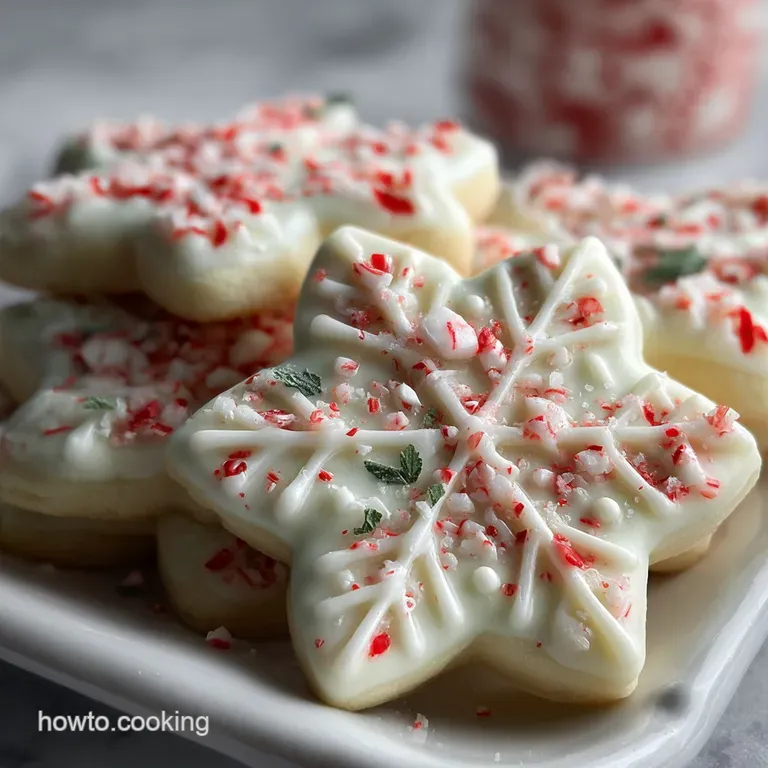
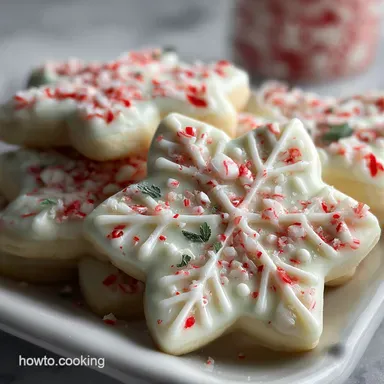
Easy Peppermint Bark Sugar Cookies
- Time: Active 20 minutes, Passive 10 minutes, Total 30 minutes
- Flavor/Texture Hook: Buttery, soft crumb base with a crisp, cooling chocolate shatter
- Perfect for: Holiday gifting, festive dessert platters, and beginner bakers
- The Chemistry Behind the Snap and Softness
- Essential Specs for Your Festive Baking Session
- Curating Wholesome Elements for the Holiday Pantry
- Assembling Minimal Tools for Maximum Success
- Executing the Flawless Chocolate Dipping Process
- Correcting Common Baking Flaws for Flawless Finishes
- Adapting Your Ingredients for Every Diet
- Preserving Freshness and Reheating for Later
- Pairing Your Sweet Treats for Elegant Entertaining
- Recipe FAQs
- 📝 Recipe Card
The Chemistry Behind the Snap and Softness
Understanding the "how" behind your bake is what transforms a hobbyist into a confident home cook. When we combine our ingredients, we aren't just mixing; we are initiating specific reactions that determine the final structure of the treat.
The Science of Why it WorksStarch Gelatinization: Cornstarch interferes with gluten development, creating a tender, "short" crumb that melts on the tongue.
Emulsification Stability: Room temperature eggs allow the fats and liquids to bond perfectly, preventing a broken dough that leaks oil during the bake.
By paying attention to these small details, we ensure the cookies don't spread into one giant puddle on the pan. The addition of peppermint extract to the dough provides a base layer of flavor that complements the topping, while the semi sweet chocolate drizzle provides a bitter contrast to the sweetness of the white chocolate. If you enjoy this flavor profile, you might also find the cooling notes in my Classic Peppermint recipe a perfect companion for your holiday spread.
| Aspect | Fast Peppermint Cookies | Classic Peppermint Bark |
|---|---|---|
| Core Texture | Soft, buttery, and cake like | Hard, brittle, and snapping |
| Preparation Time | 30 minutes total | 1 hours 30 mins (with setting) |
| Nutritional Profile | Wholesome grain based energy | Pure fat and sugar based treat |
This comparison highlights why combining the two into one dish is such a win. You get the nutritional satisfaction of a wholesome bake with the festive flair of traditional candy. It's a much more balanced way to enjoy holiday sweets without the sugar crash associated with eating pure chocolate bark.
Essential Specs for Your Festive Baking Session
Precision is the secret weapon of every successful baker. I’ve learned the hard way that "eyeballing" ingredients or guessing oven temps leads to disappointment. We use imperial measurements here to ensure that your dough has the exact hydration ratio needed for that signature soft yet-sturdy bite.
Key Metrics for Success
- Dough Temperature:65°F to 68°F (slightly cool to the touch but pliable)
- Bake Time: Exactly 10 minutes for a soft center
- Cooling Time:15 minutes on the pan to allow the structure to set
Structural Components of Every Bite
| Component | Science Role | Pro Secret |
|---|---|---|
| All Purpose Flour | Provides the gluten framework | Sift it twice for a lighter, more velvety texture |
| Cornstarch | Softens the flour's proteins | Never skip this; it's the difference between a biscuit and a cookie |
| Unsalted Butter | Delivers flavor and moisture | Use high-quality European style butter for better fat content |
Getting the butter right is half the battle. You want it softened, meaning your finger should leave a clean indentation without sliding through a greasy mess. If the butter is too warm, the cookies will spread. If it's too cold, it won't aerate properly during the creaming stage, leaving you with a dense, heavy cookie.
Curating Wholesome Elements for the Holiday Pantry
To make the best Easy Peppermint Bark Sugar Cookies, we need to be intentional with our choices. I always reach for real extracts over artificial flavorings because the depth of flavor is incomparable.
Peppermint extract is potent, so we use it sparingly to avoid a "toothpaste" aftertaste, balancing it with the warmth of pure vanilla.
- 1 cup (226g) unsalted butter, softened: Why this? Allows full control over salt levels for a balanced flavor.
- 1 cup (200g) granulated sugar: Why this? Provides sweetness and helps create those slightly crisp edges.
- 1 large egg (50g), room temperature: Why this? Acts as the primary binder for the flour and fat.
- 1 tsp vanilla extract: Why this? Rounds out the sharp mint with a creamy, floral base.
- 1/2 tsp peppermint extract: Why this? The essential cooling element that defines the holiday profile.
- 2 1/2 cups (312g) all purpose flour: Why this? The structural foundation of our cookie.
- 1 tsp baking powder: Why this? Gives a gentle lift for a soft, airy crumb.
- 1/2 tsp salt: Why this? Enhances the chocolate and cuts through the sugar.
- 1 tbsp (8g) cornstarch: Why this? Keeps the cookies tender and prevents them from becoming tough.
- 12 oz (340g) white chocolate melting wafers: Why this? Wafers contain stabilizers that help the coating set firmly.
- 4 oz (113g) semi sweet chocolate: Why this? Adds visual contrast and a necessary bitter note.
- 1/2 cup (80g) crushed candy canes: Why this? Provides the iconic "bark" texture and festive color.
- 1 tsp (4.5g) coconut oil: Why this? Helps the chocolate melt smoothly and gives it a glossy sheen.
| Original Ingredient | Substitute | Why It Works |
|---|---|---|
| Unsalted Butter | Virgin Coconut Oil (solid) | Similar fat structure. Note: Adds a subtle tropical scent to the cookies. |
| Granulated Sugar | Coconut Sugar | Lower glycemic index. Note: Will turn the cookies a darker, caramel brown. |
| White Chocolate | Vegan White Choc | Plant based alternative. Note: May take longer to set at room temperature. |
While I always prefer the classic butter and sugar combination for that nostalgic flavor, these swaps are great if you're baking for friends with specific dietary needs. Just keep in mind that the texture of a coconut sugar cookie will be slightly grainier than one made with white granulated sugar.
Assembling Minimal Tools for Maximum Success
You don't need a kitchen full of gadgets to produce professional quality cookies. In fact, keeping it simple often leads to better results because you're more focused on the dough than the equipment. I'm a big believer in using what you have, but a few specific items really make the process smoother.
- Large Mixing Bowl: Plenty of space to incorporate the flour without it flying everywhere.
- Electric Hand Mixer: Perfect for creaming the butter and sugar into a pale, fluffy cloud.
- Baking Sheets: Heavy duty ones prevent the bottoms of the cookies from scorching.
- Parchment Paper: This is non negotiable for easy cleanup and preventing sticking.
- Small Microwave Safe Bowls: For melting your chocolates in short bursts.
- Rolling Pin: To ensure even thickness across all your cookies.
Chef's Tip: If you don't have a rolling pin, a smooth wine bottle works in a pinch! Just make sure to flour it well so the dough doesn't cling to the glass.
Having these basics ready before you start prevents that frantic mid recipe search for a spatula. It also helps you maintain the "flow" of baking, which I find makes the whole experience much more therapeutic and enjoyable.
Executing the Flawless Chocolate Dipping Process
Now we get into the fun part. The secret to this recipe is the contrast between the baked cookie and the smooth, snappy chocolate layer. We aren't just slapping frosting on; we are creating a tempered style coating that holds its shape.
1. Creaming for Aeration
Beat the 1 cup softened butter and 1 cup sugar until the mixture is pale and doubled in volume. This usually takes about 3 full minutes with a hand mixer. You are literally beating air into the fat, which helps the cookies rise naturally.
2. Incorporating the Dry Foundation
Whisk the flour, baking powder, salt, and cornstarch in a separate bowl. Gradually add this to your wet ingredients. Mix until just combined—if you see streaks of flour disappear, stop. Over mixing at this stage activates the gluten and makes the cookies tough.
3. Shaping and Executing the Perfect Bake
Roll the dough to 1/4 inch thickness and cut into rounds. Place on parchment lined sheets. Bake at 350°F for 10 minutes until the edges are barely set but the centers look soft. They will continue to firm up as they cool on the hot pan.
4. Dipping and Decorating the Bark
Melt the white chocolate wafers with half the coconut oil in 30 second increments. Once the cookies are completely cold, dip half of each cookie into the velvety white chocolate. Note: Let the excess chocolate drip off before placing them back on the parchment.
5. Mastering the Final Snap
Melt the semi sweet chocolate with the remaining coconut oil. Use a fork to drizzle thin, elegant lines over the white chocolate portion. While the chocolate is still wet, sprinkle the 1/2 cup crushed candy canes over the top. The sugar in the candy canes will adhere to the wet chocolate as it sets.
6. Stabilizing the Coating
Place the finished cookies in the fridge for 15 minutes. This "shocks" the chocolate into setting, ensuring that beautiful snap when you take a bite. Once set, they can be stored at room temperature, but that initial chill is crucial for the bark texture.
7. Achieving Superior Chocolate Adhesion
One mistake I see often is dipping warm cookies. If there is any residual heat, the chocolate will slide right off or become streaky. Ensure they are cool to the touch. If your kitchen is warm, pop the cookies in the freezer for 5 minutes before dipping to help the chocolate grab onto the surface instantly.
Correcting Common Baking Flaws for Flawless Finishes
Even the best of us hit a snag sometimes. Maybe your dough feels like sand, or your white chocolate looks like chunky mashed potatoes. Don't panic! Most holiday baking issues are easily solved once you identify the root cause. If you've ever made a Classic Snickerdoodle Recipe, you know that dough hydration is everything.
Why Your Chocolate Seized
If a single drop of water gets into your melting chocolate, it will turn into a gritty, hard mess. This is called "seizing." To fix it, you can sometimes whisk in a teaspoon of boiling water or more coconut oil, but it's best to prevent it by using bone dry bowls and spoons.
| Problem | Root Cause | Solution |
|---|---|---|
| Cookies are flat/thin | Butter was too soft or melted | Chill the dough for 20 minutes before baking next time. |
| Chocolate won't set | Used chips instead of wafers | Add 1/2 tsp more coconut oil and chill in the freezer. |
| Candy canes melting | Sprinkled onto chocolate that was too hot | Wait 1 minute after dipping before adding the peppermint bits. |
Common Mistakes Checklist
- ✓ Measure flour by weight: Scooping with a cup packs the flour and makes cookies dry. Use a scale!
- ✓ Check your baking powder: If it’s over 6 months old, your cookies might not rise properly.
- ✓ Don't crowd the pan: Leave at least 2 inches between cookies to allow heat to circulate for even browning.
- ✓ Sift the crushed peppermint: Use a fine mesh strainer to remove the "dust" from your crushed candy canes so only the pretty shards remain.
- ✓ Temper your egg: If your egg is cold, it will curdle the softened butter. Warm it in a bowl of warm water for 5 minutes.
Adapting Your Ingredients for Every Diet
The beauty of a sugar cookie base is how well it plays with other flavors. While the "Easy Peppermint Bark Sugar Cookies" are a holiday staple, you can easily pivot this recipe to suit different seasons or flavor preferences. The foundational ratio of fat to flour is what matters; the flavorings are your playground.
Developing a Dark Chocolate Twist
If you find white chocolate too sweet, swap the proportions. Dip the cookies in dark chocolate and use white chocolate as the drizzle. This creates a much more "adult" flavor profile that pairs beautifully with a strong cup of black coffee.
Creating a gluten-free Alternative
You can swap the all purpose flour for a high-quality 1:1 gluten-free flour blend (like King Arthur or Cup4Cup). Because gluten-free flours absorb moisture differently, I recommend letting the dough rest for 30 minutes before rolling.
This allows the rice flours to hydrate, preventing a "gritty" texture.
Quick Decision Shortcuts
- If you want a crunchier cookie, bake for 12 minutes instead of 10 and omit the cornstarch.
- If you want a richer flavor, use brown sugar for half of the granulated sugar.
- If you want more mint, add 1/4 cup of mini Andes mint chips directly into the dough.
I’ve found that even small changes can make a big difference. For instance, if you're out of peppermint extract, you can use the zest of two oranges and dip the cookies in dark chocolate for a "Chocolate Orange" version that is equally sophisticated.
Preserving Freshness and Reheating for Later
These cookies are surprisingly hardy, making them excellent for shipping to family or keeping on hand for unexpected guests. The chocolate coating actually acts as a bit of a seal, keeping the moisture inside the cookie base longer than a traditional un frosted cookie.
- Fridge
- Store in an airtight container for up to 7 days. The cool environment keeps the chocolate snappy.
- Room Temp
- Keep in a cool, dry place for 4 days. Avoid sunny windowsills or the top of the dishwasher where heat can melt the chocolate.
- Freezer
- These freeze beautifully for up to 3 months. Wrap them individually in plastic wrap and then place in a freezer bag.
Zero Waste Tip: Don't throw away the broken bits of cookies or the leftover melted chocolate! Mix them together with a handful of nuts or pretzels and spread onto a sheet of parchment. Once it sets, you have a "kitchen sink" bark that is perfect for snacking while you clean up.
When you're ready to eat a frozen cookie, just let it sit on the counter for 20 minutes. Don't microwave them, or you'll end up with a puddle of melted chocolate and a soggy cookie. A slow thaw preserves that wonderful "shatter" of the bark layer.
Pairing Your Sweet Treats for Elegant Entertaining
Presentation is the final step in your baking journey. These cookies are visually striking on their own, but they really shine when paired with the right beverages. The peppermint provides a refreshing finish to a meal, making them a great "palate cleanser" dessert.
The Classic Café Pairing
Serve these alongside a steaming mug of hot cocoa. The heat from the cocoa slightly softens the cookie, while the peppermint in the cookie enhances the chocolate in the drink. It’s a nostalgic combination that never fails to please.
The Sophisticated After Dinner Flight
For a more grown up approach, pair these with a small glass of Baileys or a peppermint schnapps. The creaminess of the liqueur mirrors the white chocolate, while the alcohol cuts through the richness of the butter. If you're looking for another festive cookie to round out your platter, my Classic Snickerdoodle Recipe provides a warm cinnamon contrast that balances the cool mint perfectly.
Holiday Myths Debunked
One common misconception is that you must use expensive "tempering" chocolate for dipping. While couverture chocolate is lovely, high-quality melting wafers are specifically designed for home cooks to achieve a glossy finish without the complex temperature manipulation.
Another myth is that sugar cookies need to be chilled overnight. While chilling helps with flavor development, this specific dough is balanced enough to be baked immediately, making it a true "easy" recipe.
Baking these Easy Peppermint Bark Sugar Cookies is about more than just the end result. It's about the confidence you build with every step from the perfect creamed butter to the final drizzle of chocolate.
I hope these tips and tricks help you create something wholesome and flavorful that your whole family will love. Happy baking!

Recipe FAQs
Can I make these cookies dairy-free?
Yes, with minor adjustments. You can substitute the butter with a solid vegan butter alternative and use vegan white chocolate melting wafers. The texture might be slightly different, but the flavor will still be delicious.
Why did my white chocolate seize up when melting?
This happens when even a tiny bit of water comes into contact with melting chocolate. Ensure all your bowls and utensils are completely dry. If it seizes, you can sometimes salvage it by whisking in a teaspoon of boiling water or a bit more coconut oil, but it's best to prevent this by using bone dry equipment.
How should I store these cookies to keep them fresh?
Store in an airtight container in a cool, dry place. They will stay fresh at room temperature for up to 4 days, or in the refrigerator for up to 7 days to keep the chocolate snappy. You can also freeze them for up to 3 months.
Can I use chocolate chips instead of melting wafers?
It's not ideal for the bark coating. Melting wafers contain stabilizers that help them set smoothly and firmly. Chocolate chips can sometimes result in a softer, greasier coating that doesn't "snap" as nicely.
My cookies spread too much on the baking sheet. What went wrong?
Your butter was likely too soft or had started to melt. For the best texture, cream softened but not greasy butter with the sugar until it's pale and fluffy. Chilling the dough for about 20 minutes before baking can also help prevent excessive spread.
How do I get that crisp "bark" texture on top?
Ensure the cookie base is completely cooled before dipping. Then, after dipping and drizzling, place the finished cookies in the refrigerator for about 15 minutes. This "shocks" the chocolate into setting quickly, giving you that satisfying brittle snap.
Can I substitute the peppermint extract with something else?
Yes, you can adapt the flavor easily. For a chocolate orange twist, omit the peppermint extract and add the zest of two oranges. Dip in dark chocolate for a sophisticated pairing. If you enjoy bold flavors, exploring variations like those in our Classic Sugar Cookie Recipe can inspire further creativity.
Peppermint Bark Sugar Cookies
Ingredients:
Instructions:
Nutrition Facts:
| Calories | 265 kcal |
|---|---|
| Protein | 2.7 g |
| Fat | 14.1 g |
| Carbs | 32.8 g |
| Fiber | 0.4 g |
| Sugar | 23.1 g |
| Sodium | 69 mg |
