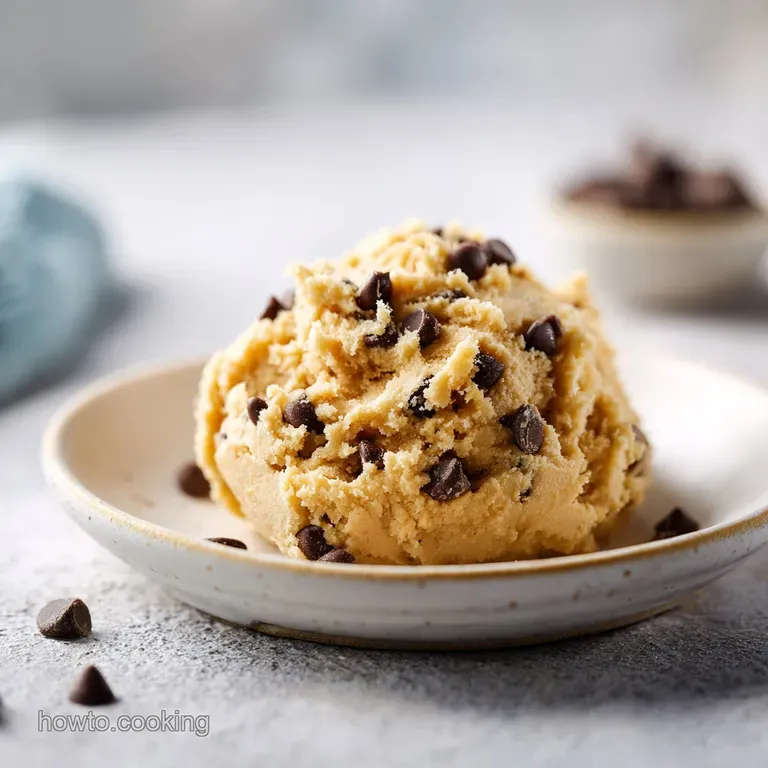
Safe Edible Cookie Dough Recipe
- Time: Active 10 minutes, Passive 5 minutes, Total 15 minutes
- Flavor/Texture Hook: Buttery, sugary, and velvet smooth with a satisfying chocolate snap
- Perfect for: Movie nights, late night cravings, or a creative topping for wholesome sundaes
- Mastering Your Edible Cookie Dough Recipe
- Why This Works
- Detailed Component Analysis
- The Building Blocks
- Required Tools for the Job
- Detailed Step-By-Step Mixing Guide
- Fixing Common Dough Problems
- Fun Flavor Variations
- Debunking Kitchen Myths
- Storage and Safety Guidelines
- Serving and Enjoyment Tips
- Recipe FAQs
- 📝 Recipe Card
Mastering Your Edible Cookie Dough Recipe
Imagine the scent of warm vanilla and rich molasses hitting you the moment you pull a bowl out of the cupboard. We’ve all been there, hovering over a batch of traditional cookies, trying to sneak a spoonful before they hit the oven.
But as I learned the hard way after a particularly nasty stomach ache in my early twenties, raw flour is just as much of a culprit as raw eggs.
That experience pushed me to find a way to make a version that’s safe, wholesome, and even more flavorful than the "real" thing. I spent weeks testing temperatures because I hated the gritty, sandy texture of most recipes.
This version feels like a silky indulgence, and once you try it, you'll never go back to the tubbed stuff from the grocery store.
We’re going to focus on building flavor through quality ingredients and a few simple safety steps. Whether you're making this for yourself or sharing it with family, this technique builds confidence in the kitchen.
It's about understanding how your ingredients behave when they aren't destined for the heat of an oven.
Why This Works
- Thermal Lethality: Heating the flour to 74°C kills potential bacteria while subtly toasting the starches for a deeper flavor profile.
- Fat Emulsification: Creaming the butter and sugar for a full three minutes creates a stable structure that prevents the dough from feeling greasy or oily.
- Starch Gelatinization: The small amount of milk hydrates the heat treated flour just enough to remove the "raw" wheat taste without making it gummy.
- Sugar Dissolution: Using a mix of brown and white sugar provides both moisture and a slight crunch, mimicking the iconic texture of traditional dough.
| Method Type | Total Time | Texture Outcome | Best For |
|---|---|---|---|
| Fresh Homemade | 15 minutes | Silky and customizable | Maximum flavor and safety |
| store-bought Tub | 2 minutes | Often waxy or stiff | Absolute emergencies only |
| Shortcut (Pre mix) | 10 minutes | Inconsistent sweetness | Beginner experimentation |
Making your own version allows you to control the quality of the fats and the sugar content, ensuring a more nutritious approach to a decadent treat. This method is far superior to store-bought options that rely on preservatives for shelf stability.
Detailed Component Analysis
| Ingredient | Science Role | Pro Secret |
|---|---|---|
| All Purpose Flour | Provides structure | Sift after heat treating to remove any clumps formed by moisture |
| Unsalted Butter | Adds lipid richness | Use high-quality butter with 82% fat for a creamier mouthfeel |
| Brown Sugar | Moisture and chew | Pack it tightly to ensure the molasses content is consistent |
Using the right components is the first step toward a successful bake free dessert. If you are looking for other ways to use your pantry staples, you might enjoy trying my Classic Cookie Cutter recipe for a different kind of family fun.
The Building Blocks
- 1 cup (125g) all purpose flour: Why this? The base structure that provides a familiar, hearty cookie texture.
- 1/2 tsp (3g) sea salt: Why this? Sharpens the sweetness and balances the richness of the butter.
- 1/2 cup (113g) unsalted butter, softened: Why this? The primary fat source that carries all the aromatic vanilla notes.
- 1/2 cup (100g) light brown sugar, packed: Why this? Adds moisture and a hint of caramel through its molasses content.
- 1/4 cup (50g) granulated white sugar: Why this? Provides the classic sweetness and a light textural contrast.
- 2 tsp (8.4g) pure vanilla extract: Why this? Essential for that nostalgic, floral aroma we love in dough.
- 2 tbsp (30g) whole milk: Why this? Replaces the liquid lost by omitting eggs and binds the dough.
- 1/2 cup (90g) mini semi sweet chocolate chips: Why this? Mini chips ensure a better distribution of chocolate in every single bite.
| Original Ingredient | Substitute | Why It Works |
|---|---|---|
| Unsalted Butter | Coconut Oil (Solid) | High fat content. Note: Adds a subtle tropical flavor and remains firm when chilled |
| Whole Milk | Oat Milk | Similar viscosity. Note: Great for keeping the dough flavorful and dairy-free |
| All Purpose Flour | Heat treated Oat Flour | Naturally sweet and gluten-free. Note: Results in a denser, slightly nuttier dough |
Required Tools for the Job
You won't need a lot of heavy machinery for this, but a few specific items make the process much smoother. I personally prefer using a stand mixer such as a KitchenAid for the creaming step because it incorporates air more consistently than mixing by hand. However, a sturdy handheld mixer works perfectly well too.
You will also need a baking sheet for heat treating the flour and a digital thermometer if you want to be precise about safety. A flexible silicone spatula is your best friend here for folding in the chocolate chips without crushing them.
Chef's Tip: If your kitchen is warm, freeze your chocolate chips for 10 minutes before folding them in. This prevents them from smearing and keeps the dough looking clean and sharp.
Detailed step-by-step Mixing Guide
- Heat treat the flour. Spread the 125g of flour onto a baking sheet and bake at 180°C (350°F) for about 5 minutes until it reaching 74°C. Note: This kills any bacteria while removing the raw taste.
- Cool and sift. Let the flour cool completely, then sift it into a bowl with the 3g of sea salt. Note: Sifting is vital because heat treating often creates small, hard lumps.
- Cream the fats. In your mixer, beat the 113g of softened butter with both 100g of brown sugar and 50g of white sugar. Cook 3 minutes until pale and fluffy.
- Add aromatics. Pour in the 8.4g of vanilla extract and continue mixing on medium speed.
- Incorporate liquids. Add the 30g of milk slowly, ensuring it fully emulsifies with the butter mixture.
- Combine the base. Turn the mixer to low and gradually add the flour and salt mixture. Mix until no white streaks remain.
- The final fold. Use a spatula to fold in the 90g of mini chocolate chips by hand.
- Final texture check. If the dough feels too soft, chill it for 15 minutes to allow the butter to firm up.
Fixing Common Dough Problems
Grainy or Sandy Texture
This usually happens when the sugar hasn't had enough time to interact with the moisture in the butter. If your dough feels like it has grit in it, you likely didn't cream the butter and sugar long enough. The friction of the mixer helps dissolve the crystals into the fat.
Dry and Crumbly Consistency
Heat treated flour can be thirstier than raw flour because the heat removes residual moisture. If your dough isn't holding together, you might need a tiny splash more milk. Add it one teaspoon at a time; you want a cohesive ball, not a sticky paste.
| Problem | Root Cause | Solution |
|---|---|---|
| Oily Surface | Butter was too warm/melted | Chill dough for 30 minutes, then re whip |
| Flat Flavor | Missing salt or low quality vanilla | Add a tiny pinch of salt or more extract |
| Dense/Heavy | Over mixing after adding flour | Mix flour only until just combined |
Common Mistakes Checklist:
- ✓ Always let the flour cool completely before adding it to the butter (prevents melting).
- ✓ Pat the brown sugar firmly into the measuring cup for accuracy.
- ✓ Use room temperature butter, not melted or cold from the fridge.
- ✓ Sift the flour after heating to ensure a velvety mouthfeel.
- ✓ Don't skip the salt; it's the key to making the flavors "pop."
If you love the flavor profile of this dough, you really should try making a Brownie Cookie Dough recipe for a more intense chocolate experience.
Fun Flavor Variations
- For a Sugar Cookie Edible Dough Recipe: Omit the brown sugar and use 150g of granulated white sugar instead. Replace the chocolate chips with colorful sprinkles and add a drop of almond extract for that classic bakery scent.
- For an Edible Cookie Dough Recipe for One: Simply divide all ingredients by four. You can heat treat the small amount of flour in a microwave safe bowl in 30 second bursts, stirring in between, until it reaches 74°C.
- Double Chocolate: Substitute 20g of the flour for high-quality cocoa powder for a deep, dark version of the base.
Decision Shortcut: If you want a richer flavor, use dark brown sugar instead of light. If you want a crunchier texture, use standard sized chocolate chips instead of minis. If you want a nutritious boost, fold in a tablespoon of ground flaxseeds.
Debunking Kitchen Myths
A common misconception is that "raw eggs are the only danger in cookie dough." In reality, raw flour is a raw agricultural product that hasn't been treated to kill germs like E. coli. Always heat treat your flour, even if you’re in a hurry.
Another myth is that you can just bake this dough if you change your mind. Because there are no leavening agents (like baking soda or powder) and no eggs for structure, these will just melt into a sugary puddle in the oven. This is strictly a "treat in-a bowl" situation.
Storage and Safety Guidelines
Storage: You can keep this dough in an airtight container in the fridge for up to 5 days. Because it contains milk and butter, it needs to stay chilled to remain wholesome.
Freezing: This dough freezes beautifully. I like to scoop it into small balls using a tablespoon and freeze them on a tray. Once solid, toss them into a freezer bag for up to 3 months. You can eat them straight from the freezer for a firm, fudge like snack.
Zero Waste: If you have leftover crumbs or small bits of dough, don't toss them! They are incredible when mixed into a batch of vanilla ice cream or used as a decadent layer in a yogurt parfait. You can even press the leftovers into a small tart shell for a quick, no bake dessert base.
Serving and Enjoyment Tips
There is something so satisfying about serving this in small glass jars for a dinner party. It feels much more sophisticated than eating it straight from the mixing bowl (though that’s perfectly fine too!).
If you want to go the extra mile, sprinkle a few extra flakes of sea salt on top right before serving to really accentuate the chocolate.
For a fun family activity, set out small bowls of different toppings like crushed pretzels, peanut butter chips, or dried cranberries. This allows everyone to customize their own portion. It’s a confidence building way to get kids involved in the kitchen without worrying about hot ovens or raw eggs.
Enjoy the process and the flavorful results!

Recipe FAQs
What are the essential ingredients for edible cookie dough?
Flour, sugar, butter, milk, and chocolate chips are the staples for this recipe. You must use heat treated flour to eliminate pathogens, as you skip the baking step.
How do you make cookie dough that is safe to eat raw?
Heat treat the flour to 74°C (165°F) before combining any ingredients. This thermal process kills any potential bacteria lurking in the raw grain.
How do you make cookie dough with 3 ingredients?
You can simplify it using cream cheese, powdered sugar, and chocolate chips. This version skips the flour entirely for a soft, truffle like texture, but it won't taste like traditional dough.
Is edible raw cookie dough healthy?
No, it is an indulgent treat, not a health food. While you control the quality of fats and skip raw eggs, it remains high in sugar and butter.
Can I substitute regular flour for heat treated flour in edible dough?
No, you must heat treat standard flour before consumption. The risk of E. coli contamination in raw grain is significant, even if the dough looks perfect.
How can I make the dough taste less like raw wheat and more baked?
Toast the flour gently before cooling and sifting it. This slight toasting deepens the flavor profile, mimicking the subtle caramelization achieved during actual baking.
What is the best fat to use if I want a very firm dough, similar to a no-bake cookie?
Use coconut oil or cold, firm shortening instead of softened butter. If you try making a larger batch, understanding fat ratios here will also help you achieve the perfect texture in the Classic Cream Wafer recipe.
Safe Edible Cookie Dough
Ingredients:
Instructions:
Nutrition Facts:
| Calories | 578 kcal |
|---|---|
| Protein | 4.8 g |
| Fat | 29.8 g |
| Carbs | 75.3 g |
| Fiber | 1.8 g |
| Sugar | 54.2 g |
| Sodium | 312 mg |
