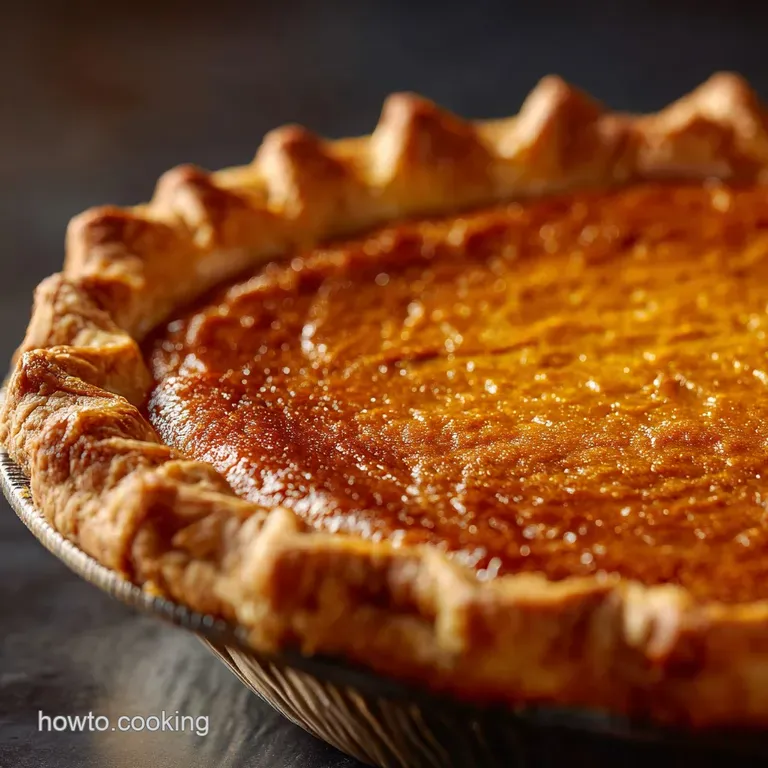
Pumpkin Pie with Silky Filling and Flaky Butter Crust
- The Ultimate Pumpkin Pie Recipe: A Guide to Custard Perfection
- The Science of Silky: Why This Filling Isn't Grainy
- Pantry Checklist: Essential Ingredients for the Best Pumpkin Pie
- From Dough to Dessert: Step-by-Step Baking Instructions
- Troubleshooting Your Perfect Pumpkin Pie: Avoiding Common Baking Problems
- Keeping It Fresh: Storage, Freezing, and Reheating Guide
- Elevating Your Dessert: The Best Pairings for Classic Pumpkin Pie
- Recipe FAQs
- 📝 Recipe Card
The Ultimate Pumpkin Pie Recipe: A Guide to Custard Perfection
Can you even smell it? That moment when the warm cinnamon hits the oven door, mingling with that deep, sweet clove aroma? This Homemade Pumpkin Pie is the very essence of autumn, rich with nutmeg and ginger, and boasting a filling so incredibly silky it practically pours onto your fork.
Forget those sad, crumbly edges and grainy custards you might remember from potlucks past. We’re making pie that sings.
Honestly, this recipe is a lifesaver, especially during the hectic holidays. The filling takes about ten minutes to whisk together, total. The true work is in the crust, but even if you cheat and use a store-bought shell (I won't tell anyone, promise), the filling alone is worth the price of admission.
It’s cheap, classic, and always the biggest crowd pleaser on the table.
We’re ditching all the frustrating pitfalls no soggy bottoms, no cracked surfaces, and definitely no bland flavor profile. I've tweaked the ratios over years of testing, and now I'm giving you the perfect blueprint.
Let’s crack on and make the best Flaky Butter Crust Pumpkin Pie you have ever tasted.
The Science of Silky: Why This Filling Isn't Grainy
Getting that perfect, smooth Silky Pumpkin Pie Filling isn't about magic; it's about smart ratios and temperature control. We are aiming for a set custard, not baked scrambled eggs. That grainy texture people complain about? That’s almost always overcooked protein.
Why Most Pumpkin Pies Fail (And How We Fix It)
Most recipes load up on whole eggs, which contain a lot of albumen (the white stuff). When albumen overcooks, it seizes and turns grainy. Our solution is simple. We use two whole eggs for structure, but then we boost the richness with one extra egg yolk.
This yolk adds stabilizing fat and lecithin, giving you that incredible mouthfeel without the textural risks. It's truly revolutionary.
The Secret Ingredient for Depth of Flavor (Black Pepper Whisper)
I know, I know. Black pepper in a pie? Trust me on this. That tiny, almost imperceptible ⅛ teaspoon of freshly ground black pepper acts as a molecular alarm clock for the sweet spices it amplifies the cinnamon and nutmeg dramatically.
You won't taste heat, but you will notice a depth and warmth that professional pastry chefs rely on. It's the simple trick that takes this pie from good to spectacular.
Yield and Preparation Timeline
This recipe yields one perfect 9 inch deep dish pie, easily serving 8 happy people. If you are baking for a big crowd, you might want to try scaling this into two smaller pies or maybe checking out my recipe for Mini Pumpkin Pies: Flaky Crust Individual Desserts for Fall for easy portions. Remember that most of the 6 hour total time is just passive chilling and setting. Do not rush the cooling.
The Custard Ratio: Optimizing Egg Yolks for Richness
We talked about the extra yolk, but let's reiterate why the fat content matters. Fat helps distribute flavor, resulting in a more homogenous filling. The heavy cream combined with the extra yolk prevents that watery separation you sometimes see in poorer pies.
This is how you achieve true, lasting richness in your American Pumpkin Pie Filling .
Controlling Moisture: Pre-Baking the Pumpkin Puree
While the formal instructions don't include this, if you are using a puree that seems particularly watery, you need to fix it. Excess moisture equals a weak, cracked custard. You can gently cook the puree in a saucepan for about five minutes over medium heat to drive off some water before mixing the filling.
I only do this if I'm using homemade puree, but it’s a brilliant hack.
The Role of Brown Sugar vs. Granulated Sweeteners
We use a mix of both for the best result. Brown sugar brings molasses, which is essential for that sticky, deep autumnal flavor we associate with the season. Granulated sugar, however, dissolves faster and helps the custard set cleanly. Using both ensures complex flavor and great texture.
Pantry Checklist: Essential Ingredients for the Best Pumpkin Pie
The best pie starts with the best ingredients. Don't skimp on quality spices, please. Nothing ruins a beautiful dessert faster than stale spice cabinet contents!
Crust Details: Why Cold Butter is Non-Negotiable
If you’ve ever followed my guidance for Homemade Apple Pie: The Flakiest All-Butter Classic Recipe , you know the mantra: COLD BUTTER . The butter must be ice-cold because when it hits the hot oven, the melting pockets of fat create steam, forcing the dough layers apart. That’s how you get flakes!
Puree Breakdown: Canned vs. Roasting Fresh Pumpkin
Honestly, for consistency, canned 100% pumpkin puree is king. It has a stable, consistent moisture level, whereas fresh roasted pumpkin often holds too much water, requiring that extra step of cooking it down.
Make sure the label says "100% Pure Pumpkin" and not "Pumpkin Pie Mix" that stuff is pre-spiced and sweetened.
Dairy Choices: Evaporated Milk vs. Heavy Cream
I prefer heavy cream (or double cream) for its pure, high fat richness. However, many classic recipes call for evaporated milk. Both work, but cream gives a slightly silkier, higher end result.
| Ingredient | My Preference | Viable Substitute |
|---|---|---|
| Pumpkin Puree | Canned (Libby's is great) | Canned butternut squash puree |
| Heavy Cream | Heavy Cream (35% fat) | Evaporated Milk (12 oz can) or Full Fat Coconut Milk |
| Brown Sugar | Light Brown Sugar | Dark Brown Sugar (adds deeper molasses flavor) |
| Flour | All-Purpose | gluten-free Blend (look for high Xanthan Gum content) |
| Spice Blend | Individual Spices | 2 ½ tsp store-bought Pumpkin Pie Spice |
Spice Cabinet Deep Dive: Creating the Signature Autumn Blend
Do yourself a favor and grate your nutmeg fresh. The aroma is incomparable. We rely heavily on cinnamon and ginger here, which provide the bulk of the warmth, but cloves and that crucial black pepper add the finishing complexity.
Chef’s Note: Stale spices are invisible spices. If your jar of cinnamon smells muted, buy a new one. It makes that much difference in your pie.
From Dough to Dessert: step-by-step Baking Instructions
Ready to conquer that soggy bottom problem forever? Let’s get cooking.
Phase I: Preparing the Flaky All-Butter Pie Crust
First, combine the dry ingredients for the crust in a food processor or bowl. Next, cut in the butter until it looks like coarse sand mixed with some pea-sized pieces. Now for my favorite trick: Drizzle in your ice water, replacing some of it with a tiny bit of vodka if you have it.
Vodka evaporates completely and stops the flour from over developing the tough gluten. Bring the dough together until it just holds, then flatten it into a disc, wrap it up tight, and chill for at least 90 minutes.
Phase II: Blind Baking the Pastry Shell (The Soggy Bottom Prevention)
Preheat your oven to 400°F (200°C). Roll out the chilled dough and carefully fit it into your pie dish, making sure it sits flush against the bottom. Trim and crimp those edges beautifully.
Crucial step incoming: Freeze the entire lined dish for 15 minutes before baking. This stops the butter from melting out prematurely and prevents shrinkage. Line the frozen crust with parchment paper, fill with weights, and bake for 15 minutes.
Remove the weights, reduce the oven to 375°F (190°C), and bake for another 5– 8 minutes until the crust base looks dry and lightly golden.
Phase III: Mixing and Pouring the Silky Custard
While the crust cools slightly, get your filling ready. Whisk the whole eggs and the extra yolk until they are slightly lighter in color. Mix in both sugars, the heavy cream, and the salt until the sugar is mostly dissolved.
Then, whisk in all those wonderful spices cinnamon, ginger, nutmeg, cloves, and that pinch of black pepper. Finally, stir in the pumpkin puree until everything is perfectly uniform and smooth. Pour this liquid gold into your cooled, blind baked crust.
Phase IV: The Final Bake and Cooling Requirements
Place the pie on a sturdy baking sheet for easy handling and protection against spills. Start the bake at 375°F (190°C) for 15 minutes; this sets the outer edges quickly.
Reduce the heat immediately to 325°F (160°C) and continue baking for 40– 50 minutes. The pie is done when the edges look puffy and set, but the center still retains a gentle jiggle like unset gelatin.
You’re looking for that perfect Silky Pumpkin Pie Filling texture. Remove it and cool it completely on a wire rack for a mandatory 4 hours.
Troubleshooting Your Perfect Pumpkin Pie: Avoiding Common Baking Problems
Listen, we all make mistakes. I once forgot to blind bake a crust entirely and served an absolute soggy bottom mess. Learn from my pain!
The Jiggle Test: Knowing When Your Custard Is Done
The jiggle test is everything. When you gently nudge the edge of the pie, the center should wobble slightly, but the movement shouldn't reach the edges. If the whole pie looks liquid, it needs more time. If there is no wobble at all, it's likely overcooked, which leads us to... cracking.
Preventing Crust Shrinkage and Browning Too Early
The two-step chilling process (before rolling, and before blind baking) handles shrinkage beautifully. To prevent the crust edge from burning during the long bake, cut thin strips of aluminum foil and gently wrap them around the crimped edges after the initial 15 minute over high heat bake.
Remove them for the last 10 minutes if you want a deeper color.
Fixing a Filling That Cracks: Temperature Management
A cracked pie happens when the filling overcooks and sets too much, or when it experiences a rapid temperature shock. If you notice a crack forming, turn the oven off immediately, prop the door open with a wooden spoon, and let the pie cool down slowly inside the cooling oven for 30 minutes before moving it to the wire rack.
Gradual cooling is key.
Keeping It Fresh: Storage, Freezing, and Reheating Guide
So, the feast is over, and you have slices left. Don't worry, this pie keeps beautifully!
Safe Refrigeration Times for Leftovers
Once the pie has fully cooled at room temperature (about 4 hours), it must be refrigerated. Cover it loosely with foil or plastic wrap. This pie is safe and still tastes fantastic for 3 to 4 days in the fridge.
Can You Freeze Pumpkin Pie? (A Defrosting Caution)
Yes, you absolutely can freeze Homemade Pumpkin Pie , especially if you're making ahead for the holidays alongside your Thanksgiving Cake Pops: Easy Spiced Pumpkin Bites for Your Holiday Table . Wrap the cooled pie tightly in plastic wrap, then a layer of foil. It keeps well for up to 1 month. To defrost, unwrap it entirely and place it in the refrigerator overnight. Reheating is generally not necessary, as pie is best served chilled.
Elevating Your Dessert: The Best Pairings for Classic Pumpkin Pie
The best thing about pie is what you put on top!
Whipped Cream Alternatives: Maple Mascarpone vs. Vanilla Bean
While plain whipped cream is always welcome, elevate your dessert game effortlessly. Try whipping heavy cream with a teaspoon of pure maple syrup and a dollop of mascarpone cheese. The mascarpone makes it dense, rich, and slightly tangy.
Alternatively, scrape the seeds from half a vanilla bean into your whipping cream for an unparalleled floral aroma. Serve this pie slightly chilled for the best contrast.

Recipe FAQs
How do I know when the pie is perfectly set without overbaking the custard?
The pie is ready when the edges appear set and firm, but the center (about a 1 inch circle) still slightly jiggles when gently tapped. Overbaking causes the custard to curdle and crack, so remove it promptly when the jiggly center stage is reached.
Remember that the residual heat will continue to set the filling as it cools completely.
My crust edges are burning before the filling is fully cooked. What should I do?
This is a common issue with long, slow baking times, particularly when using a butter crust. About halfway through the bake (30-40 minutes), create a protective ring of aluminum foil to shield the exposed pastry edges.
Gently place the foil ring over the pie, ensuring it covers only the crust, and continue baking until the filling is done.
Why did my pumpkin pie filling crack while cooling?
Cracking usually occurs due to overbaking, which causes the outer edges of the filling to set tightly before the center. It can also happen if the pie cools too rapidly due to a sudden temperature change.
Ensure you remove the pie when the center is still slightly wobbly and let it cool slowly at room temperature, away from drafts or open windows.
How can I prevent a soggy bottom crust, especially with a liquid custard filling?
The absolute best defense against a soggy crust is thorough blind baking and a high fat crust, as outlined in the recipe. Prick the shell with a fork before weighing and baking it until the dough is fully set, not just partially baked.
You can also brush the blind baked shell with a thin layer of egg white after removing the weights to create a final moisture barrier before pouring in the filling.
Can I substitute fresh pumpkin puree for the canned variety?
Yes, but be aware that fresh puree often holds more water than commercial canned pumpkin. You must drain or gently cook down your fresh puree until it is very thick and almost paste like before incorporating it into the recipe.
If the fresh puree is too watery, it will compromise the custard’s ability to set firmly.
What is the best way to store leftover pumpkin pie, and can I freeze it?
Because the filling is custard based, pumpkin pie must be refrigerated promptly after cooling. Cover the cooled pie loosely with plastic wrap and store it for up to 3 to 4 days for optimal safety and quality.
While texture may slightly suffer, individual slices can be wrapped tightly in plastic and foil and frozen for up to one month.
Can this recipe be adapted to be dairy-free or vegan?
For a rich, dairy-free adaptation, substitute the heavy cream with full fat canned coconut milk, ensuring you scoop only the thick cream layer from the top of the can. Achieving a fully vegan custard requires replacing the high ratio of egg yolks with a commercial vegan egg replacer or a mixture of agar agar and cornstarch to provide the necessary binding structure.
Silky Pumpkin Pie Flaky Crust Recipe
Ingredients:
Instructions:
Nutrition Facts:
| Calories | 738 kcal |
|---|---|
| Protein | 13.1 g |
| Fat | 40.4 g |
| Carbs | 84.5 g |
