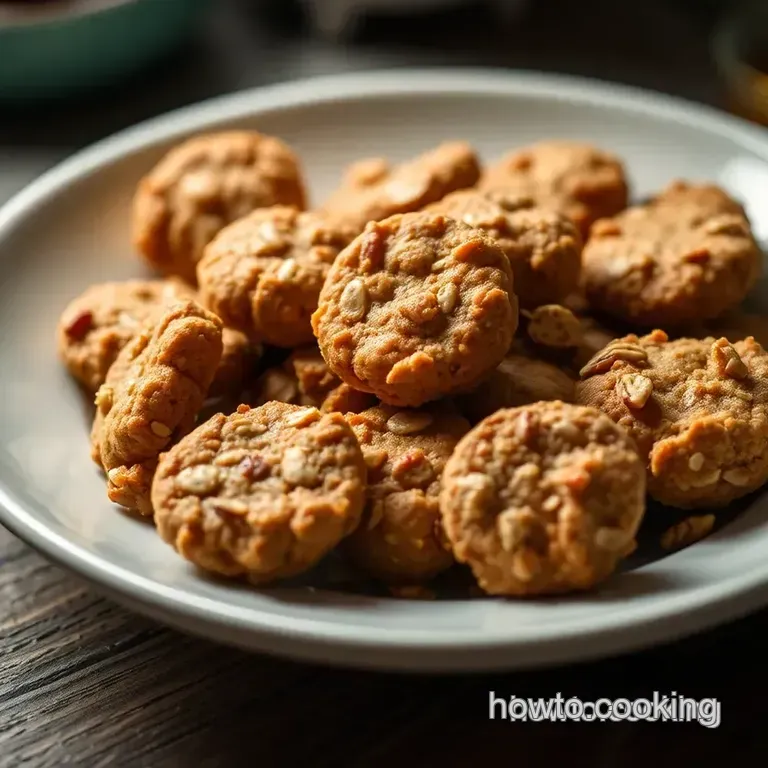
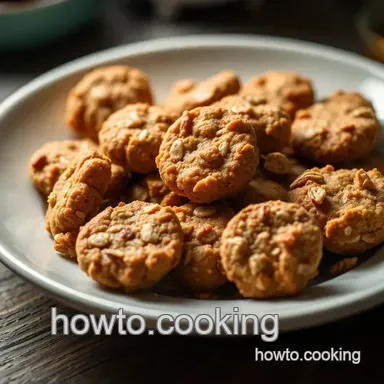
Soft & Chewy Dog Biscuits: a Tail-Wagging Treat!

Treating Your Pup Right: The Soft Dog Biscuit Recipe
Ever had one of those days where everything is just a little off? well, a few months ago, my dog charlie was having one of those days.
He wasn’t his usual bouncy self just laying around like a soggy noodle. i thought, “what can i do to lift his spirits?” then it hit me: i need a soft dog biscuit recipe ! spoiling him with some homemade goodness seemed like the perfect fix.
And let me tell you, those biscuits brought charlie back to life and my kitchen smelled amazing!
What’s the Scoop on Soft Dog Biscuits?
These soft dog biscuits have a history rooted in love and simplicity. initially, folks made dog treats out of whatever they had lying around old biscuits, leftover gravy, you name it.
Today, homemade dog treats are all the rage among pet parents, and it's no wonder! with everything from homemade milkbones to puppy biscuits homemade , the options are endless.
Plus, they’re becoming super popular at dog parties. i mean, who doesn’t want their canine crew munching on fresh made goodies?
Now, let’s get real for a second. this recipe isn’t rocket science it’s more like making cereal with milk! you can whip these biscuits up in about 45 minutes , and they yield around 24 tasty treats.
Easy peasy, right? the cost is also super budget friendly, especially compared to those pricey store-bought treats. honestly, what's not to love?
The Good Stuff: Benefits of Homemade Dog Treats
Why go the homemade route, you ask? well, the key benefits are as clear as day. for starters, these soft dog biscuits pack in healthy ingredients like whole wheat flour and peanut butter, so they’re a lot better for your buddy than that processed junk from the store.
And get this there’s no xylitol in my recipe! that’s a biggie because xylitol is a no-no for furry friends.
Plus, these biscuits have a long shelf life. if your pooch can resist them (spoiler: they probably can't), you can store them up to a week on the counter or a month in the freezer.
Talk about dog treats long shelf life! and don’t forget, they’re perfect for those special occasions when you want to do something nice for your four legged buddy.
You can even get creative with icing if you’re feeling crafty dog treats with frosting , anyone?
When you take a bite of these treats, you'll see why they beat the competition. they’re soft and chewy, unlike those hard-as-a-rock crispy dog treats homemade.
Seriously, these are the kind of snacks that make your pooch feel like the king or queen of the backyard!
Ready to Get Baking?
Before we dive into the ingredient list, let’s chat about prep. this may seem a bit simple, but the magic happens when you start mixing everything together.
Just remember: take your time and enjoy the process. you might even want to let your pup give some supervision!
Think you’re ready? Awesome! Grab your mixing bowls and bakeware, and let’s make some tail wagging magic happen. Those furry faces are going to thank you for it later!
In the next section, we'll cover the ingredients you need to make these scrumptious dog biscuits. So, stay tuned! Trust me; you don’t want to miss how to get those yummy goodies into your pup’s belly!
Essential Ingredients Guide
Creating the perfect soft dog biscuit recipe sounds like a piece of cake, or should I say, "piece of dog biscuit"? But before we dive into baking those tail wagging treats, let’s talk about the essential ingredients that’ll make your canine culinary adventure a howling success!
Premium Core Components
First things first, having quality ingredients is key. Here’s what you need:
- Whole Wheat Flour : Use 2 cups (250g) for that lovely structure. It's commonly found at any grocery store and is great for digestive health.
- Unsweetened Peanut Butter : Grab ½ cup (120ml) , making sure it’s xylitol free. This nutty goodness is a dog favorite! Check the label. Genuine peanut butter is crucial here.
- Low-Sodium Chicken or Beef Broth : 1 cup (240ml) brings in the savory flavors that will make tails wag. A good broth can also be the magic that elevates your biscuits.
- An Egg : One large beaten egg binds everything together.
- Rolled Oats : We’re talking about ½ cup (50g) of wholesome oats. Dogs love 'em, and it adds a nice texture.
- Honey : Optional! A spoonful can add sweetness to the mix.
Now, these ingredients have their own lifespan and storage needs. keep them fresh by checking the shelf life . for instance, peanut butter stays fresh for several months if unopened; once opened, try to use it within a month or two.
Store everything in an airtight container to ward off those pesky pantry pests!
Signature Seasoning Blend
Alright, friends, while dog treats don’t need a wild mix of spices like our dinners, you can jazz things up! peanut butter is a natural flavor enhancer on its own, but you might want to consider adding some pumpkin puree for added nutrition.
Trust me, dogs flip for it, and it’s a fantastic seasonal option during fall.
Smart Substitutions
Let’s face it: life gets busy, and we don’t always have everything on hand. that’s where smart substitutions come in.
No peanut butter? no problem! try using applesauce instead for those peanut free dog treats . or if you're fresh out of eggs, you can replace it with flaxseed mixed with water just one tablespoon of ground flaxseed with three tablespoons of water.
What about dietary restrictions? if your pup has sensitivities, you could use gluten-free flour for an easy switch or some homemade beef broth if your dog prefers that meaty flavor.
Just be mindful to check the ingredients!
Kitchen Equipment Essentials
Before you roll up your sleeves, let’s discuss must have tools that will make your baking experience smooth sailing. you’ll definitely need mixing bowls and a rolling pin.
A dog bone shaped cookie cutter keeps it fun!
Got kids? get them involved in cutting out the shapes! a baking sheet and some parchment paper will ensure those biscuits bake evenly and come off without sticking.
Plus, less mess means more fun!
Oh, and don’t forget to have a good mixing spoon —better yet, enlist your pup to “supervise” the mixing! I promise they’ll be your best cheerleader.
A Tail Wagging Wrap-Up
There you have it, folks! gathering these essential ingredients and tools can make whipping up your soft dog biscuit recipe an enjoyable outing.
Let’s transition to the fun part the step-by-step instructions that’ll have your furry friend drooling in no time.
Do you have any fun dog treat recipes up your sleeve? whether it’s homemade milkbones or experimenting with crispy dog treats homemade , let’s get cooking! your pup will thank you, and you’ll love how making treats at home can cement that special bond.
Puppy's gonna be living their best life! ready? let’s dive in!
Get Ready to Whip Up Some Doggie Delights!
So, you've decided to treat your furry best friend to some homemade goodies? awesome choice! let me tell ya, making a soft dog biscuit recipe is super easy, and it’s a great way to show your pooch how much you care.
Plus, it’ll save you a trip to the pet store, and you can customize it to all those picky tastes dogs can have.
Essential Preparation Steps
First things first, let’s get that kitchen ready. it's time for some mise en place , which sounds fancy but just means getting everything organized before you start.
Measure out your 2 cups of whole wheat flour and have that ½ cup of peanut butter ready to go.
Don’t forget about your 1 cup of broth the flavor booster here that's vital for yummy biscuits.
Now, time management is key! trust me, you don’t want to lose track and burn those treats. set your oven to 350° f ( 175° c) right away so it’s hot when you’re ready to bake.
And always keep an eye on the timer those biscuits only need about 20 minutes to get golden!
Being organized is crucial too: have your mixing bowls, rolling pin, and dog bone cookie cutter within reach. safety is a must, so make sure you’ve got everything you need, including oven mitts for when it’s time to take those biscuits out.
step-by-step Process
Alright, let’s break it down step-by-step. Here’s how to get started:
- Preheat that oven! Set it to 350° F and let it warm up while you mix.
- Mix Dry Ingredients : In one bowl, toss in those 2 cups of whole wheat flour and ½ cup of rolled oats . Mix it up!
- Wet Ingredients Time : In another bowl, whisk together your ½ cup of peanut butter , 1 cup of broth , and 1 egg . Optional: add a touch of honey if you want.
- Combine the Mixes : Pour your wet mixture into the dry stuff and stir until it makes a soft dough.
- Rest Time : Let that dough chill for about 10 minutes it’s gonna firm up just right.
- Roll It Out : On a floured surface, roll the dough to about ½ inch thick .
- Cut Out Biscuits : Use your dog bone cutter to make those adorable shapes.
- Bake 'Em Up : Place them on a lined baking sheet and pop it in the oven. Bake for 20 minutes or until those edges are golden brown.
- Cool Down : Let your pooch’s treats cool on a wire rack. The yummy scent is gonna have your dog drooling!
Expert Techniques & Success Strategies
Now, let’s talk expert tips. when you’re rolling out that dough, try to get it even; it helps with cooking uniformity.
If it’s too sticky, sprinkle a lil’ more flour on it. the last thing you want is sad, crumbly dog treats!
Also, keep an eye out for doneness those edges should be golden brown. And don't worry if you accidentally turn one into a crispy dog treat instead; they’ll love it anyway!
Watch out for some common mistakes! overbaking is a heartbreaker, so pay attention to the timer. not checking if the dough is too sticky can lead to a mess.
And remember, freshness is key use fresh ingredients to keep those biscuits tasty.
The Fun Part: Flavor Variations
Feel like mixing it up a bit? add some mashed banana or carrots to up the flavor game. if your pup has food sensitivities, use gluten-free flour.
Seriously, the possibilities are endless! how about throwing in some pumpkin puree? that’ll make those healthy dog biscuits even healthier.
Oh, and if you want to jazz things up for your pup, consider making dog treats with frosting yep, it’s a thing! just some plain greek yogurt as frosting can make those treats look extra special for your furbaby.
With these tips, you’ll have a batch of soft dog biscuits perfect for the happiest hound on the block! Trust me; your dog will be barking for more.
Additional Information
Ready to dive deeper? i’ve got more fun dog treat recipes up my sleeve! stay tuned for more awesome dog-friendly delights, each one as tasty as your furry friend deserves.
After all, every day is a tail wagging moment when you put love into homemade treats!
Additional Recipe Information for Soft & Chewy Dog Biscuits
When it comes to treating your pup right, nothing beats a homemade soft dog biscuit recipe. i’ve been there: standing in the kitchen, my dog staring at me with those big puppy eyes, and i just know i gotta whip up something special.
So, let’s dive into some pro tips, presentation pointers, and a few ideas to keep those tails wagging!
Pro Tips & Secrets
First off, use fresh ingredients ! seriously, it makes a world of difference. with dog treats, you wanna start with quality essentials.
For this soft dog biscuit recipe, opt for unsweetened peanut butter (make sure it’s xylitol free, folks!) and low-sodium broth for a flavor kick.
Saving time? here’s a nifty trick: mix your dry ingredients in advance. got a busy week ahead? you can mix up the flour and oats , pop them in a baggie, and have your dog biscuit base ready to go! easy peasy.
Now, let’s talk flavors. if you’re feeling adventurous, try adding pumpkin puree or a hint of cinnamon . it’ll have the pups drooling! and about that presentation?
a simple sprinkle of oats on top takes your biscuits from “meh” to “wow!” perfect for when you wanna impress the neighbors or your pup’s playdate.
Perfect Presentation
Okay, here’s where you can really have some fun and show off your culinary chops. when you roll out your dough, go for about half an inch thick.
That gives you a nice soft and chewy texture. and when you cut them, use bite sized shapes. bone shapes are a classic, but stars and hearts look super cute too!
For garnishing? consider a drizzle of dog-safe icing yes, it’s a thing! just mix some plain yogurt and a bit of peanut butter for a tasty topping that looks paws itively fantastic.
Wanna get fancy? throw in some colorful veggies for a pop of color next to those biscuits. it’s all about that visual appeal; you eat with your eyes first, right?
Storage & make-ahead
Don’t you fret if you can’t serve all 24 biscuits at once (yes, this recipe yields about 24). these treats are perfect for storage! just pop them in an airtight container at room temp for up to a week, or freeze 'em for up to three months.
When you’re ready to serve those frozen goodies, just let them thaw at room temperature for a bit. simple reheating instructions are key: nuke ‘em for about 10 seconds in the microwave if your pup prefers warm treats.
Trust me, it feels extra special!
Creative Variations
Let’s say your pup is feeling a bit fancier; the world is your oyster! you can adapt flavors think beef broth instead of chicken or even do a combo of both.
Have a pup with dietary restrictions? make flourless dog treats using pureed veggies and oats for a healthier twist.
Why stop there? seasons change, and so should your dog treats. how about adding cinnamon and apple in the fall or blueberries in summer? oh, and if you wanna give those vegan friends a shout out, you can easily make peanut free dog treats with almond flour.
Complete Nutrition Guide
You might be thinking: “but are these actually good for my pup?” great question! these soft dog biscuits are rich in protein (about 1g per biscuit ) and are a healthy alternative to store-bought options.
They’re low in sugar and sodium, making them a great option for your furry friends.
Keep in mind, though portion control is key. treats should make up no more than 10% of your dog’s daily calories.
So, spreading the love with these homemade goodies means your dog gets a healthy and delicious reward without overindulging.
Wrap Up
So there you have it tips, tricks, and a whole lotta love packed into these soft dog biscuits! your furry friend deserves the best, and with this recipe, you’ll see those happy tails wagging in no time.
Look into into this adventure of cooking for your pup after all, they’re just as much family as anyone else. happy baking, and here’s to the most tail wagging treats ever! 🐾
Frequently Asked Questions
Can I use a different type of flour in this soft dog biscuit recipe?
Absolutely! While the recipe calls for whole wheat flour, you can substitute it with all-purpose flour or a gluten-free flour blend. Just keep in mind that the texture might vary slightly, and always check if your dog has any food sensitivities.
What can I do if my dough is too sticky?
If you find the dough too sticky to roll out, simply add a little more flour until it's manageable. Aim for a soft, slightly tacky consistency better a bit sticky than too dry!
How should I store the leftover soft dog biscuits?
To keep your biscuits fresh, store them in an airtight container at room temperature for up to a week. If you want to save them for longer, pop them in the freezer just be sure to separate them with parchment paper to prevent sticking!
Can I add other ingredients or variations to the soft dog biscuit recipe?
Definitely! Feel free to experiment with ingredients like mashed banana or pumpkin puree for added flavor and nutrition. Just make sure any additions are safe for your furry friend before tossing them in the mix!
Are these biscuits suitable for dogs with dietary restrictions?
Yes, these biscuits can be tailored to accommodate your dog's dietary needs! Use gluten-free flour for those with sensitivities or stick to low-sodium broth if salt is a concern. Always consult your vet if unsure about specific ingredients.
How do I know when the biscuits are fully baked?
Your soft dog biscuits should have golden edges and a firm texture. If they feel soft when you press them in the center, they might need a couple more minutes. Just keep an eye on them your nose will help detect when they're perfectly baked!
Soft Chewy Dog Biscuits A Tail Wagging Treat
Ingredients:
Instructions:
Nutrition Facts:
| Calories | 45 |
|---|---|
| Fat | 2g |
| Fiber | 0.5g |
