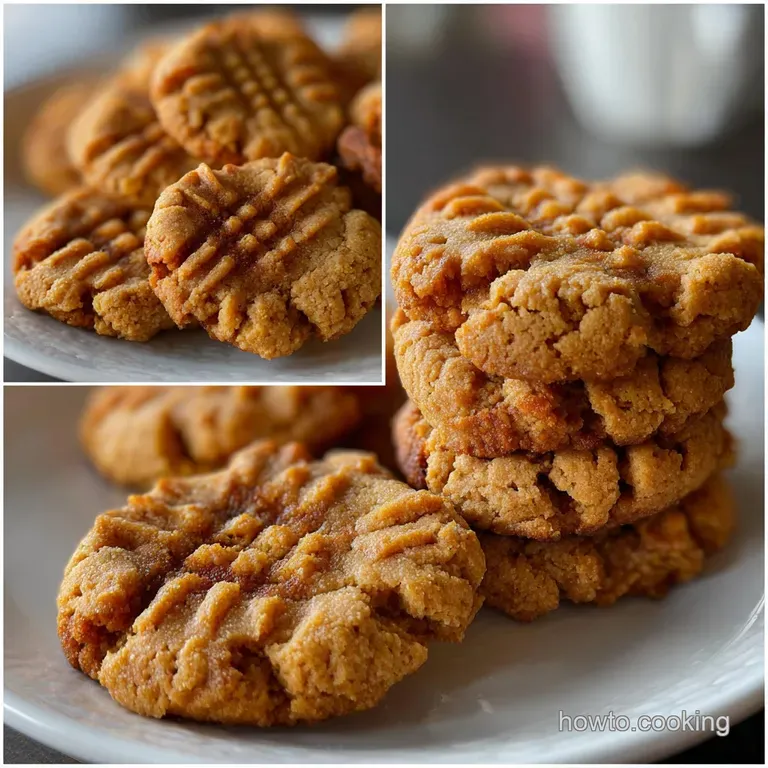
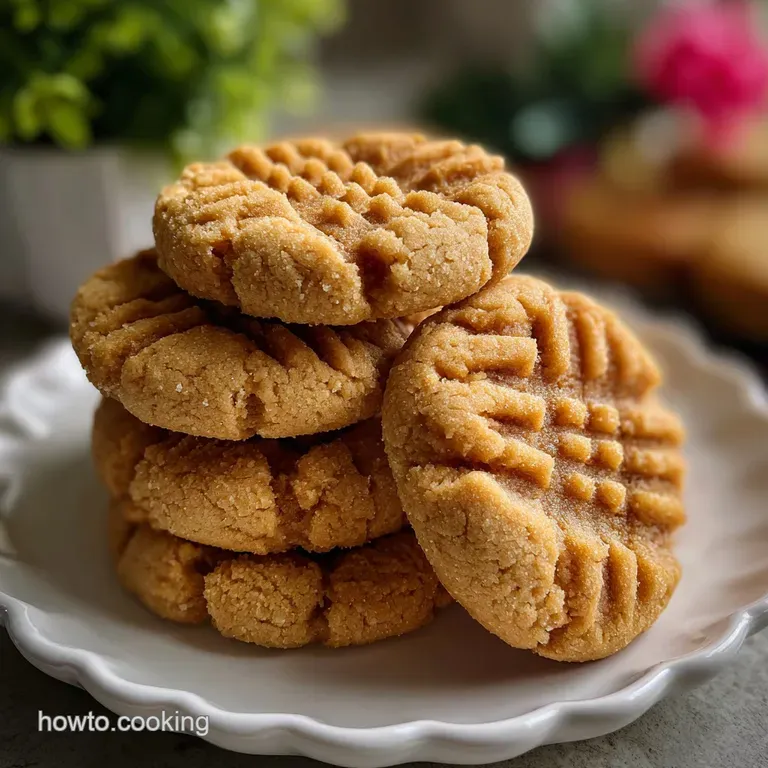
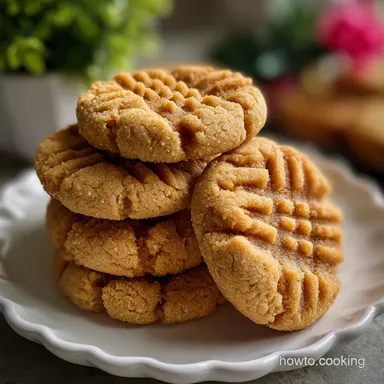
Peanut Butter Cookies: the Ultimate Chewy Classic
- Why These are The Best Classic Peanut Butter Cookies
- Essential Ingredients for Superior Peanut Butter Cookie Dough
- Baking the Iconic Criss-Cross Cookies: A Step-by-Step Guide
- Professional Baker's Secrets and Troubleshooting Your Bake
- How to Store and Preserve Freshly Baked Peanut Butter Cookies
- Delightful Pairings and Serving Ideas
- Recipe FAQs
- 📝 Recipe Card
Why These are The Best Classic Peanut Butter Cookies
That smell sweet, nutty, and slightly caramelized is pure comfort. When a batch of these classic Peanut Butter Cookies bakes, my whole house turns into a cozy bakery.
They are the perfect balance: slightly crisp edges leading to a thick, gloriously chewy center, defined by that iconic cross hatch pattern. Honestly, this is my emergency dessert recipe; it uses basic pantry staples, it’s cheap, and the active prep time is less than 15 minutes.
This version is designed to be utterly foolproof, perfect for when you need a decadent treat fast. Forget the dry, crumbly disasters you might have suffered through. We are focusing on maximizing that incredible chew.
Ready to learn the secrets to the best Peanut Butter Cookies you’ll ever make? Let’s crack on.
The History and Appeal of the Traditional Recipe
The criss cross isn't just decoration; it's a necessity! Unlike many drop cookies, traditional peanut butter dough is naturally heavy and dense due to the high fat content of the peanuts.
If you don't flatten the dough balls before baking, they won't spread properly, resulting in little, round dough bombs that are dense and unevenly cooked. The fork pattern ensures uniform baking and gives the cookie that signature flat, chewy texture we crave.
What Makes Our Recipe Stand Out (Chew vs. Crunch)
We are prioritizing chewiness in this recipe, which is the hallmark of truly superior Peanut Butter Cookies . Many recipes lean too heavily on granulated sugar, which results in a crunchier, thinner cookie.
We achieve the chew by using an even split between granulated sugar (for crisping the edges) and packed brown sugar (for moisture). The secret lies in the quality of the ingredients and, crucially, the temperature of your butter.
Prep Time and Yield Overview
This recipe is fast, provided you plan for the chill time. Active prep only takes about 15 minutes, which is just enough time to listen to one side of a great vinyl record.
We yield about 2 dozen cookies, which, depending on how many you "sample" straight off the cooling rack, might last a whole day.
The Role of Brown Sugar in Moisture Retention
Brown sugar is truly the MVP here because it contains molasses. Molasses is hygroscopic, meaning it loves water and holds onto moisture far better than white sugar does. By using plenty of packed brown sugar, we ensure that the finished Peanut Butter Cookies stay wonderfully tender and moist in the center for days after baking.
Without it, you end up with sandy, brittle cookies that dry out quickly.
Why Creaming Butter and Sugar is Non-Negotiable
Creaming is the first step where the "science" happens, and you absolutely cannot rush it. When you beat softened butter and sugar together for 3– 4 minutes, the sharp sugar crystals slice tiny air pockets into the fat. This process is called aeration.
Those air pockets expand in the oven, giving the cookies a light lift and that desirable tender, slightly crumbly texture. If you don’t cream long enough, your cookies will be dense and flat.
Understanding the Importance of Dough Chill Time
I know, I know waiting is the worst part. But trust me on this: chilling the dough is critical for successful Peanut Butter Cookies . Chilling solidifies the fats (butter and peanut butter), making them melt slower in the hot oven. This controls the cookie spread perfectly.
I once skipped the chill time because I was impatient, and the resulting cookies were paper thin puddles that ran into each other. Don't make my mistake! Thirty minutes is the minimum, and an hour is even better.
Essential Ingredients for Superior Peanut Butter Cookie Dough
The simplicity of this recipe means ingredient quality really shines through. Always use room temperature ingredients; cold eggs and butter will make your dough seize up and become crumbly.
Choosing the Right Peanut Butter (Natural vs. Processed)
This is the big one. I highly recommend using natural, unsweetened creamy peanut butter. Why? It tends to be looser and doesn't contain the stabilizers and added sugars found in brands like Jif or Skippy. Those processed butters can often result in dry, crumbly dough that doesn't spread right.
If you absolutely must use stabilized peanut butter, reduce your flour measurement by 1 2 tablespoons.
Flour, Leavening, and Salt Ratios for the Ideal Spread
We use both baking soda and baking powder in this Peanut Butter Cookies recipe . Baking soda promotes spread (essential for chewy cookies) while reacting with the brown sugar, which is slightly acidic. Baking powder adds vertical lift, keeping the center slightly thick and chewy.
A good measure of salt is crucial, too, as it balances the intense sweetness and nutty richness.
Smart Substitutions for Dairy and Eggs
Life happens, and sometimes you're missing a key ingredient. Don't panic!
| Ingredient | Substitute Option | Notes |
|---|---|---|
| Unsalted Butter | Solid vegetable shortening | Results in a slightly taller, softer cookie. |
| Large Egg | 1/4 cup applesauce or a flax egg (1 Tbsp flaxmeal + 3 Tbsp water) | If making Peanut Butter Cookies No Eggs , flax eggs work best for binding. |
| Brown Sugar | Granulated sugar + 1 tsp molasses per 1 cup | If making Peanut Butter Cookies Without Brown Sugar , this is the trick to retain moisture. |
| All-Purpose Flour | 1:1 gluten-free Baking Blend (with Xanthan Gum) | Ensure accurate measurement. |
Baking the Iconic Criss Cross Cookies: A step-by-step Guide
Baking these classic Chewy Peanut Butter Cookies is highly satisfying. Pay attention to the dough’s texture at every stage.
Step 1: Mixing and Preparing the Dough
First, preheat your oven to 350°F (175°C) and line two trays. Next, whisk your dry ingredients (flour, salt, soda, powder) in a separate bowl. This ensures the leavening agents are perfectly distributed.
Now for the star show: cream the softened butter, granulated sugar, and brown sugar on medium speed until the mixture looks visibly paler and fluffy about four minutes of whipping. This is where the magic air gets trapped! Then, beat in the peanut butter, egg, and vanilla until just combined.
Finally, slowly stream in the flour mixture, stopping the mixer the very second the last streaks of flour vanish.
Step 2: Forming the Uniform Dough Balls
The key to even baking is uniform size. Using a 1.5 tablespoon cookie scoop is a game changer; it ensures every cookie bakes identically. Roll the scooped dough gently between your palms to smooth out any rough edges, creating a perfect sphere. Place them about two inches apart on your prepared trays.
Chef’s Note: Before rolling, make sure your dough has been chilled for at least 30 minutes. If the dough feels sticky or oily, it will melt fast in the oven. If this happens, give it another 15 minutes in the freezer.
Step 3: Mastering the Signature Fork Pattern
This step is fun, but easy to mess up if you press too hard. Take a standard dinner fork and gently press the tines onto the dough ball, flattening it slightly. Turn the fork 90 degrees and press again to complete the cross hatch.
Pro Tip: Dip the fork tines in a bowl of granulated sugar between cookies. This prevents the dough from sticking to the fork and gives the cookies a beautiful sparkle once baked.
Step 4: Optimal Baking Times and Cooling Process
Bake for 10– 12 minutes, rotating the trays halfway through for even color. You want the edges to look nicely set and golden, but the center should still look slightly pale and maybe even a little puffy. When they come out of the oven, they will seem underdone. That’s perfect!
Let the cookies rest directly on the hot tray for five full minutes. This carry over cooking is essential for setting the center and ensures your Peanut Butter Cookies don’t fall apart when you move them. After five minutes, transfer them to a wire rack to cool completely.
Professional Baker's Secrets and Troubleshooting Your Bake
Why Did My Cookies Spread Too Much?
This is the most common issue when making Peanut Butter Cookies . There are three main culprits:
- Warm Butter: Your butter might have been too warm when you started, or you over creamed it, which breaks down the fat structure.
- Skipped Chill Time: The dough must be cold before it hits the oven.
- Too Much Leavening/Too Little Flour: Double check your measurements, especially the flour. Too little flour means too much wet ingredient, causing excessive spread.
Ensuring Uniform Thickness for Even Baking
If your cookies are baking unevenly, it’s usually because you didn’t press the fork down consistently during the criss cross step. Try to apply the same pressure to every dough ball.
Another culprit might be your oven if you suspect a temperature issue, use an oven thermometer to ensure you are actually hitting 350°F.
Flavor Elevation: Adding a Pinch of Spice
Want to truly elevate these Peanut Butter Cookies ? Add ¼ teaspoon of ground cinnamon and a tiny pinch of cayenne pepper to your dry ingredients. The cayenne won't make the cookie spicy, but it enhances the depth of the sweetness and nuttiness beautifully.
It’s my secret ingredient that makes everyone ask, "What is that amazing flavor?"
How to Store and Preserve Freshly Baked Peanut Butter Cookies
Proper storage means your delicious work doesn't go stale prematurely.
Short Term Storage for Peak Freshness
Once completely cooled, store your finished Peanut Butter Cookies in an airtight container at room temperature. They will keep well for 5 7 days. To prevent them from drying out, I often toss in half a slice of sandwich bread; the cookies steal the moisture from the bread instead of losing their own.
Freezing Unbaked Cookie Dough for Later
This is genius for quick weekday treats. Prepare the dough balls, press the criss cross pattern, and arrange them on a baking sheet. Flash freeze them for 1 hour until solid. Once solid, transfer the dough balls to a heavy duty freezer bag or container. They will last up to 3 months.
When ready to bake, just place them on a tray and add 2– 4 minutes to the original baking time (no need to thaw!). This way, you can have fresh Peanut Butter Cookies Easy whenever a craving strikes.
Reviving Day-Old Cookies
Did they lose their chew? No problem! Place 2 3 cookies on a microwave safe plate next to a small glass of water (this creates a steamy environment). Microwave for 10 15 seconds. They will be warm, soft, and taste almost fresh out of the oven.
Delightful Pairings and Serving Ideas
These rich, classic treats are perfect on their own, but pairing them makes them spectacular.
Alongside a tall glass of cold milk, they are unbeatable. But if you’re looking for a quick and comforting dinner before dessert, they go wonderfully after a steaming bowl of [Fall Soups: Creamy Butternut Squash Apple Soup Recipe].
We also love turning these into next level sandwiches. Grab two cookies and press them around a scoop of salted caramel ice cream or maybe some homemade frosting, similar to the amazing cream cheese frosting I use for my [Sugar Cookies: Crisp Cut-Outs That Hold Their Shape Easy Recipe].
The rich, nutty flavor of these Peanut Butter Cookies holds up perfectly to intense fillings. Enjoy every last bite!

Recipe FAQs
Why did my peanut butter cookies turn out dry and crumbly?
The main causes for dry cookies are usually over baking or inaccurate flour measurement. Ensure you are using the 'spoon and level' method for flour measurement rather than scooping directly from the bag, which packs too much flour into the cup.
Also, remove the cookies from the oven when the edges are just barely set and the centers still look slightly soft, as they firm up significantly while cooling.
Can I use natural, oil-separated peanut butter instead of commercial stabilized brands?
It is strongly recommended to use commercial, stabilized peanut butter (like Jif or Skippy) for this classic recipe. Natural peanut butter, even when well stirred, has inconsistent fat content, which can cause the cookies to spread excessively or result in a drier, crumblier final texture.
If you must use natural, look for a "no-stir" variety that mimics the consistency of commercial brands.
My cookies spread too thin on the baking sheet. What went wrong?
Excessive spread is often due to the butter being too soft or the dough not being adequately chilled. Ensure your butter is simply at room temperature not oily or melted when creaming, and strictly adhere to the dough chilling time specified in the recipe.
If your kitchen is very warm, try chilling the dough balls for 15 minutes before placing them in the oven.
Why is the criss cross pattern necessary for these cookies?
While aesthetically traditional, the fork criss cross pattern serves a functional purpose in baking peanut butter cookies. This dough is very dense and high in fat, which prevents it from naturally spreading much in the oven.
Pressing the dough slightly with a fork helps flatten the cookie for better heat distribution and ensures even baking throughout the center.
How do I make these cookies gluten-free or vegan?
For a gluten-free version, simply substitute the standard flour with a cup-for-cup gluten-free baking blend that includes xanthan gum for structure. To make them vegan, use a high-quality vegan butter stick replacement for the dairy butter, and replace the egg with a commercial liquid egg replacer or a flax egg (1 tbsp flaxseed meal + 3 tbsp water).
What are the best methods for storing and freezing these peanut butter cookies?
Once completely cooled, store the baked cookies in an airtight container at room temperature, where they will stay fresh for up to one week. For longer storage, freezing the unbaked dough is preferred; form the balls, chill them until firm, and then transfer them to a freezer bag for up to 3 months, baking straight from frozen by adding 2 to 4 minutes to the total bake time.
How can I tell when these cookies are perfectly done for that chewy texture?
The cookies are done when the edges look lightly golden brown and set, but the centers still look slightly puffy and soft. Remember that they will continue to bake for a few minutes on the hot pan after you remove them, a process called carry over cooking, which helps achieve that perfect, chewy interior without being undercooked.
Ultimate Chewy Peanut Butter Cookies
Ingredients:
Instructions:
Nutrition Facts:
| Calories | 120 kcal |
|---|---|
| Protein | 3.0 g |
| Fat | 6.0 g |
| Carbs | 14.0 g |
