Velvet Splendor: the Ultimate Red Velvet Cake with Cream Cheese Frosting
- A Slice of Southern Charm: My Love for Red Velvet Cake
- Why Every Home Baker Needs This Cake in Their Life
- The Wonders of Red Velvet Cake
- Getting Ready to Bake
- Your Ultimate Essential Ingredients Guide for Red Velvet Cake
- Elevate Your Baking: The Professional Cooking Method to Master Red Velvet Cake
- Pro Tips & Secrets
- Perfect Presentation
- Storage & Make-Ahead
- Creative Variations
- Complete Nutrition Guide
- Frequently Asked Questions
- 📝 Recipe Card
A Slice of Southern Charm: My Love for Red Velvet Cake
Oh my gosh, let me tell you about the first time i baked a red velvet cake with cream cheese frosting .
It was a chilly february afternoon, right before valentine’s day. i thought, “what could be more fitting than a fabulous red cake to celebrate love?” i whipped up my apron and tossed the ingredients around like a pro, but by the end, i was all out of food coloring! can you believe that?
i had to scramble to every corner of my pantry.
Spoiler alert: wedding cake white just doesn’t cut it for red velvet .
This cake has a rich history, too. originating from the southern u.s. in the early 1900s, it’s not just a stunning dessert; it’s a true southern belle! some say it got its “velvet” name because of its smooth texture.
Others believe it comes from cocoa powder’s reaction with acidic ingredients. regardless, this cake has captured hearts and taste buds across the nation.
Why Every Home Baker Needs This Cake in Their Life
So, what makes this red velvet beauty so special? for starters, everyone knows that the red velvet cake with cream cheese frosting isn't just a treat; it’s practically a holiday on a plate!
whether it's for your best friend’s birthday or valentine’s day, nothing says love like a slice of this moist goodness.
Worried about the time it takes? don’t sweat it! with about 15 minutes of prep and 30 minutes of chilling , you can whip it up in no time.
Plus, the baking time is just 25 to 30 minutes . perfect for a lazy weekend or an unexpected dinner guest.
And let me tell you about the yield: you’ll get 8 to 10 servings of pure bliss. just keep those serving sizes in check unless you want to eat the whole thing yourself (trust me, it’s hard not to!).
When it comes to cost, it's fairly budget friendly, too. Most of the ingredients are probably hanging out in your pantry already. That’s what I love about baking it's kind of like magic!
The Wonders of Red Velvet Cake
You might wonder, besides just being a total showstopper, what makes this cake so appealing? well, first off, it's not just pretty; it’s delicious! the subtle cocoa flavor pairs like a dream with that creamy, tangy frosting.
Seriously , it’s like a hug from your grandma on a bad day!
And that cream cheese frosting? oh boy, let’s just say it’s a game changer. you’ll want to slather that goodness on everything! plus, if you’re watching your calories, this cake offers a good mix of deliciousness without being overly heavy.
Perfect for special occasions, be it a birthday, wedding, or casual Sunday brunch, this cake brings people together. I can’t tell you how many times I’ve taken this to a potluck and left with an empty plate and a ton of compliments!
Not to mention that it's a delightful alternative to a classic chocolate cake . Those rich flavors layered with a creamy frosting can make anyone swoon.
Getting Ready to Bake
Now that i have you craving this stunning red velvet cake , let’s dive into the ingredients! you’ll need some basics: flour, sugar, baking soda, cocoa powder, and all that jazz, plus a good dose of love.
Trust me, every great cake starts with a solid foundation of ingredients and ensoiasm.
So are you ready? grab your mixing bowls and get cozy because we’re diving into the next segment where i’ll share the exact ingredients you’ll need to create your own slice of heaven .
Let's get baking!
Your Ultimate Essential Ingredients Guide for Red Velvet Cake
Alright, fellow bakers! so, you’ve decided to tackle that stunning red velvet with cream cheese frosting cake recipe , huh? i’m right there with you.
There’s just something about that rich red hue and that luscious cream cheese topping that melts my heart. but before we dive into baking, let’s get our ingredient game on point.
Premium Core Components
When you're baking, especially something fancy like a Southern red velvet cake , the quality of your ingredients makes a huge difference. Here’s a quick rundown of what you need:
- All-Purpose Flour: You’ll want 2 ½ cups (315g) . This gives your cake that fluffy texture we all love. Always check the expiration date fresh flour is key.
- Granulated Sugar: This is your sweet lifeline, set for 1 ½ cups (300g) . Look for fine, white sugar it blends easier. Store in a cool, dry place and it’ll last almost forever!
- Cocoa Powder: Just a touch, 1 tsp (2g) . You don’t want to overdo this it just adds depth, not a chocolate cake! Keep it in an airtight container to retain freshness.
- Buttermilk: Grab 1 cup (240ml) at room temp. If you’re out, mix 1 cup of milk with a splash of vinegar and let it sit. Boom, buttermilk replacement!
- Red Food Coloring: You'll need 2 tbsp (30ml) . Go for the gel kind, it packs a punch without affecting the cake’s consistency.
And remember, freshness is key! Always pick ingredients with the latest date trust me, stale baking powder is a real wreck!
Signature Seasoning Blend
Now, let’s spice things up! You’re gonna want to think about your signature seasoning blend :
- Vanilla Extract: Just 1 tsp (5g) is what you need. Nothing beats the real stuff skip the imitation.
- White Vinegar: A splash (1 tsp or 5ml) acts like magic balancing flavors and enhancing that red color. It’s like a little science experiment in your mixing bowl!
While a classic red velvet doesn't require a spice cabinet full of stuff, don’t hesitate to get creative. A pinch of espresso powder could completely jazz up your cake!
Smart Substitutions
So, what if you’re in a pinch? Life happens, and we can't always run to the store!
- gluten-free: Swap that all-purpose flour for a gluten-free blend. It'll still come out fantastic!
- dairy-free: Use almond or oat milk for the buttermilk and vegan butter for your frosting.
- Eggless Option: You could replace each egg with 1/4 cup of applesauce or a spoonful of flaxseed mixed with a little water just let it sit for a bit!
Kitchen Equipment Essentials
Before you jump into the mixing frenzy, let’s shout out about some must have tools :
- Mixing Bowls: Get a bunch nobody wants to do dishes while baking!
- Electric Mixer: Whether it’s hand or stand, get that creamy frosting smooth. Hand mixing will take ages, trust me!
- Cake Pans: Two 9 inch round pans will do the trick. Don't forget to grease them!
You could even get fancy and line the pan bottoms with parchment paper to ensure they pop out perfectly.
Wrapping Up
With all this knowledge, you’re more than ready to start whipping up that dreamy red velvet cake. Just imagine how it’ll look with those swirls of cream cheese frosting pure joy on a plate!
Now that you’ve got all the key ingredients and equipment nailed down, let’s get into those fun step-by-step instructions for making your homemade red velvet cake shine brighter than a diamond on valentine’s day.
Grab your apron, put on your favorite playlist, and let’s bake something magical! remember, trial and error are part of the fun, so don’t stress about it.
Happy baking!
Elevate Your Baking: The Professional Cooking Method to Master Red Velvet Cake
Let’s face it, nothing screams “celebration” quite like a slice of red velvet cake . it's a southern classic and, honestly, the perfect treat for any occasion.
Today, i’m diving into the professional cooking method that will help you ace this delicious dessert, particularly the amazing red velvet with cream cheese frosting cake recipe .
Essential Preparation Steps
First things first, let’s talk about mise en place . this french term just means “everything in its place.” gather your ingredients before you start.
Trust me, it makes the whole process smoother. you don’t want to be halfway through and realize you’re missing cream cheese!
Time management is also super key. Make a little checklist. For instance, while the cake is baking, you can whip up that dreamy frosting. It’s all about multitasking!
Now, onto organization . create a clean workspace. i mean, clutter doesn’t just mess with your head; it messes with your baking too! and remember, keep safety in mind.
Always use oven mitts when handling anything hot. you want beautiful cakes, not burned fingers!
step-by-step Process
Alright, let’s break this down into easy peasy steps.
- Preheat your oven to 350° F ( 175° C) . Seriously, don’t skip this!
- Prepare your cake pans grease them and maybe even put a layer of parchment paper on the bottom for easy removal.
- Mix your dry ingredients flour, sugar, salt, baking soda, and cocoa powder in one bowl.
- In another bowl, whisk together oil, buttermilk, eggs, red food coloring, vanilla extract, and vinegar until it’s all combined.
- Add the wet ingredients to the dry ones, but don’t overmix! Gently fold until just combined.
- Divide the batter between your pans evenly.
- Bake for 25- 30 minutes . The golden rule? A toothpick should come out clean when poked in the center.
- Cool for about 10 minutes in the pans, then transfer to a wire rack to cool completely.
When your cakes are cool, it’s time to make that luscious cream cheese frosting.
Here’s a pro tip: beat the cream cheese and butter until creamy . then gradually add powdered sugar until it’s a silky dream.
A dash of heavy cream helps too if you want that perfect consistency.
Expert Techniques
Let’s get real here for a sec you want your cake to be fluffy red velvet perfection, yeah? quality checkpoints, like how your batter looks and its thickness, are essential.
Remember not to have any lumps!
If your cake looks dense, chances are you overmixed it. don’t be shy about tasting your frosting! adjust the sweetness as needed.
And if something goes sideways like if it's too sweet or needs more tang add a bit more cream cheese!
Success Strategies
We’ve all been there an epic fail on the first go. So here are some common mistakes you should avoid:
- Overmixing the batter. Yikes.
- Not baking long enough. Nobody likes gooey cake!
- Forgetting that room temperature ingredients make a HUGE difference in fluffiness.
To guarantee quality assurance , always do a taste test at each stage. That way, you’ll know if you need adjustments.
And wanna skip a little prep? go ahead and make-ahead options ! you can bake the cake layers a day in advance and wrap them tight in plastic wrap.
That way, you can frost when you’re feeling inspired!
Final Thoughts on Your Velvet Journey
Pop this beauty in front of guests, and you’ll win hearts trust me. a slice of this red velvet cake with that heavenly cream cheese frosting isn’t just dessert it’s love on a plate.
And remember, baking is so much more than just following a recipe. it’s about making it your own and sharing joy with others.
So, are you ready to whip up this homemade red velvet cake ? look into into the measures, stir with passion, and don’t forget to enjoy every moment!
Next up, let’s explore some additional information to keep your baking game strong!
Pro Tips & Secrets
Alright, let’s dive deep into the red velvet with cream cheese frosting cake recipe . you might think baking is just about measuring ingredients, but it’s so much more! as someone who's had my fair share of cake experiments (and mishaps), i’ve picked up a few tricks along the way.
First off, room temperature ingredients are your best friends . When your eggs and buttermilk chill out at room temp, they blend smoothly into your batter. This gives a fluffier texture.
Also, don’t go overboard when mixing! It sounds tempting to whip it all until it’s silky smooth, but that’ll make your cake dense. Slow and steady wins the race here.
And, the frosting? oh my gosh, it can make or break your cake! taste as you go, and feel free to adjust the sweetness.
Sometimes i throw in a dash of vanilla extract just for fun. if you want to pop the flavor, a bit of heavy cream gets that frosting to the perfect consistency too.
Perfect Presentation
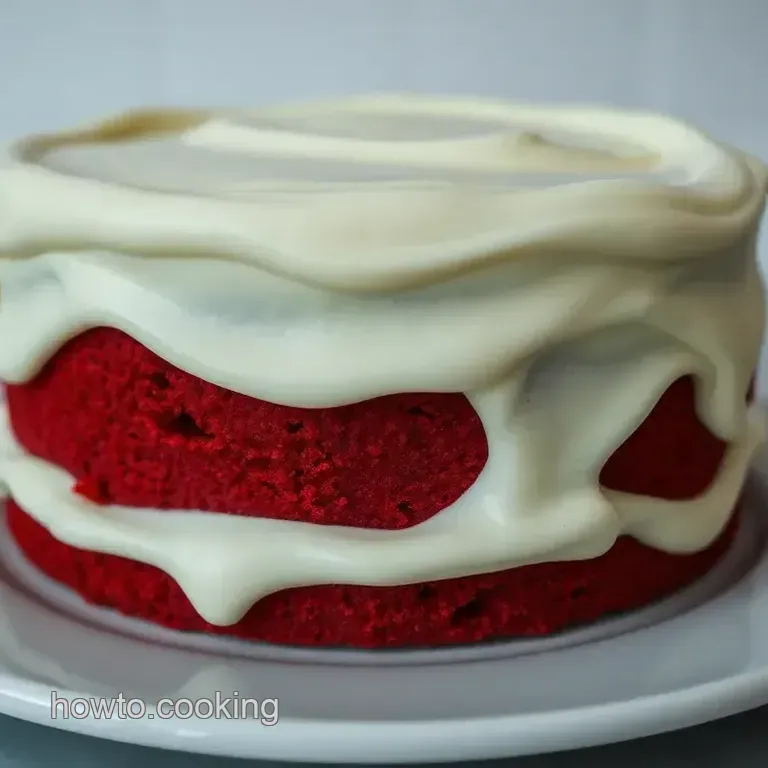
Now, let’s chat about presentation. This cake is a showstopper, and you want it to look as divine as it tastes! Plating techniques can really elevate your dessert game.
I like to use a cake turntable when frosting. it’s super easy to spin your cake while spreading the frosting evenly.
For that pro touch, put a dollop of frosting on the top, then swirl it out to the edges. cute, right?
As for garnishing , i love adding a few fresh raspberries or chocolate shavings on top to create color and texture.
They not only make it look appealing but add a little freshness against the richness of the cake. a pop of white or dark chocolate against that deep red is chef’s kiss !
Storage & make-ahead
Let’s keep it real, nobody wants their cake to go stale! if you’ve got leftovers (which sometimes happens, but can be surprising), here’s how to store it.
Once it's frosted, store it in the fridge it'll keep the cream cheese frosting fresh for about 3-5 days .
Just cover it with some plastic wrap or stick it in a cake dome.
Now, if you want to make it ahead , you totally can! you can bake the layers a day or two ahead and keep them covered at room temperature.
Just frost it right before serving. this way, you keep the cake light and fluffy!
Creative Variations
Why stick to the basic recipe when you can play with it? i mean, red velvet cake ideas are endless! you can fold in some mini chocolate chips for a little surprise in every bite or even infuse some espresso powder to provide a mocha twist that’s totally unexpected.
If you're feeling adventurous, swap the cream cheese frosting for a rich chocolate buttercream. mind blown, right? or try a layer of raspberry jam inside the two cake layers for that fruity, tangy burst.
It’s like summer on a plate!
Complete Nutrition Guide
Here’s the nitty gritty the nutrition facts of our luscious cake. each slice packs a punch of flavor at about 350 calories .
It's not a daily indulgence but hey, life’s too short not to treat yourself!
On the health side, the cream cheese gives you a little calcium, while the butter and sugar do their cozy comfort food thing.
Just be mindful of your portions maybe opt for a smaller slice and pair it with a side of fresh fruit, like strawberries or blueberries, to keep it balanced.
Just remember, it’s all about enjoying velvet desserts without the guilt every once in a while!
So, whether you’re baking it for a special occasion or just because you deserve a treat, this southern red velvet cake with cream cheese frosting is bound to impress.
I always say, there’s something magical about the combination of a moist cake with creamy frosting that just makes everything feel right in the world.
Get your apron on and dive into this delightful recipe. Remember, bake with love and don’t sweat the small stuff the best cakes come from the heart. Happy baking, my friends!
Frequently Asked Questions
What is the secret to a moist red velvet with cream cheese frosting cake?
The key to a moist red velvet cake is using ingredients at room temperature, particularly the buttermilk and eggs. Also, be careful not to overmix your batter; this can lead to a denser cake.
Finally, chilling the cake for at least 30 minutes after frosting helps maintain its moisture and allows the flavors to meld beautifully.
Can I make this red velvet with cream cheese frosting cake ahead of time?
Absolutely! You can bake the cake layers a day in advance. Just wrap them tightly in plastic wrap and store them in the fridge or at room temperature. Frosting can also be made ahead and kept in the fridge. When you're ready to serve, simply frost the cooled cake and let it sit for a bit before cutting into it.
How can I adjust the sweetness of the cream cheese frosting?
To adjust the sweetness of your cream cheese frosting, simply add more powdered sugar for a sweeter taste or reduce it if you prefer a tangier flavor. A great trick is to taste as you go; start with 3 cups of sugar and gradually increase based on your preference.
If it gets too thick, a splash of heavy cream or milk can help achieve your desired consistency.
What can I do if I don't have buttermilk for the recipe?
No buttermilk? No problem! You can make a quick substitute by adding 1 tablespoon of vinegar or lemon juice to 1 cup of milk and letting it sit for about 5 minutes. This will create a similar acidity that helps activate the baking soda in the cake recipe, perfect for achieving that classic red velvet texture!
How should I store leftovers of the red velvet with cream cheese frosting cake?
Leftover cake should be stored in an airtight container in the fridge. It will stay fresh for up to 4-5 days! If you want to keep it longer, consider wrapping individual slices in plastic wrap and freezing them.
To thaw, simply let them sit out at room temperature or warm them gently in the microwave, and enjoy a slice of heaven later!
Can I make this red velvet cake gluten-free?
Yes, you can certainly make a gluten-free version of this red velvet with cream cheese frosting cake! Simply swap out the all-purpose flour for a gluten-free all-purpose blend. Be sure to check your baking powder and food coloring as well to ensure they are gluten-free!
Velvet Splendor The Ultimate Red Velvet Cake Wit
Ingredients:
Instructions:
Nutrition Facts:
| Calories | 350 |
|---|---|
| Fat | 18g |
| Fiber | 1g |
