Baked Chicken with Parmesan and Mayonnaise
- Time: Active 10 minutes, Passive 20 minutes, Total 30 minutes
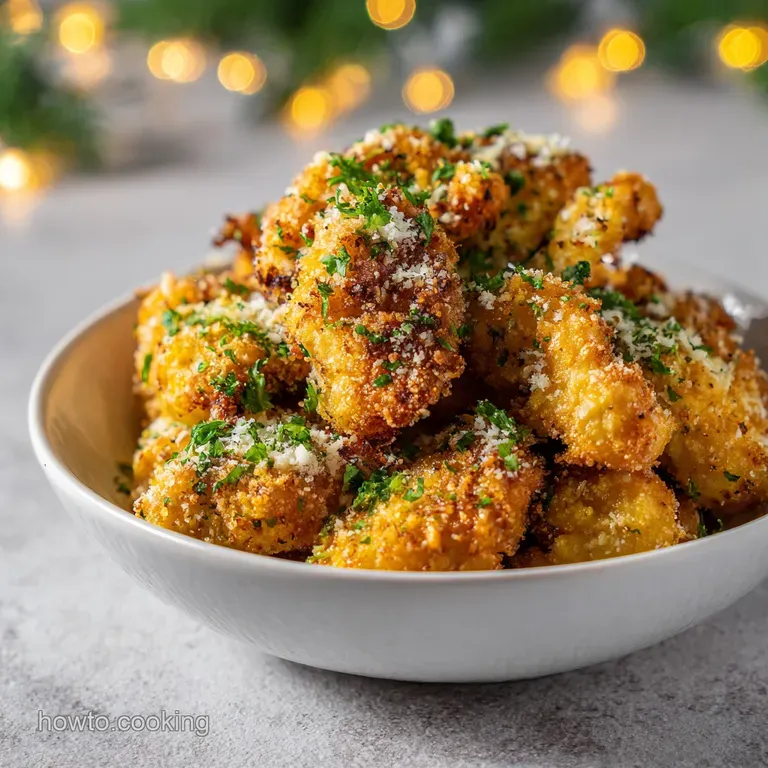
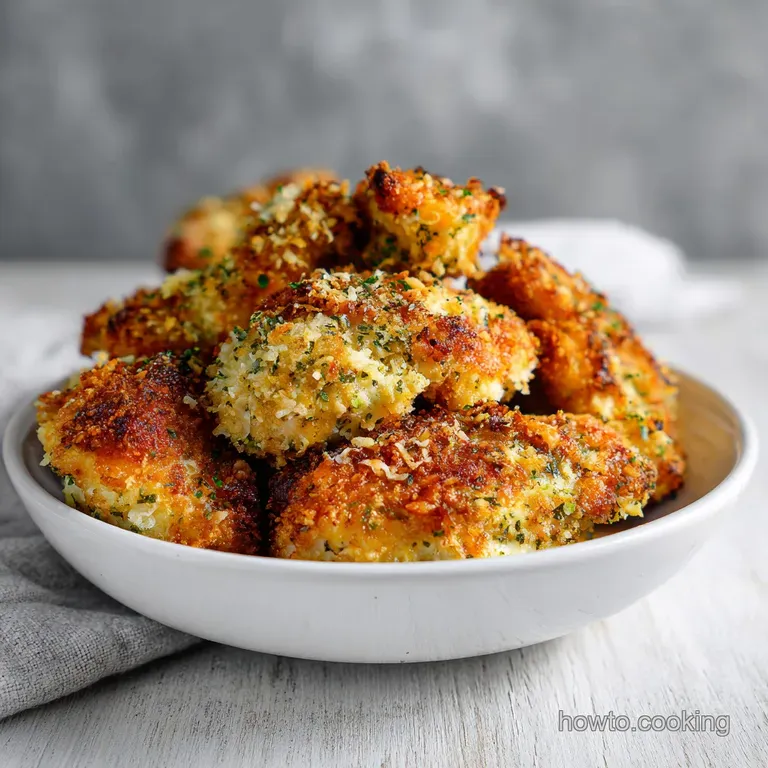
- Flavor/Texture Hook: A velvety, umami rich parmesan layer hidden beneath a crisp, shattering panko crust.
- Perfect for: Busy weeknight dinners where you need high-quality protein with minimal cleanup.
- Perfect Baked Chicken with Parmesan and Mayonnaise
- The Hidden Science of the Mayo Crust
- Precise Specs for a Wholesome Family Dinner
- The Essential Elements for a Shattering Finish
- Minimalist Tools for a Clean Kitchen Setup
- Bringing the Golden Chicken Recipe to Life
- Sidestepping Common Sogginess and Texture Pitfalls
- Simple Swaps for Wholesome Ingredient Alternatives
- Keeping Your Leftovers Fresh and Nutritious
- Plating for a Family Friendly Visual Appeal
- Recipe FAQs
- 📝 Recipe Card
Perfect Baked Chicken with Parmesan and Mayonnaise
There is nothing more disappointing than biting into a piece of chicken that looked golden on the outside but reveals a gray, rubbery, and flavorless interior. Most home cooks struggle with the "steam puddle" effect, where the juices leak out during baking, turning what should be a crispy crust into a soggy, wet mess.
I remember the first time I tried a version of this dish; I followed a recipe that told me to bake it directly on a glass dish, and the result was a mushy disaster that lacked any of the crunch I craved.
The secret to a truly successful baked chicken with parmesan and mayonnaise lies in understanding how to manage moisture and airflow. We aren't just tossing ingredients into an oven and hoping for the best.
We are using the fat in the mayonnaise to create a protective barrier around the lean protein, while the high heat of a 425°F (220°C) oven works with a wire rack to ensure the crust crisps up from every single angle.
This isn't just another tray bake; it is a calculated method to get the juiciest results possible from boneless breasts.
By the end of this, you will have a family favorite that looks like it came from a professional kitchen but only took you ten minutes of hands on work. We are going to focus on wholesome ingredients and reliable steps that remove the guesswork.
No more checking the oven every two minutes or wondering if the middle is still raw while the top burns. We've got a system that works every single time, and it starts with prepping your chicken the right way.
The Hidden Science of the Mayo Crust
The real magic here happens through a process of moisture retention and fat based insulation. Chicken breasts are notoriously lean, which means they have almost zero internal fat to keep them moist as the proteins tighten during cooking. This is why they often turn into "rubber" if overcooked by even a minute.
The Fat Barrier: Mayonnaise is an emulsion of oil and egg, which creates a waterproof seal around the meat fibers, preventing the natural juices from evaporating into the dry oven air.
Protein Networking: The grated parmesan doesn't just add a salty, umami kick; it melts and binds with the mayonnaise to create a structural "glue" that holds the panko breadcrumbs in place.
Airflow Dynamics: Placing the chicken on a wire rack allows the hot air to circulate underneath the meat, which means the bottom doesn't sit in its own juices and get soggy.
| Cooking Method | Prep Time | Resulting Texture | Cleanup Effort |
|---|---|---|---|
| This Oven Method | 10 minutes | Uniformly crispy and moist | Minimal (one tray) |
| Traditional Pan Fry | 20 minutes | Very crispy but can be oily | High (splatter everywhere) |
| Standard Tray Bake | 5 minutes | Soggy bottom, dry top | Minimal |
Using a wire rack is truly the one step most people skip, but it is what transforms this from a "casserole" style dish into a truly crusted piece of poultry. When you bake directly on a sheet or in a ceramic dish, the side of the chicken touching the surface is essentially being steamed in its own liquid.
We want a 360 degree bake to get that satisfying crunch on every bite.
| Component | Science Role | Pro Secret |
|---|---|---|
| Real Mayonnaise | Fat based insulator | Use full fat for better moisture locking |
| Parmesan Cheese | Binding agent | Grate your own for a better melt |
| Panko Crumbs | Texture builder | Toss with oil or spices for deeper color |
| High Heat (425°F) | Surface dehydration | Preheating for 20 mins is non negotiable |
If you find yourself wanting to experiment with other textures, you might enjoy comparing this to the richness of my cheesy chicken casserole which uses a similar flavor profile but in a more comfort food, "one pot" style. Both use the power of dairy to keep the meat tender, but the oven baked version we are making today focuses specifically on that contrasting crunch.
Precise Specs for a Wholesome Family Dinner
To ensure your baked chicken with parmesan and mayonnaise comes out exactly like the photos, we need to stick to the specific checkpoints that prevent overcooking. Accuracy with thickness is more important than the weight of the breast itself.
- Internal Temperature: Always aim for 165°F (74°C). Pull it at 160°F (71°C) if you want to allow for carryover cooking during the rest.
- Uniform Thickness: Pounding the meat to exactly 3/4 inch (2 cm) ensures the thin end doesn't dry out before the thick end is safe to eat.
- Oven Temperature: 425°F (220°C) is the sweet spot. Anything lower and the chicken finishes before the crust gets golden; anything higher and the crust burns before the center is cooked.
Chef Tip: Freeze your parmesan wedge for 10 minutes before grating. It makes it much easier to get those fine, airy shreds that incorporate perfectly into the mayonnaise.
The Essential Elements for a Shattering Finish
We are using simple, wholesome ingredients that work together to build layers of flavor. Avoid using "salad dressing" style spreads; you need real mayonnaise for the oil content.
- 4 (6 oz) boneless skinless chicken breasts: Pounded to a uniform 3/4 inch thickness.
- 1/2 tsp Kosher salt: Essential for seasoning the meat fibers directly.
- 1/2 tsp cracked black pepper: Provides a subtle heat.
- 1/2 cup real mayonnaise: Acts as the moisture locking base.
- 1/2 cup grated Parmesan cheese: Use the "sandy" grated kind or finely microplaned fresh parm.
- 1 tsp garlic powder: Distributes flavor more evenly than fresh garlic in this dry heat application.
- 1 tsp onion powder: Adds a savory sweetness to the coating.
- 1/2 cup Panko breadcrumbs: These Japanese style crumbs stay crispier than traditional breadcrumbs.
- 1 tbsp fresh parsley: Finely chopped for a pop of color and freshness.
- 1/2 tsp smoked paprika: This provides a beautiful golden hue and a hint of woodsy flavor.
| Original Ingredient | Substitute | Why It Works |
|---|---|---|
| Panko Breadcrumbs | Crushed Pork Rinds | Same crunch but keeps it low carb and keto friendly |
| Mayonnaise | Greek Yogurt | Tangier flavor and lower fat, but slightly less crispy |
| Parmesan Cheese | Pecorino Romano | Sharper, saltier flavor profile; use slightly less salt |
When you are looking for a side dish to balance out this richness, a light vegetable forward option is best. For instance, the quick preparation of a chicken cabbage stir fry uses similar protein but offers a completely different texture profile that works well if you are meal prepping for the week and want variety.
Minimalist Tools for a Clean Kitchen Setup
You don't need a pantry full of gadgets for this. We are focusing on efficiency to make this a realistic weeknight option.
- Large Rimmed Baking Sheet: To catch any drips and provide a base for the rack.
- Wire Cooling Rack: This is the most critical tool for airflow.
- Meat Mallet (or heavy skillet): Used for pounding the chicken to an even thickness.
- Small Mixing Bowl: To whisk the mayo parm mixture.
- Shallow Dish: For dredging the chicken in the panko.
- Instant Read Meat Thermometer: The only way to guarantee the chicken is safe and juicy.
Bringing the Golden Chicken Recipe to Life
- Prepare the oven. Preheat your oven to 425°F (220°C). Note: A fully preheated oven is vital for hitting the crust with immediate heat to stop it from sliding off.
- Prep the protein. Pat the chicken breasts completely dry with paper towels. Note: Moisture on the surface of the meat will prevent the mayonnaise from sticking.
- Level the thickness. Use a meat mallet to pound the thicker ends until the entire breast is a uniform thickness of approximately 3/4 inch.
- Season the base. Season both sides of the chicken lightly with the 1/2 tsp salt and 1/2 tsp pepper.
- Create the binder. In a small mixing bowl, whisk together 1/2 cup mayonnaise, 1/2 cup grated parmesan, 1 tsp garlic powder, and 1 tsp onion powder until a thick paste forms.
- Mix the crunch. In a separate shallow dish, toss 1/2 cup panko breadcrumbs with 1/2 tsp smoked paprika and 1 tbsp finely chopped parsley.
- Apply the coating. Slather the top and sides of each chicken breast with the creamy parmesan mayonnaise mixture using a spoon or spatula.
- Dredge for texture. Press the chicken, mayo side down, into the panko crumbs to coat, or sprinkle the crumbs over the top for a thicker, more even layer.
- Set for airflow. Place the prepared chicken on a wire rack set inside your large rimmed baking sheet.
- Bake to perfection. Bake for 18–22 minutes until the crust is deeply golden and the internal temperature reaches 165°F (74°C).
Sidestepping Common Sogginess and Texture Pitfalls
The biggest mistake I see people make is overcrowding the tray. If the chicken breasts are touching, they will steam each other's edges, and you'll lose that beautiful 360 degree crunch.
Why Your Chicken Crust Is Soft
If your crust isn't "shattering" when you bite into it, it’s likely a moisture issue. Either the oven wasn't hot enough, or you didn't dry the chicken well enough before applying the mayo.
If you skip the wire rack, the bottom will always be soft there’s no way around the physics of gravity and juice release.
| Problem | Root Cause | Solution |
|---|---|---|
| Crust slides off | Surface was too wet | Pat chicken bone dry with extra paper towels |
| Meat is tough | Overcooked or uneven | Use a thermometer and pound to 3/4 inch |
| Crumbs are pale | Heat too low | Ensure oven is at 425°F (220°C) before baking |
Common Mistakes Checklist
- ✓ Pat the chicken completely dry before seasoning (prevents the "mayo slide").
- ✓ Pound the chicken to an even thickness so it cooks at the same rate.
- ✓ Use a wire rack to allow steam to escape from the bottom of the meat.
- ✓ Don't peek! Opening the oven door drops the temperature significantly.
- ✓ Let the chicken rest for 5 minutes after baking to allow juices to redistribute.
Simple Swaps for Wholesome Ingredient Alternatives
If you are cooking for a crowd or have specific dietary needs, this recipe is incredibly flexible. The core principle a fat based binder and a textured topper remains the same even if you change the components.
For the Calorie Conscious: You can swap the mayonnaise for a thick Greek yogurt. While it won't be quite as "fried tasting" as the mayo version, it adds a lovely tang. Just be aware that yogurt has more water content, so the crust might take an extra 2 minutes to crisp up.
For the Keto Crowd: Eliminate the panko entirely and double the parmesan. You can also mix in some crushed pork rinds for that specific "breaded" feel without the carbohydrates.
- Scaling Down (1-2 servings): Use a smaller toaster oven or a quarter sheet pan. Reduce the bake time by about 2-3 minutes as smaller environments often circulate heat faster.
- Scaling Up (8-10 servings): Use two separate baking sheets. Do not try to crowd them onto one. Rotate the pans halfway through the 20 minute cook time to ensure even browning.
- Spiced Variations: Add a teaspoon of Italian seasoning or a pinch of cayenne pepper to the panko mix for a kick.
Chef Tip: If you want an even deeper color, toast your panko breadcrumbs in a dry skillet for 2 minutes before using them to coat the chicken.
Keeping Your Leftovers Fresh and Nutritious
One of the best things about this baked chicken with parmesan and mayonnaise is how well it holds up. Because the mayo protects the meat, it doesn't dry out nearly as fast as plain roasted chicken.
In the Fridge: Store in an airtight container for up to 3 to 4 days. To maintain the crunch, avoid stacking the pieces directly on top of each other while they are still warm, as the residual steam will soften the crust.
In the Freezer: You can freeze the cooked chicken for up to 2 months. Wrap each breast tightly in foil and then place them in a freezer bag. To reheat, thaw in the fridge overnight.
The Best Way to Reheat: Never use the microwave if you want to keep the crust. Place the chicken back on a wire rack in a 350°F (180°C) oven for about 10 minutes.
This will revive the panko shatter while gently warming the center without overcooking it.
Zero Waste Tip: If you have leftover panko and parmesan mixture that didn't touch the raw chicken, don't throw it away! Toss it with some melted butter and sprinkle it over roasted broccoli or cauliflower for a quick, crunchy side dish.
Plating for a Family Friendly Visual Appeal
Presentation doesn't have to be complex to be inviting. Because this dish has a rustic, golden look, it thrives on simple contrasts.
To show off the juiciness, I like to slice the chicken on a slight bias (diagonal). This reveals the white, steaming meat against the dark golden crust. Place the slices over a bed of bright green sautéed spinach or alongside some vibrant roasted carrots.
The fresh parsley we added to the panko provides a nice herbal note, but a final sprinkle of fresh herbs right before serving adds that "just finished" aroma that hits the table first.
If you are looking for another way to use these flavors in a different format, my baked garlic chicken offers a similar creamy satisfaction but with a focus on a more velvety sauce rather than a crunchy crust.
Debunking Kitchen Legends
Myth: Mayonnaise makes the chicken taste like eggs. Truth: Once baked, the mayonnaise loses its "condiment" flavor entirely. It transforms into a neutral fat that simply tastes like rich, melted butter, highlighting the parmesan and garlic instead.
Myth: You must flip the chicken halfway through. Truth: If you are using a wire rack, there is absolutely no need to flip. Fipping actually risks tearing the delicate crust before it has fully set. Let the airflow do the work for you.
Myth: Searing the meat first "locks in" the juices. Truth: Searing is for flavor (Maillard reaction), not moisture. In this recipe, the mayonnaise is what actually prevents moisture loss, and the over high heat oven handles the browning perfectly without the extra step of a frying pan.
- If you want maximum crunch
- Use the wire rack and Panko.
- If you want maximum creaminess
- Skip the panko and double the mayo parm mixture.
- If you want extra flavor
- Add a teaspoon of Dijon mustard to the mayonnaise binder.
This recipe is all about working smarter, not harder. By using the right tools and understanding the "why" behind the ingredients, you can turn a basic chicken breast into a high-quality meal that your family will ask for every week. Enjoy the sizzle, the aroma of toasted cheese, and that first perfect, crunchy bite!

Recipe FAQs
What does mayonnaise do to chicken when cooking?
Mayonnaise acts as a protective moisture barrier. It prevents the meat from drying out under high heat while providing a rich, savory base that helps the parmesan and panko crust adhere perfectly to the breast.
What is the secret ingredient to the most flavorful baked chicken ever?
The secret is the combination of fat and aromatics. Using mayonnaise mixed with garlic and onion powder ensures the seasoning penetrates the meat, while the crust development technique used here creates a superior, golden texture that seals in all the natural juices.
Can mayonnaise be mixed with Parmesan cheese?
Yes, they combine into a perfect spreadable paste. When you whisk the mayonnaise with the grated parmesan, garlic powder, and onion powder, it creates a thick, flavorful coating that stays put on the chicken while baking at 425°F.
What are common mistakes when making Parmesan chicken?
Failing to dry the chicken is the most frequent error. If you skip patting the meat completely dry with paper towels, the mayonnaise mixture will slide off; additionally, avoid skipping the meat mallet step, as uneven thickness prevents the breast from reaching 165°F uniformly.
How to ensure the chicken breast stays moist?
Pound the chicken to a uniform 3/4 inch thickness before baking. This ensures every part of the breast reaches 165°F at the same time, preventing the edges from overcooking and drying out while the center is still raw.
How to get the crust crispy on all sides?
Place the chicken on a wire rack set inside a rimmed baking sheet. This allows for 360-degree airflow around the meat, preventing the underside from becoming soggy and ensuring the panko coating stays crisp throughout the 18 22 minute bake time.
How to serve this chicken once it finishes baking?
Let the chicken rest for 5 minutes after removing it from the oven. This resting period is critical as it allows the juices to redistribute back into the fibers, ensuring every bite is succulent and flavorful.
Baked Parmesan Mayo Chicken

Ingredients:
Instructions:
Nutrition Facts:
| Calories | 549 calories |
|---|---|
| Protein | 58.4 g |
| Fat | 30.3 g |
| Carbs | 8.2 g |
| Fiber | 0.6 g |
| Sugar | 0.8 g |
| Sodium | 685 mg |
