Chocolate Peanut Butter Protein Bar Recipe
- Essential methods for a wholesome Chocolate Peanut Butter Protein Bar
- Performance data for your nutritious snack preparation
- Selecting the finest components for a flavorful result
- Professional tools for your kitchen confidence
- Mastering the construction of your protein snack
- Technical fixes for common preparation challenges
- Flavorful adaptations for your homemade snack bars
- Wholesome storage methods for long term freshness
- Creative plating for your nutritious homemade bars
- Troubleshooting Common Issues
- Troubleshooting Common Issues
- Recipe FAQs
- 📝 Recipe Card
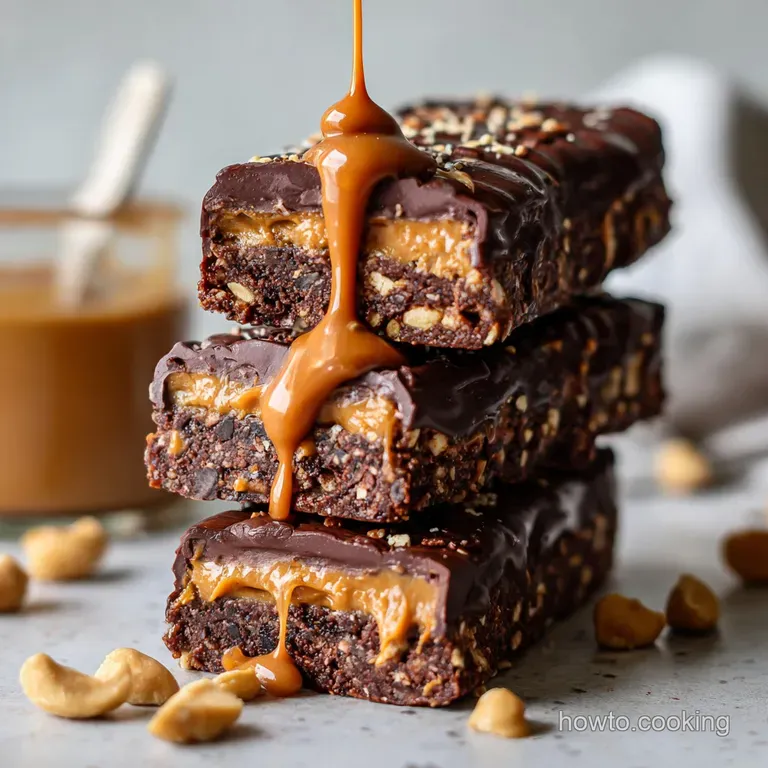
Essential methods for a wholesome Chocolate Peanut Butter Protein Bar
The smell of roasted peanuts hitting a warm drizzle of maple syrup is something I never get tired of. It fills the kitchen with this grounded, earthy sweetness that makes you want to skip the gym and just eat the dough straight from the bowl.
I remember the first time I tried making these; I was so tired of buying those expensive, chalky bars from the store that felt like eating a flavored brick. Satisfy your cravings with this easy, delicious, homemade chocolate protein bar snack featuring peanut butter.
This recipe is all about finding that middle ground between a nutritious post workout fuel and a treat that actually tastes like dessert. We've all been there, hovering over the kitchen counter, trying to find something to tide us over until dinner without reaching for the processed stuff.
By making these ourselves, we control the texture and the quality of the fats, ensuring every bite is as wholesome as it is flavorful.
Getting that velvety consistency in the center while maintaining a chocolate top that yields with a satisfying shatter is easier than you think. You don't need a degree in food science to get it right, but a little bit of kitchen confidence goes a long way.
We are going to focus on how simple ingredients like rolled oats and ground flaxseed transform into a dense, fudgy base that keeps you full for hours.
The Physics of the Bind
Protein Adhesion: The whey or plant based protein powder acts as a drying agent that absorbs moisture from the maple syrup and peanut butter, creating a stable, dough like matrix.
This prevents the bars from collapsing at room temperature by forming a structural network that holds the oat flour in place.
Chef's Tip: Freeze your peanut butter for 10 minutes before measuring if it’s a very runny, natural variety; it makes it much easier to scoop and helps maintain a thicker consistency during the initial mixing phase.
Performance data for your nutritious snack preparation
When you're planning your meal prep for the week, knowing exactly how long you'll be in the kitchen is vital. This recipe involves a brief "cook" time, which primarily focuses on gently melting the chocolate and syrup to ensure a silky integration.
This isn't a traditional bake, but the heat application is what prevents the bars from feeling grainy or separated.
| Preparation Method | Total Time | Texture Outcome | Best For |
|---|---|---|---|
| Stovetop Melting | 30 minutes | Silky, integrated fats | Maximum shelf stability |
| Microwave Method | 20 minutes | Softer, more pliable | Quick afternoon prep |
| Cold Press | 45 minutes | Chewy and dense | Raw food enthusiasts |
Taking the time to use the stovetop method for the chocolate coating ensures that the coconut oil and dark chocolate chips emulsify properly. This prevents the chocolate from "blooming" or turning white in the fridge.
A little patience during the melting phase results in a professional, glossy finish that makes these look like they came from a high end health boutique.
If you are looking for a similar texture profile but want something a bit more decadent for a weekend treat, you might also enjoy the technique used in my Peanut Butter Protein recipe. It uses a slightly different ratio but hits those same flavor notes that we all love.
Selecting the finest components for a flavorful result
The secret to a truly nutritious homemade Chocolate Peanut Butter Protein Bar snack with peanut butter lies in the quality of your base. I always reach for natural creamy peanut butter the kind where the only ingredients are peanuts and salt.
The oils in natural peanut butter are more fluid, which helps the oat flour hydrate more evenly than the thick, stabilized brands.
| Original Ingredient | Substitute | Why It Works |
|---|---|---|
| Natural Peanut Butter | Almond Butter | Similar fat profile. Note: Slightly more neutral flavor, may need a pinch more salt |
| Pure Maple Syrup | Raw Honey | Both are viscous binders. Note: Honey is sweeter; use 10% less for a balanced taste |
| Rolled Oats | Quinoa Flakes | High protein alternative. Note: Creates a slightly earthier, nuttier base texture |
| Chocolate Whey | Pea Protein | Great for vegan diets. Note: Increases thirstiness of dough; add 1 tsp water if too crumbly |
When you're blending your oats into flour, aim for a fine, dusty consistency. If the oats are too coarse, the bar snack with peanut butter will feel "rustic" and might fall apart when you slice it. I like to use a high powered blender to ensure the oat flour is almost like silk.
This creates a dense, fudgy interior that mimics the texture of a brownie but with all the wholesome benefits of whole grains.
For the chocolate topping, 70% cocoa chips are the sweet spot. They provide a deep, sophisticated bitterness that cuts through the richness of the peanut butter. Adding just a teaspoon of coconut oil to the melt is a trick I learned years ago; it lowers the melting point of the chocolate, so it doesn't shatter into a million messy pieces when you take a bite.
Professional tools for your kitchen confidence
Having the right gear makes the difference between a messy counter and a streamlined process. You don't need fancy gadgets, but a few basics will ensure your bars turn out consistent every single time. A solid 8x8 inch baking pan is the standard here, providing the ideal thickness for 12 generous bars.
| Component | Science Role | Pro Secret |
|---|---|---|
| Ground Flaxseed | Hydrophilic Binder | Absorbs 3x its weight in liquid to create a gel like "glue" |
| Coconut Oil | Lipid Plasticizer | Keeps the chocolate coating flexible so it doesn't crack when sliced |
| Sea Salt | Flavor Potentiator | Suppresses bitterness in chocolate and amplifies the sweetness of the syrup |
I highly recommend using parchment paper to line your pan. Leave a little overhang on the sides think of them as "handles." Once the bars have set, you can just lift the entire block out onto a cutting board. It makes slicing so much cleaner and prevents you from scratching your pans with a knife.
A heavy bottomed saucepan is also better for melting the chocolate than a thin one, as it distributes heat evenly and prevents scorching.
Mastering the construction of your protein snack
Watching the mixture come together is the most satisfying part. It starts as a loose collection of powders and oils, but as you stir, it transforms into a heavy, glossy dough. It’s important to work the dough with a stiff spatula or even your hands once it gets too thick for a spoon.
This ensures the protein powder is fully hydrated and there are no hidden pockets of dry flour.
- Process the oats. Blend 1 1/2 cups (120g) rolled oats until they reach a fine, flour like consistency. Note: Fine flour ensures a fudgy, non grainy texture.
- Combine dry ingredients. Whisk the oat flour, 2 scoops (60g) chocolate protein powder, 2 tbsp (15g) ground flaxseed, and 1/4 tsp sea salt in a large bowl.
- Warm the binders. In a small saucepan over low heat, gently warm 1 cup (250g) natural creamy peanut butter and 1/3 cup (80ml) maple syrup until the mixture is fluid and begins to shimmer.
- Merge the phases. Pour the warm peanut butter mixture into the dry ingredients.
- Incorporate fully. Stir until a thick, uniform dough forms. Note: If it’s too crumbly, add a teaspoon of water; if too sticky, add a tablespoon of oat flour.
- Press into pan. Transfer the dough to a lined 8x8 inch pan and press firmly with the back of a spoon until the surface is completely flat and compressed.
- Melt the topping. In a double boiler or microwave, melt 1/2 cup (90g) dark chocolate chips with 1 tsp (5g) coconut oil until velvety and glossy.
- Glaze the base. Pour the chocolate over the peanut butter layer and tilt the pan to coat evenly.
- Set the bars. Place in the refrigerator for 20 minutes until the chocolate has hardened and the base is firm.
- Slice and serve. Lift the parchment handles and cut into 12 even bars using a sharp, warm knife.
The compression in step 6 is vital. If you don't press the dough down hard enough, the bar snack with peanut butter will be airy and fragile. I often use the bottom of a flat measuring cup to really pack it in there. You want the base to be a solid, singular mass that can support the weight of the chocolate.
Technical fixes for common preparation challenges

Even with the best intentions, things can go a bit sideways. Maybe your protein powder was a bit more absorbent than usual, or perhaps your peanut butter was the bottom of the jar and a bit dry. Don't panic; these are all easy fixes.
The most common issue people face is a "chalky" texture, which usually just means the dough needs a tiny bit more moisture to fully hydrate the proteins.
The Dry Crumb Issue
If your mixture looks like wet sand instead of a dough, it’s likely the protein powder or the flaxseeds have soaked up all the available liquid. This happens often with plant based powders. Simply add one tablespoon of warm water or unsweetened almond milk at a time.
Mix thoroughly between additions until the dough can be pinched together without falling apart.
The Chocolate Seize
Water is the enemy of melting chocolate. Even a single drop can turn your glossy coating into a clumped, grainy mess. If this happens, you can sometimes save it by whisking in a teaspoon of room temperature coconut oil, but it’s best to ensure all your tools are bone dry before you start.
| Problem | Root Cause | Solution |
|---|---|---|
| Bars falling apart | Insufficient compression | Press the dough harder into the pan using a flat bottomed tool |
| Sticky surface | High humidity or syrup ratio | Dust the base lightly with extra oat flour before adding chocolate |
| Cracked chocolate | No fat in the glaze | Always include the 1 tsp coconut oil to keep the top flexible |
Common Mistakes Checklist
- ✓ Never use "instant" oatmeal; rolled oats provide the necessary structure and fiber.
- ✓ Ensure the peanut butter and syrup are warmed together; cold binders won't integrate with dry powders.
- ✓ Let the chocolate set in the fridge, not the freezer, to prevent the coating from becoming too brittle.
- ✓ Wipe your knife blade between every single cut for those clean, professional looking edges.
- ✓ Use a kitchen scale for the 120g of oats if possible; volume measurements for flour can vary wildly.
Flavorful adaptations for your homemade snack bars
Once you've mastered the basic homemade Chocolate Peanut Butter Protein Bar, you can start playing with the profile. I've found that adding a teaspoon of espresso powder to the chocolate melt creates a "mocha" version that is incredible for a mid morning pick me-up.
The coffee notes deepen the chocolate without making it taste like a latte.
If you are looking for a more traditional treat that isn't focused on the protein hit, the logic here is very similar to my Giant PB Cups recipe. That recipe focuses more on the confectionery side, but the "melt and set" technique is a direct cousin to what we are doing here.
The Crunch Factor
For those who miss a bit of texture, you can swap the creamy peanut butter for a crunchy variety. Alternatively, fold in 1/4 cup of crushed pretzels or cacao nibs into the dough before pressing it into the pan. The salty sweet contrast of pretzels is particularly addictive.
The Low Calorie Swap
To reduce the density of the bars, you can replace half of the peanut butter with a powdered peanut butter (like PB2) reconstituted with water. Just be aware that this will change the fat content significantly, making the bars a bit less "fudgy" and more "chewy." It’s a trade off, but it works if you’re watching your macros closely.
Wholesome storage methods for long term freshness
Because these bars contain natural oils and no preservatives, how you store them really matters. I've made the mistake of leaving them on the counter on a hot day, and let's just say "melted mess" doesn't begin to cover it.
The fats in the peanut butter and the coconut oil in the chocolate will soften quickly at room temperature.
Keep your bars in an airtight container in the refrigerator for up to 10 days. I like to place a small piece of parchment paper between the layers so the chocolate tops don't stick to the bottoms of the bars above them. For long term storage, these bars freeze beautifully for up to 3 months.
When you're ready to eat one, just let it sit on the counter for 5 minutes; it will reach the perfect "fudgy" consistency while still being cool and refreshing.
Zero Waste Tip: Don't throw away those leftover oat crumbs at the bottom of the blender! Toss them into your morning yogurt or a smoothie. If you have extra melted chocolate left over from the topping, drizzle it over some fruit or stir it into a warm mug of milk for a quick treat.
Even the flaxseed dregs can be added to your next batch of pancake batter for an extra fiber boost.
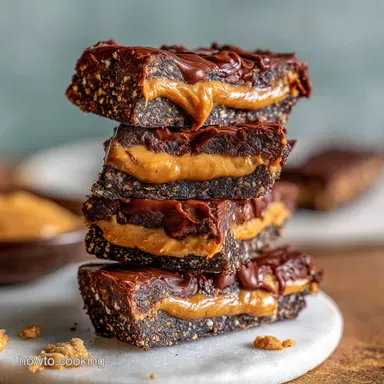
Creative plating for your nutritious homemade bars
Just because these are a "fuel" food doesn't mean they shouldn't look beautiful. When I'm serving these to friends after a group hike or a long walk, I like to do a little extra. A light sprinkle of flaky sea salt (like Maldon) over the chocolate before it sets adds a sparkling visual element and a fantastic crunch.
It signals that this is a "real" food, not just a supplement.
You can also serve these as a "deconstructed" dessert. Slice a bar into small cubes and use them as a topping for a bowl of Greek yogurt or a scoop of banana "nice cream." The density of the bar snack with peanut butter provides a great contrast to a soft, creamy base.
If you want to go all out, drizzle a tiny bit of extra melted peanut butter over the set chocolate in a zigzag pattern. It looks like something from a professional bakery and only takes an extra 30 seconds.
This kind of presentation builds confidence in your cooking and makes the experience of eating a nutritious snack feel like a true indulgence. Whether you're grabbing one on the way out the door or sitting down with a cup of coffee, these bars are a testament to how simple, wholesome ingredients can outperform anything you'll find in a plastic wrapper.## FAQ
Troubleshooting Common Issues
| Issue | Solution |
|---|---|
| How can I make these bars vegan | Use a plant based protein powder (pea, rice, or hemp) and choose maple syrup over honey. Ensure your chocolate chips are dairy-free; many dark chocolate brands are naturally vegan, but always check th |
| Protein bar mixture too crumbly | Crumbly dough usually happens if the oat flour is too coarse or if the protein powder is highly absorbent. Add 1-2 teaspoons of water or almond milk until the dough holds its shape when pressed. |
| Use regular flour instead of oat flour | No, regular all purpose flour cannot be eaten raw as it may contain bacteria. Oat flour is safe to consume without baking and provides the specific chewy texture required for these bars. |
My chocolate topping is cracking when I cut the bars. Why?
If you skip the coconut oil in the chocolate melt, the topping becomes very brittle when cold. Adding that small amount of fat keeps the chocolate flexible enough to slice cleanly.
Troubleshooting Common Issues
| Issue | Solution |
|---|---|
| Make these without protein powder | Yes, you can replace the protein powder with an equal amount of additional oat flour or almond flour. Note that the flavor will be less "chocolatey" and the protein content will be lower. |
| How long do these bars last at room temperature | While they are safe to eat, they will become very soft if left out for more than 2 hours. For the best texture, keep them refrigerated until you are ready to eat. |
| Necessary to blend the oats | Blending the oats into a fine flour is essential for a "fudgy" texture. If you leave them whole, the bars will be very chewy and may not hold together as a solid bar. |

Recipe FAQs
Can I use regular wheat flour instead of oat flour?
No, avoid using standard wheat flour. Raw flour carries risks of bacteria and will not achieve the desired dense, fudgy texture characteristic of this no-bake bar.
How do I prevent the chocolate coating from cracking when slicing?
Add one teaspoon of coconut oil to your chocolate melt. This acts as a lipid plasticizer, lowering the melting point and allowing the glaze to remain slightly flexible even when fully chilled.
How to make these bars vegan?
Substitute whey protein with a plant based alternative. Ensure your binding agent is maple syrup rather than honey, and always verify that your dark chocolate chips are dairy-free.
Will using almond butter instead of peanut butter change the texture significantly?
Yes, slightly, but it is a manageable substitution. Almond butter has a thinner oil profile; you might need to press the dough more firmly into the pan to ensure structural integrity, similar to how you ensure even spread in our Chewy Chocolate Chip Cookies recipe.
Is it true that I must use a slow cooker for the binding ingredients?
No, a slow cooker is unnecessary and inefficient for this process. Gently warm the peanut butter and syrup on the stovetop over low heat or in short bursts in the microwave until just fluid.
How long can these protein bars safely be stored on the counter?
For optimal texture, refrigerate them. While they are safe for about two hours at room temperature, the natural oils will soften quickly, so refrigeration extends the firm, ideal texture for up to ten days.
How to compress the base mixture properly for a non-crumbly bar?
Use a flat, heavy object to press the mixture firmly into the pan. After stirring the thick dough, use the bottom of a dry measuring cup or a small flat spatula to compact the base until it is a dense, uniform layer.
Chocolate Peanut Butter Bars
Ingredients:
Instructions:
Nutrition Facts:
| Calories | 258 kcal |
|---|---|
| Protein | 11.3 g |
| Fat | 15.5 g |
| Carbs | 21.0 g |
| Fiber | 3.3 g |
| Sugar | 9.0 g |
| Sodium | 131 mg |
