Classic Pound Cake: Dense and Buttery
- Time: Active 20 minutes, Passive 75 minutes, Total 95 minutes
- Flavor/Texture Hook: Deeply buttery with a dense, silky crumb and a sweet, vanilla bean glaze.
- Perfect for: Family gatherings, holiday brunches, or a budget-friendly but impressive weekend project.
- Mastering the Perfect Classic Pound Cake
- Why This Method Works
- Wholesome Ingredients and Smart Swaps
- Tools for a Velvety Crumb
- Steps for the Golden Crust
- Troubleshooting Your Pound Cake Problems
- Variations and Flavor Upgrades
- Myths About Pound Cake
- Storage and Zero Waste Tips
- Toppings and Perfect Pairings
- Recipe FAQs
- 📝 Recipe Card
Mastering the Perfect Classic Pound Cake
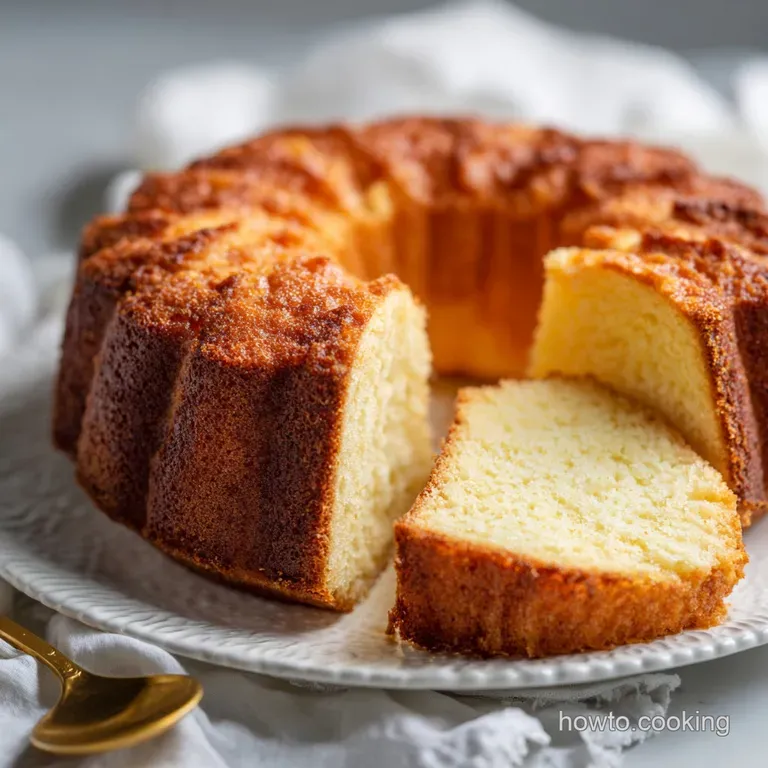
The smell of a Classic Pound Cake hitting that 60 minute mark in the oven is something you never forget. It isn't just sweet; it's a deep, toasted butter aroma that fills every corner of the house.
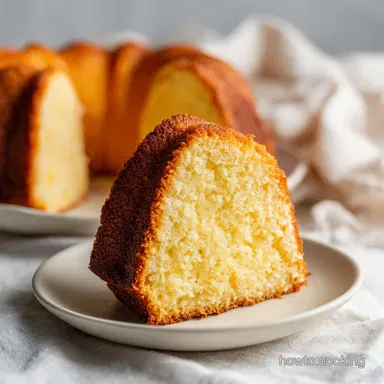
I remember the first time I actually got the crust right that dark, mahogany exterior that almost snaps when you slice into it, revealing a crumb so fine it looks like yellow velvet.
Most people think pound cake is just a boring brick of flour, but when it's done with this specific technique, it’s the most empowering thing you’ll ever bake.
The real hero of this story is the butter. We aren't just using it for flavor; we're using a full 1 lb of unsalted butter as our primary leavening agent. In this recipe, the butter isn't just an ingredient; it's the structural foundation.
When you beat it for those crucial minutes, you’re actually trapping millions of tiny air bubbles that will expand in the heat of the oven. If that butter is too cold, it won't trap air. If it's too warm, it collapses. Getting it to exactly 65°F is the secret to that legendary lift.
We're going to use simple, wholesome pantry staples to create something that tastes like a professional bakery did the work. This budget smart approach relies on technique rather than expensive additives.
By sifting our all purpose flour three times, we mimic the lightness of expensive cake flour without the extra cost. It’s all about working with what you have to get results that feel truly special for your family.
Why This Method Works
- The Cold Start Strategy: Placing the batter in a cold oven allows the cake to rise slowly as the temperature climbs, preventing the top from setting too quickly and ensuring an even, dense crumb.
- Mechanical Aeration: By creaming the butter and sugar for a full 5–7 minutes, we create the entire structure of the cake without needing a single teaspoon of baking powder or soda.
- Triple Sifting: Passing the flour through a sieve three times incorporates air and breaks up clumps, which is why this Classic Pound Cake feels so light despite its signature density.
- Triple Fat Emulsion: The gradual addition of room temperature eggs ensures the fat from the butter and the water from the eggs stay bound together, preventing a "broken" or curdled batter.
Serving Size Calculator
| Servings | Ingredient Adjustments | Pan Size | Cook Time |
|---|---|---|---|
| 8 People | Halve all ingredients | 9x5 Loaf Pan | 55 minutes |
| 16 People | Use full recipe | 10 cup Bundt | 75 minutes |
| 32 People | Double all ingredients | Two 10 cup Bundts | 75-80 mins |
The beauty of this calculator is that it helps you plan for everything from a quiet Sunday morning to a large family reunion. When you're doubling the recipe, remember to keep your pans on the same oven rack with at least two inches of space between them to ensure the heat circulates properly for that mahogany finish.
Wholesome Ingredients and Smart Swaps
Building a Classic Pound Cake requires high-quality, simple ingredients. Since we aren't using chemical leaveners, the freshness of your eggs and the quality of your butter will be the most prominent flavors.
I always suggest using the best butter you can afford, but even a store brand unsalted butter works beautifully if you follow the temperature rules.
Component Analysis
| Ingredient | Science Role | Pro Secret |
|---|---|---|
| Unsalted Butter | Aeration & Tenderness | Use 65°F butter for the best "plastic" state to hold air bubbles. |
| Granulated Sugar | Structural Weakener | Sugar cuts into the butter to create the air pockets we need for rising. |
| All Purpose Flour | Protein Structure | Sifting three times prevents the cake from becoming a "lead sinker" brick. |
| Large Eggs | Emulsification | Room temperature eggs prevent the butter from seizing up during mixing. |
Required Ingredients
- 1 lb unsalted butter: Softened to 65°F. Why this? Provides the foundational fat and air trapping capability for the cake's rise.
- Substitute: 1 lb salted butter (omit the extra 1 tsp sea salt).
- 14 oz granulated sugar: Standard white sugar. Why this? Essential for "creaming" and creating a crisp, caramelized exterior crust.
- Substitute: 14 oz superfine sugar for an even tighter, more velvety crumb.
- 6 large eggs: Must be at room temperature. Why this? They provide liquid, structure, and help the batter emulsify smoothly.
- Substitute: 1.5 cups liquid egg substitute (though the crumb will be less rich).
- 1 lb all purpose flour: Sifted three times. Why this? Provides the necessary gluten for structure without being as heavy as bread flour.
- Substitute: 1 lb cake flour (omit sifting more than once).
- 1/4 cup whole milk: Room temperature. Why this? Adds just enough moisture to keep the crumb from being overly dry.
- Substitute: 1/4 cup buttermilk for a slightly tangier flavor profile.
- 1 tbsp vanilla bean paste: For flavor and speckled aesthetics. Why this? Offers a more intense, wholesome vanilla punch than standard extract.
- Substitute: 1 tbsp high-quality pure vanilla extract.
- 1 tsp fine sea salt: To balance the sweetness. Why this? Sharpens the buttery notes and prevents the cake from being one dimensional.
- Substitute: 1 tsp table salt or kosher salt.
Tools for a Velvety Crumb
To get that iconic shape and even bake, you really need a 10 cup Bundt pan or a tube pan. I prefer a heavy duty cast aluminum pan because it conducts heat so evenly, which is vital for the 75 minutes of baking time. A stand mixer, like a KitchenAid, is also a near necessity here.
You can do this with a hand mixer, but your arm will be exhausted after 7 minutes of creaming!
Don't forget a fine mesh sieve for that triple sifting of the flour. It might seem like a chore, but it's the difference between a "good" cake and a "how did you make this?" cake. Also, a digital thermometer is a budget friendly tool that ensures your butter is actually at 65°F.
It takes the guesswork out of the process.
Steps for the Golden Crust

- Cream the butter. In a stand mixer with a paddle attachment, beat the 1 lb softened butter on medium high speed for 2 minutes until it looks smooth and pale.
- Incorporate the sugar. Gradually stream in the 14 oz granulated sugar and 1 tsp sea salt, beating for 5–7 minutes until the mixture is light, fluffy, and looks like whipped cream. Note: This is the most important step for the cake's volume.
- Add the eggs. Lower the mixer speed to medium low. Add the 6 large eggs one at a time, ensuring each is fully incorporated until the batter looks glossy and smooth before adding the next.
- Prep the liquids. Combine the 1 tbsp vanilla bean paste with the 1/4 cup room temperature whole milk.
- Mix in solids. With the mixer on the lowest setting, alternatingly add the 1 lb sifted flour and the milk mixture, beginning and ending with the flour. Mix only until no white streaks remain.
- Fill the pan. Pour the batter into a greased and floured 10 cup Bundt pan, smoothing the top with a spatula.
- Start cold. Place the pan in a cold oven. Do not preheat.
- Bake the cake. Set the oven to 325°F (163°C). Bake for approximately 75 minutes until a skewer comes out clean and the crust is deep mahogany.
- Initial cool. Cool the cake in the pan for 15 minutes until the edges slightly pull away from the sides.
- Glaze and finish. Invert onto a rack. Whisk 1 cup confectioners' sugar, 2.5 tbsp heavy cream, and 0.5 tsp vanilla, then drizzle over the warm cake until it drips down the sides.
Troubleshooting Your Pound Cake Problems
Even the most experienced home cooks run into issues with this Classic Pound Cake every now and then. Usually, it comes down to temperature or timing. If your cake feels too dense, it's almost always because the creaming step was cut short. If you're interested in how different fats affect cakes, you might see similar patterns when making my Classic Rum Cake, though that recipe uses a much more liquid heavy batter.
Dense Ring at Bottom
This is a very common issue often called the "sad streak." It happens when the batter isn't fully emulsified or if the oven temperature is uneven. When the butter and eggs aren't perfectly combined, the fat separates during baking and sinks to the bottom, creating a gummy, dark layer.
Substitution Table
| Original Ingredient | Substitute | Why It Works |
|---|---|---|
| Whole Milk | Buttermilk | Adds acidity and a subtle tang; results in a slightly softer crumb. |
| Vanilla Bean Paste | Almond Extract | Use half the amount; provides a nutty, wedding cake flavor profile. |
| AP Flour | gluten-free Blend | Must be a 1:1 blend with xantham gum. Note: Texture will be slightly grittier. |
Troubleshooting Table
| Problem | Root Cause | Solution |
|---|---|---|
| Cake Sticking | Improper Greasing | Use a "cake goop" (equal parts flour, oil, shortening) to coat every crevice. |
| Heavy/Leaden Crumb | Butter Too Warm | Ensure butter is 65°F; if it's oily or shiny, it's too warm to hold air. |
| Cracked Top | Oven Too Hot | Start in a cold oven and check that your oven is calibrated to exactly 325°F. |
Common Mistakes Checklist
- ✓ Never skip the triple sifting of the flour; it is the only way to get a fine crumb with all purpose flour.
- ✓ Always use room temperature eggs; cold eggs will seize the butter and break your beautiful emulsion.
- ✓ Stop mixing the moment the flour is incorporated; over mixing after adding flour develops gluten and makes the cake tough.
- ✓ Don't peek! Opening the oven door in the first 45 minutes can cause the cake to collapse.
- ✓ Let the cake rest for exactly 15 minutes before inverting; too soon and it breaks, too late and it sticks.
Variations and Flavor Upgrades
While the Classic Pound Cake is a masterpiece on its own, it’s a wonderful canvas for creativity. If you want to make it dairy-free, you can swap the butter for a high-quality plant based butter stick (not the tub kind!) and use almond milk.
The texture will be a bit different less "melt in-your mouth" but it still yields a very respectable crumb.
For a seasonal twist, try adding the zest of two lemons and a cup of fresh blueberries tossed in a tablespoon of flour. The flour coating prevents the berries from sinking to the bottom. If you enjoy the tangy profile of buttermilk, you can swap the whole milk out entirely, which creates a flavor profile similar to a Buttermilk Pie but in cake form.
Scaling and Adjustments
When scaling this recipe down for a loaf pan, you'll need to beat the eggs and use exactly half. For a 9x5 loaf pan, reduce the bake time to about 55 minutes, but keep the temperature at 325°F.
Scaling up to two Bundt pans is simple just double everything but make sure your mixer can handle 2 lbs of butter and 2 lbs of flour! If it looks like it's struggling, work in two separate batches.
Myths About Pound Cake
One huge misconception is that "the more you beat it, the fluffier it gets." This is only true during the butter and sugar stage. Once the flour goes in, beating is your enemy. Another myth is that you must use cake flour for a "professional" result.
Actually, the traditional Southern pound cake has always used all purpose flour because the higher protein content helps support the massive amount of butter and sugar.
Searing the Batter?
Some people believe you should "sear" the batter by starting at a high temperature. This is actually counter productive for a Classic Pound Cake. A high heat start causes the outside to crust over and burn before the center has had time to rise, leading to a raw middle and a charred exterior.
The "cold start" method is the true secret to success.
Storage and Zero Waste Tips
This cake is actually better on day two. The flavors have time to settle, and the moisture redistributes. I keep mine under a glass cake dome at room temperature for up to 4 days. If you need to keep it longer, wrap it tightly in plastic wrap and store it in the fridge for up to a week.
For freezing, this cake is a dream. Wrap individual slices in parchment paper and then foil, and they’ll stay perfect for 3 months. To prevent waste, any "scraps" from the center of the tube or a broken cake can be toasted and turned into croutons for a fruit salad or layered into a trifle with whipped cream and berries.
Toppings and Perfect Pairings
The classic glaze is my favorite, but a simple dusting of confectioners' sugar is elegant and budget friendly. If you want to get fancy, serve a slice with a dollop of crème fraîche and some macerated strawberries. The tartness of the cream cuts right through the rich, buttery density of the cake.
For a cozy afternoon, a slice of this cake paired with a strong Earl Grey tea is unbeatable. The bergamot in the tea highlights the vanilla bean paste in the batter. If you're serving this for brunch, try lightly toasting a slice in a dry pan until the edges are crispy and serving it with a spoonful of Greek yogurt and honey.
It transforms the dessert into a wholesome feeling morning treat.

Recipe FAQs
What is a traditional pound cake?
A traditional pound cake is a dense, buttery sponge made using equal weights of butter, sugar, eggs, and flour. It relies on the mechanical aeration of butter and sugar for its rise, rather than chemical leaveners like baking powder.
What cake can I eat with high cholesterol?
Strictly speaking, this pound cake is not suitable for a cholesterol conscious diet. Because it requires one full pound of butter and six large eggs, it is very high in saturated fats and should be consumed only as an occasional indulgence.
How to modify this recipe for diabetic patients?
Consult your healthcare provider before consuming, as this recipe contains high levels of carbohydrates and refined sugars. There is currently no safe way to swap the 14 oz of sugar or 1 lb of flour in this specific formula without drastically altering the structural integrity and bake time of the
cake.
What is the secret to the best pound cake?
The secret is the creaming process. You must beat the butter and sugar for the full 5 7 minutes until the mixture is light, fluffy, and significantly increased in volume. If you enjoyed mastering the texture of this aeration, you will find that same precision leads to better results in other rich desserts.
How to fix a dense, heavy cake?
Ensure you are not rushing the creaming stage or the addition of eggs. A dense texture usually indicates that the butter and sugar were not beaten long enough to trap air, or the eggs were added too quickly, causing the emulsion to break before the flour was folded in.
Is it true the cake will be ruined if I don't use a cold oven?
No, this is a common misconception. Starting in a cold oven is simply the method used here to ensure a slow, even rise for a cake with such a high density of butter and eggs.
How to tell when the cake is fully baked?
Insert a skewer into the center of the cake. The cake is done when the skewer comes out clean and the exterior crust has turned a deep mahogany color after the 75-minute baking period.
Classic Pound Cake Recipe
Ingredients:
Instructions:
Nutrition Facts:
| Calories | 472 kcal |
|---|---|
| Protein | 5.7 g |
| Fat | 26.1 g |
| Carbs | 54.4 g |
| Fiber | 0.8 g |
| Sugar | 32.6 g |
| Sodium | 148 mg |
