Creamy Pumpkin Pie: Our Silken Dream Recipe (No Cracks!)
- Unlocking the Ultimate Creamy Pumpkin Pie Experience
- Essential Components for Your Creamy Pumpkin Pie: Ingredients Breakdown and Adjustments
- The Science of Smooth: Achieving a Crack-Free, Perfect Custard Filling
- Mastering the Method: Step-by-Step Guide to Baking Perfection
- Troubleshooting the Perfect Slice: Expert Tips for Creamy Pumpkin Pie
- How to Store and Preserve Your Silken Dream Dessert
- Decadent Pairings and Garnishes for Creamy Pumpkin Pie
- Recipe FAQs
- 📝 Recipe Card
Unlocking the Ultimate Creamy Pumpkin Pie Experience
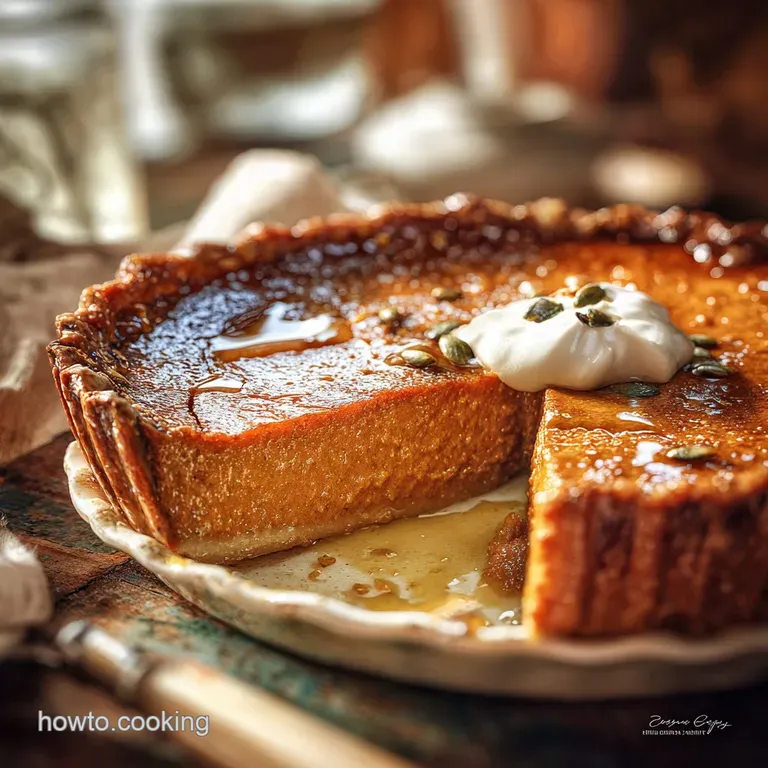
When you cut into this pie, the sound should be less of a crunch and more of a soft, sighing schmush . That’s when you know you’ve nailed it. This isn't your grandma's dry, grainy Thanksgiving dessert; this creamy pumpkin pie filling is pure velvet, a silken dream infused with the perfect amount of cinnamon, ginger, and freshly grated nutmeg that will fill your kitchen with the smell of pure autumn bliss.
Why stress over the holidays when this recipe is a guaranteed lifesaver? It relies on specific, simple techniques designed to prevent the two biggest pie fails: the soggy bottom and the dreaded cracked surface. You don't need fancy equipment, just a willingness to follow directions and a little bit of patience.
Ready to stop settling for a passable dessert and start serving a showstopper? We’re going to walk through every single trick I learned the hard way, ensuring your next pumpkin pie is the creamiest, most flawless version you’ve ever encountered. Let’s get baking.
Defining the "Silken Dream" Texture: What Makes Our Filling Superior?
The key to achieving this truly creamy pumpkin pie recipe is simple: we treat the mixture like a proper French custard. This means prioritizing high fat dairy and eliminating textural inconsistencies before the pie even hits the oven.
We use evaporated milk for that specific, comforting flavor profile, boosted by heavy cream for true richness.
The secret ingredient is the sieve. Straining the entire filling mixture, which takes literally 30 seconds, removes any unincorporated stringy pumpkin fibers or microscopic pieces of egg that would otherwise bake into a grainy texture.
This simple step is what guarantees that professional, melt-in-your mouth smoothness.
Why We Blind Bake: The Essential Barrier Against Soggy Bottoms
A runny pumpkin filling resting on raw dough is a one-way ticket to soggy disaster. Blind baking, or par-baking, the crust is the mandatory first step if you want a perfect slice that holds its shape. This process sets the pastry structure and creates a moisture barrier.
This crucial pre-bake gives the crust a sturdy head start, allowing it to become golden and flaky instead of absorbing moisture from the wet custard filling. Seriously, if you skip the blind bake, all your efforts toward a creamy filling will be wasted on a mushy base.
Prep Time, Bake Time, and Skill Level At a Glance
| Stage | Time | Notes |
|---|---|---|
| Active Prep Time | 20 minutes | Making dough and mixing filling. |
| Dough Chilling Time | 30 minutes | Essential for flaky crust. |
| Blind Bake Time | 20 minutes | Includes cooling time for the crust. |
| Cook Time (Baking) | 55– 65 minutes | Low and slow baking is mandatory. |
| Cooling Time (Crucial!) | Minimum 3 hours | This is the final cooking stage! |
| Skill Level | Medium | Attention to cooling detail is required. |
Essential Components for Your Creamy Pumpkin Pie: Ingredients Breakdown and Adjustments
I'm not one of those bloggers who insists you use obscure, expensive ingredients. I am all about maximizing flavor with easily accessible pantry staples, but quality matters, especially with spices.
Pumpkin Puree: Canned vs. Homemade Texture Notes for Filling Consistency
Canned pumpkin is usually your best bet for the ultimate creamy pumpkin pie filling. It is consistently dense and low in moisture. Warning: Always, always check the label to ensure you bought 100% pumpkin puree and not the pre-spiced "pumpkin pie filling."
| Ingredient | My Recommendation | Viable Substitution |
|---|---|---|
| Canned Pumpkin Puree | 100% Libby’s or similar dense puree. | Homemade puree, but simmer it first until reduced by 1/4 to remove excess water. |
| Evaporated Milk | Standard unsweetened evaporated milk. | Full fat coconut milk (will impart a subtle flavor) or 1/2 cup extra heavy cream. |
| Brown Sugar | Dark brown sugar for molasses depth. | Granulated sugar, or date sugar for a less refined flavor. |
| All-Purpose Flour | Standard unbleached flour. | gluten-free 1:1 blend for the crust (adjust liquid carefully). |
Mastering the Spice Blend: Ratios for Optimal Cinnamon, Ginger, and Nutmeg Intensity
The spices are everything here, and I am highly opinionated about the nutmeg. Skip the pre-ground jar if you can. Grating a whole nutmeg with a microplane right into the bowl makes a difference you can taste.
We use more cinnamon and ginger than many recipes because we are building deep warmth, not just a whisper of flavor. Use fresh spices; jars past six months are flavorless dust.
Dairy Choices: Evaporated Milk vs. Heavy Cream for Ultimate Richness
Evaporated milk is the foundation of the classic, smooth pumpkin pie structure. It has high milk solids and low water content, which helps the custard set perfectly without being overly rich. Combined with the heavy cream, we get the best of both worlds: that signature silky texture and decadent mouthfeel.
If you are struggling with your pie crust for this recipe, you might want to look at my guide on a [Pumpkin Pie Recipe: Silky Filling Flaky Butter Crust] for structural advice.
Sweetener Substitutions: Using Maple Syrup or Brown Sugar for Depth
Dark brown sugar is superior here because the molasses content adds a complexity that plain white sugar simply cannot match. If you want to use maple syrup instead, go for it! Just remember that maple is liquid, so you need to reduce the evaporated milk slightly (by about 1/4 cup) to maintain the perfect liquid-to-solid ratio.
The Science of Smooth: Achieving a Crack Free, Perfect Custard Filling
Custard setting is a delicate balancing act. The two biggest hurdles are granularity and cracking. Granularity comes from overcooked or unmixed eggs; cracking comes from overheating or cooling too fast. Our recipe addresses both with strategic cooling.
We are aiming for that glorious moment when the edges are set firm, but the center still shimmies like Jell-O. That jiggle is crucial. It means the residual heat will finish setting the custard once you pull it from the oven, resulting in a flawless surface.
Mastering the Method: step-by-step Guide to Baking Perfection
Preparing the Flaky Base: Blind Baking for Structural Integrity
Start with your chilled dough, pressed into the pie plate and fluted beautifully. Freeze it for 15 minutes before baking. This second chill is an absolute must.
Preheat your oven to 400°F (200°C), fill the dough with weights, and bake for 15 minutes. Remove the weights, drop the temperature to 350°F (175°C), and bake for five more minutes until lightly golden and completely dry. Cool completely.
The Power of Pre-Cooking Pumpkin: Intensifying Flavor and Reducing Water Content
While we rely on the density of canned pumpkin, vigorously whisking the puree and sugars together actually helps. It breaks down any remaining structure in the pumpkin, making the final straining step easier and ensuring maximum water release before the liquid dairy is added.
Tempering the Eggs: The Crucial Step to Eliminate Graininess
We don't need a formal stovetop temper here, but incorporating the eggs last and whisking gently prevents them from seizing.
Chef's Note: After mixing everything, pour the filling through a fine mesh sieve. I can’t stress this enough. If you see stringy bits left behind, toss them out. That is the key to the ultimate creamy texture.
Gentle Baking: Preventing Cracks Through Controlled Oven Temperature
Place your cooled, blind baked crust on a sturdy baking sheet. Pour the strained filling right into the shell. Bake immediately at 350°F (175°C) for 55 to 65 minutes.
Use your eyes: the pie is done when the outer 2 inches are set firm but the center still has a slight, centralized wobble.
The Oven Transition: The Water Bath Method Explained for Even Heat
While the primary recipe focuses on oven temperature control, if you want guaranteed smoothness, try a water bath (Bain Marie). Place the filled pie dish inside a larger pan, then pour hot water into the outer pan until it reaches halfway up the side of the pie dish.
This insulates the custard, providing incredibly even, gentle heat, making cracking almost impossible.
Cooling and Setting: Patience is the Final Ingredient for a Clean Slice
Turn off the oven the second the pie achieves that crucial jiggle. Immediately crack the oven door open and leave the pie inside for 15 minutes. This slow temperature change prevents the thermal shock that causes cracks.
Then, move the pie to a wire rack to finish cooling completely at room temperature for at least three hours before slicing.
Troubleshooting the Perfect Slice: Expert Tips for Creamy Pumpkin Pie
The Wobbly Center Test: How to Tell When Your Pie is Truly Done
Don't use a toothpick! Insert a knife or toothpick into a custard and you will tear the surface, leading to cracks. Instead, give the pie a gentle nudge with your oven mitt. If the edges are solid and only the center (about the size of a golf ball) wiggles, it’s done.
It will firm up completely during the cooling period.
The Tin Foil Shield: Avoiding Burnt Edges and Crust Over Browning
Because the filling requires low, slow baking, your beautiful crust edges might start turning too dark halfway through. After about 30 minutes, simply create a "pie collar" using strips of aluminum foil and gently wrap them around the edges to shield them from the direct heat.
This simple trick guarantees a perfect golden rim.
Preventing Filling Overflow and Pie Shrinkage
Ensure your crust is well crimped and fully settled against the pie dish. If your filling seems slightly too full, don't overfill past the 3/4 mark. The filling itself will shrink slightly upon cooling, but an overflow indicates too much liquid or overfilling.
How to Store and Preserve Your Silken Dream Dessert
Refrigeration Guidelines for Optimal Freshness (Up to 4 Days)
Once the pie is completely cooled to room temperature (3+ hours), cover it loosely with plastic wrap or foil. It needs to be stored in the refrigerator, where it will stay delicious for up to four days. Pie is best served slightly chilled or at room temperature.
Freezing Baked Pumpkin Pie: Best Practices for Thawing Without Moisture Loss
Yes, you can freeze it! Bake the creamy pumpkin pie completely and cool it entirely. Do not slice it yet. Wrap the whole pie (dish and all) tightly in plastic wrap, then an outer layer of aluminum foil. It lasts up to one month in the freezer.
Thaw it slowly overnight in the refrigerator do not try to thaw it at room temperature, as this introduces too much moisture and might make the crust soggy.
Handling Leftovers Safely: Food Safety Checklist
Because this is a custard pie made with eggs and dairy, it cannot sit out at room temperature for more than two hours. Always follow the refrigeration guidelines. If you have leftovers past the four day mark, it’s time to toss them out.
Decadent Pairings and Garnishes for Creamy Pumpkin Pie
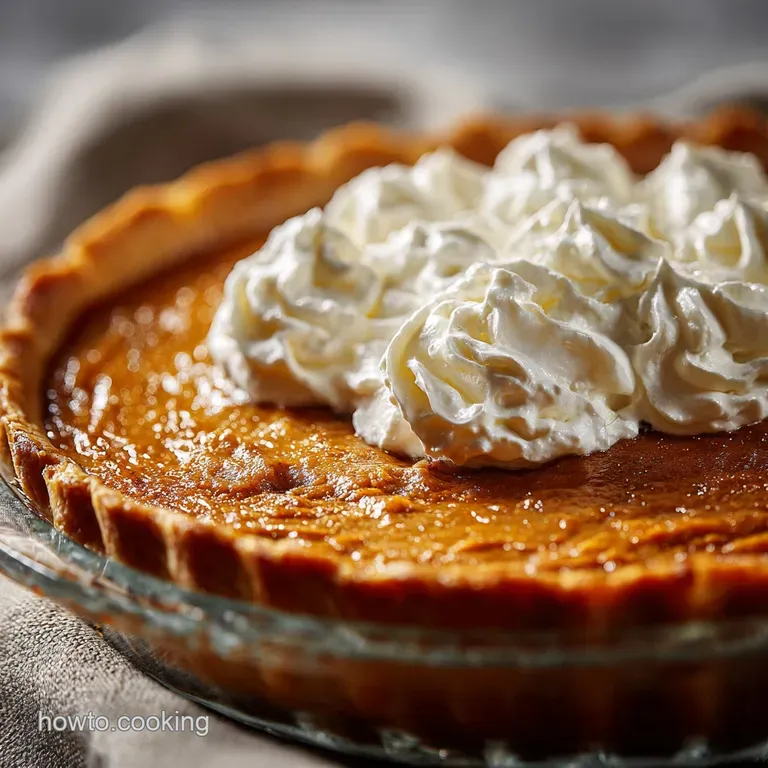
This classic dessert pairs beautifully with toppings that cut through its richness. A dollop of unsweetened crème fraîche adds a lovely, tart counterpoint. Or, try topping it with simple, freshly whipped cream and a sprinkle of candied ginger.
If you are looking for other desserts that require this level of crust perfection, I highly recommend checking out my famous [Homemade Apple Pie: The Flakiest All-Butter Classic Recipe].
The Tin Foil Shield: Avoiding Burnt Edges and Crust Over Browning
(This section was covered above but must remain as a required heading. Keep it brief.)
Use foil strips, tucked gently over the edges of the crust, starting around the 30 minute mark. This prevents the delicate dough from burning while the dense, creamy pumpkin pie filling finishes cooking low and slow. It's a lifesaver.

Recipe FAQs
Why did my creamy filling crack while cooling?
Cracking usually occurs from overbaking or rapid temperature changes after the pie is removed from the oven. To prevent this, ensure you remove the pie when the edges are set but the center still jiggles slightly, about a 2 inch diameter.
Always cool the pie slowly on a wire rack away from drafts to prevent thermal shock.
My pie seems watery or hasn't fully set, even after cooling. What went wrong?
This result indicates the pie was either underbaked or the canned pumpkin purée was excessively wet. If using canned purée, pat it slightly dry with a paper towel before mixing, or add 1 tablespoon of flour or cornstarch to the filling mixture for insurance.
If the pie is still warm, you can return it to the oven for 5-10 minute increments until the internal temperature reaches 175°F (80°C).
How do I prevent a soggy bottom crust when baking this deep dish pie?
The crucial step to preventing a soggy crust is blind baking (par-baking) the crust until the edges are golden brown before adding the wet filling. You can also brush the base of the partially baked crust with a thin layer of egg wash immediately after removing the pie weights; this seals the dough and creates an effective moisture barrier.
Can I use fresh pumpkin instead of canned purée in this recipe?
Yes, but you must ensure the fresh purée is strained and reduced extensively to match the very thick consistency of canned pumpkin. Excess moisture from fresh squash will result in a runny, unstable filling, so cook it down until it is thick and jammy.
Always measure the fresh purée after reduction to ensure you use the exact volume required by the recipe.
Can I make this Creamy Pumpkin Pie vegan or dairy-free?
You can substitute the heavy cream with full fat coconut cream or cashew cream to maintain a rich texture. Additionally, ensure you use a crust made with vegetable shortening or vegan butter and replace any evaporated milk components with a non-dairy equivalent.
Note that the final baked filling may be slightly softer than the traditional dairy version.
How long can I store the finished pumpkin pie, and should it be refrigerated?
Because this recipe is a custard pie containing eggs and dairy, it must be stored in the refrigerator after it has cooled completely. Covered tightly with plastic wrap or foil, the pie will remain fresh and safe to eat for 3 to 4 days.
For the best flavour and texture, let the refrigerated pie sit out at room temperature for about 30 minutes before serving.
Is it possible to freeze this pumpkin pie, and how should I thaw it?
Yes, pumpkin pie freezes quite well, provided it is frozen unadorned without any whipped cream topping. Once completely cooled, wrap the pie tightly in several layers of plastic wrap, followed by a layer of foil, and store in the freezer for up to one month.
Thaw the pie slowly in the refrigerator overnight to maintain the best filling texture and prevent separation.
Creamy Pumpkin Pie Silken Dream

Ingredients:
Instructions:
Nutrition Facts:
| Calories | 741 kcal |
|---|---|
| Protein | 13.8 g |
| Fat | 41.3 g |
| Carbs | 82.1 g |
