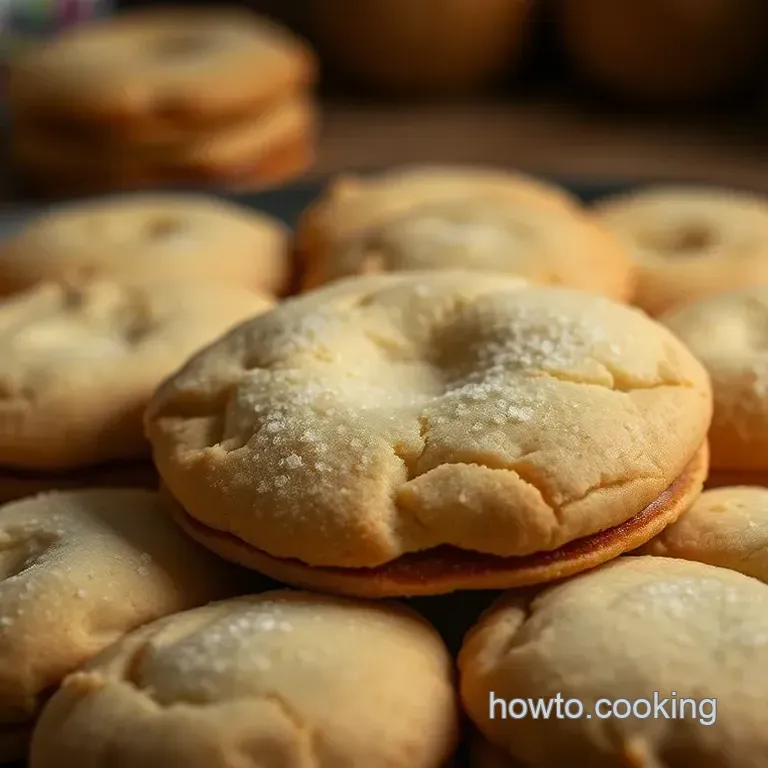
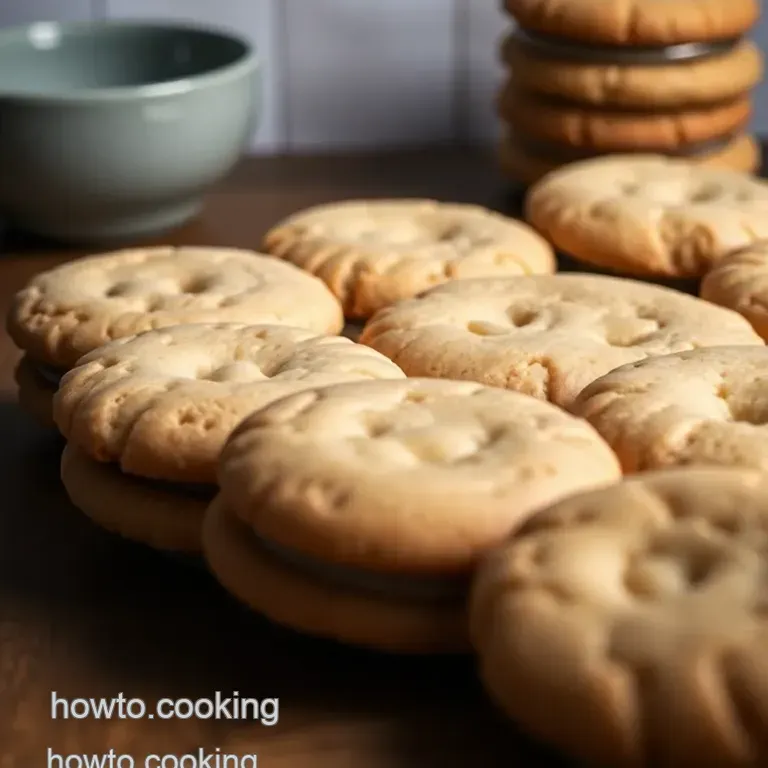
Delightful Sandwich Cookies Using a Cookie Press
What’s your favorite childhood memory? for me, it’s definitely those afternoons spent baking with my grandma. she had this amazing ability to turn our tiny kitchen into a cozy wonderland of flour clouds and sweet smells.
One of our go-to recipes? sandwich cookies using a cookie press. oh my gosh, the thrill of watching those perfectly shaped cookies pop out was just the best! they were always filled with rich, creamy buttercream or a tangy jam, making each bite a burst of nostalgia.
Baking has its history, and sandwich cookies trace back to the good old days of european baking. but here’s the best part: today, they’re more popular than ever! from family gatherings to elegant dessert tables, pressed cookie recipes are a hit.
And don’t let the name fool you these beauties are not just delicious, but they are also pretty easy to whip up once you get the hang of using that cookie press.
Recipe Overview
Now, don’t stress about the technique. sure, using a cookie press can feel a bit daunting at first. but trust me it's totally doable and super satisfying! in about one hour (plus a little chilling time), you can create around 24 charming sandwich cookies that will wow your friends and family.
For around the cost of your favorite latte, you can buy the ingredients. Plus, making these easy sandwich cookies at home means you’ll have enough to share or not! I mean, who could resist a rich cookie filled with dreamy buttercream or luscious jam?
Key Benefits
These cookies aren’t just pretty faces; they also pack a punch nutritionally. with a buttery base and a delightful filling, they can be a sweet treat without going overboard.
Plus, they are incredibly versatile! you can go classic with vanilla buttercream or get creative with all sorts of delicious cookie fillings .
Want to try cookies with jam filling ? you do you!
The great thing about sandwich cookies is they can elevate any occasion. think about it. birthdays, holidays, or even just a cozy tea time.
They make perfect sweet treats for tea and who doesn’t love a satisfying cookie crunch ?
And here's a little secret: these cookies are way more fun than your average cookie recipe. the shapes and designs you can create with a homemade cookie press are endless! from hearts to flowers, or even seasonal designs your guests will be amazed at your creative flair.
Transition to Ingredients
Ready to dive in? let’s gather our ingredients and gear up for a delightful baking adventure! here’s everything you need to turn that cookie press into a magical tool for creating some unforgettable gourmet sandwich cookies .
Trust me, once you get started on these velvet textured treats, you’ll be dreaming up all sorts of cookie shapes and designs in no time! onward to our ingredient list!
Essential Ingredients Guide to Baking Cookies
Baking is an art, my friends. it’s like a dance in your kitchen, where ingredients waltz together to create delicious treats.
Let’s break down the essentials you’ll need to whip up those sandwich cookies using a cookie press that will have everyone raving.
Premium Core Components
First off, let’s talk about quality ingredients . It’s crucial if you want your dessert to shine. Here’s what to keep an eye on:
Butter: Use unsalted butter for that rich flavor. You’ll need about 1 cup (226g) for our cookies. The softness? Aim for a nice creamy consistency, so let it sit out before baking.
Sugar: Granulated sugar is your go-to, measuring 1 cup (200g) . Look for a clean, pure white texture no clumps.
Eggs: One large egg will hold everything together beautifully. Make sure it’s at room temperature.
For storage , keep your flour, sugar, and butter in a cool, dry place. They’ll last a good while, but use your flour within 6 months for the best quality.
Signature Seasoning Blend
Time to spice things up! The dough is just the start. Here’s how to enhance your cookies:
Vanilla extract: Just a teaspoon adds a sweet depth. Don’t skimp on this one; quality matters!
Baking powder: A wee bit— 1/2 teaspoon —helps your cookies rise. Spoiled or old baking powder can ruin your cookies, so check your pantry.
Salt: Don’t forget it! Just a 1/4 teaspoon helps balance the flavors.
As for herbs and spices, think creative! Add a pinch of cinnamon for a warm twist.
Smart Substitutions
Sometimes, you can’t find that perfect ingredient. No worries; we’ve got substitutions galore!
Butter: Out of unsalted butter? You can swap it with salted if you reduce the additional salt.
Sugar: Try coconut sugar if you’re looking for something healthier.
Flour: Need a gluten-free option? Use almond or hazelnut flour just remember to adjust the measurements a little.
Filling: For fillings, maybe you want chocolate buttercream instead of vanilla? Go ahead! Mixing it up keeps things exciting.
Kitchen Equipment Essentials
Now, let’s get into the tools that will help you create those pressed cookie recipes effortlessly:
Cookie press: This is your main squeeze for shaping cookies! It can seem tricky, but practice makes perfect seriously, you’ll get the hang of it.
Mixing bowls: You’ll need a couple of these for combining ingredients.
Baking sheets & parchment paper: Line those bad boys up to keep cookies from sticking.
Cooling rack: Essential! Let your cookies cool properly before sandwiching them.
Electric mixer: It’s totally worth it for whipping up butter and sugar until fluffy. You want that airy texture!
Tips for Baking Success
You want your sandwich cookies to shine, right? Here are some tried and-true tips:
Chill Your Dough: For the best shapes, wrap that dough tight and refrigerate for about 30 minutes .
Pack the Press Well: Fill your cookie press firmly. A good seal means fewer mishaps while pressing.
Experiment with Shapes: Switch out the discs on your press to create fun designs don’t be shy!
Cool Completely: Once baked, let those cookies chill before slapping on the filling. Nobody wants mushy sandwiches!
Now that we’ve laid down the groundwork with quality ingredients, equipment, and tips, it’s time to dive into the glorious world of sandwich cookie creations.
Think of those buttercream for cookies , creamy fillings endless variations await you.
Ready to roll up your sleeves and get started? Let’s take those tips and ingredients to the next step by crafting your delightful sandwich cookies . Happy baking!
Crafting Delicious Sandwich Cookies: Pressed Perfection
Alright, folks, gather 'round because we’re diving into the world of sandwich cookies using a cookie press. if you’ve never tried making these delightful treats, you’re in for a real treat! with that buttery crunch and a soft, creamy filling, i swear these babies can light up any gathering.
Plus, they look like they belong in a fancy bakery, but trust me, they're simple to whip up at home.
Let’s roll up our sleeves and dive into the essential preparation steps before we get into the juicy details.
Essential Preparation Steps
Mise en place french for “everything in its place.” before you start, make sure you’ve got all your ingredients on hand.
Nothing's worse than realizing midway that you’re short on flour or butter. trust me, i’ve been there! have your cookie press and baking sheets ready to roll.
Time management tips prepping your dough takes around 15 minutes , and chilling it for 30 minutes is crucial.
Use that time to clean up your workspace, grease a couple of cookie sheets, or pour yourself a cup of coffee because you deserve it!
Organization Strategies – Lay everything out in an orderly fashion. Keep your ingredients near the mixing area, and your tools nearby. This avoids frantic searches for a whisk or a spatula mid-recipe.
Safety considerations when working with ovens, seriously be extra careful! keep an eye on the timers, and know that baking requires hot surfaces.
Use oven mitts, and don’t let your kids run around the kitchen while you're pulling trays out, okay?
step-by-step Process
Prep the dough cream 1 cup (226g) of softened unsalted butter with 1 cup (200g) of sugar. beat in one egg and a dash of vanilla until it's all smooth and luscious.
In a separate bowl, whisk 2 cups (240g) of all-purpose flour, 1/2 tsp baking powder , and 1/4 tsp salt .
Mix them together until it’s a dream dough.
Chill the Dough – Wrap that dough in plastic and pop it in the fridge for around 30 minutes . You’ll want it nice and firm for easy handling.
Oven Time – Preheat that beauty to 350° F ( 175° C) . Line your baking sheets with parchment paper because we’re not trying to scrub stuck cookies off, right?
Cookie press glory now here’s the fun part! fill your cookie press with the chilled dough. press those cookies onto prepared sheets, about 2 inches apart .
Leave some room; they expand!
Bake ’em up bake those cookies for 10- 12 minutes until the edges are lightly golden. once out, cool them on the sheets for about 5 minutes before transferring them to a cooling rack.
Gotta let them chill before the filling party!
Make the filling while the cookies cool, whip up your filling. combine 1/2 cup (114g) of softened butter, 2 cups (240g) of powdered sugar, a drizzle of cream, and touch of vanilla until it’s smooth and fluffy.
Assemble the Sandwich Cookies – Spread or pipe that scrumptious filling onto the flat side of half the cookies, then top with the remaining cookies. Voila! Sandwich cookie perfection!
Expert Techniques
Now, let’s talk about some expert techniques to nail your pressed cookie recipe . make it a point to experiment with different shapes using the discs on your cookie press.
The designs can totally elevate your dessert presentation. check your cookies around 10 minutes ; if they look slightly golden but still soft, they’re likely done.
Chilled Cookie Dough Tips – If your dough gets soft while working with it, pop it back in the fridge!
Filling Options for Cookies – Why not get creative? Try using cookies with jam filling or a decadent chocolate ganache. The world is your oyster, my friend!
Success Strategies
Be on the lookout for common mistakes like overbaking, which leads to dry cookies instead of that perfect soft and crunchy combo! always aim for that tender texture.
You can troubleshoot by adjusting your baking time and temp based on how your oven behaves. remember to chill your dough enough; it makes all the difference.
Consider make-ahead options ! You can prep your dough in advance and freeze it. Just let it thaw before using your cookie press on baking day.
Now, take a moment to think about the satisfaction of serving these gorgeous sandwich cookies at your next gathering; your friends will be talking about your creative cookie combinations long after the last crumb is devoured.
Keep this up, and we’ll be masters in gourmet sandwich cookies and European baking recipes in no time. Stay tuned for some additional information on elevating your cookie game, including decoration ideas and tips on making stunning variations!
Pro Tips & Secrets for Perfect Sandwich Cookies
Okay, let’s get straight to the good stuff! when whipping up sandwich cookies using a cookie press , you want to nail that delicious cookie texture and presentation.
One of my absolute favorite cookie press techniques is to chill the dough before you press it into shapes. seriously, it makes a world of difference! i’ve battled with dough that’s too soft, and trust me, it’s a mess.
So, wrap that dough up, toss it in the fridge for 30 minutes , and you’ll be good to go.
Now, onto flavor! you can really elevate those simple sandwich cookies with some easy tweaks. try adding a pinch of cinnamon or nutmeg to the dough for a warm hug of flavor.
Oh, and don't sleep on the filling options for cookies ! a basic buttercream can be enhanced with vanilla extracts or even a splash of peppermint for a minty twist.
Experimenting with flavors is half the fun, right?
Perfect Presentation: Because We're Fancy Like That
Here’s where you can play artist! plating is key, especially when you want those cookies to catch some eyes. for a chic presentation, place your cookies on a nice platter and dust them with powdered sugar.
If you’re feeling fancy and bold, why not drizzle some chocolate on them? you’ll feel like a pastry chef in no time!
For garnish ideas, think about using fresh mint leaves or some berries; they not only add color but make your cookies look like a million bucks.
Remember: food is about the experience, and an elegant dessert idea like this makes all the difference!
Storage & make-ahead Tips: Keep Those Cookies Fresh
So you’ve made a batch of these beauties, but how do you keep them fresh? here’s the scoop: store those sandwich cookies in an airtight container with a layer of parchment paper between the layers to keep them crispy.
They’ll stay good for about a week if you can resist munching on them daily!
If you want to make a big batch ahead of time (you go, chef!), the cookie dough can be made and kept in the fridge for up to three days or frozen for up to a month.
Just let it chill out for about 30 minutes again when you take it out of the freezer before pressing it into perfect shapes.
Creative Variations to Make Them Your Own
Let’s not forget about the fun part sandwich cookie variations ! you can switch things up! love chocolate? add cocoa to your dough.
Craving something fruity? swap the buttercream for a sweet jam filling like raspberry or strawberry.
Taking inspiration from european baking recipes , you could even try a fun lemon curd filling for a zingy kick.
Or go full-on indulgence and dip the finished cookies in chocolate. trust me, these options will turn your family friendly cookie recipes into gourmet sandwich cookies you can’t resist.
Complete Nutrition Guide: Sweet Treats with a Twist
Now, i know what you’re thinking “are these as bad for me as they are delicious?” well, moderation is key. each cookie has around 150 calories , which isn’t outrageous for a delightful dessert.
Plus, using quality ingredients can give you a confidence boost knowing you're serving up something tasty and satisfying.
Whether you stick to classic cookie recipes or venture into rich cookie textures with healthier alternatives what’s important is enjoying every single bite! don’t forget portion control, especially if you're sharing at a gathering.
Expert FAQ Solutions: Got Questions? I've Got Answers!
Okay, so you might have some nagging questions. what if my cookies aren’t pressing well? make sure your dough is chilled and well packed in the press.
Is there a way to fix uneven baking? rotate those baking sheets halfway through!
And if you’re feeling adventurous about flavors, there’s no hard and fast rule. mix it up try different cookies shapes and designs with your cookie press ! you’ll impress everyone with a variety of delightful cookie fillings .
Wrapping It Up
So, there you have it! you’re now armed with the ultimate guide to making sandwich cookies using a cookie press .
Embrace your creativity, don your apron, and make that kitchen your happy place! the best part? you can use these techniques and tips to charm family and friends at your next gathering or party, or just whip up a batch for that sweet afternoon treat.
Enjoy every bite because, hey, you’ve earned it! happy baking, my cookie loving friend!
Delightful Sandwich Cookies Using A Cookie Press

Ingredients:
Instructions:
Nutrition Facts:
| Calories | 150 |
|---|---|
| Protein | 1.5g |
| Fat | 7g |
| Carbs | 22g |
| Fiber | 0.5g |
| Sugar | 10g |
| Sodium | 30mg |
