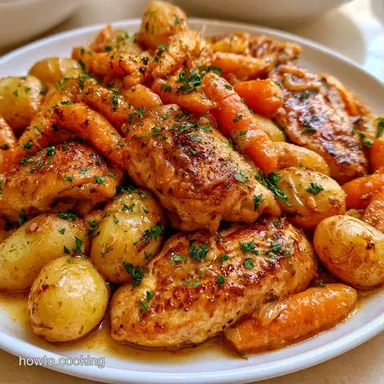
Dutch Oven Chicken Thighs with Potatoes and Carrots
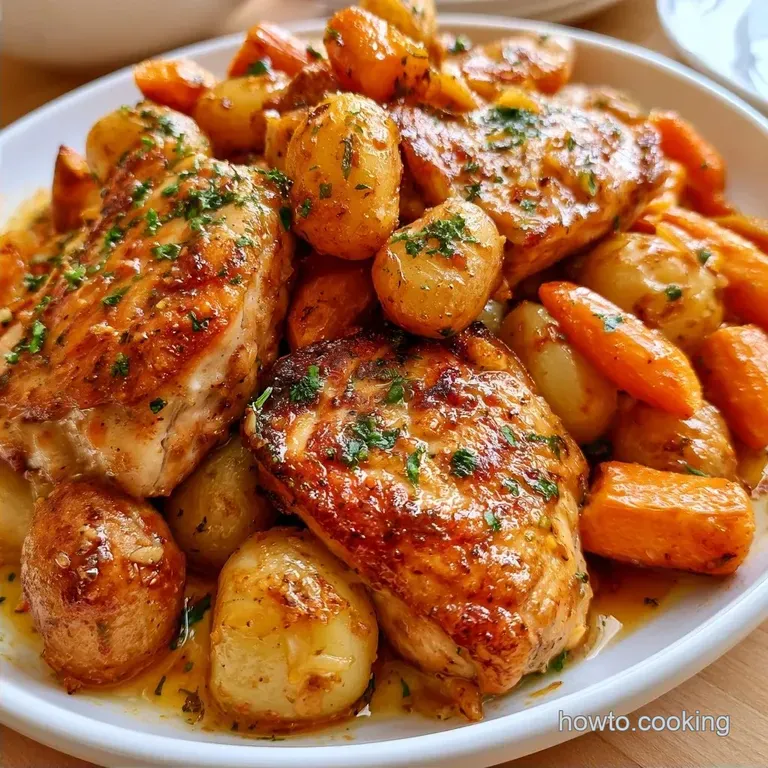
- Time: 15 min active + 50 min cook
- Flavor/Texture Hook: Mahogany brown skin with a rich, savory pan sauce
- Perfect for: Weeknight family dinners or beginner cooks
Dutch Oven Chicken Thighs
Nothing beats the sizzle of chicken skin meeting hot oil. I previously struggled with braised chicken that looked pale and tasted dull because I was hesitant to let it brown. Once I learned to leave the thighs alone in the pan and let them sear, the results improved dramatically.
This method for Dutch Oven Chicken Thighs offers a high reward for very little work. You'll achieve that rich, caramelized taste typical of slow roasted Sunday meals, but in only about an hour.
The potatoes absorb the savory chicken fat, and the carrots stay tender without turning to mush. It is a hearty meal that doesn't need a professional kitchen or pricey components.
| Method | Time | Texture | Best For |
|---|---|---|---|
| Fast Sear & Braise | 65 mins | Crispy skin, tender meat | Weeknights |
| Low & Slow Oven | 3 hours | Fall off-bone, soft skin | Slow Sundays |
Essential Ingredients List
Choose bone-in, skin-on chicken thighs for this dish. Their higher fat content prevents the meat from drying out during the braising process, whereas boneless cuts can easily become tough if overcooked by even a few minutes.
The vegetable base consists of baby potatoes and carrots. The potatoes act as sponges for the savory pan sauce, while the carrots provide a natural sweetness to balance the salty chicken stock. Yellow onions are preferred here because they have a mild flavor and melt seamlessly into the sauce.
For the braising liquid, use a combination of white wine and chicken stock. The wine introduces a zesty acidity that balances the fatty chicken. If you prefer to avoid alcohol, a splash of apple cider vinegar or additional stock is a great alternative.
Fresh rosemary and thyme are essential, as they infuse both the oil and the sauce with depth.
What Each Ingredient Does
- Bone in Thighs: Enhances the overall flavor and keeps the meat succulent.
- Dry White Wine: Provides acidity to offset the fat.
- Unsalted Butter: Promotes better browning for the vegetables and gives the sauce a glossy sheen.
- Fresh Thyme/Rosemary: Contributes the signature earthy notes of the dish.
Ingredients & Substitutes
- 6 bone in, skin on chicken thighs (approx. 3 lbs) Why this? More moisture and flavor than breasts
- 1 tsp kosher salt Why this? Critical for drawing out surface moisture
- ½ tsp cracked black pepper Why this? Provides a subtle woody warmth
- 2 tbsp olive oil Why this? Ideal for searing at high temperatures
- 1 lb baby potatoes, halved Why this? Better structural integrity than russets
- 3 large carrots, sliced into 1 inch chunks Why this? Adds color and a sweet contrast
- 1 medium yellow onion, diced Why this? Creates a savory, aromatic foundation
- 4 cloves garlic, smashed Why this? Adds a pungent, deep flavor
- 2 tbsp unsalted butter Why this? Improves browning and sauce consistency
- 1 ½ cups low sodium chicken stock Why this? Serves as the braising medium
- ½ cup dry white wine Why this? Balances the heavier fats
- 3 sprigs fresh thyme Why this? A classic pairing for poultry
- 1 sprig fresh rosemary Why this? Adds a piney, aromatic depth
- 1 bay leaf Why this? Provides a subtle herbal background
Substitution Options:
| Original Ingredient | Substitute | Why It Works |
|---|---|---|
| Dry White Wine | Chicken Stock + 1 tbsp Lemon Juice | Mimics acidity. Note: Less complex flavor |
| Baby Potatoes | Parsnips or Turnips | Similar density. Note: Earthier, slightly sweeter taste |
| Fresh Thyme | 1 tsp Dried Thyme | Concentrated flavor. Note: Use less than fresh |
The Right Tools
You need a heavy bottomed Dutch oven, ideally enameled cast iron such as Le Creuset or Lodge. The thick walls distribute heat evenly, which prevents the bottom of your Dutch Oven Chicken Thighs from scorching during the simmer.
A sturdy wooden spoon or a fish spatula is helpful for scraping the brown bits off the bottom. Those bits, called the fond, are where most of the flavor lives.
For the finishing touch, an instant read meat thermometer is the only way to be sure the chicken is done without cutting into the meat and letting the juices escape.
The step-by-step Process
1. Searing Over High Heat
Use paper towels to pat the chicken thighs completely dry. This step is crucial, as moisture on the skin leads to steaming rather than browning. Season both sides with salt and pepper. In a Dutch oven, heat olive oil over medium high heat until it begins to shimmer.
Place the thighs skin side down and sear without moving them for 6-8 minutes until the skin turns a deep mahogany and lifts easily from the surface. Flip and cook for another 2 minutes, then set the chicken aside on a plate.
2. Creating the Flavor Base
Lower the heat to medium. Using the remaining chicken fat, sauté the butter, diced onions, and sliced carrots. Cook for 5 minutes until the onions are tender and clear. Stir in the halved potatoes and smashed garlic, continuing to cook for 3 minutes more.
Aim for the potatoes to develop a light golden crust.
3. Deglazing and Braising
Add the white wine to the pot, scraping up all the flavorful browned bits from the bottom with a spoon. Once the wine has bubbled and reduced by half, stir in the chicken stock. Tuck the bay leaf, rosemary, and thyme into the liquid.
Return the chicken thighs to the pot, skin side up. Ensure the liquid only reaches halfway up the sides to maintain the skin's crispness. Cover with a lid and simmer on low for 30-35 minutes until the meat hits 165°F (74°C) internally.
Chef Note: Should the sauce be too thin toward the end, remove the lid for the final 5 minutes. This allows the liquid to concentrate into a rich, glossy glaze.
Fixing Common Issues
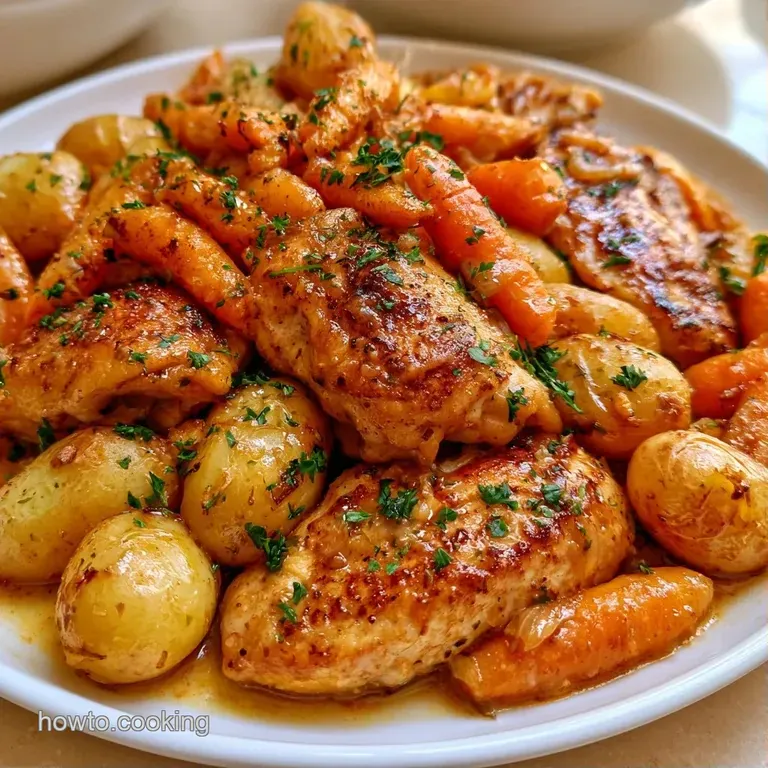
One of the most common complaints with Dutch Oven Chicken Thighs is soggy skin. This usually happens when the pot is overcrowded or the lid is too tight, trapping too much steam. Keep the liquid level low and don't move the chicken too much during the sear.
If your vegetables are turning into mush, you might be slicing the carrots too thin. Keeping them in 1 inch chunks ensures they finish at the same time as the potatoes.
When the sauce is too watery, it's often because the wine wasn't reduced enough before adding the stock. A quick simmer without the lid usually fixes this.
Fixing Soggy Skin
If the skin isn't crisp enough after braising, pop the whole pot under a broiler for 2-3 minutes. Just keep a close eye on it so the garlic doesn't burn.
Correcting Mushy Veggies
Cut root vegetables into larger, uniform pieces. This prevents the smaller bits from disintegrating while the larger ones cook.
Thickening Thin Sauce
Whisk a small amount of cornstarch with cold water and stir it into the simmering sauce, or simply reduce the liquid by simmering uncovered.
| Problem | Fix |
|---|---|
| Soggy skin | Broil for 2 mins or lower liquid level |
| Mushy carrots | Cut into 1 inch chunks |
| Watery sauce | Simmer without lid for 5-10 mins |
Try These Flavor Twists
Customize the flavor profile by switching the herbs. For a Mediterranean twist, substitute the rosemary with dried oregano and stir in a handful of kalamata olives during the final 10 minutes of simmering.
If you'd prefer an alternative starch, try Dutch Oven Chicken Thighs and Orzo. Replace the potatoes with 1 cup of dry orzo and an additional cup of stock during the last braising phase. The pasta soaks up the chicken juices and becomes incredibly rich.
For a completely different approach, my Homemade Chicken and Dumplings recipe starts with a similar base but incorporates fluffy dough for a heartier meal.
Different Combinations
- The Rice Option: Create Dutch Oven Chicken Thighs and Rice by incorporating long grain rice and extra liquid.
- Vegetable Variations: Replace carrots with parsnips or celery for a more earthy taste.
- Boneless Version: Use boneless thighs, but cut the simmering time to 20 minutes to prevent overcooking.
- Added Heat: Stir red pepper flakes into the butter and onions.
Quick Adjustments
- Need more tang? → stir in 1 tsp lemon zest
- Want a thicker sauce? → simmer uncovered 5 mins
- Want it spicier? → add 1/2 tsp red pepper flakes
Storage and Leftover Ideas
Place any remaining chicken in a tightly closed container and refrigerate. Per the FDA website for food storage guidelines, you should consume refrigerated leftovers within 3-4 days.
For the best results when reheating, skip the microwave to prevent the skin from becoming rubbery. Instead, transfer the meat and vegetables to a baking dish, add a bit of water or stock, and warm in the oven at 350°F (180°C) for 15 minutes.
Save the bones and leftover braising liquid. You can simmer the bones with some celery and onion scraps to create a simple, homemade stock for future soups.
| Storage Method | Duration | Tip |
|---|---|---|
| Fridge | 3-4 days | Keep sauce and meat together |
| Freezer | 2 months | Freeze in portions with sauce |
| Reheating | 15 mins | Use oven to maintain texture |
Great Side Dish Pairings
Because this meal already contains potatoes and carrots, adding a green vegetable will balance everything out. Steamed green beans or a fresh arugula salad with lemon dressing are excellent choices.
If you are hosting a larger group, a loaf of crusty sourdough bread is essential for soaking up every bit of the pan sauce.
For a more intense flavor profile or a themed meal, this pairs beautifully with Mole Sauce with Chicken, though the accompanying pan sauce is usually plenty.
Why This Recipe Works
This recipe depends on how heat interacts with protein and connective tissue. Searing the skin at high heat creates a crust that tastes savory and resists the moisture of the braise.
Collagen Conversion: Chicken thighs have a lot of connective tissue. The moist, low heat of the Dutch oven turns that collagen into gelatin, which makes the meat feel tender and the sauce feel rich.
Layered Flavor: By searing the meat, then sautéing the vegetables in the rendered fat, and finally deglazing with wine, you build layers of flavor that a one pot dump meal just can't match.
Scaling the Recipe
Cutting it in half: Use a smaller 3 quart pot. Reduce the cooking time by about 20%, as a smaller volume of liquid heats up faster.
Doubling the batch: Use a 7 quart pot. Only increase the salt and spices by 1.5x, as too much salt can concentrate during the braise. Work in batches when searing the chicken so you don't crowd the pan and steam the meat.
| Original | Budget Swap | Impact | Savings |
|---|---|---|---|
| White Wine | White Grape Juice + Vinegar | Slightly sweeter | $3-5 |
| Fresh Thyme | Dried Thyme | Less aromatic | $2 |
| Baby Potatoes | Regular Potatoes (cubed) | Similar texture | $1 |
Recipe FAQs
Which simmer time is best for the chicken?
Simmer for 30-35 minutes until the internal temperature reaches 165°F.
Tip: Use a meat thermometer in the thickest part of the thigh to ensure doneness.
Do I need to bake these thighs at 375 or 400 degrees?
Actually, no. This recipe uses a stovetop simmer method rather than oven roasting.
Tip: Keep the lid tight to trap steam and maintain moisture in the meat.
What is the total cooking time for this dish?
The entire process takes about 65 minutes from preparation to plating.
Tip: Pat the skin bone dry with paper towels before searing to achieve a better crust.
Is it true that baking thighs at 225 degrees is the best method?
This one's false: a quick sear followed by a simmer is more efficient for this one-pot meal.
Tip: Searing skin side down for 6-8 minutes is essential for that mahogany color.
Can I use boneless chicken thighs instead of bone-in?
Yes, though you should reduce the simmer time to prevent the meat from overcooking.
Tip: If you enjoyed the one-pot convenience here, see how we use similar logic in our one-pot soup.
How to simplify the preparation of this meal?
Dice all vegetables before heating the oil to streamline the sautéing process.
Tip: Use a large Dutch oven to avoid crowding the pan during the searing step.
Dutch Oven Chicken Thighs