Snow Ice Cream: Easiest 5-Minute Winter Treat
- The Purest Winter Treat: An Overview of Snow Ice Cream
- Minimalist Ingredients for Maximum Creaminess
- Whipping Up Your Winter Delight: A Step-by-Step Method Guide
- The Delicious Science Behind the Creamy Texture
- Expert Tips for Fluffy, Not Soupy, Snow Ice Cream
- Can You Store Leftover Snow Ice Cream?
- Elevating the Experience: Toppings and Pairings
- Recipe FAQs
- 📝 Recipe Card
The Purest Winter Treat: An Overview of Snow Ice Cream
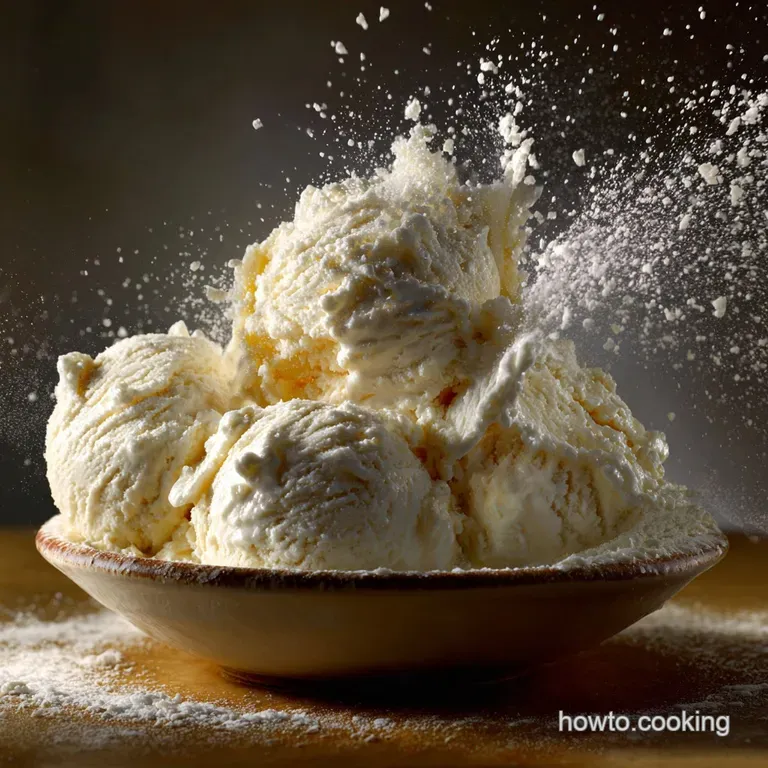
The moment those first pristine flakes hit the ground, something magical happens in my kitchen. Forget the store-bought tubs and the noisy ice cream machines, because we’re making something infinitely better and faster.
This dessert is impossibly light, ridiculously creamy, and carries the clean, crisp taste of winter right into your bowl. I’m talking about Snow Ice Cream , and trust me, this recipe is the one you need when that perfect powder falls.
This isn’t just a cute snow day activity; this method is a legitimate culinary lifesaver. You only need five minutes, three main pantry ingredients, and zero effort, meaning it’s the ultimate cheap and cheerful treat when you’re stuck inside.
It eliminates the long waiting times associated with traditional freezing methods, giving you that instant gratification we all crave when a craving strikes.
I know what you're thinking: Is it really that good? Yes. We’ve learned through trial and error and a few sadly watery experiments that the secret lies entirely in the fat content of the base.
Once you understand the simple science behind making fluffy, non-icy Snow Ice Cream , you’ll pray for the next blizzard. Let’s crack on and get this winter masterpiece assembled.
The Appeal of a 5 Minute Dessert
The immense appeal of homemade Snow Ice Cream is its sheer speed and accessibility. Who wants to churn for 45 minutes or wait six hours for a dessert to freeze when you can have a bowl of delicious, vanilla scented goodness in under seven minutes flat?
This is the instant soft serve of the natural world, using ingredients you probably already have stashed in your pantry.
It’s also incredibly fun to make, which is half the point of a snow day, right? Kids love being involved in gathering the main ingredient, and the immediate transformation from fluffy powder to smooth dessert feels like a kitchen miracle.
We rely on the high sugar and fat content of the condensed milk base to prevent the resulting mixture from turning into a bland, crystalline mess.
Is the Snow Safe to Eat? Collecting the Best Powder
This is the big question, and the answer is usually yes, provided you follow a few common sense rules. Always ensure you are collecting the freshest snow the soft, fluffy stuff that just fell, not the hard, compacted, or icy stuff that’s been sitting around.
The fluffier the snow, the more air it contains, which translates to lighter, better textured Snow Ice Cream .
Critically, avoid yellow snow (obviously), and never collect snow from high traffic areas, roadsides, or directly beneath roofs. Roofing materials can leach chemicals and heavy metals, so always scoop from a pristine, open area, preferably in the middle of a yard.
Use a clean, designated bowl, and chill it slightly before heading out to gather your bounty.
The Nostalgic History of Snow Cream
People have been using snow to create icy desserts for centuries, long before modern refrigeration arrived. Think about the Roman Emperor Nero, who sent servants high up mountains to retrieve fresh snow for his sweet treats.
This simple Snow Ice Cream dessert is really just a modern twist on a very old tradition, proving that the best culinary ideas are often the most basic.
That wonderful, pure flavor takes me right back to being a kid, standing outside with a mixing spoon and watching the flakes drop. There's a beautiful simplicity to this whole process. It's truly the easiest snow cream recipe you will ever find, relying on the natural elements and a few humble pantry additions.
Minimalist Ingredients for Maximum Creaminess
The beauty of this recipe lies in its simplicity. We are talking about maybe four ingredients, tops, but each one plays a vital role in transforming fluffy flakes into the ultimate homemade Snow Ice Cream .
Don’t skimp on quality here; since the ingredient list is so short, every flavor note stands out.
Choosing Your Dairy Base (Milk vs. Cream Ratios)
We use sweetened condensed milk as the core structure for our perfect Snow Ice Cream . Why? Because it’s high in both sugar and fat, which are the two secret weapons against unwanted ice crystals. The sugar lowers the freezing point, and the fat provides that incredible mouthfeel.
To slightly thin that sticky sweet condensed milk, we add a touch of whole milk or half and half. Do not use skim milk! The higher the fat percentage in your liquid, the creamier your final Snow Ice Cream will be.
If you’re feeling extra decadent, heavy cream works wonders, though you might need slightly less of the condensed milk.
Sweetener Swaps: Granulated Sugar Alternatives
Since we use sweetened condensed milk, additional sugar isn't strictly necessary, but sometimes people want less intensity. If you are substituting the condensed milk entirely (see the table below), you must use some form of granulated or powdered sugar mixed into heavy cream.
If you substitute half the condensed milk with heavy cream, adding 1/4 cup of powdered sugar ensures the resulting Snow Ice Cream maintains its smooth texture without becoming grainy.
Avoid liquid sweeteners like honey or agave syrup unless you are okay with a much softer, almost slushie like result, as they introduce extra water.
Pure Flavor: Selecting the Best Vanilla Extract
Please, for the love of all that is delicious, use real vanilla extract. Imitation vanilla will give this elegant, simple dessert a chemical edge that is truly disappointing. Since the flavor profile of this Snow Ice Cream is so pure and simple, the vanilla is the star.
If you don't have vanilla, you can easily pivot the entire profile. Use almond extract for a delicate marzipan note, or peppermint extract for a fun, festive twist.
Quantity Guide: How Much Snow Do You Really Need?
Snow volume is a highly variable thing, depending entirely on how fluffy, or how wet, the snow is. A dry, fluffy powder will take up more volume than a wet, heavy snow. This recipe calls for 8 10 cups of loosely packed snow.
The ratio you’re looking for is approximately 8 parts snow to 1 part liquid base. You’ll know you have enough snow when the mixture transforms from a watery vanilla soup into a thick, moldable soft serve consistency. It's a "feel" thing, so don't be afraid to keep adding snow until it looks right.
| If You Don't Have This... | Use This Instead... | Why It Works |
|---|---|---|
| Sweetened Condensed Milk | 1 cup Heavy Cream + 1/2 cup Powdered Sugar | Provides the necessary fat and sweetness structure. |
| Whole Milk | Heavy Cream or Half and Half | Higher fat content is always better for creamy texture. |
| Vanilla Extract | Almond Extract (use 1/2 tsp) | A different but delicious flavor profile for your Snow Ice Cream . |
Whipping Up Your Winter Delight: A step-by-step Method Guide
Speed is your friend. Working quickly, especially when combining the two main elements, is the key to preventing a tragic snow melt down. When making Snow Ice Cream , you need to have everything measured, chilled, and ready to go before the snow even enters the house.
Prep Step: How to Properly Collect Fresh Snow
Grab your mixing bowl and stick it in the freezer for at least 15 minutes before you start. This chilling step is absolutely mandatory; it gives you critical extra working time. Once the bowl is chilled, grab a separate clean container and head outside.
Only gather snow that is light and fluffy, ideally right off the top layer. Fill your container loosely remember, 8 cups is a lot of snow when it’s airy and fresh. Bring the snow straight inside and immediately proceed to the next step. Do not let the snow sit in a warm kitchen!
Creating the Sweetened Liquid Base Mixture
In a medium bowl, whisk together the full cup of sweetened condensed milk, the 1/4 cup of whole milk (or cream), the vanilla extract, and the tiny pinch of salt. That salt is crucial; it cuts through the cloying sweetness of the condensed milk and brightens the vanilla flavor beautifully.
Make sure this mixture is fully uniform and homogeneous before you introduce the snow. Have your mixing spoon or spatula ready and waiting. This liquid is the lifeblood of our perfect Snow Ice Cream .
The 30 Second Mix: Combining Snow and Liquid Correctly
Transfer the chilled mixing bowl from the freezer. Immediately dump about 6 7 cups of your fresh snow into the cold bowl. Pour the prepared liquid base mixture evenly over the snow.
Now, work swiftly but gently. Using a folding motion think of gently lifting the snow from the bottom and turning it over onto the liquid incorporate the ingredients. Avoid rapid beating or whisking; aggressive mixing introduces friction and heat, which melts the snow far too fast.
Immediate Service: Preventing Pre-Melt
As you fold, the mixture will thicken dramatically and begin to resemble soft serve. If it looks too soupy, quickly fold in the remaining snow, a half cup at a time, until you hit that dreamy, thick consistency. The ideal Snow Ice Cream should just barely hold its shape when scooped.
Chef’s Note: The moment the consistency is right, you must serve it. This dessert has zero shelf life. Scoop immediately into chilled serving bowls or cones for the best results. Waiting even five minutes means the texture starts to break down into a watery sludge.
The Delicious Science Behind the Creamy Texture
Why does this method result in something so much creamier than simply pouring milk and sugar over snow? It all comes down to fat and sugar manipulation. We are essentially creating a quick, instant emulsion where the fat droplets coat the water molecules from the melting snow.
When you use high fat condensed milk, those fats wrap around the delicate snow crystals as they melt. This prevents the small water crystals from binding together into large, grainy ice chunks.
It’s what gives this specific Snow Ice Cream recipe its signature smooth mouthfeel, making it feel closer to a true, churned ice cream.
Expert Tips for Fluffy, Not Soupy, Snow Ice Cream
I have made terrible, soupy, watery snow ice cream. I once tried to use non-fat milk and regular sugar, and the result was truly disgusting just gritty, flavored ice water. Learn from my mistakes! Follow these guidelines for perfection every single time you make homemade Snow Ice Cream .
Controlling Crystal Size: Why Fresh Powder is Key
We need fresh, fluffy, aerated snow because its large surface area and high air content are critical. Old, dense, or compacted snow is already halfway to being solid ice, meaning there’s less air and more compacted water just waiting to melt quickly.
If you absolutely must use slightly older snow, try breaking it down with a fork first to introduce some air and mimic that fresh, fluffy powder texture. But honestly, wait for the perfect snowfall for the best Snow Ice Cream .
The Role of Fat in Preventing Icy Crunch
As mentioned, fat is the texture stabilizer here. If your Snow Ice Cream is too crunchy or icy, it means your liquid base was too lean. You need high fat dairy (heavy cream, condensed milk, or half and half) to properly disrupt the water’s attempt to recrystallize.
This is why this recipe works so much better than traditional snow cream recipes that simply use milk, sugar, and vanilla. We're actively fighting the crystallization process.
Optimizing Temperature for the Perfect Soft Serve Consistency
The biggest mistake people make is thinking they have all the time in the world. You don't! Work swiftly, use chilled equipment, and keep the ingredients as cold as possible until the last moment.
If your kitchen is sweltering, the snow will melt before you can incorporate the base fully, resulting in a thin, disappointing mess. Try assembling your Snow Ice Cream in a cool utility room or even in the garage if it's not too messy out there.
Common Error: Adding Too Much Liquid Too Soon
If you dump all the liquid base over 8 cups of snow at once, you might panic and find it overly wet. Always add the snow in stages (start with 6 7 cups, then add the rest as needed).
If your mixture looks too thin, the only fix is to grab more fresh snow if you still have some outside and fold it in rapidly to re-thicken the consistency. This is key to achieving the perfect, thick Simple Snow Ice Cream Recipe consistency.
The Importance of Working Fast and Cold
Think of this process like folding whipped egg whites gentle yet immediate. The longer you take to mix the ingredients, the more water is released, and the faster the resulting dessert melts.
For best results, make sure your serving spoons are also ready. I recommend scooping this out and serving it alongside a warm, contrasting dessert, maybe a slice of super moist [Zucchini Bread: The Ultimate Moist Spiced Tea Loaf Recipe] to balance the cold.
Can You Store Leftover Snow Ice Cream?
Here is the sad truth, friend: No. You cannot properly store leftover Snow Ice Cream .
Why Freezing is Not Recommended (Texture Breakdown)
If you attempt to freeze this homemade Snow Ice Cream , you will be left with a dense, solid block of heavily crystallized ice. Because the water molecules were never broken down and stabilized through traditional churning, they will rapidly bind together when placed in a freezer environment.
The result is extremely hard, gritty, and unpleasant. This dessert is designed to be made and consumed immediately, capturing that fresh, airy quality of the snow itself. If you have leftovers, they will simply melt into a liquid within 15– 30 minutes, which is why I strongly recommend only making as much as you can eat in one sitting.
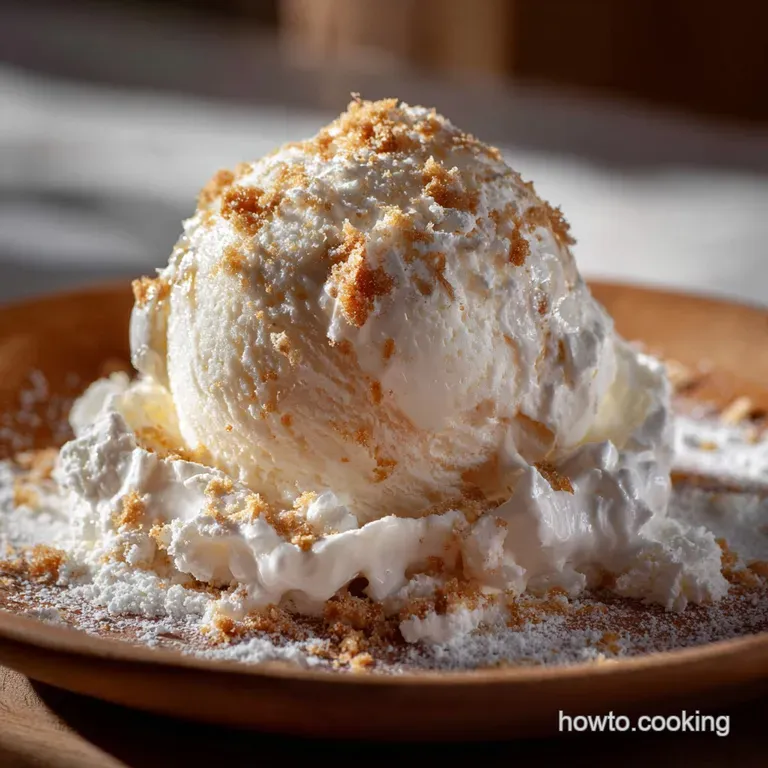
Elevating the Experience: Toppings and Pairings
Just because the base recipe is simple doesn't mean we can’t dress it up! The neutral vanilla flavor of the classic Snow Ice Cream Dessert makes it the perfect canvas for all your favorite sundae toppings.
Try a drizzle of homemade hot fudge or caramel, crushed Oreos, or mini chocolate chips for added texture. My favorite way to serve it is with brightly colored sprinkles the jimmies variety because they add a fun, nostalgic pop and crunch.
If you’re looking for a refreshing, non-alcoholic pairing to cut through the sweetness, try serving a bowl alongside a cold, prepared glass of Iced Matcha Latte Recipe: Achieve Clump Free Perfection . The slightly bitter, earthy matcha offers a fantastic contrast to the sweet vanilla cream.
This truly is the easiest way to turn a natural phenomenon into a spectacular, memorable treat. The resulting flavor of this homemade Snow Ice Cream is pure, delightful, and worth bundling up for! Enjoy every spoonful of your magical winter dessert.

Recipe FAQs
Is it truly safe to eat fresh snow?
Yes, but safety depends entirely on the source. You should only use newly fallen, fluffy snow collected far away from roads, chimneys, or areas prone to pollution. Always collect the snow in a clean bowl immediately after it falls to ensure the highest purity and minimal contamination.
My ice cream turned icy and runny instead of creamy. What went wrong?
This typically occurs if the liquid mixture (cream, sugar, vanilla) was not cold enough, or if you mixed the snow too slowly, allowing too much of it to melt. Ensure all your liquid ingredients are well chilled before starting, and work quickly to gently fold the snow into the base until just combined.
Can I store or freeze leftover Snow Ice Cream?
Unfortunately, Snow Ice Cream must be enjoyed immediately upon preparation and does not store or freeze well. Due to its high air and water content, freezing leftovers causes the snow crystals to separate and solidify into hard, granular ice, completely destroying the soft serve texture.
Can I make Snow Ice Cream vegan or dairy-free?
Absolutely. Substitute the heavy cream or milk with canned full fat coconut milk (ensure you chill it thoroughly overnight to scoop out the thick cream layer). Alternatively, high fat oat cream or cashew cream can also yield an acceptably creamy texture, though it may be slightly softer than the traditional dairy version.
I don't have heavy cream. Can I use regular milk instead?
While you can use regular milk, the finished ice cream will be significantly less creamy and resemble a sweet sorbet or slushie texture. For the best rich consistency, use evaporated milk or half and-half as a minimum substitute, as the fat content is crucial for the silky mouthfeel.
How do I know when I have added enough snow?
The total volume of snow required depends heavily on its density, so relying strictly on volume measurements (like 8-10 cups) can be misleading. Stop adding snow when the mixture achieves the desired consistency of thick, fluffy soft serve ice cream, ensuring you stir just enough to prevent the mixture from melting rapidly.
What are good ways to adjust the flavor besides using vanilla extract?
You can easily change the profile by experimenting with different extracts or additions to the liquid base. Try adding peppermint extract for a winter holiday flavor, almond extract for a marzipan note, or mixing in a teaspoon of fine cocoa powder for a quick chocolate version.
Always taste the base mixture before adding the snow.
Easiest 5 Minute Snow Ice Cream
Ingredients:
Instructions:
Nutrition Facts:
| Calories | 400 kcal |
|---|---|
| Fat | 15 g |
| Fiber | 0 g |
