Cooked Farro: the Chefs Guide to Fluffy Grains
- Mastering the Ancient Grain: Why Farro Deserves Your Attention
- The Science of Fluffy Grains: Achieving Perfect Chewiness in Your Cooked Farro
- Essential Prep: Gathering Your Simple Ingredients
- The Stovetop Method: Flawlessly Cooking Farro from Start to Finish
- Troubleshooting Farro: Expert Tips and Avoiding Common Errors
- Meal Prep Mastery: Storing and Reheating Cooked Farro
- Versatility in the Kitchen: How to Use Your Perfectly Cooked Farro
- Recipe FAQs
- 📝 Recipe Card
Mastering the Ancient Grain: Why Farro Deserves Your Attention
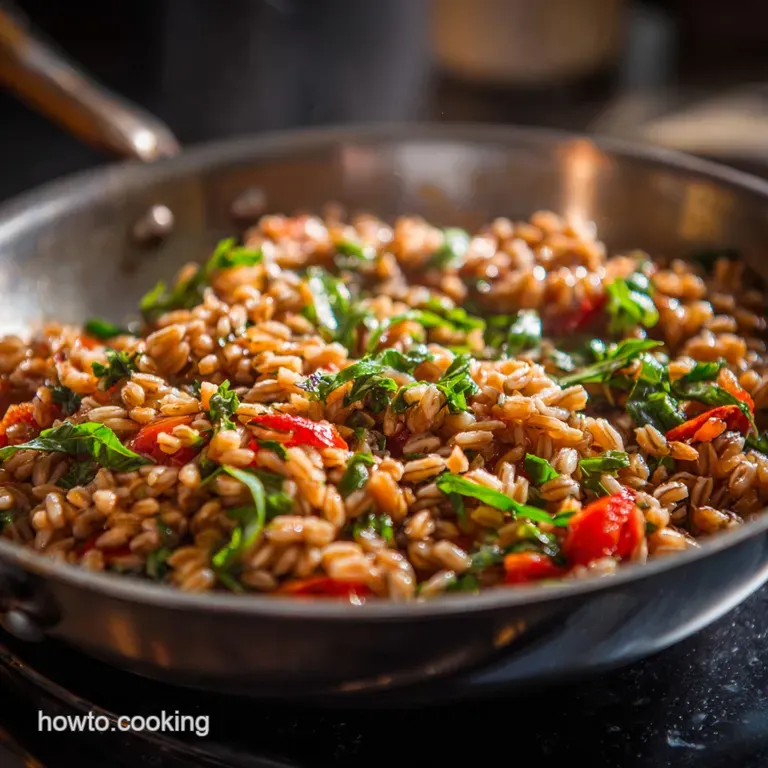
The aroma of a perfectly cooked grain is just… intoxicating. I’m talking about farro, specifically, and if you haven't mastered Cooked Farro yet, prepare to be completely converted.
This ancient grain offers a substantial, nutty chewiness that leaves lesser grains absolutely in the dust, honestly.
It’s a total meal prep superhero, unbelievably cheap, and requires almost zero babysitting while it simmers away on the stove. You can use it hot, cold, sweet, or savory, making it the ultimate blank slate for quick weeknight sides or healthy lunch ideas.
I used to mess this up constantly, ending up with gluey mush instead of fluffy, distinct kernels, but I finally nailed the absorption ratio and the resting trick. Let’s ditch the guesswork and get straight to the bulletproof method for perfectly textured Cooked Farro that stands up to any dressing or sauce.
The Science of Fluffy Grains: Achieving Perfect Chewiness in Your Cooked Farro
This isn't just about throwing grains into water; this is about precision. The perfect bowl of farro requires understanding what the grain needs to fully hydrate without bursting.
What is Farro? Defining the Mediterranean Staple
Farro is an ancient wheat grain, a true staple of Italian cooking. It has a high protein and fiber content, which is why it fills you up so satisfyingly, unlike some starches. When you bite into it, you get a tender interior wrapped in a pleasantly tough exterior that's the hallmark of properly Cooked Farro .
Deciphering the Types: Pearled vs. Semi Pearled Farro
You’ll see different types in the store, and this matters for cooking time. Whole farro is the full grain and takes forever (up to an hour) because the husk is intact. Pearled farro has the entire bran removed, making it cook quickly, but it loses some nutrients.
I always recommend semi pearled farro . It has some of the bran removed, balancing speed (around 30 minutes) and nutrition perfectly. This recipe is optimized for that semi pearled variety.
The Essential Liquid Ratio: Farro’s Golden Rule
Most packages suggest too much water, leading to that sticky, unpleasant result we are trying to avoid. Trust me when I say the 3:1 ratio (3 parts liquid to 1 part grain) is the absolute golden rule for absorption cooking.
This ensures the farro drinks up everything and leaves you with distinct grains, not soggy bottoms. You're aiming for a final product that is delightfully firm and nutty, yielding that incredible chewiness we want from perfect Cooked Farro .
The Brine Benefit: Enhancing Farro's Natural Nutty Flavor
Seasoning the cooking liquid isn't optional; it’s mandatory. Grains don't absorb salt well once they've finished cooking, so you must season the water or broth thoroughly before adding the farro. This allows the grain to absorb a properly seasoned liquid right to its core, making every single bite flavorful.
Preventing Sticking: Why the Rinse and Soak Matters
Rinsing the farro, just like rinsing rice, removes surface starches and dust. If you skip this, the starches thicken the cooking water too much, leading to that gummy, gloopy texture when your farro is done.
A quick 30 second rinse under cold water makes a massive difference in achieving fluffy Cooked Farro .
The Texture Payoff: Resting Farro After Cooking
This is the secret weapon often overlooked! Once the farro has absorbed the liquid and the heat is off, leaving the lid on for five minutes allows the internal steam to redistribute moisture. This crucial step finishes the cooking process gently and transforms moist kernels into genuinely fluffy, separate grains.
If you take the lid off immediately, the grains lose steam too quickly and end up feeling dense.
Essential Prep: Gathering Your Simple Ingredients
One of the best things about this recipe is how minimalist the ingredients are. It’s all about high-quality basics and proper technique.
Selecting Quality Farro: What to Look for at the Market
Look for farro sold in sealed bags or containers, and check the date. Farro should look plump, uniform, and slightly light brown or golden. If it looks dusty or broken, leave it. Remember, always opt for semi pearled if you want the best balance of fast cooking time and texture for your Cooked Farro .
Building Flavor: Water vs. Broth Choices
While water works fine (especially when salted), I almost always use stock vegetable or chicken for the best flavor payoff. The farro absorbs the stock’s flavor intensely. If you don't have stock, you can use water and add a tablespoon of nutritional yeast for an umami boost.
Salt and Seasoning: The Crucial First Step
Use fine sea salt. I use a full teaspoon for every cup of dry farro. It seems like a lot, but remember, only a fraction actually ends up in the grain; the rest stays in the liquid.
| Ingredient | My Preferred Choice | Substitution |
|---|---|---|
| Farro (Semi Pearled) | Local, organic brand | Whole Grain Spelt (increase cooking time) |
| Cooking Liquid | Low-sodium Vegetable Stock | Water + 1 tbsp Nutritional Yeast or Bouillon |
| Salt | Fine Sea Salt | Kosher Salt (use 1.5x the amount) |
| Fat (Optional) | Extra Virgin Olive Oil | Unsalted Butter or Grapeseed Oil |
Adjusting for Different Farro Varieties (Pearled vs. Whole)
If you must use pearled farro, reduce the cooking time to about 20 minutes, and aim for a 2.5:1 liquid ratio. If you're tackling whole farro, you will need to soak it overnight ( 8 hours) and then boil it for 45– 60 minutes in the 3:1 ratio.
This recipe is for semi pearled, which is the easiest path to perfect Cooked Farro .
The Stovetop Method: Flawlessly Cooking Farro from Start to Finish

This is the absorption method, which means everything cooks down in one pot. It's clean, easy, and preserves maximum flavor.
Step 1: Rinsing and Soaking the Grains (If Applicable)
Place 1 cup of semi pearled farro in a fine mesh sieve. Rinse it thoroughly under cold running water for a minute. Shake off the excess water. Do not soak semi pearled farro , as it can lead to mushiness. We just want to remove the surface starch.
Step 2: Simmering to Al Dente Perfection
In a heavy bottomed saucepan, combine the rinsed farro, 3 cups of liquid (stock is best!), 1 teaspoon of salt, and a splash of olive oil. Bring the mixture to a rolling boil over high heat, uncovered. Immediately reduce the heat to the absolute lowest setting you want a whisper of a simmer.
Step 3: Checking for Doneness and Draining
Cover the pot tightly and let it simmer undisturbed for 25 to 30 minutes. After 25 minutes, quickly lift the lid and try a few kernels. They should be tender but still have a lovely, satisfying resistance in the center, which is that perfect al dente bite.
If there is still liquid visible but the grains are tender, turn off the heat and proceed to step 4. If the grains are still firm and the liquid is gone, add 1/4 cup of hot water and cook, covered, for another 5 minutes.
Step 4: The Final Fluffing and Seasoning Technique
Once the farro is tender and the liquid is absorbed, turn the heat off. Leave the lid firmly on and let the pot sit for exactly 5 minutes. This steaming rest period is non-negotiable for achieving fluffy Cooked Farro .
Then, remove the lid and use a fork— never a spoon —to gently rake and fluff the grains. If you need any extra seasoning, add it now.
Chef’s Note: Using a spoon to fluff grains crushes them, resulting in a compacted, gluey texture. The fork separates them, adding air and defining the texture. This simple trick transforms your finished Cooked Farro .
Troubleshooting Farro: Expert Tips and Avoiding Common Errors
I’ve had my share of farro disasters (once mistook it for whole grain rice and cooked it for an hour; it was cement). Here are the real world fixes.
Why Your Farro is Mushy (And How to Fix It Next Time)
Mushy farro is usually caused by two things: too much liquid, or skipping the rinse. If you use the 3:1 ratio and still get mush, you might have simmered it too aggressively, or you may be using pearled farro, which requires less liquid.
Next time, try the pasta method (boiling in excess water and draining like pasta) if you keep struggling with the absorption method. The texture of properly made Cooked Farro should always be chewy, not soft.
Speeding Up the Process: Using a Pressure Cooker (Alternative Method)
If you are absolutely pressed for time, a pressure cooker is your friend. Use a 1:2 ratio (1 part farro to 2 parts liquid). Cook semi pearled farro on High Pressure for 8 minutes, then allow a 10 minute Natural Pressure Release.
The result is consistently perfect Cooked Farro in a fraction of the time.
Achieving Truly Distinct Grains: The Post Cook Spread
If you plan to use the farro for a cold salad, like the vibrant Mediterranean Farro Salad A Burst of Sunshine on Your Plate , you must cool it correctly. After fluffing, immediately spread the hot Cooked Farro in a thin layer on a baking sheet. This stops the cooking process immediately and allows the steam to escape quickly, preventing clumping as it cools.
Meal Prep Mastery: Storing and Reheating Cooked Farro
One of the great joys of this grain is how beautifully it handles refrigeration and freezing. Make a huge batch!
Optimal Refrigeration: Keeping Farro Fresh for Days
Store your completely cooled Cooked Farro in an airtight container in the refrigerator. It stays fresh and perfectly textured for 4 to 5 days. It's the perfect anchor for lunch bowls throughout the week.
Freezing Farro: The Best Way to Preserve Texture
But does it freeze well? You bet. Flash freeze it first: spread the cooled farro on a lined baking sheet until solid (about 2 hours). Then transfer the frozen grains into a freezer safe zip-top bag, squeezing out all the air.
This prevents one giant block of ice and allows you to scoop out small portions as needed. Frozen Cooked Farro lasts for up to 3 months.
Reactivating the Grains: Warming Up Cooked Farro
Farro can dry out slightly in the fridge. To reheat without compromising that beautiful chew, transfer the desired amount to a saucepan. Add a splash of water or stock (about 1 tablespoon per cup of farro). Cover the pan and heat over low until steamy and warm, allowing the moisture to reactivate the grains.
You can also microwave it, covered, with a splash of water.
Versatility in the Kitchen: How to Use Your Perfectly Cooked Farro
Now that you have perfectly textured farro, the possibilities are genuinely endless.
You can use it as a hearty, satisfying base for rich, saucy dishes. For instance, the nutty texture of the Cooked Farro is incredible when served alongside a savory gravy or incorporated into a filling for stuffed peppers.
It has a robust structure that holds up beautifully, soaking up flavor without falling apart.
Sometimes I simply toss warm farro with a generous drizzle of olive oil, lemon zest, and a handful of fresh herbs (parsley, chives, basil). It makes a shockingly elegant side dish in under a minute. It also pairs amazingly with a hearty Slow Cooked Beef Stew: Comfort in Every Bite , adding textural interest where mashed potatoes might feel heavy. No matter how you choose to use it, mastering this simple process guarantees you a fantastic result every single time.

Recipe FAQs
Do I need to rinse or soak farro before cooking it?
Rinsing farro is highly recommended, as it removes any surface dust and excess starch which helps prevent the grains from sticking together, ensuring a fluffier result. Soaking is only necessary if you are using whole farro, as it softens the tough outer bran and drastically reduces the cooking time required.
Why is my farro still hard and chewy after the standard cooking time?
This is often a sign you are using whole farro, which requires pre-soaking (4-8 hours) to cook properly within 30-40 minutes. If you are using pearled or semi pearled farro, ensure that your water is at a rolling boil and that you are maintaining the correct 1:3 grain-to-liquid ratio throughout the process.
What is the difference between pearled, semi pearled, and whole farro?
These terms refer to how much of the bran layer has been removed. Pearled farro has the entire bran removed, making it the fastest cooking variety (approx. 20 minutes) but less nutritious. Whole farro is the most nutritious but takes the longest and requires soaking, while semi pearled is a versatile compromise.
My cooked farro is mushy. How can I prevent this next time?
Mushiness is typically caused by overcooking or using too much liquid. Ensure you stick to the 1 part farro to 3 parts liquid ratio, and use a heavy bottomed pot to maintain an even temperature. Start checking for doneness the satisfying chewiness a few minutes before the recipe suggests.
Can I cook farro in broth instead of plain water?
Absolutely, using vegetable, chicken, or beef broth instead of water is an excellent way to introduce layers of flavour and complexity, especially if the farro will be used in savoury dishes or salads. Adjust the salt content slightly, as commercial broths often contain significant sodium.
How should I store leftover cooked farro, and how long does it last?
Allow the farro to cool completely before transferring it to an airtight container and storing it in the refrigerator. Properly stored cooked farro will maintain its quality and be ready for quick use for 4 to 5 days. For long term use, it is also suitable for freezing.
Does cooked farro freeze well?
Yes, cooked farro freezes exceptionally well, making it perfect for meal prepping. Once cooled, spread the grains thinly on a baking sheet to flash freeze for 30 minutes, then transfer to a freezer bag or container to prevent clumping.
It can be stored for up to three months and reheated with a splash of water or broth.
Fluffy Cooked Farro Every Time
Ingredients:
Instructions:
Nutrition Facts:
| Calories | 226 kcal |
|---|---|
| Protein | 8.4 g |
| Fat | 3.0 g |
| Carbs | 42.8 g |
