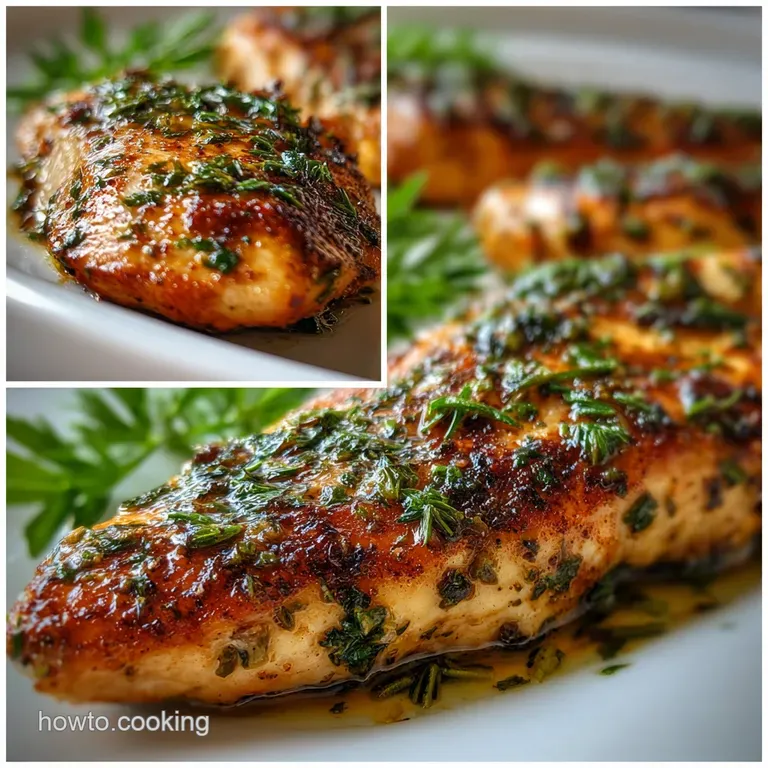
Chicken Breast Recipe with Garlic and Herbs: Golden and Succulent

- Time: Active 10 minutes, Passive 20 minutes, Total 30 minutes
- Flavor/Texture Hook: Golden seared exterior with a succulent, herb infused center
- Perfect for: Nutritious weeknight dinners and meal prep confidence
- Simple Chicken Breast Recipe with Garlic and Herbs
- Key Benefits of This Method
- Nutrient and Flavor Analysis
- Wholesome Ingredients and Smart Swaps
- Necessary Kitchen Tools for Success
- Step by Step Cooking Guide
- Common Mistakes to Avoid Daily
- Personalizing the Herb Infusion Process
- Storage and Waste Reduction Tips
- Complementary Side Dish Pairing Ideas
- Common Kitchen Myths
- Recipe FAQs
- 📝 Recipe Card
Simple Chicken Breast Recipe with Garlic and Herbs
Listen, we’ve all been there. You pull a pan of chicken out of the oven and it has the texture of a dry sponge. It’s frustrating when you’re trying to put a wholesome meal on the table and the main event is just... sad.
This Chicken Breast Recipe with Garlic and Herbs will become your new weeknight dinner favorite because it actually stays juicy. I spent years overcooking poultry before I realized that it isn't about the chicken itself, it's about how you treat the proteins before they hit the pan.
The aroma of fresh rosemary and thyme hitting the warm olive oil in your kitchen is enough to make anyone hungry. We’re going for a golden brown sear that offers a slight crunch, followed by a buttery finish that coats every bite.
This isn't just another boring healthy meal, it's a technique that builds confidence in the kitchen. Once you master the sear and baste method, you'll never settle for "okay" chicken again.
I remember the first time I tried making this for my family without the butter baste at the end. It was fine, but it lacked that velvety mouthfeel that makes a dish feel special. Now, I don't skip the small details.
We’re using budget friendly pantry staples like smoked paprika and garlic to create a flavor profile that tastes like it came from a bistro. Let’s get your skillet ready.
Key Benefits of This Method
Understanding the physics of your food changes how you cook. When we talk about poultry, we’re dealing with lean proteins that lose moisture rapidly once they pass a certain temperature. My goal is to help you understand the "why" so you can replicate these results every single time.
Protein Denaturation: Heat causes the tightly coiled proteins in the chicken to unfold and then bond together, a process that can squeeze out moisture if it happens too fast.
Maillard Reaction: This chemical reaction between amino acids and sugars occurs at high heat, creating hundreds of different flavor compounds and that signature golden crust.
- Thermal Equilibrium: Bringing the meat closer to room temperature prevents the exterior from overcooking while the center is still cold.
- Aromatic Infusion: Fats like olive oil and butter act as carriers, pulling the essential oils out of the rosemary and thyme to coat the meat.
- Carryover Cooking: The internal temperature continues to rise after the meat is removed from the heat, which is why we pull it just before the target.
- Fat Lubrication: The addition of a small amount of unsalted butter at the end creates a silky emulsion with the pan juices.
| Meat Thickness | Internal Temp | Rest Time | Visual Cue |
|---|---|---|---|
| 1/2 inch | 160°F | 3 minutes | Firm to touch, clear juices |
| 1 inch | 162°F | 5 minutes | Opaque center, golden edges |
| 1.5 inches | 165°F | 8 minutes | Deep golden crust, no pink |
This table helps you decide when to pull the pan off the heat. Remember, the meat keeps cooking as it sits! If you wait until it hits 165°F on the stove, it will likely reach 170°F by the time you eat, which leads to that "woody" texture we want to avoid.
Trust the rest period to finish the job.
Nutrient and Flavor Analysis
| Ingredient | Science Role | Pro Secret |
|---|---|---|
| Kosher Salt | Denatures surface proteins | Apply 10 minutes early to "dry brine" for better crust. |
| Garlic Paste | Sulfuric flavor release | Microplane your garlic to release more allicin for punchier flavor. |
| Smoked Paprika | Oil soluble color/flavor | Add to the oil early to "bloom" the spice and deepen the hue. |
Wholesome Ingredients and Smart Swaps
Getting the best results doesn't mean you need the most expensive ingredients. In fact, using what you have on hand often leads to the most creative and nutritious meals. I always keep a stash of dried herbs, though fresh is the gold standard for this specific sear. If you are looking for a way to use up garden greens, this pairs beautifully with a Velvety Chicken Cabbage recipe if you want to swap the starch for more fiber.
- 4 (6oz / 170g) chicken breasts: Boneless and skinless for even cooking.
- 1 tsp kosher salt: Use sea salt if needed, but reduce the amount by a quarter.
- 1/2 tsp black pepper: Freshly cracked provides a much sharper bite.
- 3 tbsp extra virgin olive oil: This is our primary fat for the over high heat sear.
- 4 cloves garlic: Mince these into a fine paste to avoid burning.
- 1 tbsp fresh rosemary: Finely chopped. Why this? Its piney notes stand up well to high cooking temperatures.
- 1 tbsp fresh thyme: Strip the leaves from the woody stems.
- 1 tsp smoked paprika: Adds a subtle earthiness and a beautiful red gold tint.
- 1 tbsp unsalted butter: The secret to that glossy, bistro style finish.
| Original Ingredient | Substitute | Why It Works |
|---|---|---|
| Fresh Rosemary | Dried Rosemary (1 tsp) | Concentrated flavor. Note: Soak in oil first to soften the needles. |
| Unsalted Butter | Ghee or Clarified Butter | Higher smoke point but keeps the rich, nutty dairy flavor. |
| Extra Virgin Olive Oil | Avocado Oil | Higher smoke point. Note: Lacks the peppery finish of olive oil. |
Choosing the right fats and seasonings is the first step toward confidence in the kitchen. If you find yourself out of fresh herbs, don't panic. The smoked paprika and garlic paste do a lot of the heavy lifting.
Just remember that dried herbs are more potent, so use about a third of the amount called for in the fresh version.
Necessary Kitchen Tools for Success
You don't need a professional kitchen to make a wholesome meal, but the right gear makes the process smoother. I swear by my heavy bottomed skillet because it holds onto heat. If you use a thin pan, the temperature drops the second the cold meat touches it, and you end up steaming the chicken instead of searing it.
3 Essential Tools
- Heavy Skillet: A cast iron or stainless steel pan is vital for creating that crust.
- Instant Read Thermometer: This is the only way to be 100% sure your chicken is safe and juicy.
- Kitchen Tongs: Essential for flipping the meat without piercing the surface and losing juices.
Chef's Tip: Freeze your butter for 10 minutes before the final basting step. It will melt more slowly, allowing you to spoon it over the chicken for longer without the milk solids burning.
step-by-step Cooking Guide
- Prepare the meat. Pat the 4 chicken breasts dry with paper towels. Note: Moisture on the surface creates steam, which prevents a golden crust from forming.
- Season thoroughly. Sprinkle the 1 tsp kosher salt and 1/2 tsp pepper over both sides of the chicken.
- Create the herb rub. In a small bowl, mix the 4 minced garlic cloves, 1 tbsp rosemary, 1 tbsp thyme, 1 tsp smoked paprika, and 1 tbsp of the olive oil.
- Apply the paste. Rub the herb mixture onto the chicken until every inch is coated and fragrant.
- Heat the pan. Place the remaining 2 tbsp olive oil in the skillet over medium high heat.
- Start the sear. Lay the chicken in the pan until you hear a loud, consistent sizzle.
- Cook first side. Sizzle for 5 to 7 minutes until the edges turn opaque and the bottom is deep golden.
- Flip and finish. Turn the chicken over. Cook for another 5 to 6 minutes.
- The butter baste. Add the 1 tbsp unsalted butter to the pan. Spoon the foaming butter over the chicken for 2 minutes until the internal temp hits 162-165°F.
- Rest the meat. Move the chicken to a board and wait 5 minutes until the fibers relax and juices redistribute.
Common Mistakes to Avoid Daily
The biggest hurdle in cooking lean meat is the fear of undercooking it, which leads everyone to cook it into oblivion. I used to be the person who sliced into the meat while it was still in the pan "just to check." Don't do that. It lets all the liquid run out. Trust your thermometer and the resting process.
Why Your Chicken is Tough
If your meat feels like rubber, you likely skipped the "tempering" step. Taking the chicken out of the fridge 15 minutes before cooking allows the proteins to relax. When cold meat hits a hot pan, the fibers seize up instantly, creating a tight, chewy texture that no amount of sauce can fix.
Why Your Garlic Burnt
Garlic is delicate. If you chop it into big chunks, they sit on the bottom of the pan and turn bitter and black. By mashing it into a paste with a bit of salt, it dissolves into the oil and coats the chicken, protecting it from the direct heat of the metal.
| Problem | Root Cause | Solution |
|---|---|---|
| Pale, white skin | Pan wasn't hot enough | Heat oil until it shimmers before adding the chicken. |
| Rub tastes bitter | Burnt herbs or garlic | Lower heat slightly after the initial flip and add butter. |
| Dry, stringy meat | Overcooking | Pull from heat at 162°F; carryover cooking reaches 165°F. |
- ✓ Pat the chicken completely dry before seasoning (prevents grey, steamed meat)
- ✓ Leave space between the breasts in the pan (avoids moisture buildup)
- ✓ Use a timer to ensure you don't flip the meat too early
- ✓ Always rest the meat for at least 5 minutes before slicing
- ✓ Clean your skillet properly afterward to maintain its non stick properties
Personalizing the Herb Infusion Process
Cooking should be an expression of what you love. While rosemary and thyme are classics, you can easily shift the flavor profile to match your mood. If you want something with more of a kick, try adding a pinch of red pepper flakes to the garlic paste.
I often use this basic method but finish it with a splash of lemon juice to cut through the richness of the butter.
For those who love a bit of luxury, you can deglaze the pan with a splash of white wine before adding the butter. This creates a pan sauce that is out of this world. If you're looking for more inspiration on liquid gold finishes, my Rosemary Chicken Sauce recipe uses a similar base technique to create a velvety jus that feels incredibly fancy but is totally doable on a Tuesday night.
If you are cooking for a crowd, you can double this recipe, but you'll need to work in batches. Never crowd the pan. If you put too much meat in at once, the temperature of the skillet drops and you lose that beautiful sear.
Simply keep the first batch warm in a low oven (about 200°F) while you finish the rest.
Storage and Waste Reduction Tips
Leftover garlic herb chicken is a goldmine for the rest of the week. I like to slice it thin and use it for salads or wraps. It stays fresh in the fridge for up to 4 days if stored in an airtight glass container.
To reheat without drying it out, I recommend a splash of water or chicken broth in the pan and covering it with a lid to create steam.
Freezing is also an option! You can freeze the cooked breasts for up to 3 months. I suggest freezing them individually on a parchment lined tray before putting them into a bag so they don't stick together. This makes it easy to grab just one for a quick lunch.
For a zero waste approach, don't toss those herb stems! If you have leftover rosemary or thyme stems, throw them into a freezer bag. When the bag is full, simmer them with some veggie scraps to make a fragrant homemade stock.
Even the browned bits at the bottom of the pan (the fond) can be turned into a quick sauce with a little water and a whisk.
Complementary Side Dish Pairing Ideas
Since the chicken is savory and herby, I love pairing it with something that can soak up those buttery pan juices. A simple mash or some roasted root vegetables works wonders. If you have the oven going anyway, a Broccoli Casserole recipe is a fantastic companion that adds a creamy element to the plate.
Right then, you're ready to go. Remember to keep your pan hot, your garlic fine, and your patience steady while the meat rests. Cooking a wholesome meal like this is about the process as much as the result. You've got the tools and the science now go make something savory!
Common Kitchen Myths
Myth: Searing meat "seals in" the juices. This is one of the oldest stories in the kitchen. Searing actually creates flavor through the Maillard reaction, but it doesn't create a waterproof barrier. Moisture loss happens because of temperature, not because you didn't sear it fast enough.
Myth: You must cook chicken until the juices run clear. While clear juices are a good sign, they aren't a scientific measurement of safety. Some chickens have more myoglobin in their tissues which can keep juices slightly pink even when the meat is safely cooked. Use a thermometer to be sure.
Myth: Marinating chicken for 24 hours makes it juicier. Actually, long marinating times in acidic ingredients can turn the surface of the chicken mushy. For this recipe, the dry rub and the immediate sear provide better texture and plenty of flavor without the wait.

Recipe FAQs
What's the best way to season the chicken breast?
Pat it dry and season generously. Moisture on the surface steams the chicken, preventing a good sear. Applying salt and pepper ahead of time also helps create a better crust.
How do I get a golden brown crust on my chicken?
Start with a hot, heavy skillet. Ensure your pan is adequately heated with oil shimmering before adding the chicken. This high heat jumpstarts the Maillard reaction for that desirable crust.
Why is my chicken breast dry and tough?
You likely overcooked it. Chicken breast is lean and cooks quickly. Rely on an instant read thermometer and remove it from the heat when it reaches 162°F; carryover cooking will bring it to a safe 165°F. Mastering temperature control here is similar to techniques used in our How to Make Roast Whole Chicken Juicy & Flavorful: A Family Favorite.
Can I use dried herbs instead of fresh?
Yes, but use less. Dried herbs are more concentrated, so use about one-third the amount of fresh herbs. For best results, you can soak dried herbs in a little warm oil for a few minutes before adding them to the paste.
How long should I rest the chicken after cooking?
Rest for at least 5 minutes. This crucial step allows the juices to redistribute throughout the meat, ensuring a succulent bite. Skipping this step can lead to dry chicken as the juices run out when you slice it.
What's the secret to the glossy finish on the chicken?
Add a tablespoon of unsalted butter at the end. Spooning the foaming butter over the chicken for the last minute or two creates a rich, emulsified sauce that coats the meat beautifully, similar to how a glaze forms in other recipes like our How to Make Amazing Garlic Butter Honey BBQ Chicken Tacos.
How can I flavor my chicken differently?
Experiment with spices and aromatics. You can add a pinch of red pepper flakes for heat, or deglaze the pan with white wine before adding butter for a simple pan sauce. A squeeze of lemon juice at the end also brightens the flavor significantly.
Garlic Herb Chicken Breast

Ingredients:
Instructions:
Nutrition Facts:
| Calories | 328 kcal |
|---|---|
| Protein | 39.2 g |
| Fat | 17.4 g |
| Carbs | 1.5 g |
| Fiber | 0.4 g |
| Sugar | 0.1 g |
| Sodium | 582 mg |
