Chicken Thigh Recipe with Garlic and Herbs: Crispy Baked
- Time: Active 10 minutes, Passive 25 minutes, Total 35 minutes
- Flavor/Texture Hook: Shatter crisp skin and velvety, garlic infused meat
- Perfect for: High protein family dinners or low carb meal prep
- Perfecting This Chicken Thigh Recipe with Garlic and Herbs
- Science of the Shatter Crisp Skin
- Wholesome Ingredients for Robust Flavor
- Essential Gear for Home Cooks
- The Simple Step-by-Step Method
- Troubleshooting for a Flawless Result
- Versatile Variations for Your Family
- Myths Regarding Poultry Preparation
- Storage and Zero Waste Strategies
- Flavorful Pairings for Your Plate
- HIGH in Sodium
- Recipe FAQs
- 📝 Recipe Card
Perfecting This Chicken Thigh Recipe with Garlic and Herbs
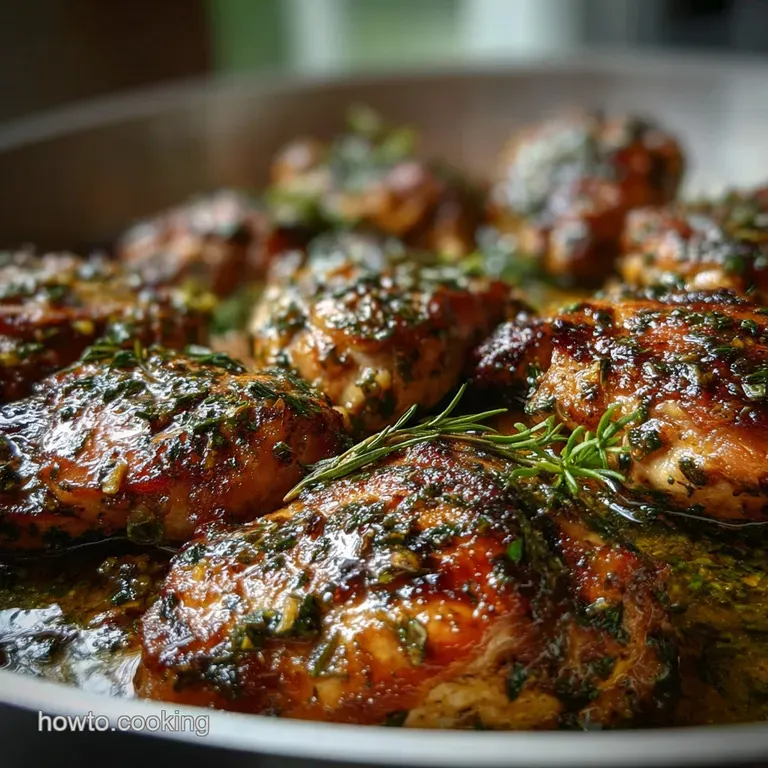
There is a specific sound that defines a successful dinner in my house, and it is the audible crack when a knife first touches the skin of a perfectly rendered chicken thigh. This Chicken Thigh Recipe with Garlic and Herbs will become your new favorite weeknight dinner because it relies on technique rather than complicated steps.
I remember the first time I tried making this, I rushed the heat and ended up with charred skin and raw centers. Since then, I have learned that patience with the pan is the secret to building that flavorful, golden crust we all crave.
We are moving away from the rubbery, lackluster chicken that often comes out of a standard bake. Instead, we are using a method that treats the chicken more like a high end steak, basting it in melted butter and fresh aromatics to build layers of savory goodness.
You do not need a culinary degree to pull this off, just a heavy pan and the confidence to let the heat do its work. It is a wholesome way to feed your family without spending hours at the stove.
The beauty of bone in chicken is the built in insulation it provides. While boneless cuts can dry out in a heartbeat, these thighs remain incredibly moist because the bone conducts heat more gently.
You will find that the combination of rosemary and thyme creates a fragrant steam that permeates the meat from the inside out, making every bite consistently flavorful. Let's look at why this specific approach yields such a professional result in a home kitchen.
Science of the Shatter Crisp Skin
Maillard Reaction: This chemical interaction between amino acids and reducing sugars creates the brown, flavorful crust and complex aromas during the initial sear.
Fat Rendering: Starting in a cold pan allows the thick layer of subcutaneous fat to melt slowly, effectively frying the skin in its own liquid for a thinner, crispier texture.
Protein Denaturation: The gentle transition from stovetop to oven ensures proteins uncoil and rebond slowly, trapping internal juices rather than squeezing them out.
| Thickness | Internal Temp | Rest Time | Visual Cue |
|---|---|---|---|
| 1 inch | 175°F | 5 minutes | Juices run clear when pierced |
| 1.5 inches | 175°F | 7 minutes | Bone pulls away from meat |
| 2 inches | 185°F | 10 minutes | Skin is mahogany and firm |
Understanding the temperature is vital because chicken thighs are actually more nutritious and tender when cooked to a higher internal temperature than breasts. While 165°F is the safety standard, taking thighs to 175°F allows the connective tissue to fully melt into gelatin, giving the meat a silky mouthfeel.
Wholesome Ingredients for Robust Flavor
| Ingredient | Science Role | Pro Secret |
|---|---|---|
| Kosher Salt | Protein Solvent | Apply 1 hour early to "dry brine" for better browning |
| Smoked Paprika | Color Catalyst | The tiny oil soluble particles bloom in fat for deep orange hues |
| Fresh Garlic | Aromatic Infusion | Smashed cloves release oils without burning as easily as minced |
How the Dry Brine Works
When you apply 1.5 tsp Kosher salt to the skin early, it draws out moisture through osmosis. That moisture then dissolves the salt and is reabsorbed, seasoning the meat deeply while leaving the surface dry enough to shatter when it hits the heat.
Whole Garlic Over Minced
We use 8 cloves of garlic, peeled and smashed, because they act as little flavor bombs in the pan. Smashed garlic offers a mellow, nutty sweetness without the risk of the bitter, acrid taste that comes from tiny minced bits burning in the hot butter.
The Oven Finish Benefit
Moving the pan to the oven provides surrounding heat that mimics a rotisserie. It allows the garlic and herbs to gently toast in the rendered fat without the direct, aggressive heat of the stovetop burner.
Essential Gear for Home Cooks
For this recipe, a heavy bottomed skillet is your best friend. I highly recommend a 12 inch cast iron skillet or a high-quality stainless steel pan. These materials hold heat exceptionally well, which prevents the pan temperature from dropping when you add the cold meat.
If you use a thin non stick pan, you won't get that iconic sear because the heat won't be consistent enough to render the fat properly.
You will also want a pair of sturdy tongs and a reliable meat thermometer. Guessing the doneness of bone in chicken is a risky game that often leads to overcooked, dry results. Having a thermometer gives you the confidence to pull the chicken at exactly the right moment. If you are looking to expand your poultry repertoire after this, the heat control techniques here are very similar to what I use in my Rosemary Chicken Sauce recipe.
- 1.5 lb bone in, skin on chicken thighs: Why this? The bone adds flavor and prevents the meat from drying out during roasting.
- 1.5 tsp Kosher salt: Why this? Large grains provide even coverage and better moisture control than table salt.
- 1 tsp freshly cracked black pepper: Why this? Freshly ground pepper has volatile oils that provide a sharp, floral heat.
- 0.5 tsp smoked paprika: Why this? Adds a subtle earthiness and encourages a deep, golden color on the skin.
- 8 cloves garlic, peeled and smashed: Why this? Smashed cloves infuse the oil without burning during the long sear.
- 3 sprigs fresh rosemary: Why this? A hardy herb that stands up to high heat and provides woodsy notes.
- 5 sprigs fresh thyme: Why this? Its delicate, lemony flavor balances the richness of the chicken fat.
- 2 tbsp unsalted butter: Why this? Used for basting to add a velvety finish and help brown the skin.
- 1 tbsp extra virgin olive oil: Why this? Provides a high smoke point base to start the rendering process.
The Simple step-by-step Method
The Chicken and Rub
Pat the 1.5 lb chicken thighs completely dry with paper towels. Note: Surface moisture is the enemy of a good sear, as it creates steam. Combine the 1.5 tsp Kosher salt, 1 tsp pepper, and 0.5 tsp smoked paprika in a small bowl.
Rub this mixture evenly over both sides of the chicken, making sure to get under the skin where possible.
The Cold Start Pan Sear
Place the chicken thighs skin side down in a cold 12 inch skillet and add 1 tbsp olive oil. Turn the heat to medium. Cook for 12-15 minutes without moving them until the fat has rendered and the skin is deep golden and releases easily from the pan.
Garlic and Herb Infusion
Flip the chicken thighs so they are skin side up. Note: The skin should look like parchment paper at this stage. Add the 8 smashed garlic cloves, 3 sprigs of rosemary, and 5 sprigs of thyme to the open spaces in the pan.
The Aromatic Basting Phase
Place the 2 tbsp unsalted butter into the pan. Once it melts and begins to foam, tilt the pan slightly and use a large spoon to pour the flavored butter over the chicken skin. Baste for 2 minutes until the kitchen smells intensely of garlic and herbs.
The Final Oven Roast
Transfer the entire skillet into a preheated 400°F oven. Bake for 10-12 minutes until the internal temperature reaches 175°F at the thickest part of the thigh.
Resting for Juiciness
Remove the pan from the oven and transfer the chicken to a warm plate. Note: This allows the fibers to relax and reabsorb the juices. Let the meat rest for 5 minutes before serving to ensure every bite is succulent.
Troubleshooting for a Flawless Result
Addressing Soggy Chicken Skin
If your chicken skin comes out soft rather than crispy, the most likely culprit is trapped steam. This usually happens if the pan is overcrowded or if the chicken wasn't dried properly before cooking.
When the thighs are too close together, the moisture escaping from the meat can't evaporate, so it gets trapped under the skin. Always leave at least an inch of space between each piece of meat.
Managing Garlic Burning Issues
Garlic can turn bitter if it spends too much time in high, direct heat. If you notice the cloves turning a dark, charcoal black before the chicken is done, simply spoon them out of the pan. The oil is already infused with their flavor, so they have done their job.
You can also nestle the garlic cloves underneath the herb sprigs to provide a little heat shield.
| Problem | Root Cause | Solution |
|---|---|---|
| Skin sticks to pan | Flipped too early | Wait for the fat to render; it will release naturally when ready. |
| Meat is tough | Undercooked bone in | Thighs need 175°F to break down connective tissue; use a thermometer. |
| Bitter aftertaste | Burnt herbs/garlic | Add aromatics only after flipping the chicken to avoid excess heat. |
- ✓ Pat chicken completely dry with paper towels before seasoning.
- ✓ Start in a cold pan to maximize fat rendering for thinner skin.
- ✓ Use a cast iron skillet for the most even heat distribution.
- ✓ Don't skip the resting period; it is essential for moisture retention.
- ✓ Ensure the oven is fully preheated before transferring the pan.
Versatile Variations for Your Family
If you need to adjust the quantities for a larger group, remember that pan space is your limiting factor. For a double batch, you will need to sear the chicken in two separate pans or in batches. When doubling the recipe, only increase the salt and herbs by 1.5x to avoid overwhelming the dish.
If you are scaling down to just two thighs, you can use a smaller 8 inch skillet and reduce the oven time by about 3 minutes.
For those who want a different texture, you might enjoy the contrast of a Parmesan Crusted Chicken recipe. It offers a different kind of crunch but uses many of the same flavor principles we have discussed here.
| Method | Time | Texture | Best For |
|---|---|---|---|
| Stovetop to Oven | 35 mins | Glass like skin | Traditional excellence |
| Air Fryer | 22 mins | Extra crispy edges | Quick weeknight meals |
| Slow Cooker | 6 hours | Fall off-the bone | Hands off meal prep |
Air Fryer Substitution Steps
You can absolutely make Garlic and Herb chicken thighs in the air fryer. Rub the chicken with the oil and spices, then place them skin side down at 380°F for 12 minutes. Flip them, add the garlic and herbs on top, and cook for another 8-10 minutes.
The skin won't be quite as "fried" in taste, but it will be incredibly crispy.
Creamy Pan Sauce Adaptation
To turn this into a Creamy garlic herb chicken thigh dish, remove the chicken from the pan after roasting. Pour off all but a tablespoon of fat, whisk in a splash of chicken broth to deglaze, then stir in 1/2 cup of heavy cream. Simmer for 2 minutes and pour over the chicken.
Boneless Skinless Thigh Swap
If you prefer a Boneless skinless chicken thigh recipe with garlic and herbs, reduce the stovetop time significantly. Sear them for only 5 minutes per side on medium high heat, then finish in the oven for 5-7 minutes. Since there is no skin to render, you can start with a hot pan.
Myths Regarding Poultry Preparation
One common misconception is that you need to wash your chicken before cooking it. This actually spreads bacteria around your kitchen sink and doesn't make the chicken any cleaner. The high heat of the pan is what truly makes the meat safe to eat.
Focus on drying the skin with paper towels instead, which is far more effective for the final result.
Another myth is that basting with butter "seals in the juices." In reality, basting is about flavor and heat distribution. The fat in the butter helps the skin brown more evenly by filling in the microscopic gaps between the skin and the pan, while the milk solids in the butter provide a nutty, toasted flavor that oil alone cannot achieve.
Storage and Zero Waste Strategies
Store any leftovers in an airtight container in the fridge for up to 4 days. When reheating, avoid the microwave if you want to keep the skin crispy. Instead, place them in a 350°F oven or an air fryer for 5 minutes.
You can also freeze the cooked thighs for up to 3 months, though the skin will lose its signature crunch upon thawing.
Don't throw away those herb stems or the bones! I keep a bag in my freezer for "stock scraps." The rosemary and thyme stems still have plenty of flavor for a wholesome chicken stock.
Once you have eaten the meat, simmer the bones with some onion skins and carrot tops for a few hours to create a nutritious base for soups or stews. It is a simple way to ensure nothing from your kitchen goes to waste.
Flavorful Pairings for Your Plate
This chicken is so savory that it pairs beautifully with bright, acidic sides. A simple arugula salad with a lemon vinaigrette cuts through the richness of the butter basted skin perfectly.
If you want something more heartier, roasted fingerling potatoes can be cooked on a separate tray in the oven at the same time as the chicken. They soak up the garlic herb aroma in the air beautifully.
For a low carb option, steamed green beans tossed in a little bit of the leftover pan juices are a revelation. The garlic cloves that roasted in the pan become soft and spreadable, almost like butter. I love mashing them onto a piece of crusty bread or mixing them into a side of cauliflower mash. It adds a wholesome, gourmet touch to what is essentially a very simple, high confidence meal. If you enjoy these Mediterranean flavors, you might also like the profile of this Light Herbaceous Greek recipe.

HIGH in Sodium
862 mg mg of sodium per serving (37% % of daily value)
American Heart Association recommends a limit of about 2,300mg sodium per day.
Sodium Reduction Tips for Roasted Chicken Thighs
-
Reduce Added Salt-25%
Decrease the amount of Kosher salt from 1.5 tsp to 0.75 tsp. This can significantly reduce the sodium content without sacrificing too much flavor. Start with a smaller amount and add more to taste after cooking if needed.
-
Consider Salt Free Chicken-15%
Check the chicken thighs' packaging; some chicken can be pre-brined with added salt. Choose chicken that specifies it is not pre-treated with sodium solutions to avoid hidden sources of sodium.
-
Garlic Power!-5%
Enhance the flavor profile with more garlic! Consider adding 2-3 additional cloves of garlic, as garlic has a strong flavor without any sodium.
-
Herb Boost
Experiment with other fresh or dried herbs like oregano, basil, or marjoram to add complexity and reduce the perceived need for salt. Use more herbs than spices for increased flavor!
Recipe FAQs
What is the best way to ensure crispy skin on these garlic herb chicken thighs?
Pat the chicken thighs completely dry and start them in a cold pan. This allows the fat to render slowly and crisp up the skin without burning. Ensure there's enough space between thighs to prevent steaming.
Can I use boneless, skinless chicken thighs for this recipe?
Yes, but adjust the cooking time. Boneless, skinless thighs cook faster; sear for about 5 minutes per side on medium high heat, then finish in the oven for 5-7 minutes. Starting with a hot pan is best for these cuts.
Why does the recipe suggest cooking thighs to 175°F instead of the usual 165°F?
Cooking thighs to 175°F breaks down connective tissue into gelatin. This makes the meat incredibly tender and succulent, offering a silky mouthfeel that is superior to the standard safe temperature.
How do I prevent the garlic from burning when searing the chicken?
Add the garlic and herbs after flipping the chicken to the skin-up side. This protects the aromatics from the most intense direct heat and infuses their flavor as they gently toast in the rendered fat.
What is the purpose of dry brining the chicken before cooking?
Dry brining draws out moisture from the skin and seasons the meat deeply. The salt helps tenderize the meat and ensures the surface is dry, which is crucial for achieving that desirable shatter crisp skin.
Can I make a creamy sauce with the pan drippings?
Absolutely, it's a fantastic way to enhance the dish. Remove the chicken, deglaze the pan with a splash of broth, and whisk in heavy cream to create a rich, flavorful sauce that complements the garlic and herbs beautifully.
How should I store and reheat leftovers to maintain texture?
Store leftovers in an airtight container in the fridge for up to 4 days. For reheating, use an oven or air fryer at 350°F for about 5 minutes to revive the crispy skin; avoid the microwave.
Garlic Herb Chicken Thighs
Ingredients:
Instructions:
Nutrition Facts:
| Calories | 389 kcal |
|---|---|
| Protein | 30.8 g |
| Fat | 26.4 g |
| Carbs | 2.1 g |
| Fiber | 0.4 g |
| Sugar | 0.2 g |
| Sodium | 862 mg |
