Honey Garlic Chicken Breasts Crunchy
- Time: Active 10 minutes, Passive 10 minutes, Total 20 minutes
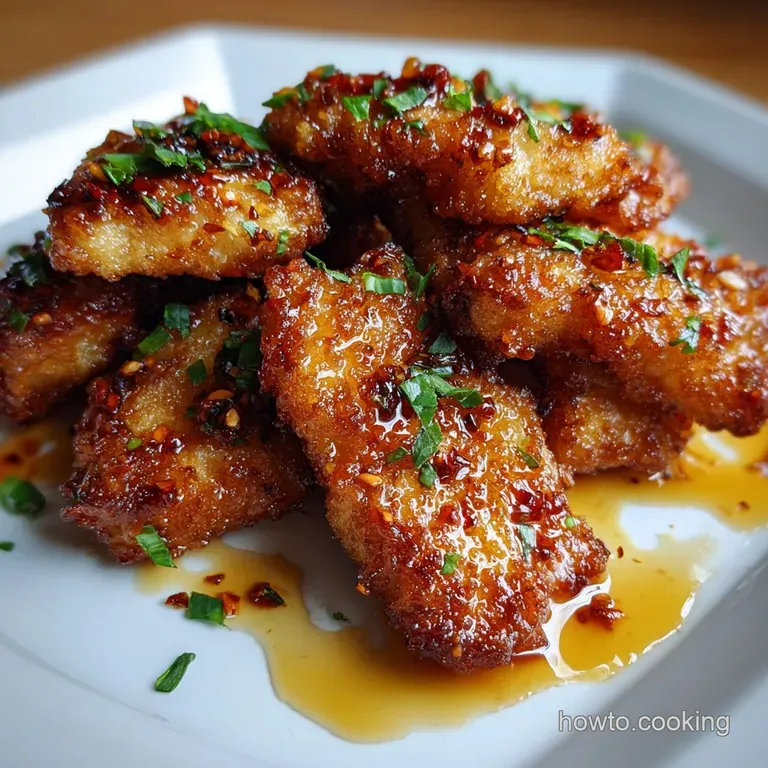
- Flavor/Texture Hook: Shatter crisp coating with a velvety, sweet savory finish
- Perfect for: Wholesome family dinners or impressive weeknight hosting
- Physics of the Shatter Crisp Coating
- Critical Metrics for Kitchen Success
- Wholesome Elements for Best Flavor
- Tools for an Efficient Flow
- Executing the Perfect Sear Stepwise
- Professional Solutions for Every Challenge
- Creative Adaptations for Family Meals
- Maintaining Integrity During Storage
- Finishing Touches for Serving Success
- HIGH in Sodium
- Recipe FAQs
- 📝 Recipe Card
You won't believe the sound my fork made when it hit this chicken last night, it literally shattered. I used to struggle with that weird, rubbery coating that slides right off the meat, but I finally figured out the trick is all about the starch ratio.
My kitchen smelled like a dream, with that sticky sweet garlic aroma drifting through the whole house while the pan hissed and popped.
It’s the kind of wholesome meal that makes you feel like a pro without needing a culinary degree. Honestly, I’ve made every mistake in the book, from burnt garlic to soggy breading, but we’ve refined this process so it works every single time.
You’ll get that deep, golden color and a sauce that clings to every nook and cranny.
We're going to use a blend of textures here to ensure the chicken stays juicy while the outside remains firm. If you've been looking for a way to bring more confidence to your stovetop skills, this is the recipe that proves technique beats complicated ingredients every day of the week. Let’s get stuck in.
Physics of the Shatter Crisp Coating
- Amylose Retrogradation: Cornstarch contains high levels of amylose, which creates a brittle, glass like structure when fried that resists moisture better than flour alone.
- Vapor Pressure Release: The thin coating allows steam from the chicken to escape quickly, preventing the breading from becoming soggy from the inside out.
- Maillard Stability: Honey's natural sugars caramelize at a lower temperature, creating a complex flavor profile without needing high heat that might toughen the protein.
| Method | Cook Time | Texture | Best For |
|---|---|---|---|
| Stovetop | 10 minutes | Maximum shatter crunch | Traditional experience |
| Oven Baked | 20 minutes | Firm but lighter | Hands off preparation |
| Air Fryer | 12 minutes | Very dry and crispy | Wholesome oil reduction |
Choosing the right method depends on your evening flow, though the stovetop version provides the most authentic texture for these honey garlic chicken breasts crunchy. Similar to the crisping technique used in our Velvety Chicken Cabbage recipe, maintaining a high surface temperature is the secret to success.
Critical Metrics for Kitchen Success
| Component | Science Role | Pro Secret |
|---|---|---|
| Cornstarch | Texture Reinforcement | Creates the "shatter" effect by inhibiting gluten. |
| Liquid Honey | Viscosity & Glaze | Acts as a humectant to keep the sauce glossy. |
| Egg Wash | Protein Adhesive | Ensures the dry dredge sticks through the sizzle. |
| Apple Cider Vinegar | pH Balancing | Cuts through the sugar to brighten the savory notes. |
Regardless of the coating, the internal temperature is your most important metric. You are looking for a firm feel and a clear juice run. If you want a different flavor profile entirely, you might enjoy the citrus notes in this How to Bake recipe.
Wholesome Elements for Best Flavor
- 1.5 lbs chicken breasts: Sliced into even cutlets. Why this? Even thickness ensures every piece finishes cooking at the exact same moment.
- Substitute: Chicken thighs (boneless) for a richer, more forgiving meat.
- 1/2 cup all purpose flour: The base of our dredge.
- Substitute: Almond flour for a nuttier, denser crumb.
- 1/2 cup cornstarch: The key to the crunch.
- Substitute: Potato starch works equally well for a light, crispy finish.
- 1/3 cup liquid honey: Use a high-quality wildflower honey.
- Substitute: Maple syrup offers a woodsy, complex sweetness.
- 4 cloves garlic: Freshly minced is non negotiable.
- Substitute: 1 teaspoon garlic powder if you're in a rush.
- 2 large eggs: Beaten until no streaks remain.
- Substitute: 1/4 cup heavy cream or buttermilk for a thicker coating.
- 2 tbsp low sodium soy sauce: Adds depth without over salting.
- Substitute: Tamari for a gluten-free alternative.
- 1 tbsp apple cider vinegar: For that necessary tang.
- Substitute: Rice vinegar for a milder, slightly sweeter acidity.
- 1 tsp garlic powder, 1/2 tsp cayenne, 1 tsp sea salt, 1/2 tsp black pepper: For the seasoning blend.
- 1/4 cup neutral oil: For the shallow fry.
- 1/2 tsp toasted sesame oil: A tiny drop for aromatic finish.
Tools for an Efficient Flow
You’ll want a large heavy bottomed skillet, like a cast iron pan or a stainless steel sauté pan, to maintain steady heat. Avoid thin non stick pans if possible, as they don't always provide that hard sear we’re looking for.
A set of shallow bowls for your dredging station will keep the mess contained.
A wire cooling rack is another helpful tool. Instead of placing the finished chicken on paper towels, which can trap steam and soften the bottom, let them sit on a rack for a minute. This allows air to circulate around the entire piece, keeping it crispy while you whisk together the honey and garlic.
Executing the Perfect Sear Stepwise

Preparing the Cutlets
- Pat 1.5 lbs chicken breasts completely dry with paper towels. Note: Surface moisture is the enemy of a crispy crust.
- Slice the chicken into 1 inch thick strips or even cutlets.
Setting Up the Dredging Station
- Whisk 1/2 cup flour, 1/2 cup cornstarch, and all the dry seasonings in one bowl.
- Beat 2 large eggs in a separate bowl until fully combined.
- Dip each piece of chicken into the egg, then roll it in the flour mixture. Note: Press the flour firmly into the meat to ensure it stays put.
Executing the Perfect Sear
- Heat 1/4 cup neutral oil in your skillet until it shimmers and wisps of smoke appear.
- Place chicken in the pan and cook for 4-5 minutes per side until golden and audibly crunchy.
- Remove the chicken to a wire rack and wipe the excess oil from the pan.
Glazing for the Final Crunch
- Add the minced garlic to the warm pan for 30 seconds until fragrant and pale gold.
- Pour in 1/3 cup honey, soy sauce, vinegar, and sesame oil, simmering until the sauce bubbles and thickens.
- Return the chicken to the pan, tossing quickly until every piece is velvety and glazed.
Professional Solutions for Every Challenge
Preventing a Soggy Crust
If your chicken comes out soft rather than crispy, it’s usually a temperature issue. When the oil isn't hot enough, the coating absorbs fat instead of sealing. Also, once you add the sauce, work fast. The longer the chicken sits in the liquid, the more the starch will soften.
Managing the Garlic Heat
Garlic can turn bitter in a heartbeat if the pan is too hot. I always pull the pan off the burner for a second before adding the garlic, letting the residual heat do the work. This gives you a sweet, mellow flavor rather than a burnt, acrid one.
| Problem | Root Cause | Solution |
|---|---|---|
| Breading falling off | Meat was too wet | Pat dry with towels before the egg dip. |
| Sauce too thin | Not enough reduction | Simmer the honey mixture for an extra 2 minutes. |
| Tough chicken | Overcooking | Pull the chicken at 160°F; carryover will reach 165°F. |
Common Mistakes Checklist ✓ Don't overcrowd the pan; cook in two batches if necessary. ✓ Use a neutral oil with a high smoke point like canola or grapeseed. ✓ Wait for the "shimmer" in the oil before adding the first piece of meat.
✓ Let the chicken rest on a wire rack, never directly on a flat plate. ✓ Add the sesame oil at the very end to preserve its delicate aroma.
Creative Adaptations for Family Meals
Creating Crunchy Chicken Bites
If you have kids, cutting the chicken into small 1 inch cubes makes this feel like a wholesome version of takeout. The cook time will drop to about 3 minutes per side. It increases the surface area, meaning you get even more of that honey garlic chicken breasts crunchy texture in every single bite.
The Air Fryer Hack
For a lighter version, spray the breaded chicken pieces generously with oil and air fry at 400°F for 12 minutes, flipping halfway through. It won't have the same deep fried richness, but it’s remarkably efficient for a busy Tuesday.
You can then toss them in the sauce prepared on the stovetop.
gluten-free Swap
You can easily make this gluten-free by using a 1:1 gluten-free flour blend and ensuring your soy sauce is replaced with tamari. Since cornstarch is naturally gluten-free, the structural integrity of the crunch remains exactly the same.
Maintaining Integrity During Storage
Fridge: Store leftovers in an airtight container for up to 3 days. The sauce will soak into the breading, so it won't be as crunchy the next day, but the flavor actually deepens.
Freezer: I don't recommend freezing the chicken once it's glazed, as the texture becomes quite soft upon thawing. However, you can freeze the breaded, fried chicken (before saucing) for up to 2 months.
Reheating: To bring back the crunch, avoid the microwave at all costs. Use a toaster oven or air fryer at 350°F for 5 minutes. This helps the exterior firm up again.
Zero Waste: If you have leftover sauce in the pan, toss in some steamed broccoli or shredded carrots. The honey garlic glaze is a perfect way to make vegetables more appealing to the whole family.
Finishing Touches for Serving Success
I love serving this over a bed of fluffy jasmine rice to soak up that extra glaze. A sprinkle of toasted sesame seeds and some sliced green onions adds a fresh, sharp contrast to the sweetness of the honey. It's a wholesome presentation that looks far more complicated than it actually is.
If you’re looking to round out the meal, a side of crisp cucumbers with a splash of rice vinegar works wonders. The coolness of the cucumbers cuts right through the richness of the fried coating. This dish also pairs beautifully with a Parmesan Crusted Chicken recipe if you're doing a buffet style family gathering and want to offer multiple textures.
Chef's Note: For an extra layer of flavor, grate the garlic directly into the honey before adding it to the pan. This allows the garlic oils to infuse into the sweetener, creating a more uniform taste throughout the glaze.

HIGH in Sodium
845 mg mg of sodium per serving (37% % of daily value)
The American Heart Association recommends limiting sodium intake to about 2,300mg per day.
Tips to Reduce Sodium
-
Reduce Added Salt-25%
Eliminate or significantly reduce the 1 tsp of sea salt in the flour mixture. Taste and adjust other seasonings accordingly.
-
Lower Sodium Soy Sauce-20%
Replace the regular soy sauce with a low-sodium or reduced sodium soy sauce. This can significantly cut down on the sodium content.
-
Control Honey's Impact-10%
While honey itself doesn't contain sodium, be mindful of its quantity. The combination with soy sauce and salt elevates the sodium level, so avoid adding more honey.
-
Enhance Garlic Flavor-5%
Double the amount of fresh minced garlic (4 cloves) to enhance the savory flavor without adding extra sodium.
-
Spice It Up!
Increase the amount of cayenne pepper for a flavor boost. Using more spices can help compensate for the reduction in salt.
-
Experiment with Herbs
Incorporate sodium free herbs and spices like smoked paprika, black pepper, or onion powder for enhanced flavor without increasing sodium levels. Don't be afraid to try different combinations to find your favorites!
Recipe FAQs
What makes these honey garlic chicken breasts crunchy?
The combination of cornstarch and a proper frying technique. Cornstarch creates a brittle, glass like structure when fried, and ensuring the oil is hot enough prevents it from becoming soggy.
How do I prevent the breading from falling off?
Pat the chicken thoroughly dry before breading. Surface moisture is the enemy of adhesion; the egg wash and flour mixture won't stick well to wet chicken.
Can I make this ahead of time?
Yes, but with a texture compromise. The chicken can be fried and stored in the fridge for up to 3 days, but it will lose some of its crunchiness. Reheat in a toaster oven or air fryer to revive crispiness.
How do I reheat the crunchy chicken?
Use a toaster oven or air fryer at 350°F for 5 minutes. Avoid the microwave, as it will make the chicken soft and unappealing.
Is it okay to use chicken thighs instead of breasts?
Yes, chicken thighs work well and are more forgiving. They tend to stay juicier during cooking and offer a richer flavor, though the cooking time might need slight adjustment.
What if my sauce is too thin?
Simmer the honey mixture for longer. Allow the sauce to bubble and reduce for an extra 1-2 minutes to thicken to a velvety consistency that clings to the chicken.
Can I substitute the soy sauce?
Yes, use tamari for a gluten-free option. Tamari offers a similar salty depth without the gluten, making it a great substitute for those with dietary restrictions.
Honey Garlic Chicken Crunchy

Ingredients:
Instructions:
Nutrition Facts:
| Calories | 579 kcal |
|---|---|
| Protein | 58.3 g |
| Fat | 13.5 g |
| Carbs | 51.8 g |
| Fiber | 1.2 g |
| Sugar | 23.9 g |
| Sodium | 845 mg |
