How to Make Basic Icing: a Sweet Finish for Any Treat
A Sweet look into into Basic Icing
Alright, let me take you on a little personal journey. it all started one rainy afternoon in my childhood kitchen, where the smell of butter and sugar took over like it was meant to be in a movie.
I remember my mom whipping up a simple icing for her famous cupcakes. "how do you make basic icing?" i asked, all wide eyed and curious.
She smiled, tossed her head back, and said it was as easy as pie. well, maybe not pie, but you get the drift.
And just like that, icing became a part of my life sweet, versatile, and perfect for turning any ordinary treat into something extraordinary.
Recipe Overview
Now, here’s your history lesson. this basic icing, sometimes called recipe for icing or simple glaze, has taken a trip around the world! its roots can be traced back to british baking, where it has draped cakes like elegant capes for centuries.
Fast forward to today this icing is a staple in many american homes, simplifying our dessert game. seriously, who wouldn’t want a quick way to add sweetness to cupcakes or cookies?
Let's talk time. whipping this up takes a mere 10 minutes . yes, you read that right! prep time is minimal, no long baking involved.
Just some mixing and bam! you’ve got icing. as for cost, all you really need are a couple of pantry staples. so, let's say you’re at the grocery store, and the only thing standing between you and cupcake glory is a few bucks.
It’s definitely not breaking the bank here.
Key Benefits
Feeling good about your sweet tooth? this easy icing recipe brings more than just sugar. while it’s sweet on the taste buds, it’s also light enough that you won’t feel weighed down after a cupcake binge.
Think of it as a lovely drizzle of happiness on your treats! plus, if you’re hosting a baby shower or a birthday bash, this icing shines, looking gorgeous on cakes without stealing the spotlight.
Let’s not forget about flavor! if you’re wondering how to jazz it up, you can easily swap in vanilla or almond extract.
Want a chocolate twist? toss in some cocoa powder. so versatile! you'll also find it great for decorating; use it to pipe a few swirls on your treats!
So, what’s the secret sauce? the simplicity! compared to other complicated frosting recipes , this one's much easier. no temperature anxieties or pastry bags needed.
Just a bowl, a whisk, and your imagination.
Time to Gather Ingredients!
You’re still with me? Awesome! Let’s get to it and pull together those ingredients for this scrumptious basic icing. Here’s what you’ll need:
- 2 cups (240g) of icing sugar (sifted)
- 2 tablespoons (30ml) of milk (or water for a dairy-free option)
- 1 teaspoon (5ml) vanilla extract (optional for flavor)
Just imagine this silky smooth goodness over your favorite baked goods. Hey, pour some over a Tarte Fine , and you’re basically a kitchen genius!
This icing is that secret weapon in your baking arsenal that’ll make you the star of any gathering. so go ahead, master this easy icing , and get ready to impress your friends and family.
Who knows, maybe one day you’ll find yourself being asked, “how do you make basic icing?” and you’ll just smile, knowing the answer has its roots in a cozy childhood kitchen.
Ready to get started? let’s do this!
Essential Ingredients Guide: Your Go-To for Making Icing!
Getting into baking? you gotta start with the right ingredients! let’s break down what you need to whip up some delicious goodies, like crispy cookies or tasty cakes.
Trust me, knowing your premium core components can make or break your baking game.
Premium Core Components
When you're tackling your kitchen adventures, measurements are key! Here’s the scoop:
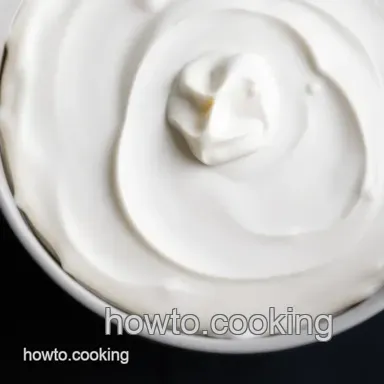
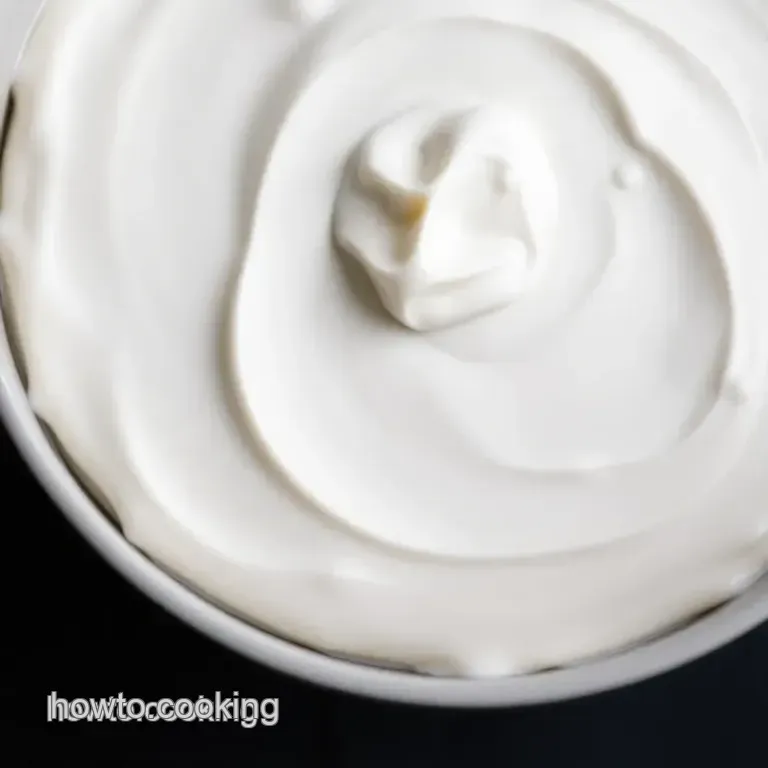
- For icing , you’ll need 2 cups (240g) of sifted icing sugar . It’s all about that smooth texture, right?
- If you’re using milk, stick with 2 tablespoons (30ml) at room temperature. Feel free to swap that out for a dairy-free alternative, though!
Quality is crucial. go for fresh ingredients whenever you can. check expiry dates because old supplies can ruin your baking joy.
Tip : store your icing sugar in an airtight container. it’ll last for about 2 years if kept dry and dark.
Signature Seasoning Blend
Okay, let’s spice things up! You wanna turn that simple icing into a masterpiece.
- Flavor enhancers are your besties. A splash of vanilla extract can really elevate the flavor. Trust me, I learned that the hard way when I skipped it once!
Smart Substitutions
Ever in a pinch? We’ve all been there. When you’re stuck and asking yourself, “how do you make basic icing?” don’t sweat it! Here’s what I’ve gathered:
- Common alternatives : Don’t have icing sugar? No problem! Granulated sugar can be blended into a fine powder.
- dairy-free options : If you're out of milk, almond milk or water can save the day.
- Emergency replacements : If you need something quick, you can use a premade frosting for that instant gratification.
Kitchen Equipment Essentials
Now let’s chat about those must have tools that can make your life easier.
- You’ll need a mixing bowl and a whisk . Honestly, these are your bread and butter (or should I say, icing and cake)!
- A sifter is a game changer. Sifting your icing sugar? Total key to smoothness!
- Got a rubber spatula ? You’ll thank me later when you’re scraping every last bit of icing from the bowl.
Tips to Make Icing Like a Pro
There’s always room to grow, even for seasoned bakers.
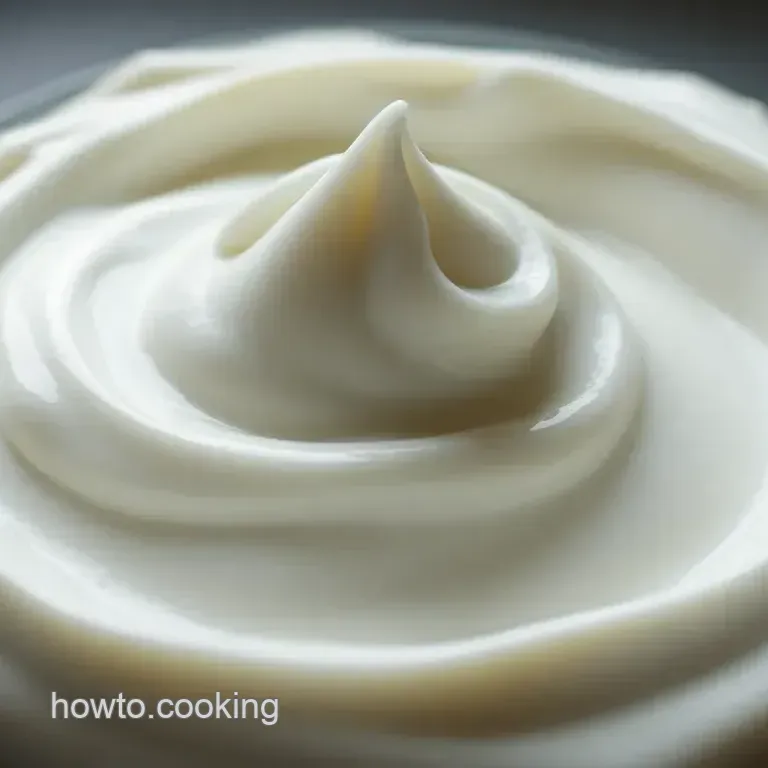
- Sift first : This prevents lumps and creates a smooth finish, which is everything when making icing.
- Adjust as needed : If your icing is too thick, add more liquid, little by little. If too thin, sprinkle more sugar. It’s all about balance.
- Add a splash of fun : For a hint of color, throw in some food coloring and watch it transform!
When I started baking, I was terrified of icing. I mean, how do you even make basic icing without it looking like a hot mess? Before I knew it, I was drizzling it over cupcakes and thinking I could open a bakery!
Baking is all about trial and error, and if you mess it up, just grab some more icing sugar and try again.
So, ready to dive into the world of homemade frosting? let's jump into the step-by-step instructions and get those goodies glistening! follow along to transform your kitchen chaos into a sweet symphony of flavors and textures.
Trust me, your tastebuds will thank you!
Elevating Your Baking Game with Professional Cooking Methods
Honestly, if you want to up your kitchen game, you’ve gotta master a few professional cooking methods. seriously, the difference between a cake that’s just okay and one that leaves your guests begging for the recipe is all in the technique.
Let’s dive into the nitty gritty of winning in the kitchen, focusing on some must know tips that’ll make your cooking fly off the radar.
Essential Preparation Steps
First things first: mise en place . it’s a fancy french term that just means having everything in its place. chop your veggies, measure out your ingredients, and get everything ready before you start cooking.
Trust me, it makes a world of difference when you're in the heat of the moment!
Next up, let’s chat about time management . use a timer your best buddy in the kitchen. set it for boiling water, baking cakes, or even when you're waiting for that final drizzle of icing .
It keeps you from losing track of time, especially when you're getting creative or distracted by netflix shows.
Now, organization strategies are key too. keep your workspace tidy. you know how chaotic making a cake can get? avoid that rush of cleaning up later.
A clean kitchen boosts your mood and makes cooking feel less like a chore and more like a chill hangout.
And hey, don’t forget safety considerations ! keep a fire extinguisher nearby, and be cautious with sharp knives and hot surfaces.
It sounds basic, but you’d be surprised at how often people get injured in the kitchen. safety first, sweet friends!
Step-by-step Process to Perfection
Alright, now let’s break it down step-by-step. Here’s how to nail it with the perfect cake and an easy icing recipe to top it off.
Preheat Your Oven : Set it to 350° F . You want that perfect baking environment, trust me.
Mix Your Dry Ingredients : Get your flour, baking powder, and sugar together. Mix those bad boys until they’re evenly distributed this ensures your cake’s fluffiness.
Temperature Control : Use room temp eggs and butter. Cold ingredients can lead to a dense cake. Seriously, bringing things to room temp makes a huge difference.
Timing is everything : bake your cake for 25- 30 minutes , and while it's in the oven, check for doneness by inserting a toothpick into the middle.
If it comes out clean, you’re golden!
Visual Cues : Look for a light golden brown color. That’s your sign it’s time to take it out. Don’t leave it too long, or it’ll turn into a stone.
Expert Techniques You Need to Know
So, here are a few professional methods that can really enhance your baking. ever heard of the “creaming method”? it’s super simple: beat butter and sugar together until it’s light and fluffy.
This air incorporates beautifully in your batter, providing that amazing lift.
Let’s not forget about critical steps. Always taste your batter before baking. Just a spoonful! You want to pick up on any flavor missteps before it’s too late.
Finally, keep an eye on quality checkpoints. are your eggs fresh? is your baking powder active? little checks here can save you from major fails down the line.
And if things start to go south maybe your cake isn’t rising don’t panic! simply add a bit more baking powder next time or adjust your oven temperature.
Success Strategies for Your Baking Journey
We all mess up, right? but there are common mistakes to avoid. like overmixing your batter say goodbye to fluffy cakes if you do! trust me, mix just until combined and then let it be.
Quality assurance is crucial. If your cake sinks in the middle, you might have added too much liquid or not mixed properly. Adjustments are always possible for the next bake!
And as for perfect results, sometimes it’s good to plan ahead. in fact, when you learn how to make basic icing , it can elevate your cakes and cookies big time! it can be made ahead and stored in the fridge.
Just bring it back to room temperature when you’re ready to use it.
Now, I'm breaking out my favorite recipe for icing that’s so good, you’ll want to drizzle it on everything. It's simple: just 2 cups of icing sugar , 2 tablespoons of milk , and whisk until smooth!
And if you're looking to explore a more complex icing option, look no further than homemade frosting for cupcakes you’ll be the star of dessert parties!
Stick around, folks! We’ve got more exciting tips coming up in the next section on how to take your baking to the next level with additional information!
Sweet Secrets of Basic Icing: Elevate Your Treats!
So, you wanna know how do you make basic icing ? let me tell ya, it's one of the easiest and most delightful things you can whip up in your kitchen.
Seriously, it’s like adding the cherry on top of an already amazing sundae! let’s dive into some tips and tricks that’ll have your icing game on point.
Pro Tips to Master Your Icing
First off, sifting is king ! When you sift your icing sugar, you're setting yourself up for smooth, lump free perfection. Trust me, a lumpy icing is like wearing mismatched socks. Just… no.
And hey, wanna save time? if you're in a rush, as we often are during those busy weeknights, use room temperature milk instead of cold.
It mixes in more smoothly, cutting your prep time from “oh great, i’m running late!” to “i got this!” in no time.
For flavor enhancement, a dash of vanilla extract can take your icing from basic to fabulous. feel like mixing things up? try adding a touch of lemon or almond extract .
It’s like a flavor party in your mouth!
A Little Presentation Magic
Now let’s talk about presentation . whether it's cupcakes for a fall gathering or cookies for a cozy evening with friends, the way you present your treats can make all the difference.
Grab a piping bag if you've got one and pipe your icing on top like it’s the mayflower of frosting.
Artistic drizzles? avant garde!
For garnishing, fresh fruit is always a winner. think vibrant strawberries or zesty lemon slices. a little sprinkle of colorful sprinkles or edible glitter makes everything feel like a celebration.
Don't forget the color combos ; contrasting colors can make your treats pop visually. eye-catching desserts? yes, please!
Storage Tips and make-ahead Magic
Okay, so you've made your icing, but you have leftovers. what's next? if you want to store it, just cover it with a damp cloth.
This keeps it from drying out like last week’s bread. for those among us who like to make-ahead , whipped icing can be stored in the fridge.
It’ll last about one week . however, give it a good stir before using, as it might thicken a bit.
When it’s reheating time, don’t blast it in the microwave. Instead, let it come to room temp on the counter, giving it a gentle mix to bring back that luscious texture.
Get Creative with Variations
You ever have those moments where you just want to switch things up? with icing, the options are endless! wanna turn your basic icing recipe into chocolate icing? just mix in cocoa powder easy peasy! feeling a little adventurous? try making a spiced icing with nutmeg or cinnamon for those fall cupcakes.
Trust me, your guests will be all "what’s your secret?"
And if you're glancing at dietary restrictions, you can swap out regular milk for almond or coconut milk. And woah, if you don't have icing sugar, powdered coconut sugar is an option, though it may alter the icing’s look a bit!
Health Considerations A Sweet Balance
Now, let’s briefly chat about health. this icing is low in calories around 60 calories per serving and it’s simply sugar and a bit of liquid.
Not in the ultra packed nutrition category? sure! but with the right applications, like drizzling over fresh fruit or tartes fines , it becomes a special treat without the guilt.
Just remember, moderation is key. I always like to pair these sweet delights with some healthier choices, like fresh fruits or a cup of herbal tea. It’s about balance!
Wrap-Up
To wrap it all up, making icing doesn't have to be a chore. it can be a fun and creative outlet! the next time you need to finish off a cake or some cookies, remember these tips.
Whether it’s for simple sweets on a tuesday afternoon or an epic fall celebration, let your icing shine! now go ahead, grab those ingredients, and fancy up those treats.
After all, who wouldn’t want a little extra sweetness in their day? happy icing!
Frequently Asked Questions
How do you make basic icing that's perfect for cakes?
Making basic icing for cakes is easy! Just sift 2 cups of icing sugar, then mix in 2 tablespoons of milk and optionally, a teaspoon of vanilla extract. Whisk until smooth and adjust the consistency with more liquid or icing sugar as needed. This will give you a lovely, glossy finish for your beautiful cakes!
What should I do if my icing is too thick?
If your icing is too thick, simply add a little more liquid milk or water one teaspoon at a time, mixing thoroughly until you reach the desired consistency. Remember, you want it to flow smoothly over your baked goods, not spread like treacle!
Can I make basic icing without dairy?
Absolutely! You can substitute the milk with water or any plant based milk, like almond or soy milk. This way, you can enjoy your icing whether you’re lactose intolerant or just fancied trying something different.
How long can I store my basic icing?
For the best results, it's ideal to use the icing immediately after making it. If you're not using it right away, cover the bowl with a damp cloth to prevent it from drying out. You can also store leftover icing in an airtight container in the fridge for up to a week, but it's best to re-whip it before use.
What are some fun variations of basic icing?
You can easily give your basic icing a twist! For a chocolate version, mix in 2 tablespoons of cocoa powder. If you'd like a fruity flavor, try swapping vanilla extract for lemon or orange extract, or even a few drops of food coloring for a festive look. Your baked goods will look and taste delightful!
How do I know if my icing has the right consistency?
A simple test for icing consistency is to dip a spoon into it. If the icing drips off smoothly and leaves a nice, shiny surface, you're good to go! If it's cloudy or falls heavily, you might need to mix in a bit more liquid or icing sugar.
How To Make Basic Icing A Sweet Finish For Any T