Melted Chocolate Algae Delights
- look into Into the World of Melted Chocolate Algae Delights in 20 Mins
- Your Go-To Guide for Essential Ingredients
- Navigating the World of Professional Cooking
- Pro Tips & Secrets for Melted Chocolate Algae Delights
- Perfect Presentation
- Storage & Make-Ahead
- Creative Variations
- Complete Nutrition Guide
- Frequently Asked Questions
- 📝 Recipe Card
look into Into the World of Melted Chocolate Algae Delights in 20 Mins
A Sweet Surprise
Alright, picture this: it’s a cozy friday night, you’ve had a long week, and your sweet tooth is practically screaming.
I was right there not too long ago, standing in front of my pantry, wondering how to whip up something delicious without having to spend hours in the kitchen.
And that's when i stumbled upon a game changer melted chocolate algae delights in 20 mins ! trust me, it’s like a hug in dessert form.
Have you ever thought about combining chocolate and algae? no? me neither, until i gave it a shot. but lemme tell you, it’s a match made in flavor heaven.
What Makes These Delights So Special?
You might think algae is more suitable for a science experiment, but let me assure you, it brings this magical umami twist to chocolate that you just can’t ignore.
Historically, algae has been used in various cuisines around the world, especially in asian dishes. these delights are not just random; they nod to that cultural innovation while being super relevant with today’s health trends.
Who knew i could feel kinda gourmet in my own kitchen?
Now, let’s chat practical stuff. this recipe is a no-brainer. with just 20 minutes and a handful of ingredients, you'll be chowing down on rich chocolate flavor that’s also nutrient dense.
Seriously, you don’t have to be a master baker; even cooking novices can nail this one. and let’s be real what’s better than quick chocolate treats that also pack a powerful punch of health benefits?
Why You Need to Try These Delights
Ok, let’s break it down. first off, health benefits! spirulina, the star of our algae show, is a fantastic source of protein and packed with vitamins.
You’re not just treating yourself; you’re energizing your body, too. plus, these treats are vegan friendly thanks to simple ingredients like almond milk and coconut oil.
And hear me out, these easy dessert recipes are perfect for so many occasions. got unexpected guests? whip these up! planning a cozy night in? heck yes! plus, they make for some seriously cool conversation starters.
You get to say, “oh, these? just a little melted chocolate and some algae,” and watch jaws drop.
Unlike other chocolate recipes , the combo of chocolate and algae not only gives you that delightful sweetness but also a unique taste you just don't find in your run-of-the-mill desserts.
You’ll remember where you had these, for sure.
Let’s Get to the Good Stuff
Now, I’ve teased your taste buds long enough. Here’s where we dive into the ingredients that will make your Melted Chocolate Algae Delights shine. Gather up:
- Dark chocolate (70% cocoa or higher) – it’s gotta be good, people!
- Coconut oil – this gives it that smooth texture.
- Dried spirulina powder – this is where the magic happens.
- Sugar – sweeten things up a bit.
- Almond or coconut milk – keep it creamy.
Take these ingredients, mix them, pour them into molds, and chill for a bit. Voila! You’ve got yourself a gourmet chocolate treat that’s tasty, nutritious, and super easy to make.
So, are you ready to experiment with these edible algae recipes ? let’s move on to the ingredients, because trust me, you are going to want to jump into this crunchy, chocolatey world.
Get your aprons on, and let’s make some magic happen with these melted chocolate algae delights in 20 mins !
Your Go-To Guide for Essential Ingredients
When it comes to cooking, knowing your ingredients is half the battle. whether you're tackling a simple melted chocolate recipe or diving into more adventurous algae desserts , understanding what you're working with can truly elevate your culinary game.
Let’s break it down into bite sized chunks, shall we?
Premium Core Components
First up, let’s talk about those essential ingredients. When you're eyeing that recipe for Melted Chocolate Algae Delights in 20 Mins , it's important to get the right stuff.
Detailed measurements : you’ll want to keep both us and metric measurements handy. for instance, my go-to for melting chocolate is 8 oz of dark chocolate , which is about 225g .
This makes it easier for everyone, no matter where you're cooking from.
Quality indicators : not all chocolates are created equal! look for chocolate that's at least 70% cocoa for that rich chocolate flavor we're after.
If it melts beautifully and has a nice sheen, you know you’re onto something great.
Storage guidelines : chocolate can be picky. store it in a cool, dry place, away from sunlight. if you want it to last a while, freeze straight-up chocolate bars.
You’ll be able to whip up those dark chocolate treats whenever the craving strikes!
Freshness tips : check the expiration date. fresh ingredients make all the difference in your final dish. when you're shopping for stuff like spirulina for your algae chocolate, ensure it's bright and has a slightly earthy scent.
That’s how you know it’s packed with those spirulina health benefits!
Signature Seasoning Blend
Next, let’s dive into the magical world of spices and herbs.
Essential spice combinations : there’s nothing like a solid signature seasoning blend to spice things up! for our chocolate algae delights, i’d stick to vanilla extract it’s understated but makes a huge impact.
Herb Selections : Have you ever thought about pairing chocolate with herbs? Mint is a stellar choice. Imagine mint leaves sprinkled on top of your cooled chocolate bites. It’s such a vibe!
Flavor Enhancers : Beyond vanilla, consider adding a teeny bit of sea salt . A sprinkle of salt can bring out the sweetness like you wouldn’t believe.
Regional variations : want to switch things up? try using cocoa nibs for a crunch, or go bold with a dash of cayenne if you’re feeling spicy.
This is where your creativity can really shine.
Smart Substitutions
Now, let’s say you don’t have something on hand. No stress!
Common Alternatives : If you're out of spirulina, reach for matcha powder instead. It gives a similar nutritional boost and is super trendy.
Dietary Modifications : You can easily switch coconut milk for almond milk based on your dietary preferences. Go with what you love!
Emergency Replacements : Ran out of nuts for garnish? Try granola or even toasted oats for that crunch factor.
Seasonal Options : If it’s summer and you have fresh mint growing like crazy in your garden, use it! Fresh herbs make everything pop.
Kitchen Equipment Essentials
Last but not least, let’s check out what tools you’ll need.
Must Have Tools : A heatproof bowl to melt your chocolate is crucial. It’s all about that double boiler method, folks!
Alternative Equipment : No rubber spatula? No problem! A mixing spoon works just fine, but make sure to scrape well.
Preparation Tips : Always have your setup prepped. This includes chopping your chocolate before the melting process.
Storage Solutions : Grab some silicone molds or even cupcake liners to give those unique dessert ideas some shape.
Now that I've spilled the beans about essential ingredients, we’re primed to get cooking. Let’s jump into those step-by-step instructions for crafting your Melted Chocolate Algae Delights ! This is where the magic happens, and you're gonna love it!
Navigating the World of Professional Cooking
Cooking can feel overwhelming sometimes, especially when you’re trying out new techniques. whether you’re whipping up a mouthwatering melted chocolate algae delight in 20 mins or just a simple meal, getting the basics down can really transform your experience in the kitchen.
Let’s break it down step-by-step, making it fun and, more importantly, easy.
Essential Preparation Steps
First off, let's talk about mise en place . this fancy term just means “everything in its place.” seriously, when you gather all your ingredients before starting, it’s like having a personal assistant in the kitchen.
You’d be surprised at how much smoother the whole experience goes. plus, you won’t find yourself halfway through a recipe, realizing you’re out of sugar!
Next up, let’s chat about time management . set a timer for your tasks! it’s great for keeping you on track, especially when you’re working with something delicate like melting chocolate.
Use your phone or a kitchen timer, whatever works. this helps you avoid burning your chocolate or overcooking your algae mixtures yikes!
Then there’s organization . keep your work area tidy. if you take the time to clean as you go, you won’t be left with a disaster zone to clean up after the fun's over.
And, hey, don’t forget safety considerations . always have a clean towel ready for spills, and remember to watch out for hot surfaces! cooking should be fun, not a trip to the emergency room.
step-by-step Process
Alright, let’s get to the heart of it! Here’s how to make those Melted Chocolate Algae Delights .
Melt the chocolate : get your chopped dark chocolate and coconut oil into a heatproof bowl. this is gonna be your chocolate base.
Set it over simmering water this is your double boiler. you want to keep the heat low and stir until it’s creamy and oh-so-smooth.
Aim for around 120° f .
Prepare the Algae Mixture : In a separate bowl, mix your spirulina powder with sugar, and continue whisking in almond milk until it’s smooth.
Combine the Mixtures : Take that luscious chocolate and fold in the algae mixture. Make sure it’s blended without any lumps. Trust me; it makes a world of difference!
Mold the Delights : Now, pour that gorgeous mix into silicone molds. Tap them to release air bubbles those are sneaky little devils!
Chill : Throw them in the fridge for about 10 minutes , quick enough to let the magic happen!
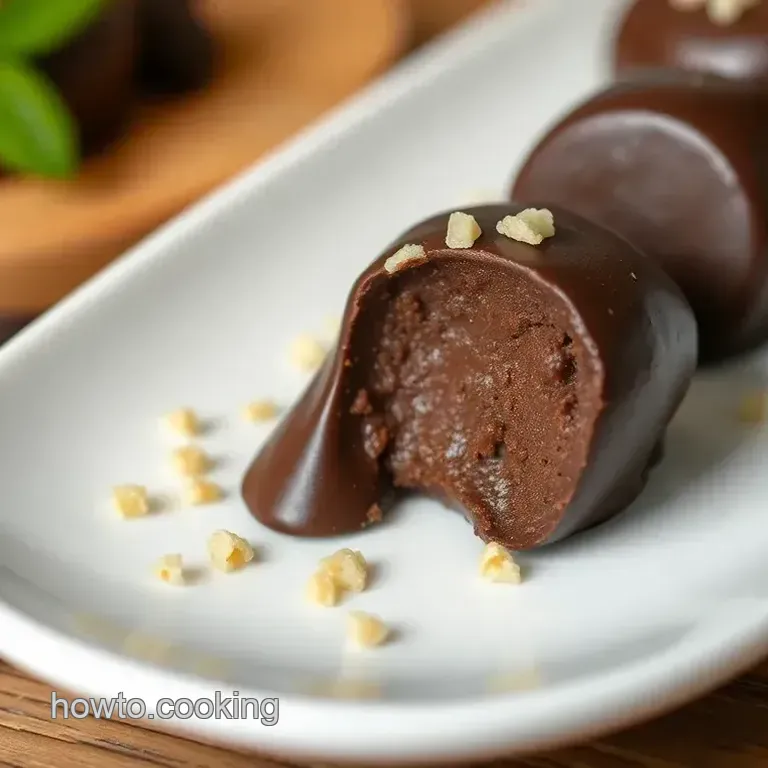
Serve : Once they’re set, pop them out and sprinkle with nuts or mint leaves. You’re in for a treat, my friend!
Expert Techniques
Want to step up your game? Here are some expert techniques . Always invest in quality ingredients. Trust me; it makes an impact especially with a rich chocolate flavor.
Make sure you hit those quality checkpoints as you go. if your chocolate seizes up, a tiny splash of coconut milk can rescue it.
And if you get adventurous, add spices like cinnamon for an unexpected twist!
If you’re facing stubborn chocolate, troubleshoot by starting fresh it can happen to the best of us!
Success Strategies
Here’s what you wanna avoid. don’t rush your chocolate melting. going too fast can lead to burnt chocolate, which is a hard pill to swallow when you’re aiming for gourmet chocolate recipes .
Plus, make sure you’re not skipping the chilling phase; that’s key for the delightful set texture!
And how about some quality assurance tips ? take a quick taste before chilling! you want to ensure the balance of sweetness from the sugar and the robust flavor of the spirulina fits your vibe.
Oh, and for a quick gourmet dessert prep, consider making these in advance . They freeze well, so you can whip them out for unexpected guests or midnight cravings.
In the end, all this prep and technique helps create something that’s not just a dessert, but a conversation starter! whether it’s sharing dessert ideas with friends or exploring healthy chocolate recipes together, cooking becomes a shared experience.
Now that we’ve gotten our fundamentals down, let’s dive into some additional information that can spice things up in your kitchen!
Pro Tips & Secrets for Melted Chocolate Algae Delights
Alright, friends, let’s chat about a few pro tips to make those melted chocolate algae delights in 20 mins shine even brighter! now, i gotta tell you, getting the balance right between rich chocolate flavor and that intriguing algae twist is a little art and a lot of fun.
Chef's personal insights : i always use high-quality dark chocolate (think 70% cocoa or higher). trust me, it brings out a richer taste in your dessert.
And isn't that what we live for? meanwhile, cozy up with that coconut oil. it not only makes the chocolate smooth but adds a slight tropical flavor.
Total game changer!
Time saving techniques : you can get everything ready before you start melting. measure out your ingredients ahead of time. while your chocolate is melting, mix up that algae with the almond milk.
Kill two birds with one stone, right?
Flavor enhancement tips : feeling adventurous? toss in a pinch of sea salt to elevate the flavor! you’ll be surprised how that little sprinkle can do wonders for those dark chocolate treats.
And if you really want to get fancy, a drop of peppermint oil is divine.
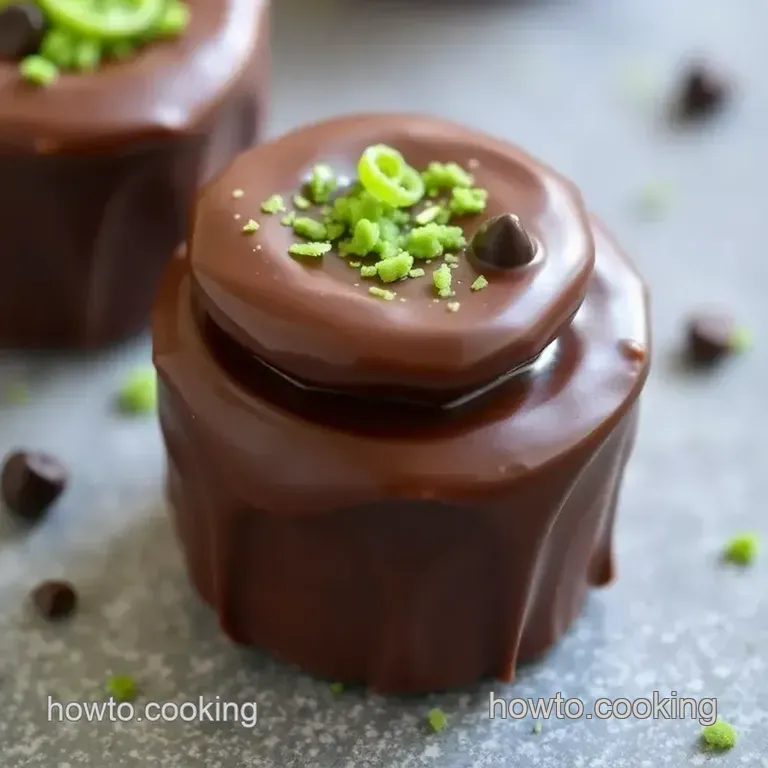
Presentation advice : presentation matters, folks! pour those rich chocolate delights into some cute silicone molds. pop a mint leaf on top, and voila! instant aesthetic.
Trust, your friends will think you’re a culinary genius.
Perfect Presentation
Okay, so now that your Melted Chocolate Algae Delights are all ready, let's talk about how to make 'em look as snazzy as they taste!
Plating techniques : use white plates to create a beautiful contrast against the dark chocolate. when you're ready to serve, arrange them like a pretty little bouquet.
For example, two in the center, with a few around. it’ll wow the crowd every time.
Garnish ideas : chopped nuts are great, but i like to sprinkle a little colored sea salt for that fancy touch.
A drizzle of melted white chocolate over the top can also make them pop visually.
Color combinations : Pair those dark chocolates with some bright, fresh berries. The color burst is just so inviting. Berries? Yes, please!
Visual appeal tips : When you serve them, try placing everything on a rustic wooden board. It gives a nice cozy vibe. And don’t forget: food tastes better when it looks good!
Storage & make-ahead
Now, let’s be real. Sometimes, you want to whip these up ahead of time because we’re all busy bees, am I right?
Storage guidelines : Keep your boasts in an airtight container in the fridge if you’re not enjoying them all at once. They’ll stay fresh for about a week.
Preservation methods : If you wanna freeze them, you can! Just wrap each delight in plastic wrap, then place 'em in a freezer safe bag. They’ll last about a month.
Reheating instructions : If you’ve frozen them, let them thaw in the fridge overnight. No microwaving needed they’re best cold!
Freshness duration : These little gems are best enjoyed within the first week for that fresh taste. After that, they still taste good but might lose a bit of that awesome texture.
Creative Variations
Feeling a bit creative? You’ve totally got some room to experiment with these delights!
Flavor adaptations : How about a bit of orange zest mixed in? It adds a delightful zest that pairs well with dark chocolate. Trust me; it’s like a party in your mouth!
Dietary modifications : If you’re vegan, stick to coconut oil and almond milk and you’re already on the right track.
Seasonal twists : Around the holidays, try adding ground ginger or cinnamon for a seasonal spin. Cozy vibes all around!
Regional variations : How about a southern touch with some pecans or a Pacific Northwest twist with hazelnuts? It’s all about getting creative with your roots.
Complete Nutrition Guide
Alrighty, folks, let’s break down what’s going on nutritionally with these delights.
Detailed breakdown : Each treat is about 150 calories. You’re getting some healthy fats from the chocolate and coconut oil while the algae sneaks in some nutrients.
Health benefits : Let’s not forget those spirulina health benefits! It’s packed with protein, vitamins, and healthy fat. Plus, it’s like a superhero in the dessert world!
Dietary considerations : These beauties are gluten-free and can totally cater to vegan friends. Score!
Portion guidance : Stick to one or two, and you’ll be right within your healthy dessert boundaries. Balance is key!
Wrapping it up, if you’re looking to impress your friends with something unique and absolutely tasty, these melted chocolate algae delights in 20 mins are a must.
They’re quick, easy, and a total showstopper. happy cooking, y’all!
Frequently Asked Questions
What are Melted Chocolate Algae Delights in 20 Mins?
Melted Chocolate Algae Delights in 20 Mins are a unique and indulgent treat made from a blend of rich dark chocolate and nutritious algae powder like spirulina. The dish combines sweet and savory flavors, offering a quick yet impressive dessert option that’s perfect for any occasion.
Can I use other types of algae powder instead of spirulina?
Yes, you can substitute spirulina with other edible algae powders such as chlorella or matcha, which will alter the flavor slightly. Just keep in mind that the color and taste may vary depending on the type of algae you choose to use.
How should I store my Melted Chocolate Algae Delights?
To store your Melted Chocolate Algae Delights, keep them in an airtight container in the refrigerator for up to a week. If you want to keep them longer, they can also be frozen for up to three months; just allow them to thaw in the refrigerator before serving.
What other ingredients can I add to enhance the flavor?
You can enhance the flavor of your delights by adding ingredients like a dash of cinnamon, chili powder for heat, or extracts such as vanilla or almond. You might also consider mixing in different nuts or seeds for added texture and flavor complexity.
Are Melted Chocolate Algae Delights healthy?
Yes, these delights incorporate dark chocolate, which is rich in antioxidants, and algae, which offers numerous health benefits such as vitamins and minerals. However, moderation is key, as they're still a treat and should be enjoyed as part of a balanced diet.
How can I adjust the sweetness of the recipe?
You can easily adjust the sweetness by changing the amount of sugar used; simply add more or less based on your preference. Alternatively, you can use natural sweeteners like honey or maple syrup, keeping in mind that this may alter the texture slightly.
Melted Chocolate Algae Delights In 20 Mins

Ingredients:
Instructions:
Nutrition Facts:
| Calories | 150 |
|---|---|
| Protein | 2g |
| Fat | 10g |
| Carbs | 15g |
| Fiber | 2g |
| Sugar | 8g |
| Sodium | 5mg |
