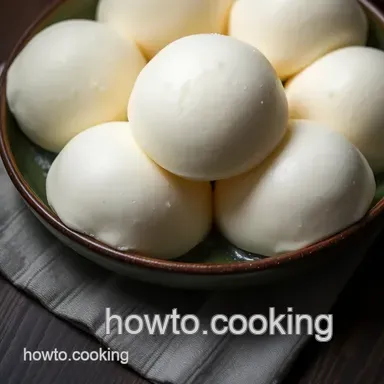
Mochi Ice Cream: a Delectable Japanese Dessert
- Recipe Overview
- Key Benefits
- Essential Ingredients Guide to Making Mochi Ice Cream
- Mastering the Art of Mochi Ice Cream: A Professional Cooking Method
- Pro Tips & Secrets for Making Mochi Ice Cream
- Perfect Presentation for Your Mochi Ice Cream
- Storage & Make-Ahead Tips
- Creative Variations to Try
- Complete Nutrition Guide
- Expert FAQ Solutions
- 📝 Recipe Card
Oh my gosh, have you ever bitten into something and just felt like you’d found a treasure? that’s exactly how i felt the first time i tried mochi ice cream , a delightful japanese dessert that rocked my world!
Picture this: you’re at a summer picnic, and someone pulls out a colorful box of these chewy, creamy delights.
You pick one up, and the moment you sink your teeth into it, the soft mochi enveloping a scoop of ice cream hits your taste buds.
It’s like a party in your mouth! trust me, once you try this, it’ll become a favorite go-to.
Mochi ice cream is more than just a dessert; it’s an experience! this treat showcases the magic of japanese sweets , blending a chewy outer layer of glutinous rice with luscious ice cream.
And guess what? you can totally make these at home. yes, you read that right! while it sounds fancy and maybe even a bit daunting, i promise it’s doable.
If i can do it, so can you!
Recipe Overview
Now, let’s chat about where this whole mochi thing came from. mochi itself is a traditional part of japanese cuisine , made from sweet rice and often enjoyed during festivals.
The ice cream version? well, that became super popular in the u.s. during the 1990s. but truth be told, i think it skyrocketed in popularity because people just can’t get enough of chewy desserts.
Can you blame them?
When it comes to preparation, it’s a bit more hands-on than just scooping ice cream from a tub. you’re looking at about 30 minutes of prep time , plus an additional hour to let everything chill.
So, in total, you’ll be investing around 1 hour and 35 minutes to bring this fab treat to life.
And let me tell you, it’s so worth it for that homemade goodness you’ll be serving up!
So, what about costs?
Whipping up your own mochi ice cream can actually save you a few bucks compared to buying them at a specialty store.
Plus, it yields about 12 pieces , so you can share with friends or just keep them all to yourself.
No judgment here!
Key Benefits
Okay, let’s spill the tea on why you’ll want to make this dessert at home. first up, there are some cool health benefits ! if you use healthier options for the ice cream like making it dairy-free or choosing fruit flavored options you can keep things lighter and still satisfy that sweet tooth.
It’s a little treat that doesn’t break the bank on calories, especially if you go easy on the sugar with your fillings.
Now, let’s talk about occasion. mochi ice cream is perfect for summer cookouts, birthday parties, or even a fun night in while binge watching your favorite show.
Seriously, it makes any gathering feel a bit more special. you can even customize your flavors think tropical desserts with mango or matcha for that japanese twist.
It's like having a mini ice cream shop at home!
And let me not forget the major allure of going homemade. how cute is it to say you made your own ice cream treats ? not only do you get to tailor it to your liking, but you also get that satisfaction of showing off your cooking skills.
So, whether you’re a closet chef or someone trying to impress friends at your next get-together, don’t dismiss the idea of crafting your own mochi ice cream.
Now, let's dive into the fun part what you need to make this sweet dream a reality!
Essential Ingredients Guide to Making Mochi Ice Cream
Hey there, dessert lovers! today, let’s dive into the wonderful world of mochi ice cream. if you've ever tried this traditional japanese dessert , you know how delightful it is: creamy, chewy, and oh-so-refreshing.
But before we get too deep into making it, let’s start off with the essential ingredients you’ll need, and some tips to ensure your mochi and ice cream combo turns out fabulous!
Premium Core Components
First up, let’s talk about the ingredients :
Sweet rice flour: this is the superstar here! you'll need 1 cup (120g) of this glutinous rice flour. think of it as the key to that chewy texture we all love in mochi.
When shopping, look for brands labeled mochi flour or sweet rice flour. if it’s soft and fine, you’re spot on!
Granulated Sugar: You need 1/4 cup (50g) for sweetness. I always check if the grains are finely milled makes a difference in how it blends.
Water: Gotta have 1 cup (240ml) . This one's straightforward, but make sure it’s not straight from the hot tap it’ll mess up your dough.
Cornstarch or Potato Starch: You’ll use this for dusting to prevent sticking. Trust me, you don’t want a sticky mess when you’re shaping your mochi.
And for the ice cream filling , grab yourself a pint (480ml) of your favorite ice cream. Go wild matcha, vanilla, or even tropical flavors like mango!
Quality Indicators
When selecting your ingredients, keep an eye out for freshness. sweet rice flour should have a slight nutty aroma , while sugar should be dry and free from clumps.
Store it in a cool, dry place, and your flour can last for up to a year. the ice cream should be firm, and your taste buds will thank you later!
Signature Seasoning Blend
While mochi ice cream is typically a sweet treat, there are fantastic ways to customize it. you can swap in some herbs and spices or add a twist with flavor enhancers.
Try adding a pinch of salt to the filling or mixing in some matcha powder to amp up your mochi dough.
You might also want to explore unique pairings like using coconut cream for a tropical feel or even fruit flavored mochi for a refreshing twist.
The world of asian desserts can be an adventure go ahead, mix it up!
Smart Substitutions
Have dietary restrictions? No worries!
- dairy-free Desserts: Opt for coconut or almond ice cream instead of the traditional dairy options. It’s just as yum!
- gluten-free Option: Look for certified gluten-free sweet rice flour for the mochi dough.
Even if you run out of something, you can improvise. For example, if you don't have ice cream, try using fresh fruit or a frozen yogurt as an alternative.
Kitchen Equipment Essentials
Let’s not forget the gear! Here are some must have tools for this mochi making adventure:
- Mixing bowl: For combining your ingredients.
- Steamer: If you don't have one, you can use a microwave safe dish you can still make it work!
- Ladle or scoop: To serve your ice cream, which should be super important for those perfect bites!
Make sure you have some plastic wrap on hand. It’ll help keep things tidy when you’re shaping your mochi. You don’t want those sticky fingers sticking to everything in sight!
Wrapping It Up!
Now that you’ve got your ingredients laid out and your tools ready, you’re all prepped for this fun cooking journey.
Making mochi ice cream can be a totally fun experience, especially when you customize it to your heart’s content. think of easy mochi ice cream it’s summery, it’s chewy, and it’s bound to impress anyone you serve.
Plus, if you’re crafting a dessert with a bit of a personal twist, it’ll create even more memory making moments.
Get ready for the instructions, as we’ll transform these ingredients into a delightful experience worthy of those classic Japanese treats ! Stay tuned for the delicious step-by-step guide!
Mastering the Art of Mochi Ice Cream: A Professional Cooking Method
Oh my gosh, if you’ve never tried mochi ice cream , you are seriously missing out! this delightful japanese dessert combines the chewy, soft texture of mochi with the creamy goodness of ice cream literally like a sweet hug for your taste buds.
To create this treat at home, there's a cool set of professional cooking methods you’ll want to use. let’s dive into how to whip up this delightful dessert!
Essential Preparation Steps
First off, let’s talk about mise en place . this french term just means "everything in its place." before starting, gather all your ingredients sweet rice flour, sugar, water, and your favorite ice cream flavor.
Trust me, it saves you time and stress later. oh, and make sure you have a dusting of cornstarch handy to avoid sticky situations.
Time management is key! you’ll want to set aside about 30 minutes for prep and 1 hour for chilling, with a quick 5-minute steam of your mochi dough.
While that’s happening, clean as you go. it'll keep your space organized and you feeling less frazzled.
Step-by-step Process
Prepare the Ice Cream : Scoop your favorite ice cream into small balls and freeze them until they’re solid (about 1 hour ). For my last batch, I used matcha amazing!
Make the Mochi Dough : In a bowl, whisk together 1 cup of sweet rice flour and 1/4 cup of sugar. Gradually add 1 cup of water, mixing until smooth.
Cook the mochi dough : pour that mixture into a steamer or a microwave safe dish. cover and steam for 20 minutes .
If you’re using a microwave, choose 1-2 minute bursts instead.
Chill the Mochi : After steaming, let it cool briefly. Dust your workspace with cornstarch, place the mochi on it, and cover it with more cornstarch to prevent sticking.
Shape the Mochi : Roll out your dough to about 1/4 inch thick and cut it into squares. This part can get a little messy but just embrace it!
Assemble the Mochi Ice Cream : Put a frozen ice cream ball in the center of each mochi square and pinch those corners to seal the deal.
Freeze Again : Place the assembled mochi on a cookie sheet back in the freezer for at least 30 minutes .
Expert Techniques
Let’s get into some serious cooking tips here. the key to a perfect mochi is to control the temperature precisely.
Don't let your dough overcook it should be slightly translucent when done. as far as timing goes, set your timer for each cooking stage.
Plus, using too much cornstarch can affect the flavor, so don’t go overboard.
Now, troubleshooting! got sticky dough? if it’s too tacky while assembling, just pop it back in the fridge for a few minutes.
And if you find that it’s too dry, a tiny splash of water can help.
Success Strategies
Let’s cut to the chase what's the number one mistake? skipping the waiting time . impatience can lead to messy mochi. want quality assurance tips ? always freeze your ice cream balls until they’re hard and be generous with cornstarch on your hands and surfaces.
Looking for quality checkpoints ? After everything’s assembled, bite in and check for that chewy yet creamy balance. If the ice cream is too soft, your mochi will melt too quickly.
And hey, you can actually make these ahead of time! they freeze like a dream and are solid for up to a month.
Perfect for summer gatherings or when you just want a tasty treat!
Wrapping It Up
So, there you have it your complete guide to mastering mochi ice cream . it’s not just a japanese sweet ; it’s a fun experience in the kitchen.
The combo of chewy and creamy is unbeatable, and you can play around with flavors like mango or matcha .
Now that you’re ready to roll dough and scoop ice cream, get excited for your delicious journey into asian desserts ! the next section will cover some additional information on variations, tips for dessert customization, and how to embrace other unique dessert recipes .
Let’s keep that sweet creativity flowing!
Pro Tips & Secrets for Making Mochi Ice Cream

Let’s get real for a second. making mochi ice cream might seem a bit daunting at first, but trust me once you’ve got the hang of it, you’ll be whipping up these mouthwatering japanese sweets like a pro! here are some of my favorite chef secrets to elevate your game.
Chef's Personal Insights
First up, the mochi dough is all about the texture. you want it to be chewy but not so sticky that it drives you nuts.
It took me a few tries to find that sweet spot. one trick i learned is to sprinkle cornstarch generously on your hands and workspace.
It makes a world of difference, trust me!
Time Saving Techniques
If you’re pressed for time, try making and chilling your ice cream a day ahead. that way, you can dive straight into making your mochi when it’s time for dessert night.
Trust me, these frozen desserts are worth the wait!
Flavor Enhancement Tips
Don’t be afraid to get creative with your flavor choices. you can add fruit purees or even a splash of extract to your mochi dough for that extra oomph.
Think matcha, black sesame, or even tropical flavors like coconut. there’s no limit to the deliciousness!
Presentation Advice
Remember, we eat with our eyes first. for a stunning presentation, think colors! arrange your mochi ice cream on a vibrant plate and sprinkle a bit of pistachios or coconut flakes on top.
You could even add some fresh fruit on the side for that pop of color and freshness.
Perfect Presentation for Your Mochi Ice Cream
So you’ve got your mochi ice cream ready now let’s talk about making it look Instagram worthy!
Plating Techniques
Place each piece of mochi in a little nest of sweetened coconut or on a pretty dish. The contrast of textures makes your serve way more inviting.
Garnish Ideas
A little drizzle of honey or a sprinkle of matcha powder can take your mochi to the next level. Want to impress your friends? Add an edible flower for that elegant touch.
Color Combinations
Bright colors equal happy vibes! Try using fruity fillings to balance colors maybe a vibrant mango mochi against a backdrop of green matcha. It looks fab!
Visual Appeal Tips
Make sure the mochi pieces are uniform in size. it makes everything look neat and easy on the eyes. adding some fresh mint leaves next to them can also add that refreshing pop.
Storage & make-ahead Tips
Okay, so you made a bunch of these bad boys. How do you keep them fresh? Easy peasy!
Storage Guidelines
Store your mochi in an airtight container to ensure they don’t dry out. Line the container with parchment paper between the layers, so they don’t stick together.
Preservation Methods
If you’re planning to keep them for a few days, keep them in the freezer . They’re best enjoyed fresh but can hold up for about a week.
Reheating Instructions
If you’ve stored them in the fridge, leave them at room temperature for about 10- 15 minutes before serving for that perfect chewiness.
Freshness Duration
You’ve got about a week to eat these delights before they lose that magical texture. So, gather your friends, and make a night of it!
Creative Variations to Try
Let’s jazz things up a bit! Mochi ice cream is a blank canvas just waiting for your creative touch.
Flavor Adaptations
Feeling fruity? Swap out traditional ice cream for sorbet or even yogurt. How about some delicious fruit flavored mochi as a lighter alternative?
Dietary Modifications
Using dairy-free desserts or doing a gluten-free version? You can easily find options that cater to your diet without sacrificing flavor.
Seasonal Twists
Chili chocolate mochi in winter and mango mochi in the summer? Yes, please! Tailoring your mochi to the seasons can spice things up.
Regional Variations
Think about adding local flavors. If you’re in the South , how about adding a peach filling? Or if you're feeling adventurous, go for a New Orleans beignet inspired mochi!
Complete Nutrition Guide
This isn’t just about indulgence there’s something good in every bite.
Detailed Breakdown
Each piece of mochi ice cream is around 150 calories . It’s a sweet treat but not a total diet buster!
Health Benefits
With ingredients like fresh fruit and sweet rice flour, you’re getting some natural goodness. It's a way to satisfy your cravings without a ton of guilt.
Dietary Considerations
Whether you’re gluten-free, dairy-free, or just trying to watch what you eat, there’s room to customize. You can totally make gluten-free desserts if you use the right flour.
Portion Guidance
Yields about 12 pieces with each being just right for a little sweet fix.
Expert FAQ Solutions
You’ve got questions? I’ve got answers!
Common Questions
If you’re wondering about making it vegan, go for coconut milk ice cream!
Troubleshooting Guide
If your mochi dough turns out too sticky, add a pinch of cornstarch into the mix before cooking.
Success Tips
Make sure your ice cream is super hard before wrapping it in mochi. It’ll make the process way smoother.
Variations Explained
Mochi ice cream comes in all shapes and sizes. Play with flavors and fillings until you find your favorite combo!
In conclusion, making mochi ice cream is a super fun project. it’s all about getting your hands a little sticky, enjoying the process, and ultimately creating a delicious traditional japanese dessert that will impress everyone! so get in the kitchen, roll up those sleeves, and let’s make some magic happen.
You got this!
Mochi Ice Cream A Delectable Japanese Dessert