No Guilt Brownie Recipe: Fudgy and Rich
- Time: Active 10 minutes, Passive 20 minutes, Total 30 minutes
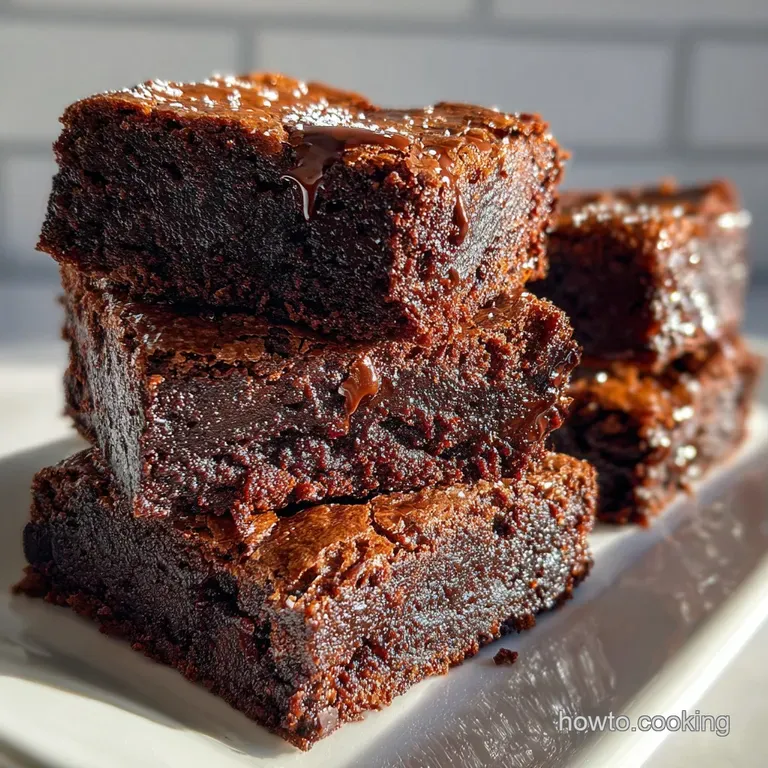
- Flavor/Texture Hook: Dense, fudgy, and intensely dark chocolate
- Perfect for: School lunchboxes, post workout treats, or guilt free late night snacking
- Crafting the Ultimate No Guilt Brownie Recipe
- The Physics of the Crumb
- Component Analysis of the Batter
- Essential Specs for Reliable Baking
- Ingredients and Smart Swaps
- Essential Tools for Streamlined Baking
- Clear Instructions for Dense Results
- Troubleshooting Your Chocolate Fix
- Texture Variations for Every Family
- Storing and Repurposing Your Scraps
- Serving Ideas for Balanced Desserts
- Wholesome Baking Myth Busters
- Recipe FAQs
- 📝 Recipe Card
Crafting the Ultimate No Guilt Brownie Recipe
Imagine the kitchen filling with the deep, intoxicating aroma of Dutch processed cocoa and warm maple syrup. The air gets heavy with that specific chocolate scent that promises something decadent is about to emerge from the oven.
For years, I believed that a truly fudgy brownie required at least two sticks of butter and enough sugar to make my teeth ache, but this recipe changed everything for my family.
It started on a Tuesday afternoon when I was desperate for something sweet but didn't want the afternoon energy slump. I had a half empty container of Greek yogurt and a bag of oat flour staring at me.
After a few messy trials one of which resulted in a brownie so dry it could have been used as a doorstop I finally found the balance. The result is a treat that feels like a cheat meal but fits perfectly into a wholesome lifestyle.
We're going to use minimal tools here because, honestly, who has time for a sink full of dishes on a weeknight? You’ll just need a single bowl, a whisk, and a bit of confidence.
This isn't just a substitute for "real" brownies; it’s a chocolate experience that stands entirely on its own merits, offering a velvety crumb and a rich finish that will have you reaching for seconds.
The Physics of the Crumb
Protein Emulsification: The egg and Greek yogurt work together to create a stable structure that replaces the need for heavy fats, ensuring the batter doesn't separate.
Starch Hydration: Oat flour absorbs moisture more slowly than wheat, so letting the batter sit for a few minutes before baking creates a more cohesive, less crumbly texture.
Maillard Reaction Control: Maple syrup browns faster than granulated sugar, providing that deep, caramelized flavor even with a shorter baking time.
Acidic Leavening: The lactic acid in the yogurt reacts instantly with the baking powder to create tiny air pockets, preventing the brownies from becoming too dense or rubbery.
| Method | Time | Texture | Best For |
|---|---|---|---|
| Standard Oven | 20 minutes | Classic fudgy center with slight crust | Achieving the traditional brownie experience |
| Stovetop (Water Bath) | 35 minutes | Silky, truffle like, almost steamed | Maximum moisture retention without any crisp edges |
| Toaster Oven | 18 minutes | Extra crispy edges and soft middle | Small batches or avoiding heating the whole house |
If you find yourself loving the way yogurt adds a nutritious boost to your baking, you might also want to try this Healthy Cheesecake recipe. It uses similar principles of moisture management to create a dessert that feels incredibly indulgent while remaining wholesome.
Component Analysis of the Batter
| Ingredient | Science Role | Pro Secret |
|---|---|---|
| Greek Yogurt | Provides moisture and fat mimicking proteins | Use full fat or non fat; both work but full fat adds a richer mouthfeel |
| Oat Flour | Offers a soft, tender crumb structure | Grind your own oats in a blender for a superfine, "cake like" texture |
| Dutch Cocoa | Delivers intense color and neutralized acidity | Always sift it to avoid stubborn bitter clumps in the finished bake |
| Maple Syrup | Humectant that keeps the brownies moist | Ensure it is room temperature to prevent the egg from seizing |
Building confidence in the kitchen often comes down to understanding how ingredients interact. When we swap out traditional fats for yogurt, we aren't just saving calories; we're changing the way the crumb holds onto water.
This keeps the brownies from drying out, even if you accidentally leave them in the oven for an extra minute or two.
Essential Specs for Reliable Baking
For this no guilt brownie recipe, precision in your measurements and environment makes the difference between a "healthy snack" and a true dessert. We are aiming for a dense, fudgy result, which means we need to be mindful of how the heat penetrates the batter.
- Checkpoint 1 (Oven Temp): Ensure your oven is preheated to exactly 175°C. A portable oven thermometer is your best friend here, as many home ovens run 10 degrees off.
- Checkpoint 2 (Pan Size): Use a 20cm (8 inch) square pan. Using a larger pan will cause the batter to spread too thin, leading to a dry, overcooked brownie.
- Checkpoint 3 (The Crumb): A toothpick inserted into the center should come out with a few moist crumbs attached, not clean. If it's clean, they are overdone.
Chef Tip: Freeze your dark chocolate chips for 10 minutes before folding them into the batter. This prevents them from melting prematurely during the mixing phase, ensuring you get distinct "pockets" of melted chocolate in every bite.
Ingredients and Smart Swaps
- 1/2 cup (120g) Plain Non Fat Greek Yogurt
- Substitute: Unsweetened applesauce (120g). Why this? Applesauce provides moisture but results in a slightly fruitier, softer texture.
- 1/2 cup (120ml) Pure Maple Syrup
- Substitute: Honey (120ml). Why this? Honey is sweeter; reduce the total amount by 1 tablespoon to balance.
- 1 large Egg (room temperature)
- Substitute: Flax egg (1 tbsp ground flax + 3 tbsp water). Why this? Best for vegan needs, though the rise will be slightly flatter.
- 1 tsp (5ml) Pure Vanilla Extract
- Substitute: Almond extract (1/2 tsp). Why this? Adds a cherry like depth that pairs beautifully with dark chocolate.
- 1/2 cup (45g) Unsweetened Dutch Processed Cocoa Powder
- Substitute: Natural cocoa powder. Why this? It's more acidic; the brownies will be lighter in color and tangier.
- 3/4 cup (90g) Oat Flour
- Substitute: Whole wheat pastry flour (90g). Why this? Provides a similar structure but contains gluten for more "chew."
- 1/4 tsp Salt
- Substitute: Sea salt flakes. Why this? Enhances the chocolate flavor more intensely than standard table salt.
- 1/2 tsp Baking Powder
- Substitute: Baking soda (1/4 tsp) + 1/2 tsp lemon juice. Why this? Only use if the yogurt is particularly tart to balance pH.
- 1/4 cup (40g) Dark Chocolate Chips (70% cocoa)
- Substitute: Cacao nibs. Why this? Adds a distinct crunch without any added sugar.
Essential Tools for Streamlined Baking

You don't need a high end stand mixer for this recipe. In fact, a simple whisk is better because it prevents over aerating the batter, which can lead to a cakey texture instead of the fudgy one we want. I always recommend using a silicone spatula to get every last drop of that chocolatey goodness out of the bowl.
For the baking vessel, a metal pan is preferred over glass. Metal conducts heat more efficiently, giving you those slightly chewy edges that everyone fights over. If you only have glass, you might need to increase your baking time by about 5 minutes.
Don't forget the parchment paper; it makes lifting the entire block of brownies out of the pan a breeze, which is vital since these are quite tender when warm.
Clear Instructions for Dense Results
- Preheat the oven. Set your temperature to 175°C and line your 20cm square pan with parchment paper. Note: Leaving an overhang on the sides helps you lift the brownies out easily.
- Whisk the wet components. In a large bowl, combine the Greek yogurt, maple syrup, egg, and vanilla. Whisk until the mixture is smooth and pale.
- Sift the cocoa. Add the Dutch processed cocoa powder directly into the wet mix through a fine mesh strainer. Note: Cocoa is notorious for clumping, and sifting ensures a silky batter.
- Incorporate the dry base. Stir in the oat flour, salt, and baking powder. Mix until no white streaks remain.
- Add the chocolate. Gently fold in the dark chocolate chips using a spatula. Look for an even distribution so every slice gets a hit of chocolate.
- Transfer to pan. Pour the batter into your prepared pan and smooth the top with your spatula. The batter will be thick and glossy.
- Bake for precision. Place the pan on the center rack and bake for 20 minutes. Watch for the edges to set while the middle still looks slightly soft.
- Perform the toothpick test. Insert a toothpick into the center; it should come out with a few moist, fudgy crumbs.
- Cool completely. Place the pan on a wire rack and let it sit for at least 30 minutes. Cooling allows the starches to set, which is the secret to that dense texture.
- Slice and serve. Use a sharp knife to cut into 12 even squares. Wipe the knife between cuts for the cleanest edges.
Troubleshooting Your Chocolate Fix
Why My Brownies Are Dry
The most common culprit is over baking. Because this recipe lacks the massive amount of butter found in traditional brownies, even two extra minutes in the oven can zap the moisture. Another reason could be packing your oat flour too tightly in the measuring cup.
Always use the "spoon and level" method or, better yet, a kitchen scale.
| Problem | Root Cause | Solution |
|---|---|---|
| Gummy Texture | Under baked or cut too soon | Bake for 2-3 more minutes and ensure they cool completely before slicing |
| Crumbly Edges | Over mixing the oat flour | Fold the flour in gently until just combined to keep the structure tender |
| Lack of Flavor | Not enough salt or low quality cocoa | Increase salt to 1/2 tsp and use high fat Dutch processed cocoa |
Common Mistakes Checklist
- ✓ Use a room temperature egg to ensure it emulsifies properly with the yogurt.
- ✓ Never skip the parchment paper; these brownies are moisture rich and will stick to the pan.
- ✓ Avoid over mixing the batter once the oat flour is added to prevent a rubbery texture.
- ✓ Resist the urge to cut them while hot; the internal structure needs time to "bond."
- ✓ Ensure your baking powder is fresh by testing a pinch in hot water (it should bubble).
Texture Variations for Every Family
If you want to customize this no guilt brownie recipe, the possibilities are endless. For those who love a bit of crunch, adding 30g of chopped walnuts or pecans into the batter provides a beautiful contrast to the fudgy base.
My kids personally love it when I swirl a tablespoon of almond butter across the top before baking; it creates a marbled effect that looks like it came from a professional bakery.
| Variation | Ingredient Adjustment | Result |
|---|---|---|
| Salted Caramel | Drizzle 2 tbsp caramel on top | Sweet and salty depth |
| Double Choc | Add 1 tbsp extra cocoa powder | Intensely dark and bitter sweet |
| Mocha Blast | Add 1 tsp instant espresso powder | Enhances the chocolate notes |
If you decide to go the salted caramel route, I highly recommend using this Heavenly Salted Caramel Sauce recipe. It's simple to whip up and adds a layer of sophistication that makes these brownies feel like a high end dessert.
Storing and Repurposing Your Scraps
These brownies actually improve with age. I find that storing them in an airtight container in the fridge makes them even denser and more truffle like. They will stay fresh for up to 5 days. If you want to keep them longer, wrap individual squares in plastic wrap and freeze them for up to 3 months.
To reheat, just pop a frozen square in the microwave for 15 seconds.
For a zero waste approach, if you have edges that got a bit too crispy or crumbs left over, don't toss them! I love to crumble them over a bowl of Greek yogurt or use them as a "crust" for a parfait. You can even pulse the scraps in a blender and use them as a nutritious topping for smoothie bowls.
Serving Ideas for Balanced Desserts
When it's time to serve, I love to keep it simple. A cold glass of milk is the traditional choice, but a dollop of whipped cream can make it feel like a true celebration. You could try this Vanilla Bean Dream recipe for a topping that adds a light, airy contrast to the dense brownie.
Chef Tip: For a truly decadent experience, serve the brownie slightly warm with a few fresh raspberries on the side. The acidity of the berries cuts through the richness of the Dutch cocoa perfectly.
Wholesome Baking Myth Busters
Myth: You must have oil or butter for a brownie to be fudgy. Truth: Fudginess is actually a result of the ratio of fat and sugar to flour, plus the moisture level. Greek yogurt provides the necessary hydration and protein structure to mimic that mouthfeel without the saturated fat.
Myth: Healthy brownies always taste like beans or vegetables. Truth: This only happens when the recipe relies too heavily on pureed legumes without balancing the cocoa and sweeteners.
By using oat flour and maple syrup, we maintain a classic flavor profile that hides the "healthy" swaps entirely.
Myth: sugar-free substitutes bake exactly like real sugar. Truth: Liquid sweeteners like maple syrup change the hydration of the batter. You cannot simply swap 1/2 cup of maple syrup for 1/2 cup of granulated stevia without adjusting the dry ingredients, or you'll end up with a liquid mess.

Recipe FAQs
Can I substitute the Greek yogurt with regular yogurt?
No, use Greek yogurt or a thick substitute. Regular yogurt is too thin and will make your batter watery, ruining the fudgy texture we aim for.
How to ensure the brownies are fudgy and not cakey?
Do not overmix the batter after adding the flour. Overmixing develops gluten in the oat flour, leading to a spongy crumb; fold ingredients gently just until incorporated.
How to store these brownies for maximum freshness?
Refrigerate in an airtight container for up to 5 days. They actually become denser and fudgier after a day or two in the cold due to moisture settling.
Is it true that I must use Dutch processed cocoa for the best flavor?
No, but it is highly recommended for deep color. Dutch processed cocoa is alkalized, reducing bitterness and giving that classic dark brown hue.
How to make these brownies entirely vegan?
Replace the egg with a flax egg (1 tbsp ground flaxseed mixed with 3 tbsp water). You can also substitute the Greek yogurt with an equal amount of plain, unsweetened soy or coconut yogurt.
Why did my edges become brittle after baking?
This usually means they were baked slightly too long. Next time, pull them out when the toothpick still has moist crumbs attached; the residual heat finishes the cooking.
How to enhance the chocolate flavor without adding sugar?
Dissolve a teaspoon of instant espresso powder into the vanilla extract before adding it. This trick deepens the chocolate notes without adding any coffee flavor, similar to how acidity enhances flavor in our Classic Ciabatta Bread recipe technique.
No Guilt Brownie Recipe
Ingredients:
Instructions:
Nutrition Facts:
| Calories | 104 kcal |
|---|---|
| Protein | 3.5 g |
| Fat | 2.8 g |
| Carbs | 17.7 g |
| Fiber | 2.1 g |
| Sugar | 10.2 g |
| Sodium | 58 mg |
