Obsessed Tea Cake with Classic Glaze Made Nonstop
- Time: Active 15 minutes, Passive 12 minutes, Total 27 minutes
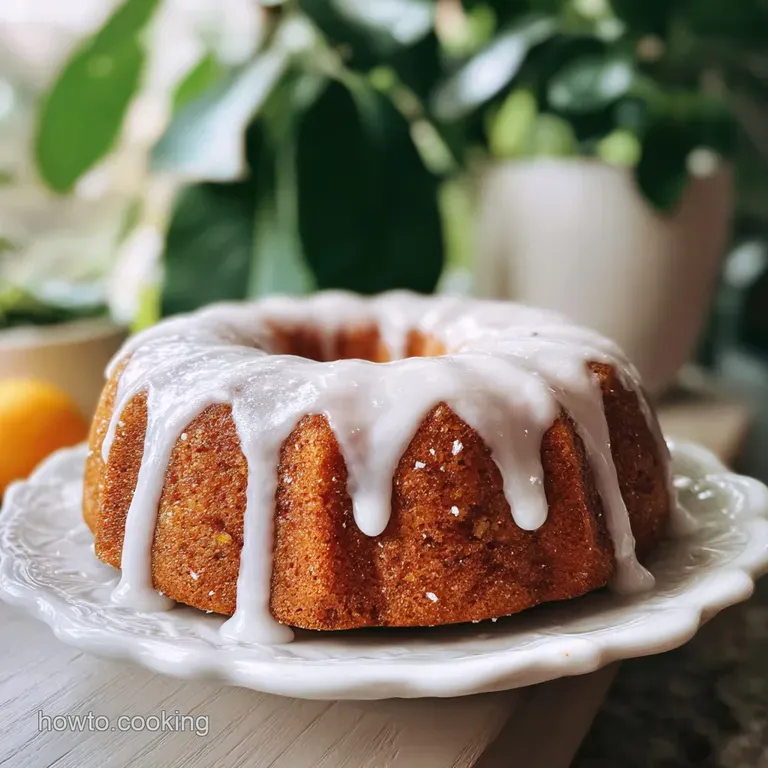
- Flavor/Texture Hook: Buttery crumb with a crackling, vanilla bean glaze finish
- Perfect for: Afternoon gatherings, festive gifting, or high confidence baking practice
- Obsessed Tea Cake with Classic Glaze Made Nonstop
- The Science of the Shatter
- Ingredient Deep Dive Analysis
- Curating Wholesome Elements for Baking
- Essential Tools for Master Bakers
- Executing the Method with Precision
- Solving Common Baking Obstacles
- Adapting Batch Sizes and Portions
- Debunking Old School Baking Tales
- Long Term Freshness and Sustainability
- Aesthetic Presentation and Flavor Pairings
- Recipe FAQs
- 📝 Recipe Card
Obsessed Tea Cake with Classic Glaze Made Nonstop
The first time the aroma of warm nutmeg and browning butter filled my kitchen, I knew I was in trouble. I was hovering by the oven door, watching as these little mounds of dough transformed into golden, domed beauties.
There's something hypnotic about the way the sugar crystallizes on the edges while the center stays tender. I've made these so often lately that my neighbors have started knocking on the door the moment they smell that tell tale scent of vanilla bean paste drifting through the vents.
Discover the irresistible recipe for Obsessed Tea Cake with Classic Glaze Made Nonstop. This isn't just a cookie, it's a bridge between a delicate sponge cake and a shortbread. We’ve all had those tea cakes that are dry enough to require a gallon of tea just to swallow, but this version changes that narrative.
By focusing on the emulsion of room temperature fats and eggs, we create a structure that holds its moisture even three days after baking.
You can expect a straightforward process that yields professional tier results. I’ve refined the ratios to ensure that even if you’re a beginner, you’ll feel a sense of wholesome accomplishment when you see that signature glaze set into a semi translucent shell.
We’re going to walk through the exact physics of why these rise just enough, ensuring you have the confidence to master this staple in your own kitchen.
The Science of the Shatter
Leavening Equilibrium: The combination of baking powder and baking soda reacts with the acidic profiles in the butter and sugar to create tiny carbon dioxide pockets. This ensures the cake is airy rather than dense.
Fat Emulsification: Creaming the butter and sugar for a full three minutes creates a mechanical aeration that supports the structure before it even hits the heat.
Starch Gelatinization: As the tea cakes bake, the moisture in the eggs hydrates the flour proteins, setting the shape while the sugar keeps the crumb tender and moist.
| Thickness | Internal Temp | Rest Time | Visual Cue |
|---|---|---|---|
| 1/2 inch | 190°F | 5 mins | Pale gold edges, matte center |
| 3/4 inch | 195°F | 8 mins | Slightly cracked top, firm base |
| 1 inch | 200°F | 10 mins | Deep golden bottom, soft dome |
When you are aiming for that specific velvety mouthfeel, similar to what you might find in a Classic French Madeleines Cakes recipe, the thickness of your dough discs matters immensely. A thinner disc will result in a crispier edge, while a thicker scoop provides that iconic cake like interior that defines this recipe. I personally prefer the 3/4 inch thickness for the best of both worlds.
Ingredient Deep Dive Analysis
| Ingredient | Science Role | Pro Secret |
|---|---|---|
| Unsalted Butter | Provides tenderizing fats and flavor | Use high fat European butter for better structure |
| Granulated Sugar | Breaks down gluten for softness | Pulse in a blender for 5 seconds for a finer crumb |
| All Purpose Flour | Builds the essential structure | Spoon and level to avoid a dry, heavy cake |
| Vanilla Bean Paste | Aromatic depth and visual flecks | Add to the fat, not the flour, to lock in scent |
Curating Wholesome Elements for Baking
To achieve a truly nutritious and flavorful result, the quality of your raw materials is paramount. We use wholesome ingredients that provide a satisfying weight to each bite. If you find yourself missing a specific item, these swaps will maintain the integrity of the bake without sacrificing the confidence we want you to feel at the oven.
- 1 cup (227g) unsalted butter, softened: Why this? Essential for the characteristic melt in-your mouth texture.
- Substitute: Salted butter (reduce added sea salt by half).
- 1 1/4 cups (250g) granulated sugar: Why this? Provides sweetness and helps with aeration during creaming.
- Substitute: Caster sugar for a more delicate, uniform texture.
- 2 large eggs, room temperature: Why this? Acts as the primary binder and adds rich protein structure.
- Substitute: 1/2 cup unsweetened applesauce (results in a denser, moister cake).
- 2 tsp (10ml) pure vanilla extract: Why this? Enhances all other flavors in the dough.
- Substitute: Almond extract (use only 1/2 tsp as it is much stronger).
- 3 cups (375g) all purpose flour, leveled: Why this? The backbone of the tea cake's structure.
- Substitute: Pastry flour for an even lighter, more crumbly finish.
- 1/2 tsp (2.5g) baking powder & 1/4 tsp (1.5g) baking soda: Why this? The dual leavening agents ensure a soft, domed rise.
- Substitute: 1 1/2 tsp baking powder if you have no soda (less browning).
- 1/2 tsp (3g) sea salt: Why this? Sharpens the sugar profile and balances the butter.
- Substitute: Kosher salt (use 3/4 tsp for similar salinity).
- 1/4 tsp (1g) freshly grated nutmeg: Why this? Provides that nostalgic, warm aromatic note.
- Substitute: Ground mace for a more citrusy, floral profile.
- 2 cups (240g) powdered sugar, sifted: Why this? Creates a smooth, lump free glaze that shatters when bitten.
- Substitute: Blend granulated sugar with cornstarch (1 cup sugar to 1 tbsp starch).
- 3 tbsp (45ml) whole milk: Why this? Thins the glaze to a perfect dipping consistency.
- Substitute: Heavy cream for a richer, more opaque white finish.
- 1 tsp (5ml) vanilla bean paste: Why this? Adds those beautiful black flecks and intense bean flavor.
- Substitute: Scrapings from half a vanilla bean pod.
Essential Tools for Master Bakers
Building your baking arsenal starts with a reliable stand mixer, such as a KitchenAid, which ensures your butter and sugar reach that cloud like state without wearing out your arm. I also highly recommend using heavy gauge aluminum baking sheets.
These provide even heat distribution, preventing the bottoms of your tea cakes from browning too quickly before the centers are set.
A fine mesh sieve is another non negotiable tool. Sifting your powdered sugar and flour might feel like an extra step, but it’s the difference between a grainy, disappointing glaze and a velvety smooth finish.
Finally, a small mechanical cookie scoop (roughly 1.5 tablespoons) ensures every cake is the same size, which is vital for consistent baking times across the entire tray.
Executing the Method with Precision
- Prep the environment. Preheat your oven to 350°F and line two large baking sheets with parchment paper. Note: This prevents sticking and ensures the bottoms don't over caramelize.
- Cream the fats. Beat the 1 cup of softened butter and 1 1/4 cups sugar in a stand mixer for 3-4 minutes until pale, fluffy, and significantly increased in volume.
- Emulsify the liquids. Add the 2 eggs one at a time, followed by the 2 tsp vanilla extract. Note: Scrape the bowl after each addition to ensure no streaks of butter remain.
- Whisk the dry base. In a separate bowl, whisk together the 3 cups flour, baking powder, baking soda, sea salt, and 1/4 tsp nutmeg.
- Combine the textures. Gradually add the dry mixture to the wet ingredients on low speed. Mix until just a few streaks of flour remain visible. Don't overwork it!
- Portion the dough. Use a scoop to form 1.5 tablespoon balls. Place them 2 inches apart on the sheets.
- Bake with care. Bake for 10-12 minutes until the edges are barely set and the tops look matte. They should not be dark brown.
- Cool completely. Let the cakes rest on the pan for 5 minutes before moving to a wire rack. Note: They need this time to "carry over" cook in the center.
- Whisk the glaze. Combine the 2 cups powdered sugar, 3 tbsp milk, and 1 tsp vanilla bean paste until the mixture flows like thick ribbons.
- Apply the finish. Dip the cooled tops of each cake into the glaze, letting the excess drip off. Set on a rack until the glaze is firm and crackling.
Solving Common Baking Obstacles
One of the most frequent hurdles is the "spreading" issue. If your tea cakes look more like pancakes than domes, it usually comes down to the temperature of your butter or the accuracy of your flour measurement. If the butter is too warm (greasy to the touch), it won't hold the air bubbles necessary for lift.
Always aim for butter that yields to a gentle thumb press but still feels cool.
Fixing a Grainy Glaze
If your glaze looks speckled or feels sandy on the tongue, it’s likely because the powdered sugar wasn't sifted or the milk was added too quickly. To fix this, you can microwave the glaze for 5-8 seconds and give it a vigorous whisk.
This small amount of heat helps dissolve any stubborn sugar crystals, restoring that silky, professional sheen we’re after.
Correcting an Overbaked Crumb
If you pull your cakes out and they feel hard as rocks, you've likely overshot the 12 minute mark. To salvage these, store them in an airtight container with a slice of plain white bread. The cakes will pull moisture from the bread overnight, softening the crumb and making them palatable again.
It's a classic trick that has saved many a batch in my kitchen!
| Problem | Root Cause | Solution |
|---|---|---|
| Cakes are flat | Butter was too soft/melted | Chill dough for 30 mins before baking |
| Crumb is tough | Overmixed the flour | Mix only until flour disappears |
| Glaze is too thin | Too much milk added | Whisk in more powdered sugar, 1 tbsp at a time |
Common Mistakes Checklist ✓ Always use room temperature eggs to avoid curdling the butter mixture. ✓ Measure flour by weight (375g) or use the "spoon and level" method. ✓ Do not glaze the cakes while they are still warm, or the glaze will melt off.
✓ Ensure your baking soda is fresh (less than 6 months old) for maximum lift. ✓ Use a cooling rack to prevent the bottoms from getting soggy after baking.
Adapting Batch Sizes and Portions
If you find yourself baking for a smaller household, this recipe scales down beautifully. To make a half batch (12 tea cakes), you’ll need to beat one egg and use exactly half of its volume. Use a smaller mixing bowl to ensure the beaters can properly aerate the reduced amount of butter and sugar.
Reduce your baking time by about 2 minutes, as smaller ovens can sometimes hold more intense heat.
When scaling up for a large gathering or a bake sale, I recommend doubling the recipe but making the glaze in two separate batches. Powdered sugar glaze can develop a "skin" if it sits out too long while you wait for multiple trays to cool.
Doubling the warm seasonings (like nutmeg) should be done carefully; I suggest using only 1.5x the amount to ensure the flavor doesn't become overwhelming.
| Premium Ingredient | Economic Substitution | Flavor Impact | Savings |
|---|---|---|---|
| Vanilla Bean Paste | Pure Vanilla Extract | Less visual flecks | Save $15-20 |
| European Butter | Store Brand Butter | Slightly less rich | Save $3-5 |
| Whole Milk | Water + bit of butter | Less creamy finish | Save $1-2 |
If you are looking to create a more decadent, dessert style variation, you could even drizzle a bit of Ridiculously Rich Chocolate recipe over the hardened vanilla glaze. This adds a sophisticated touch that transforms a simple tea cake into a centerpiece worthy treat.
Debunking Old School Baking Tales
Many people believe that "more leavening equals more rise." In reality, adding too much baking powder or soda will cause the cakes to rise too rapidly and then collapse, resulting in a dense, sunken center. Stick to the precise measurements provided to maintain that perfect dome.
The chemical balance is designed to work with the protein in the flour, not fight against it.
Another myth is that "sifting doesn't matter for modern flour." While it's true that modern flour is more refined than it used to be, sifting isn't just about removing lumps. It aerates the flour, allowing it to integrate into the butter emulsion without requiring heavy mixing.
This aeration is exactly what gives these tea cakes their "obsessed" status - it’s all about the lightness of the bite.
Long Term Freshness and Sustainability
These tea cakes are incredibly resilient. You can store them in an airtight container at room temperature for up to 5 days. To keep the glaze from sticking together, place a sheet of parchment or wax paper between the layers. If you want to keep them longer, they freeze remarkably well.
Place the unglazed cakes in a freezer bag for up to 3 months. When you're ready to eat, let them thaw at room temperature and apply a fresh batch of glaze.
For a zero waste approach, don't throw away those "ugly" crumbs or broken pieces that might happen during glazing. I love to pulse them in a food processor and use them as a buttery topping for a fruit crumble or even stir them into a bowl of Greek yogurt.
If you have leftover glaze, it can be stored in the fridge for a week and used to sweeten your morning coffee or drizzled over oatmeal.
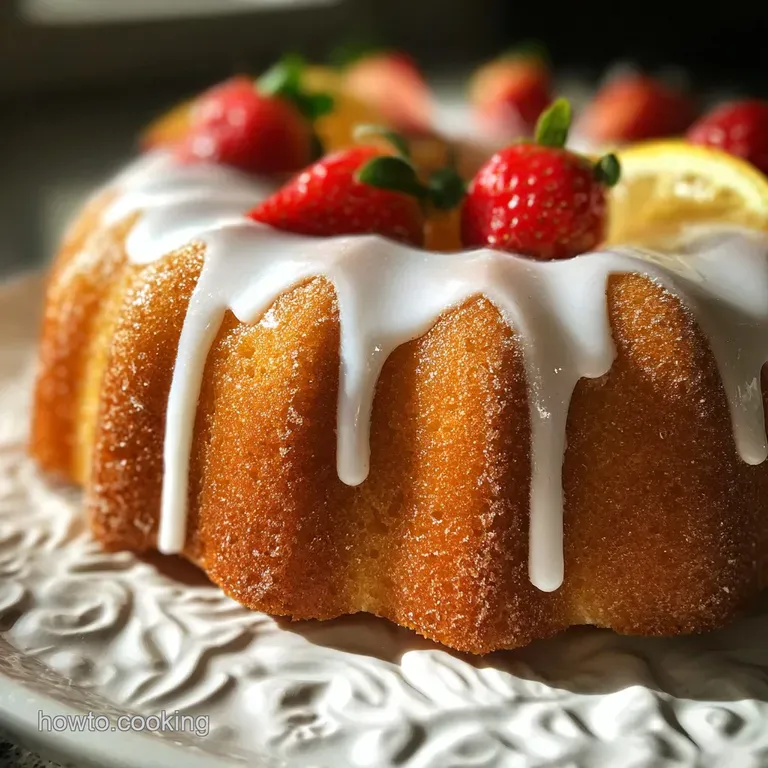
Aesthetic Presentation and Flavor Pairings
When serving these to guests, I find that a simple white ceramic platter allows the beautiful vanilla bean flecks in the glaze to shine. They look stunning when stacked in a gentle pyramid.
If you're feeling fancy, a few edible dried rose petals or a tiny dusting of extra nutmeg on top of the wet glaze can really make them pop. The contrast of the white glaze against the golden cake is a classic look that never goes out of style.
As for pairings, these are designed to be enjoyed with a hot beverage. A robust Earl Grey tea or a dark roast coffee provides a wonderful bitter contrast to the sweet glaze. If you’re serving these in the summer, a cold glass of whole milk is the ultimate companion.
The buttery nature of the cake harmonizes with the creamy milk, making it a wholesome snack that feels like a warm hug. Trust me, once you start making these, you’ll find any excuse to have a batch sitting on your counter.

Recipe FAQs
What is the filling of a Tunnock's Tea Cake?
No Tunnock's Tea Cakes do not have a traditional filling. They are made of a biscuit base topped with a soft meringue, all coated in a milk chocolate shell. They have a unique texture combination rather than a distinct filling.
Can you freeze a cake with glaze?
Yes, you can freeze unfrosted cakes, or cakes with a hardened glaze. For best results, freeze the cakes after the glaze has fully set. Wrap them tightly in plastic wrap and then in foil or place in an airtight container to prevent freezer burn and preserve texture. For a truly professional finish, consider exploring techniques similar to those used in creating Classic French Croissants: Flaky, Buttery & Easy to Make, which emphasize structural integrity.
How long do you bake a tea cake for?
Bake for 10-12 minutes at 350°F (175°C). Look for edges that are just set and a matte, pale gold center. They should not be dark brown, as they will continue to cook slightly after removal from the oven.
What type of cake is best for mirror glaze?
A smooth, dense cake is best for mirror glaze. Cakes like a génoise sponge, a pound cake, or even a well chilled mousse cake work well because their surfaces are even and don't have a lot of porous texture. This allows the glaze to adhere smoothly and create that signature shiny finish, much like the precise coating needed for Easy Éclair Recipe: Classic French Pastries at Home!.
Why did my tea cakes spread too much?
Your butter was likely too soft or melted. When butter is too warm, it can't hold the air incorporated during creaming, causing the dough to spread excessively during baking. Ensure your butter is softened to room temperature but still cool to the touch.
How do I get a smooth, crack free glaze?
Ensure your glaze is the correct consistency and applied to a completely cool cake. If the glaze is too thick, gently warm it for a few seconds; if too thin, whisk in more powdered sugar. Applying it to a cold cake helps it set quickly and evenly.
Can I make these tea cakes ahead of time?
Yes, they store well for up to 5 days at room temperature. For longer storage or if you made extra, they freeze well for up to 3 months before glazing. If you enjoyed mastering the technique of creating a sturdy yet tender crumb here, you might also appreciate applying those principles to a Buttery Strawberry Shortcake Recipe Classic American Dessert, which also relies on careful fat incorporation.
Obsessed Tea Cake Glaze

Ingredients:
Instructions:
Nutrition Facts:
| Calories | 213 kcal |
|---|---|
| Protein | 2.2 g |
| Fat | 8.3 g |
| Carbs | 32.6 g |
| Fiber | 0.4 g |
| Sugar | 20.6 g |
| Sodium | 66 mg |
