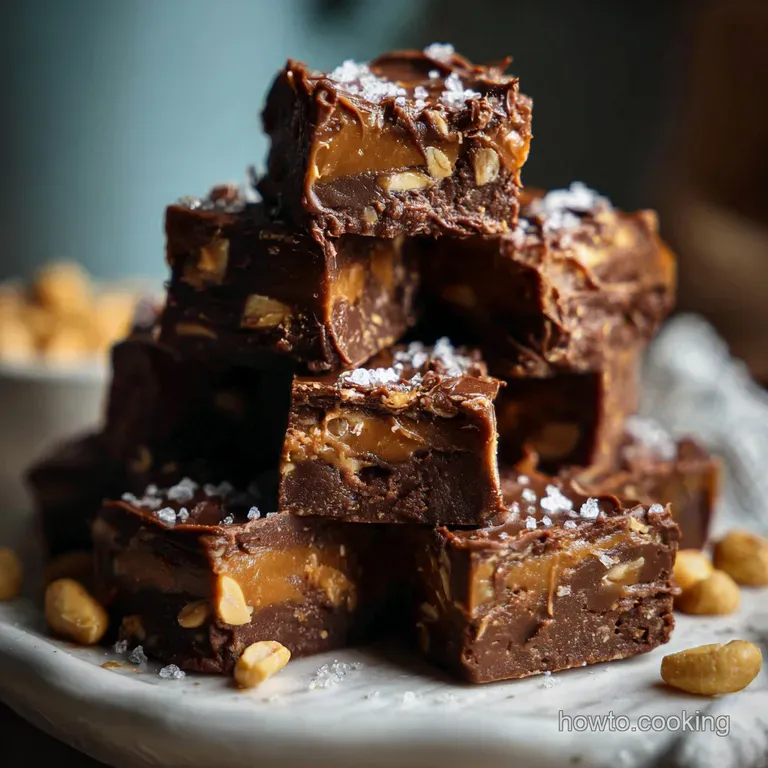
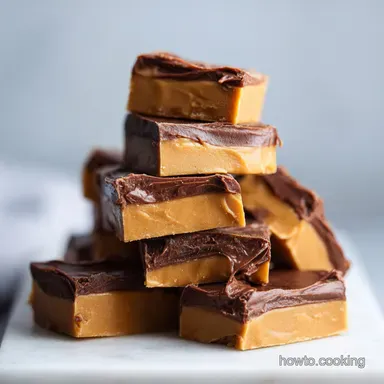
Peanut Butter Fudge: Velvety Rich
- Time: Active 5 minutes, Passive 10 minutes, Total 15 minutes
- Flavor/Texture Hook: Silky smooth with a buttery, melt in-the mouth crumb
- Perfect for: Holiday gifting, community bake sales, or wholesome family treats
Making the Best Peanut Butter Fudge
There is a specific moment in my kitchen when the air completely transforms. It starts with the heavy, sweet scent of 0.75 cup (170g) unsalted butter melting into 3 cups (600g) granulated white sugar and 0.67 cup (160ml) evaporated milk.
As it hits a rolling boil, the aroma shifts from a simple sweetness to something deeper, toasted, and almost buttery. It is a scent that pulls the family into the kitchen before I even get the jar of peanut butter open.
I remember my first attempt at this years ago; I was so nervous about the sugar crystallization that I barely breathed. But once you see that frothy, bubbling mixture turn into a golden syrup, your confidence in the kitchen just grows.
The real magic happens when you pull that pot off the heat and drop in the 1.5 cups (380g) creamy peanut butter and 7 oz (198g) marshmallow fluff. You’ll hear a faint hiss as the cool ingredients meet the hot sugar, and then the mixture turns into a glossy, velvety river of gold.
It’s not just about satisfying a sweet tooth; it’s about the satisfaction of watching simple pantry staples transform into something that looks like it belongs in a boutique candy shop.
We’ve all seen those grainy, crumbly versions that fall apart, but this recipe is designed to be sturdy yet tender, ensuring every square you cut is uniform and professional.
Right then, let's get into what makes this work. This isn't just another quick peanut butter fudge recipe that relies on luck. We are using a precise boil and specific fats to ensure that the sugar stays in its silky state rather than turning into sand.
Trust me on this: once you master the marshmallow fluff technique, you will never go back to those dry, old fashioned peanut butter fudge versions that require a degree in chemistry to get right. We are aiming for a result that is wholesome, flavorful, and consistently impressive.
Why This Formula Succeeds
- Marshmallow Fluff Interference: The fluff acts as a "doctoring agent," providing corn syrup and gelatinous structure that prevents sugar crystals from re bonding into a grainy texture.
- Evaporated Milk Concentration: By using evaporated milk instead of regular dairy, we introduce a higher protein to water ratio, which creates a more stable emulsion that won't separate during the boil.
- The Soft Ball Stage: Boiling the sugar for exactly five minutes at a moderate roll brings it to approximately 234°F, the "soft ball" stage where the sugar is concentrated enough to set but remains pliable.
- Peanut Butter Saturation: Adding 1.5 cups (380g) creamy peanut butter at the very end ensures the volatile oils don't break down from excessive heat, preserving that intense nutty aroma.
The difference between a "good" fudge and a "masterpiece" often comes down to the speed of the boil and the quality of the stir. If you have ever wondered about the difference between a cooked fudge and a no bake peanut butter fudge, it really comes down to the structural integrity. This cooked version offers a much more refined "snap" when you bite into it, while remaining soft on the tongue. If you love the deep, nutty profile we’re building here, you might also find the flavor profile similar to the one in my Peanut Butter Cookies recipe.
| Method | Total Time | Texture | Shelf Life |
|---|---|---|---|
| Classic Boil | 15 minutes | Velvety, structured, and buttery | 2-3 weeks (Fridge) |
| Fast 2 Ingredient | 5 minutes | Soft, slightly oily, and very dense | 1 week (Fridge) |
| Marshmallow Base | 15 minutes | Light, airy, and melt in-mouth | 2 weeks (Fridge) |
Choosing the classic boil method gives you that professional finish that doesn't melt the second it hits room temperature. It requires a bit more focus during those five minutes of bubbling, but the result is a nutritious sized treat that feels much more substantial.
Component Analysis
The following breakdown explains why we use these specific ingredients and how they contribute to the final set of the fudge.
| Ingredient | Science Role | Pro Secret |
|---|---|---|
| Granulated Sugar | Provides bulk and structural "snap" | Never stir the sides of the pot once boiling starts to avoid crystals. |
| Marshmallow Fluff | Prevents crystallization and adds air | Fold it in gently to maintain a slight lift in the texture. |
| Evaporated Milk | Acts as the liquid emulsifier | Use full fat evaporated milk for the most flavorful, silky result. |
| Peanut Butter | Introduces fats and protein for set | Stir it vigorously at the end to ensure it fully bonds with the syrup. |
Understanding these roles helps you troubleshoot on the fly. For instance, if you see the mixture starting to look "broken" or oily while boiling, it's usually because the heat is too high, causing the butter to separate before the sugar can encapsulate it.
Ingredients and Substitutions
To achieve that signature velvety finish, you'll need the following quantities. Always use a heavy bottomed saucepan to prevent scorching.
- 3 cups (600g) granulated white sugar
- Substitute: 3 cups light brown sugar Why this? Adds a molasses depth and slightly softer set.
- 0.75 cup (170g) unsalted butter
- Substitute: 0.75 cup salted butter Why this? Just omit the additional 0.5 tsp sea salt.
- 0.67 cup (160ml) evaporated milk
- Substitute: 0.67 cup heavy cream Why this? Provides a richer, more decadent mouthfeel.
- 7 oz (198g) marshmallow fluff
- Substitute: 1.5 cups mini marshmallows Why this? They melt into a similar sugar stabilizing syrup.
- 1.5 cups (380g) creamy peanut butter
- Substitute: Crunchy peanut butter Why this? Adds texture but may make cutting clean squares harder.
- 1 tsp (5ml) pure vanilla extract
- Substitute: 0.5 tsp almond extract Why this? Deepens the nuttiness but changes the classic flavor.
- 0.5 tsp (3g) sea salt
- Substitute: 0.5 tsp table salt Why this? Enhances the sugar profile; use slightly less if using table salt.
Using high-quality vanilla and fresh peanut butter makes a massive difference in the final product. I always tell my friends that if you wouldn't eat the peanut butter off a spoon, don't put it in your fudge. The flavor is very exposed here, so quality matters.
Cooking Steps for Success

- Prep the pan. Line an 8x8-inch or 9x9-inch baking pan with parchment paper, leaving an overhang on the sides. Note: This allows you to lift the entire block out for easy slicing later.
- Combine the base. Place the 3 cups (600g) sugar, 0.75 cup (170g) butter, and 0.67 cup (160ml) evaporated milk into a heavy saucepan.
- Melting phase. Heat the mixture over medium heat, stirring constantly until the butter is fully melted and the sugar starts to dissolve.
- The boil. Increase the heat slightly to bring the mixture to a full rolling boil (one that doesn't stop when you stir it).
- Timed boil. Boil for exactly 5 minutes, stirring frequently to prevent the bottom from scorching. Note: If you have a candy thermometer, aim for 234°F (112°C).
- Off heat addition. Remove the pan from the heat immediately. Stir in the 7 oz (198g) marshmallow fluff and 1.5 cups (380g) creamy peanut butter.
- Final seasoning. Add the 1 tsp (5ml) vanilla and 0.5 tsp (3g) sea salt, stirring until the mixture is completely smooth and glossy.
- The pour. Quickly pour the hot fudge into the prepared pan, smoothing the top with an offset spatula.
- The set. Let the fudge sit at room temperature for at least 2 hours or until completely firm. Wait until it is cold to the touch before lifting the parchment.
- Slicing. Lift the fudge out and use a long, sharp knife to cut it into 36 squares.
Chef's Tip: For an even cleaner cut, run your knife under hot water and wipe it dry between every single slice. This prevents the fudge from sticking to the blade and creates those sharp, professional edges.
Fixing Texture Problems
Fudge can be a bit temperamental, especially if the humidity is high or if your stove runs particularly hot. If things go sideways, don't panic. Most issues happen during the boiling stage or the cooling stage.
Fixing Grainy Texture Issues
If your fudge feels like it has sand in it, the sugar crystals have "re seeded." This usually happens if you stir the pot too much while it's boiling, or if sugar crystals from the side of the pot fall back into the liquid.
Next time, try using a pastry brush dipped in warm water to wash down the sides of the pot once it starts boiling.
Fixing Soft Unset Fudge
If the fudge is still "soupy" after two hours, it likely didn't reach the soft ball stage. You can actually fix this! Put it back in a pot with a tablespoon of evaporated milk, melt it down, and bring it back to a boil for another minute.
Or, simply call it "fudge sauce" and serve it over ice cream no one has to know it was a mistake.
| Problem | Root Cause | Solution |
|---|---|---|
| Grainy Texture | Sugar crystallized on the side of the pot | Use a wet brush to clean pot sides during the boil. |
| Oily Surface | Mixture boiled too hard or separated | Stir vigorously while cooling to re emulsify the fats. |
| Fudge is too hard | Boiled longer than 5 minutes | Next time, reduce boil time by 30-60 seconds. |
Common Mistakes Checklist ✓ Using a pot that is too small; the mixture will foam up significantly during the boil. ✓ Failing to have the peanut butter and fluff measured out before the boil finishes.
✓ Using "natural" peanut butter where the oil separates; this can lead to a greasy fudge. ✓ Scraping the bottom of the pot too hard if it starts to brown; those brown bits will ruin the color. ✓ Slicing the fudge while it is still slightly warm, which causes it to squash rather than snap.
Scaling for Big Groups
If you are making this for a massive party or a holiday gift basket, scaling up is relatively simple. However, I never recommend more than doubling the recipe in a single pot. The heat distribution becomes uneven in very large batches, and you risk scorching the bottom before the top reaches the correct temperature.
For a Double Batch (2x): Use a very large stockpot. Keep the boil time at 5 minutes, but be aware that it may take longer to reach the boiling point.
You don't need to double the salt or vanilla perfectly; 1.5x the amount of spices and extracts is usually enough to keep the flavor balanced without it becoming overwhelming. If you're doubling, you'll want to move into a 9x13-inch pan to maintain that perfect 1 inch thickness.
For a Half Batch (1/2): This is perfect if you just want a small treat for the house. Use a smaller saucepan so the liquid is deep enough to bubble properly. Reduce the boil time by about 30 seconds, as the smaller volume heats up and concentrates much faster. If you're looking for more variety in your treats, check out this Giant PB Cups recipe — it's a great way to use up leftover peanut butter from a half batch of fudge.
Fudge Shortcut Methods
If you are in a rush or want to save a few dollars on ingredients, there are ways to pivot this recipe without losing that nutty essence.
| If you want... | Do this... |
|---|---|
| A Budget Version | Swap butter for margarine and use mini marshmallows instead of fluff. |
| Extra Crunch | Fold in 1/2 cup of roasted, salted peanuts during the final stir. |
| Chocolate Swirl | Melt 1/2 cup chocolate chips and swirl them through the top before it sets. |
Debunking Fudge Myths
One common misconception is that you must use a candy thermometer to make good fudge. While it certainly helps with precision, "The Five Minute Rule" has been used by home cooks for decades with great success.
The key is to start the timer only when the boil is "rolling" meaning it doesn't go away when you stir it.
Another myth is that you can't make fudge on a rainy day. While high humidity can affect the sugar as it cools, making it slightly softer, it won't ruin the batch. If it's particularly humid, just boil the mixture for an extra 30 seconds to ensure more water evaporates.
Finally,, many people think you need to beat the fudge until your arm falls off. With the marshmallow fluff method, we are actually avoiding that "beating" process, as the fluff does the work of keeping the texture smooth for us.
Storage and Zero Waste
Once your fudge is set and sliced, store it in an airtight container. At room temperature, it will stay fresh for about a week, but I highly recommend the refrigerator for the best texture; it stays firm and the flavors actually deepen over a few days. In the fridge, it will last up to 3 weeks.
If you want to freeze it, wrap individual squares in plastic wrap and then place them in a freezer bag. It will keep for up to 3 months. Just thaw it in the fridge overnight before serving.
To practice zero waste in the kitchen, don't throw away those "ugly" edge pieces or the crumbs left on the cutting board. Those scraps are incredible when folded into a batch of brownie batter or sprinkled over a warm bowl of oatmeal.
If you have leftover evaporated milk (since the recipe uses 0.67 cup and cans are usually larger), use it as a rich creamer for your morning coffee or as a base for a small batch of mac and cheese.
Every bit of these flavorful ingredients can be repurposed to make your next meal just as nutritious and satisfying as this fudge.

Recipe FAQs
What do I need for peanut butter fudge?
You'll need pantry staples and basic kitchen equipment. Gather granulated sugar, unsalted butter, evaporated milk, creamy peanut butter, marshmallow fluff, vanilla extract, and sea salt. A heavy bottomed saucepan, an 8x8 or 9x9 inch baking pan, parchment paper, and a spatula are essential tools.
What is the secret to making good fudge?
Precise boiling and the right ingredients are key. Boiling the sugar mixture to the "soft ball" stage (around 234°F or 112°C) for exactly five minutes creates the correct sugar structure.
Marshmallow fluff also acts as a crucial stabilizer, preventing graininess and ensuring a smooth texture, much like how it helps stabilize sauces in other recipes.
What is cowboy fudge?
Cowboy fudge typically refers to a simpler, no-bake version. It often uses fewer ingredients and relies on peanut butter, powdered sugar, and milk or butter to set, resulting in a softer, sometimes less structured confection compared to cooked fudge.
Why did my peanut butter fudge turn out hard?
It likely boiled for too long or at too high a temperature. If your fudge reaches the "hard ball" stage (above 240°F/115°C), the sugar will be too concentrated, leading to a very hard texture.
Aim for the "soft ball" stage (234°F/112°C) by timing the boil precisely to five minutes at a rolling boil.
Can I substitute honey for sugar in peanut butter fudge?
No, substituting honey for granulated sugar is not recommended for traditional fudge. Honey has a different sugar composition and moisture content that will significantly alter the setting point and texture, likely resulting in a sticky, unset fudge. For different flavor profiles, consider recipes like our Homemade Apple Pie: The Flakiest All-Butter Classic Recipe, which uses balanced sweeteners.
What if my fudge looks grainy?
Graininess indicates sugar crystallization. This often happens if you stir the mixture too much during the boil or if stray sugar crystals from the sides of the pot fall back into the liquid. Next time, use a wet pastry brush to wash down the pot's sides as it boils to prevent this.
How do I get smooth fudge instead of crumbly?
Ensure you reach the correct soft ball stage and cool it properly. Boiling to approximately 234°F (112°C) is crucial for the sugar to set correctly without becoming brittle. Adding marshmallow fluff helps tremendously by acting as an interference agent against crystallization, similar to how stabilizers work in baked goods like these Strawberry Monkey Bread: Sticky Homemade Brioche Pull Apart Bake.
Peanut Butter Fudge
Ingredients:
Instructions:
Nutrition Facts:
| Calories | 185 kcal |
|---|---|
| Protein | 3.0 g |
| Fat | 9.5 g |
| Carbs | 23.8 g |
| Fiber | 0.6 g |
| Sugar | 22.0 g |
| Sodium | 78 mg |
