Perfect Homemade Pie Crust: a Flaky Delight for Every Occasion
Let’s Talk Pie Crust: The Heart of Every Good Pie
Oh my gosh, can we talk about pie crust for a second? i remember the first time i tried to make one.
I was about 18, staring at what felt like an enormous mountain of flour and butter. spoiler alert: it wasn't pretty.
But today, i want to share my pie crust recipe that turned my baking game from disastrous to delicious. whether you’re whipping up apple pie for thanksgiving or a quiche for brunch, having a great pie crust recipe is key.
Trust me, you need this in your life, and it’s easier than you think!
A Slice of History: Where It All Began
Did you know pies date back to ancient egypt? crazy, right? they were originally made with simple crusts filled with meat.
Fast forward to today, and we’ve turned those humble beginnings into delicious sweet and savory creations. in the modern kitchen, a pie crust recipe is more than just a base; it’s become part of our culinary identity.
It’s timeless and loved. seriously, who can resist a piece of perfectly baked pie? plus, whether you're cranking out a coconut oil pie crust for a healthy dessert or going classic with my easy version, there’s something for everyone.
Now, let's get real about time. this recipe needs about 15 minutes of active prep, plus a little chill time.
So, it's a solid 1 hour 15 minutes from start to finish, which really isn’t a huge commitment for something that tastes this darn good.
And the best part? it's an easy crust recipe that’s not intimidating at all, even for beginners.
Why This Crust Rocks
First off, let’s talk health benefits. this isn’t just any pie crust. you can swap out ingredients to make a gluten-free pie crust or a lighter, healthier version by using coconut oil instead of butter.
Talk about versatility! plus, who doesn’t love knowing they can indulge just a little more when they know the ingredients are a tad better for them?
You can serve this flaky beauty at any gathering: thanksgiving, birthdays, or even just because it's tuesday! it’s pretty much your go-to for any occasion.
And here’s a secret: you can even steal the show at dinner parties by filling it with your favorite homemade filling.
Your friends will be begging for the recipe, and you can smile like a baking superstar!
But here’s where i think it shines: compared to other crusts, it’s far simpler. no rolling and rolling until your arm aches.
This is an easy pie crust that packs a punch with flavor and texture. good luck finding a store-bought option that rivals this homemade goodness.
Plus, it saves you money in the long run!
Pie Crust Recipe Essentials
So, as we dive into the ingredients, remember that baking should be fun, not scary. this pie crust recipe only needs a few ingredients: flour, butter, salt, sugar (if you want it sweet), and ice water.
That’s it!
A tip i swear by is to keep your butter ice cold. seriously, the colder everything is, the flakier your crust will turn out.
You’ll thank me later when your neighbors start knocking on your door, begging for a slice of your latest pie.
And let’s be honest, who doesn’t want to be known as “the pie person” in their friend group?
Before we get to the ingredient list, remember: have fun with it!
Alrighty, let’s check out what you'll need to get started on this healthy pie crust journey. get ready for a delectable adventure where every slice brings a smile to your face.
Trust me this recipe is going to change your baking game.
Onward to the ingredients!
Your Go-To Essential Ingredients Guide
Hey there, fellow food lovers! today, we're diving into the essential ingredients guide that'll totally level up your baking game.
Whether you're whipping up a killer pie crust recipe or just wanna impress your friends at brunch with a beautiful quiche, nailing the right ingredients is key.
Let’s dig in!
Premium Core Components
First off, let’s talk about the main players in your kitchen cabinet . You know, the stuff you just can’t live without. Here are some golden rules:
Measurements: you’ll often find ingredients explained in both us and metric measurements . for example, if you see 2 ½ cups of flour, that means about 320g .
A little conversion can go a long way!
Quality indicators: always choose fresh ingredients. look for flour that’s whole and soft to the touch it shouldn’t feel gritty.
For butter? make sure it's unsalted and chilling in your fridge before use.
Storage guidelines: keep your pantry organized! flour and sugar last quite a while, but i’d say stick to about 1 year stored in a cool, dry place.
For butter, we're looking at about 3 months in the freezer.
Freshness Tips: When picking fruits for your filling, go for the ones that feel firm but not rock hard. And if they smell sweet? You’re golden!
Signature Seasoning Blend
Now, let’s jazz things up! Having the right spices makes all the difference in flavor for your pies.
Essential Spice Combinations: Try pairing cinnamon and nutmeg for those sweet pies, or a good mix of basil and oregano for savory ones like a quiche. They’ll wake up your taste buds!
Herb Selections: Fresh is best, but dried can work in a pinch. Trust me, chopping up some fresh parsley can elevate your dish to a whole new level.
Flavor Enhancers: Don't forget the power of salt ! It’s like the magic sprinkle in your dish. And if you’re feeling daring, slice up some garlic or onion for that extra kick!
Regional Variations: Ever heard of Southern sweet pies? They’re where the fun’s at!
Smart Substitutions
Life happens, and sometimes we don’t have all the ingredients on hand. No worries I’ve got your back!
Common Alternatives: Didn’t grab sugar? Honey or maple syrup can work wonders, just adjust measurements since they’re liquid.
Dietary Modifications: Need a gluten-free Pie Crust ? No sweat! Just use almond flour or coconut flour instead.
Emergency Replacements: If you’re out of butter, melt down some coconut oil . Your pie crust will taste divine!
Seasonal Options: Take advantage of seasonal goodies. Fresh fall apples? Perfect for that Coconut Oil Pie Crust !
Kitchen Equipment Essentials
And hey, even the best ingredients won’t shine if you don’t have the right tools.
Must have Tools: A good mixing bowl, a rolling pin, and pie dish are non-negotiables. Can we agree those are essential pieces in your baking arsenal?
Alternative Equipment Options: If you don’t have a pastry cutter, a simple fork can do the job! Roll with what you have.
Preparation Tips: Always pre-chill your utensils if you want that flaky pie crust .
Storage Solutions: Keep your oils and flours sealed. Airtight containers, baby!
Wrapping It Up
So, you’re all set up with your essential ingredients . All we need now is that delicious pie crust recipe to bring everything together!
Oh, and don’t forget the joy in cooking. this isn’t just about following the steps; it’s about creating memories in the kitchen.
In the next section, we’ll get down to business with the actual recipe and step-by-step instructions on how to craft the ultimate pie crust! can’t wait? neither can i! let’s keep that oven warm and get baking!
Mastering the Art of Professional Cooking: Perfect Pie Crust Recipe
Let’s talk about something that stirs up some serious nostalgia: a perfect homemade pie crust . you know, that flaky, buttery goodness that makes you immediate think of grandma’s kitchen? yeah, that one! crafting the right pie crust isn’t just about throwing ingredients together.
It’s an art, requiring some essential prep and techniques to get it right. trust me, once you nail this, every sweet or savory filling is destined to shine!
Essential Preparation Steps
First things first: let’s dive into mise en place , which is just a fancy way of saying, “get your stuff organized.
” measure out your ingredients since it'll speed things up later. pro tip: keep butter and water nice and chilly.
This step helps create that beautiful flaky layer we all love.
Now think about time management . chill your pie crust dough for at least 30 minutes (and longer if possible) to help it firm up.
While you’re waiting, prep your fillings or tidy up your kitchen. it’s like baking multitasking , and you’ll thank yourself later.
Being organized is key here. have everything in its place. don’t you hate when you’re elbow deep in flour, and your rolling pin is nowhere in sight? have your mixing bowl, pastry cutter, rolling pin, and pie dish ready to go.
And hey, let’s keep safety in mind. make sure your workstation is clean. those little flour spills can be a disaster waiting to happen!
step-by-step Process
Alright, let’s get into the nitty gritty, shall we?
Prepare the Ingredients: Chill your butter and ice water before you start. Trust me; your future flaky crust will be grateful.
Combine dry ingredients: grab a mixing bowl and whisk together 2 ½ cups of all-purpose flour , 1 teaspoon salt , and 1 tablespoon sugar (if you want a sweet crust).
It’s just as easy as it sounds!
Cut in the butter: now, chop your chilled 1 cup of unsalted butter into cubes and toss it in the bowl.
Use a pastry cutter or fork to mix until you see those coarse crumbs forming.
Add ice water: here’s where it gets a little tricky. gradually mix in 6-8 tablespoons of ice water , one tablespoon at a time, until the dough starts to come together.
You want it to hold together but not be too sticky.
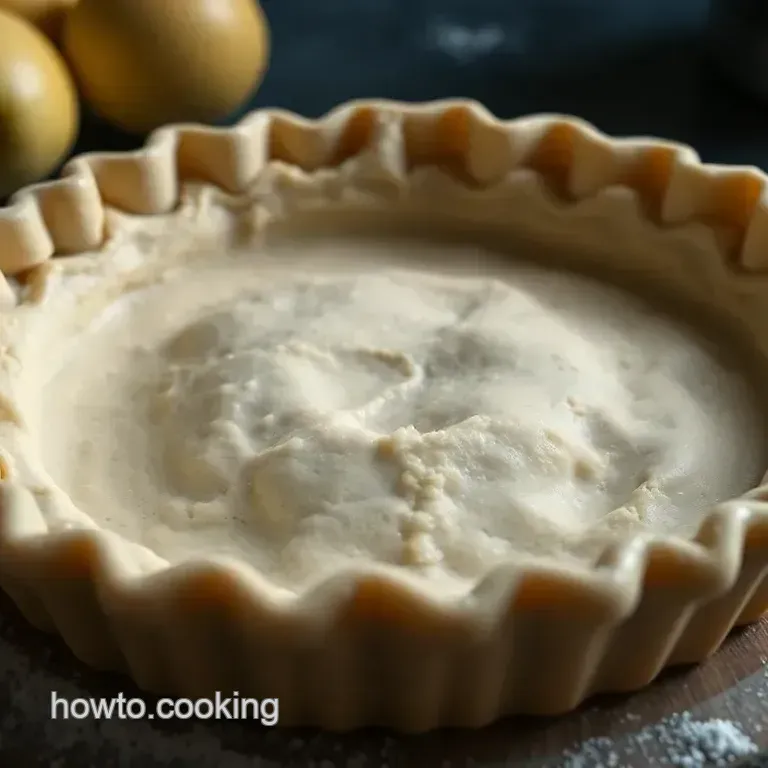
Form the dough: gather it into a ball and flatten it into a disk, about 1 inch thick, then wrap it in plastic.
This is where you pop it into the fridge to chill for at least 30 minutes .
Roll out the dough: once it’s ready, roll it out on a floured surface until it’s about 12 inches in diameter.
Gently transfer it to your pie dish and pat it into the edges without stretching.
Blind bake or fill: if you’re going the blind baking route (highly recommended if you’re filling it later), prick the bottom with a fork, cover with parchment paper, and toss in some pie weights or dried beans before baking at 375° f ( 190° c) for 15- 20 minutes .
Then you can fill it with whatever tickles your taste buds!
Expert Techniques
To enhance your skills, let’s talk about professional methods . Always remember to keep everything cold this is crucial for that flaky texture!
Quality checkpoints are important too. when you’re cutting the butter, make sure it’s well incorporated but not overworked. if you keep mixing it until it's like paste, you’ll end up with a tough crust instead of the fluffy dream we all want.
If something goes sideways, don’t freak out! troubleshooting tips : if your crust shrinks during baking, it might not have chilled long enough.
Just remember to play it cool and learn from the process.
Success Strategies
Let’s not sugarcoat it. There are common mistakes to keep an eye on. Overworking the dough? Big no-no! It will mess up that flakiness you aim for.
When it comes to quality assurance , do check your crust halfway through baking. it should be golden brown and firm to the touch.
If you’re feeling adventurous, why not try subbing some of the all-purpose flour with coconut flour for a healthy twist?
For make-ahead options, this dough keeps well in the freezer for a month. Just thaw in the fridge when you’re ready, and boom you’re halfway to pie perfection!
Perfecting your pie crust takes patience, but it’s oh-so worth it. so next time you whip up a dish, consider how a homemade pie crust can take your healthy pies to the next level.
Ready to sprinkle a little more knowledge on your baking adventure? Stay tuned for some additional information that will add that extra kick to your cooking game!
Additional Recipe Information for Perfect Homemade Pie Crust
Oh my gosh, folks! if you’re diving into pie-making, let me tell you mastering that pie crust recipe is everything! from flaky goodness to sweet savory dreams, this is where the magic happens.
Let’s chat about some pro tips, presentation techniques, storage details, creative variations, and let’s not forget about that nutrition guide.
Buckle up buttercup, we are gonna slice into this!
Pro Tips & Secrets
First off, here’s what i always say: chill, chill, chill! keeping your ingredients cold is the key to a flaky pie crust.
Butter should be icy, and your water should be, literally icy, not tepid. it helps prevent the butter from melting into the flour, giving you that texture we all want.
Got a food processor? omg, use it! a food processor pie crust can save you loads of time. just toss in your flour, salt, and sugar, then add chilled butter and pulse until you get those crumbly bits.
Then, pulse in your ice water. boom! easy peasy.
Wanna amp up the flavor? try a little splash of vanilla extract for sweet pies or fresh herbs for savory ones.
A touch of sugar can also make your crust slightly sweet, which pairs perfectly with fruit fillings. trust me; it’s a game changer!
Perfect Presentation
Okay, so once you’ve mastered the crust, let’s talk about plating. honestly, a properly presented pie can turn heads. after you bake it, give it a light dusting of powdered sugar, or drizzle some caramel sauce.
Thinking about garnishes? a dollop of whipped cream or a scoop of your favorite ice cream always steals the show.
If you want to get fancy, use a zigzag pastry cutter to give your edges a decorative touch. and how about a mix of colors? a vibrant berry pie against a golden crust is a feast for the eyes.
Colorful fillings can transform a regular pie into something that looks like it belongs on the cover of a magazine.
Storage & make-ahead
Now, don’t sweat it if you have leftover pie crust! wrap it up snuggly in plastic wrap and it can chill in the fridge for about 3 days .
If you wanna keep it longer, freeze it for up to 3 months . just make sure to check it for freezer burn!
For reheating, just pop that bad boy in the oven at 350° f until it’s warmed through about 10- 15 minutes should do the trick.
Freshness is key; you want that crust to stay flaky, so don’t skip on the storage tips!
Creative Variations
Let’s get creative! looking for a healthy pie crust option? try using coconut oil instead of butter. it gives a unique flavor that pairs well with certain fillings.
Or, if you’re running with a gluten-free crowd, a coconut flour pie crust is an excellent option! just remember, with gluten-free variations, you often need to adjust the liquid content slightly.
Seasons change, and so should your fillings! Fall calls for spiced pumpkin pies, while summer screams for fresh fruit pies. Switch it up based on what’s available!
Complete Nutrition Guide
So, you wanna know what you’re munching on? a slice of homemade pie is about 250 calories, with a decent balance of fats and carbs.
It’s not just about calories, though there are flavor compounds and nutrients that can boost your mood (hello, serotonin from those sugar hits!).
For dietary considerations, if you go with a healthy pie crust , you can cut back on calories while still enjoying yumminess.
You can surf the internet for nutrition facts if you’re counting carbs or watching your sodium!
Encouraging Conclusion
So there you have it, pie pals! whether you’re a novice or a pro, leveling up your pie crust recipe can make all the difference.
Remember, it’s all about patience and practice. baking is a science, but it’s also an art! don’t stress too much; it’s just food.
Enjoy the process. i can’t wait to see what magic you whip up in the kitchen. happy baking, friends!
Frequently Asked Questions
What’s the secret to a flaky pie crust recipe?
The trick to a flaky crust is to keep everything cold. Ensure your butter is well chilled and even consider chilling your flour beforehand. Also, handle the dough as little as possible to avoid developing gluten, which can create a tough texture.
Can I make this pie crust recipe ahead of time?
Absolutely! You can prepare the dough and wrap it tightly in plastic wrap. It can be stored in the fridge for up to 3 days or frozen for up to 3 months. Just make sure to let it thaw in the fridge before rolling it out.
How do I know when my pie crust is done baking?
Your pie crust is done when it’s a lovely golden brown and feels firm to the touch. If you're baking it blind, look for an even light golden color without any wet or doughy spots. This usually takes about 25-30 minutes at the right temperature.
What variations can I try with this pie crust recipe?
You can easily switch things up by adding herbs for a savory twist or using whole wheat flour for a nuttier flavour. If you fancy something sweet, add a bit of cinnamon or vanilla to the dough perfect for fruit pies!
Can I use butter alternatives in this pie crust recipe?
Yes, you can use coconut oil or shortening as a dairy-free substitute for butter. Keep in mind that the texture might differ slightly, but it will still yield a delicious crust. Just remember to adjust the salt, especially if you’re using salted butter alternatives!
What’s the best way to store baked pies with this crust?
Once your pie is baked, cover it loosely with foil or plastic wrap to keep it fresh. It can be stored at room temperature for a day or in the fridge for up to 3 days. For longer storage, consider freezing the pie though you might lose a bit of crispness, the flavour will still be divine!
Perfect Homemade Pie Crust A Flaky Delight For E
Ingredients:
Instructions:
Nutrition Facts:
| Calories | 250 |
|---|---|
| Fat | 14g |
| Fiber | 1g |
