Perfectly Flaky Croissants: a French Classic
Oh my gosh, let me tell you about the first time i took a bite of a warm, flaky croissant .
I was in a quaint café in paris, with the sun streaming through the windows, and it felt like love at first bite.
That buttery, delicate pastry melted on my tongue, and i thought, “i need to make these at home!” if you've ever felt the same way, you're in for a treat! making croissants is like taking your taste buds on a little trip to france sophisticated yet oh-so-rewarding!
Recipe Overview
Croissants have quite the story behind them, blending cultures and flavors. they actually originated in austria and made their way to france, where they were turned into the flaky goodness we know and adore today.
Croissants have found their way onto every brunch table, pastry case, and food photography reference, becoming a breakfast staple in cafés across america.
Honestly, who wouldn’t want to wake up to the aroma of fresh croissants wafting through the house?
Now, don’t get me wrong making croissants isn’t a walk in the park. it's considered a hard recipe because of lamination.
That fancy word just means you’ll be rolling butter between those layers of dough, and boy, does it take some practice to get it right.
But with a little patience, you'll find yourself enjoying these perfectly flaky croissants in about three hours total time.
When it comes to costs, making croissants is surprisingly affordable. You’ll spend around $10 on ingredients and be rewarded with 12 delightful pastries. Anyone else just feel like that’s totally worth it?
Key Benefits
Now, let’s talk benefits! sure, these croissants are a treat, but they also pack a punch in the kitchen. when you bake them at home, you control the ingredients so you can avoid preservatives and additives found in store-bought versions.
Not to mention, homemade croissants are perfect for a cozy breakfast or to impress guests on special occasions.
Picture this: a brunch with friends where everyone’s eyes light up as you pull out a freshly baked batch. the flakiness, the buttery goodness it’s a game changer! you might even consider adding them to your baking bucket list; they’re the ultimate baking challenge .
What’s better? once you master the technique, you can try fun variations like chocolate croissants or even almond infused ones.
Also, the satisfaction of pulling those babies out of the oven? priceless. it’s like scoring a touchdown at the super bowl pure joy! and let’s not forget; you can serve them at any occasion, from brunch to holiday gatherings, and watch your guests rave about your baking skills.
Trust me, they’ll think you're a culinary genius!
So, if you’re ready to embark on this flaky journey with me, let’s dive into the ingredients. You’ll need some basic staples, a sprinkle of love, and your kitchen! Move over, fancy French patisserie the best croissants are coming from your very own oven! Let’s get started!
Essential Ingredients Guide for Baking Croissants
Oh my gosh, let’s talk about the essential ingredients you need to whip up those delightful buttery croissants ! Seriously, knowing your ingredients is key to that flaky, golden perfection.
Premium Core Components
First things first, let’s get into the measurements . for those who love precision, you're looking at 4 cups (500g) of all-purpose flour and 1¼ cups (300ml) of warm whole milk .
Trust me, this stuff matters. if you’re not familiar with the metric stuff, don’t stress; conversions are your friend.
Now, here’s a fun fact for you: sugar and salt balance everything out. you’ll want about 2 tablespoons (25g) of sugar and 1½ teaspoons (9g) of salt .
Quality indicators ? go for organic or local ingredients when you can. fresh flour will do wonders for your croissant recipe ; stale flour is a no-go.
Storage is crucial, too. keep your flour in a cool spot, and your butter should hang out in the fridge.
And let’s not forget about freshness! always check dates on your yeast; you don’t want to find out it’s expired halfway through your croissant making journey.
Signature Seasoning Blend
Now, you might ask, is there any seasoning involved in this process? well, not much! the butter is the star of the show here.
Just remember to use unsalted butter for this recipe around 1½ cups (340g) .
However, if you're feeling adventurous, consider herb selections for future bakes. A sprinkle of fresh rosemary or thyme can elevate your breakfast pastries next time you make something savory.
Smart Substitutions
Okay, so maybe life gets in the way and you don't have all the ingredients on hand. no issue! for common alternatives , if you find yourself short on whole milk , you can substitute with almond milk or even buttermilk .
If you need a gluten-free option , just swap the all-purpose flour with a good quality gluten-free blend.
Emergency replacements? If you don’t have butter , you can use coconut oil with a little extra love.
Kitchen Equipment Essentials
What about the gear? You’ll need some must have tools :
- A rolling pin is essential for that smooth dough.
- Don't forget baking sheets , plus some parchment paper to prevent sticking.
- A pastry brush is key to getting that golden egg wash on your croissants.
And if you really want to feel fancy, using a digital kitchen thermometer can help with precise milk temperatures. Honestly, it’s a game changer!
Tips & Tricks
You know what they say: “Keep it cold!” If you want those perfect layers, keep your ingredients chilled. I always pop my butter in the freezer for a bit before starting.
Also, don’t rush the dough trust me. let it relax! it makes rolling so much easier. and about that egg wash : mix together 1 large egg with 1 tablespoon of milk for that beautiful browning.
Closing Thoughts
So there you have it! the essential ingredients and steps for making your croissants sing. whether you’re tackling this baking challenge solo or inviting friends over for a baking competition, understanding these components will set you up for success.
Now that you’re armed with this knowledge, it’s time to roll up your sleeves, embrace the art of croissant making , and bring a touch of paris to your kitchen.
Let’s dive into those step-by-step instructions to make the best homemade croissants !
Unlocking the Secrets of Professional Cooking: Perfectly Flaky Croissants
Alright, folks! today, i’m diving into the fabulous world of croissants. you know those flaky, buttery pastries that practically make your morning? yeah, those! they’re not just a breakfast pastry; they’re a little piece of heaven in pastry form.
And trust me, making them at home can be a total game changer. let’s roll up our sleeves and get to it!
Essential Preparation Steps
Mise en place might sound fancy, but it just means getting your ingredients in order before you start cooking. for this croissant recipe, lay out your 4 cups of all-purpose flour , 2 tablespoons of sugar , and all your butter.
Seriously, organization is key. you don’t want to be rummaging around for the yeast while your dough is waiting!
Next up, let’s talk time management . make sure you’re aware that croissant making is a time investment. you’ll need about 3 hours total , with 20 minutes for prep and some resting time in between.
If you’re anything like me, setting a timer will help keep you on track!
Safety is a biggie, too. Remember, your oven is gonna be cranked up to 400° F ( 200° C) . Use oven mitts, because we don’t want any burns ruining our croissant making vibe!
step-by-step Process
Alright, now that you’re all prepped, let’s break it down into some easy steps:
Dough Time : Combine your flour, sugar, salt, and yeast in a bowl. Add warm milk and melted butter . Mix it until it looks all shaggy.
Knead it : get in there and knead for about 5- 7 minutes until it’s nice and smooth.
Then, let it rest for 1 hour covered up. this is when the magic starts!
Butter Block Magic : Chop your cold butter into pieces and pound it into a 7 inch square . Yep, this is the part where the flaky goodness starts.
Roll and fold : roll your rested dough out, encase that butter block, and fold it like a letter. this is lamination fancy term, simple idea! chill for 30 minutes and do this two more times.
Shaping time : roll it out again and cut into triangles. roll ‘em up and curve them a bit. pro tip: let them rise for 1 hour .
This gives them that lovely puff we all adore.
Bake ‘Em Up : Preheat that oven and let’s get baking! Brush with egg wash and bake for about 20- 25 minutes . You’re gonna want them golden brown.
Expert Techniques
Think about this croissants are all about texture. When you get to the lamination , keep your butter cold. I can’t stress this enough!
Check the temperature points while baking. if they aren't puffing up like they should, maybe your yeast was dead? always a bummer! but don’t worry, you can troubleshoot.
If they’re browning too fast, turn that oven down a smidge.
Success Strategies
Now, let’s dodge some common mistakes. One biggie is not allowing your dough to rest enough. Rushed dough is a sad dough.
For quality assurance, always keep your ingredients, especially butter, chilled. And remember, practice yields perfection! If you mess up the first batch, it’s okay. Strawberry jam doesn’t judge.
For make-ahead options, you can shape these croissants and stick them in the fridge overnight. just let them proof in the morning before baking.
Bam! you’ve got a bakery experience in your kitchen.
A Little Personal Touch
Honestly, the first time i made croissants, i thought they’d be a total flop. i was scared as heck! but seeing those golden beauties come out of the oven? mind blowing! it's like unearthed treasure right there in your baking challenge folder.
Just picture it: fresh homemade butter croissants alongside your morning coffee.
Creating these is an art, too. if you’re into croissant drawings or food photography references , then whipping these up could inspire you.
Think of all the cute objects to draw that could come from your beautiful croissants!
So there you have it! with a bit of patience and practice, you’ll be making homemade croissants like a pro.
And whether it’s the perfect buttery croissant or just having fun with your kitchen time, it’s all about embracing the journey.
As we move towards our next topic, remember: baking isn’t just about the end result; it’s a celebration of creativity and culture. Let’s dive deeper into some additional information next!
Unlocking the Secrets of the Perfect Croissant
Oh my gosh! if you’ve ever taken a bite of a buttery croissant and thought, “i could never make this myself,” let me tell you, you can! making croissants is quite the baking challenge, but it’s so rewarding.
Plus, once you master the art of crafting these delightful breakfast pastries, you'll embark on a delicious journey that’ll have you feeling like a true pastry chef.
Let’s dive into some pro tips, presentation tricks, and even storage hacks to make your croissant making experience a breeze!
Pro Tips & Secrets
Keep it cool : a key secret to those flaky layers? keep everything cold! butter should be icy, and your dough should be given time to rest in the fridge.
You’ll want to treat your ingredients like they’re royalty.
Time saving techniques : if you're pressed for time but still want to impress, consider making the dough the night before and letting it rest in the fridge.
Your future self will thank you!
Flavor Enhancements : To elevate your croissant game, sprinkle a bit of flaky sea salt on top before baking. It takes those sweet and buttery flavors to another level.
Presentation Advice : Invest in a fancy pastry brush for that egg wash. Just a simple brush can make your croissants look as good as they taste!
Perfect Presentation
Once you've rolled, folded, and baked your homemade croissants, it’s time to present them like the pastry royalty they are!
Plating techniques : place croissants on a simple white plate for a chic look. add a sprig of fresh mint or a slice of orange on the side for that pop of color.
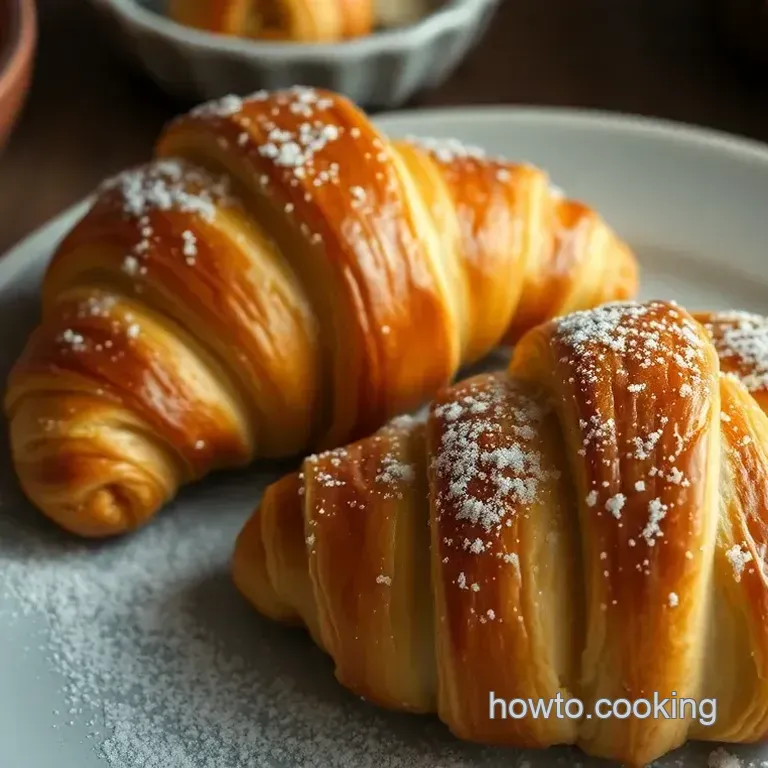
Garnish Ideas : Dust with powdered sugar after they cool a bit. It gives that beautiful bakery fresh vibe. Nothing says "I made these" like a small, tasty flourish!
Color Combinations : Pair those golden, flaky croissants with vibrant fresh fruits. Think strawberries, blueberries, or kiwi slices on the side.
Visual Appeal Tips : A well stacked display on a wooden board with a few cute objects to draw attention will be Instagram worthy for sure!
Storage & make-ahead
Let’s face it, sometimes life gets busy, and you might not eat all 12 croissants in one sitting.
Storage Guidelines : Store croissants in an airtight container at room temperature for up to two days . If they last longer, consider putting them in the fridge.
Preservation Methods : For longer storage, freeze them! Freeze the baked croissants in a single layer, then wrap them tightly in plastic wrap. They can stay good for about a month.
Reheating Instructions : When you're ready to enjoy them again, pop them in a 350° F oven for about 8 minutes. They’ll be warm and flaky again!
Freshness Duration : For best quality, consume within two days for room temperature croissants, or up to a month if frozen.
Creative Variations
Don’t be afraid to get creative! Croissants aren’t just for breakfast; you can jazz them up however you like.
Flavor Adaptations : Want a chocolate filled croissant? Just add some chocolate chips when rolling them up. Divine!
Dietary Modifications : If gluten is an issue, use a gluten-free all-purpose flour blend. It might not be exactly the same, but it’ll work just fine.
Seasonal Twists : Thinking about fall flavors? Try adding pumpkin spice to the dough or a cinnamon sugar mix before rolling.
Regional Variations : Give a nod to the savory side by incorporating savory ingredients, like cheese or herbs, for a delightful twist that’s still deeply satisfying.
Complete Nutrition Guide
It’s good to know what you’re eating, right? Here’s a quick lowdown on what’s inside your delicious homemade croissants:
Calories : about 250 . not too shabby! protein : roughly 5g to help keep you full. fat : a rich 14g , thanks to the butter.
Yes, please! carbs : around 29g , giving you that lovely energy boost. dietary considerations : just be cautious if you’re watching your sodium or sugar intake.
Wrap-Up
So there you have it! with just a bit of patience and practice, you can master making croissants that not only taste amazing but also look stunning perfect for sharing (or keeping to yourself!).
Whether you're enjoying them on lazy sunday mornings or impressing guests, these homemade pastries will elevate any occasion.
So, roll up your sleeves and give this recipe a try! You’ll find that the journey of baking these little crescents is just as rewarding as the final product and maybe even better! Happy baking! 🥐
Frequently Asked Questions
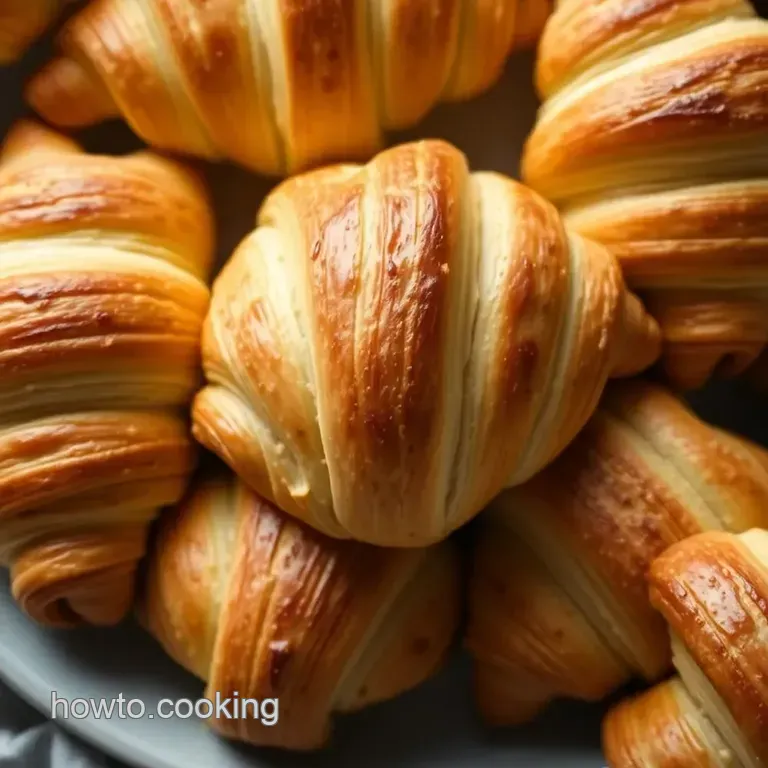
What is the secret to perfectly flaky croissants?
The secret lies in proper lamination folding cold butter into the dough to create thin layers. Keeping your ingredients cold throughout the process, especially the butter, is essential for achieving that delightful flakiness. A little patience during the resting phases also goes a long way!
How can I tell when my croissants are fully baked?
Your croissants are baked to perfection when they're a deep golden brown on the outside and give off a lovely buttery aroma. If you have a digital kitchen thermometer handy, the internal temperature should reach around 200°F (93°C). Trust your nose and eyes nothing beats that freshly baked scent!
Can I freeze croissants, and how should I store them?
Absolutely! You can freeze croissants after they've cooled down completely. Just wrap them tightly in plastic wrap or foil and place them in a freezer bag. When you fancy a croissant, simply reheat them in the oven at 350°F (175°C) for about 10-12 minutes. Freshly baked with that oven aroma!
Are there any healthy alternatives I can use for croissant dough?
If you’re looking to lighten up your croissants, you can substitute all-purpose flour with a whole wheat flour or a gluten-free blend. Keep in mind that the texture may change a bit, but it’s a tasty way to enjoy croissants with a bit more nutrition. Balance is key!
What are some popular variations for croissants?
You can get creative with your croissants! Try adding fillings like almond paste, chocolate chips, or even ham and cheese for a savory option. For a true taste adventure, why not whip up some sweet or savory versions? The possibilities are as vast as the culinary scene in London!
Why is my croissant dough too sticky, and how can I fix it?
Stickiness can often occur if your dough is too warm or if you’ve added too much liquid. Try chilling the dough for a bit and dust your work surface with a little flour to make it manageable. Remember, a little stickiness is expected, especially in lamination, but you can always adjust flour accordingly!
Perfectly Flaky Croissants A French Classic

Ingredients:
Instructions:
Nutrition Facts:
| Calories | 250 |
|---|---|
| Fat | 14g |
| Fiber | 1g |
