Red Velvet Cake with Cream Cheese Frosting: a Classic Delight
- The Magic of Red Velvet Cake
- A Slice of History
- Why This Cake Rocks
- Your Go-To Guide on Essential Ingredients for Delicious Cakes
- Mastering the Art of Professional Cooking
- Pro Tips & Secrets for the Ultimate Red Velvet Cake
- Perfect Presentation: Creating a Stunning Centerpiece
- Storage & Make-Ahead: Keep It Fresh
- Creative Variations: Spice It Up!
- Complete Nutrition Guide: Balancing Indulgence
- Final Thoughts
- Frequently Asked Questions
- 📝 Recipe Card
The Magic of Red Velvet Cake
Oh my gosh! let me tell you about the first time i tried making a red velvet cake recipe . it was a chilly winter evening, and i was feeling adventurous.
I was scrolling through pinterest, and bam! there it was this beautiful, velvety cake that looked like it was just begging to be served at a fancy dinner party.
I thought, “how hard could it be?” spoiler alert: it wasn’t that hard, but it was a total game changer in my baking life.
You see, every time i bake this cake, i'm instantly taken back to that night. the warm smell of cocoa and the sweet hint of vanilla filled my tiny kitchen.
When i finally served it, jaws dropped, and forks were flying. it's not just any cake; a red velvet cake is a showstopper and perfect for any celebration or just a cheeky slice in the afternoon with your favorite tea.
Trust me, your friends will think you’re some kind of baking wizard!
A Slice of History
The origins of red velvet cakes go back to the southern united states, with some claims linking it to a hotel in new york during the 1920s.
It’s basically a piece of edible history, steeped in tradition where the rich, red color symbolized luxury. nowadays, it's hot stuff.
Whether it’s a birthday bash or just a tuesday, a piece of this cake always wows the crowd.
Now let’s talk about time. making this red velvet cake takes about 1 hour and 25 minutes from prep to finish.
It’s not a quick whip-up, but honestly, it’s not too crazy either. you’ll need 20 minutes to get everything together and about 30 to 35 minutes of baking, which gives you enough time to sip some coffee or binge watch your latest netflix obsession.
The best part? it feeds about 12 people perfect for sharing! but it’s also that kind of cake you might want to keep all to yourself.
I mean, who could resist all that lush cream cheese frosting?
Why This Cake Rocks
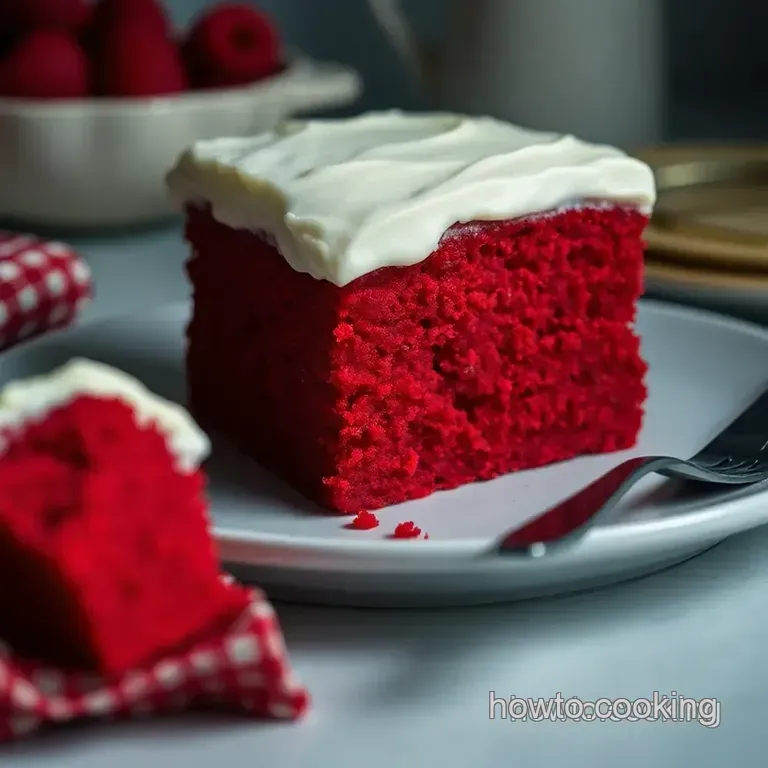
So why should you try out this red velvet cake recipe easy ? for starters, it’s so moist and tender! thanks to the ingredients like buttermilk and vegetable oil, you get that perfect melt-in-your mouth texture.
Not to mention, it packs a unique flavor profile with a dash of cocoa powder balancing out the sweetness.
Let’s not forget the health benefits (not that we should count calories in cake, but hey, maybe once in a while).
While it’s not exactly a health food, it does offer some antioxidants from the cocoa and buttermilk, plus it’s just a happier treat than your average chocolate cake.
What’s cooler? it’s perfect for those extra special occasions valentine's, birthdays, or even just a sunday afternoon with friends.
Plus, if you’re eyeing something that stands out at dessert tables, this cake is it! seriously, no one’s ever going to forget that gorgeous red hue.
It's not just another cake recipe! if you’ve tried other velvet cake recipes , this one's got a personality of its own and trust me, everyone’s going to want seconds.
Now that i’ve whetted your appetite and hopefully sparked your curiosity, let’s dive into the juicy part the ingredients! 🥰 we’re about to whip up a cake that’ll not just taste divine but also leave you with killer bragging rights.
Ready to venture into baking happiness? let’s get those ingredients lined up!
Your Go-To Guide on Essential Ingredients for Delicious Cakes
Oh my gosh, if there’s one thing i've learned from baking, it’s that ingredient selection is key to whipping up amazing desserts like a show stopping red velvet cake recipe ! let’s break down those essential ingredients that can make or break your cake game.
Premium Core Components
When we talk about premium core components , we're talking serious business. start with precise measurements. you’ll want 2 ½ cups (315g) of all-purpose flour and 1 ½ cups (300g) of granulated sugar for a solid base.
Did you know that how you measure flour can affect how your cake rises? we're not kidding! use the spoon and-level method for accuracy.
Quality indicators are also crucial. look for fresh, vibrant colors in ingredients like cocoa powder, and always check the expiration dates on your baking powder and salt.
When it comes to storage , keep your flour in a cool, dry place, and it can last up to 6 12 months .
Pro tip: a little airtight container goes a long way!
Worried about freshness? Always check that eggs are not past the sell-by date, and opt for room temperature dairy products for that perfect, velvety texture.
Signature Seasoning Blend
Let’s dive into the signature seasoning blend . the magical part of a cake like our beloved red velvet cake lies in its subtle spices.
You’ll want 1 teaspoon of cocoa powder to give it a little depth. oh, and keep your spices fresh! also, feel free to experiment with some vanilla extract and a splash of vinegar trust me, it’s a game changer!
Pair it with herbs like mint or a sprinkle of cinnamon for an unexpected twist. feeling adventurous? try a southern style variation by adding a touch of nutmeg or even a pinch of cayenne! it’ll elevate your cake to a whole new level.
Smart Substitutions
Let’s be real for a sec. sometimes we just don’t have everything we need on hand. that’s where smart substitutions come to play! no buttermilk? mix 1 cup of milk with 1 tablespoon of vinegar or lemon juice .
Boom instant buttermilk!
If you’re looking for dietary modifications , swap the sugar with a sweetener of your choice though be careful, as it can change the texture.
Sometimes, you might even need an emergency replacement for ingredients. for instance, if you’re out of vegetable oil, melted butter can save the day!
Kitchen Equipment Essentials
Now, let’s chat about those kitchen equipment essentials . you don’t need a fancy kitchen to whip up a great red velvet cake .
But you do need a few must have tools: good mixing bowls, measuring cups, and, of course, a trusty whisk or electric mixer.
If you want an instant upgrade, an offset spatula makes frosting those layers a breeze !
If you’re low on cash or just feel adventurous, a regular whisk will do the job too, though it might take a little more elbow grease.
Time to Bake!
Now that you’ve armed yourself with the best ingredients and tools, we can dive into the step-by-step instructions for that gorgeous red velvet cake.
Hang tight, because this cake is a show stopper that’ll definitely impress your friends and fam. it’s perfect for birthdays, anniversaries, or heck even just a thursday afternoon when you need to treat yourself!
Trust me. Once you nail this red velvet cake recipe easy , you’ll have a go-to for any special occasion. Get ready to unleash your inner baker!
Mastering the Art of Professional Cooking
When it comes to whipping up a fabulous red velvet cake recipe , there’s something really magical about embracing professional cooking methods.
You know, it’s like having a secret weapon in your culinary arsenal. let’s dive into some essential preparation steps that ensure you’re not just tossing ingredients together, but creating a masterpiece.
Essential Preparation Steps
First up, let’s talk about mise en place . seriously, this french term just means "everything in its place." before you even crack that egg, gather all your ingredients and tools flour, sugar, measuring cups, and your trusty mixing bowls.
It saves you time and prevents that last minute panic when you're measuring flour while your butter is melting. trust me; i’ve been there!
Now, time management is key. if you're new to this, start with the thing that takes the longest. in our red velvet cake journey, that’s the baking time of about 30 to 35 minutes at 350° f ( 175° c) .
While it’s in the oven, you can whip up that delicious cream cheese frosting. multitasking is the name of the game.
Don’t underestimate the power of organization. lay out your ingredients in the order you’ll use them. you’ll be amazed at how much smoother the process flows.
Oh, and let’s not forget safety. always keep your work area clean and avoid cross contamination. no one wants to be the reason for a baking faux pas!
step-by-step Process
Now, let’s get into the nitty gritty of the process with some clear instructions.
- Preheat your oven to 350° F ( 175° C) . Grease and flour those cake pans.
- In a mixing bowl, sift together 2 ½ cups of all-purpose flour and 1 ½ cups of sugar along with your 1 tsp baking soda, 1 tsp salt , and 1 tsp cocoa powder .
- In another bowl, whisk together 1 ½ cups of vegetable oil , 1 cup of buttermilk , 2 large eggs , 2 tbsp red food coloring , and 1 tsp vanilla extract .
- Mix the wet and dry ingredients until it’s all smooth. Just don’t overmix it, okay? We want that light and fluffy texture.
- Divide your batter into the pans evenly and pop them in the oven. Bake for about 30 to 35 minutes until a toothpick comes out clean.
Keep a close eye on the cakes towards the end! They should bounce back while you gently press on them.
Expert Techniques
Here’s where things get really fun! to make sure your red velvet cake is top-notch, here are some key techniques.
After baking, let those babies cool in the pans for 10 minutes . then transfer to a cooling rack. this helps keep them moist.
When you make the cream cheese frosting, beat 8 oz of softened cream cheese with ½ cup of unsalted butter until it’s fluffy and creamy about 5 minutes.
Gradually add in 4 cups of powdered sugar and mix until smooth. if it's too thick, a splash of heavy cream can work wonders.
Now, for quality checkpoints: always taste as you go. you’d be surprised how a pinch more sugar can enhance the overall flavor.
If your cake looks a bit uneven, don’t fret! a little frosting on the sides can hide those imperfections.
Success Strategies
Common mistakes? oh boy, i’ve made them all! like forgetting to bring eggs to room temperature it can ruin that fluffiness we want! always ensure you’ve got everything measured and ready because nothing says amateur like scrambling to find ingredients mid-recipe.
As for quality assurance, check the cakes about 5 minutes before the timer goes off. sometimes they’re done early! for those that want to make-ahead, you can bake the cake and freeze it.
Just make sure it’s well wrapped to avoid freezer burn.
In short, this red velvet cake recipe is not just about following steps blindly. it’s about learning, experimenting, and having fun.
Trust me, once you nail it, you’ll be the rock star in the kitchen.
So there you have it! you’re now on your way to being a pro in the kitchen. don’t be afraid to mix things up and put your personality into it.
After all, cooking should be as enjoyable as eating!
Now, let’s transition into some additional information that will further enhance your culinary skills.
Pro Tips & Secrets for the Ultimate Red Velvet Cake
Oh my gosh, if you’ve landed on this page, you’re probably looking for an amazing red velvet cake recipe . i get it! this cake is gorgeous, delicious, and definitely a head turner at any gathering.
But before you dive into mixing your batter, here’s the scoop with some pro tips to make your cake sing!
First off, always use room temperature ingredients ! this little secret makes a world of difference. when your eggs and buttermilk are on the warmer side, you’ll get a fluffier texture.
Makes sense, right?
Now, let’s chat about mixing. once you combine your wet and dry ingredients, don’t over mix . seriously, just mix until everything is blended.
If you go all-in, you’ll end up with a heavy cake instead of that tender crumb you’re aiming for. we want it light and dreamy, people!
For an extra flavor boost, add a splash of almond extract. it gives your cake an incredible depth that just elevates the experience.
Trust me on this one. and if you’re feeling adventurous, consider swapping out the cream cheese frosting with a chocolate ganache.
Yum!
Perfect Presentation: Creating a Stunning Centerpiece
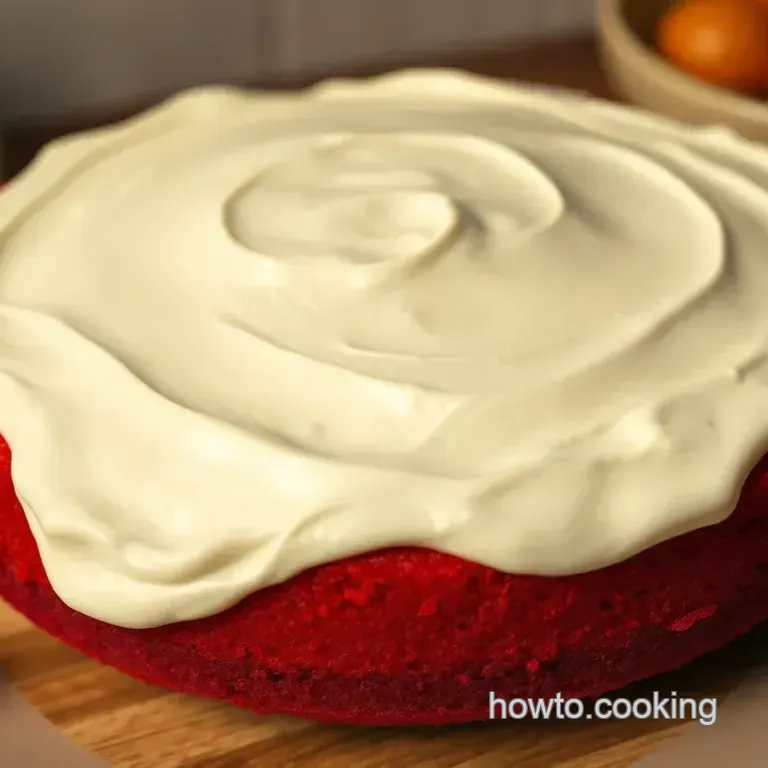
Okay, so you’ve baked your gorgeous red velvet cake. now it's time for the showstopper moment ! plating can be just as important as taste.
For a beautiful presentation, trim the tops of your cake layers if they’ve domed up. this way, they stack neatly.
When you frost, go for a rustic look by swirling the frosting on top. it’s kind of like giving your cake a soft, cozy blanket, and it looks inviting! don’t forget the garnishes.
A sprinkle of cacao powder or some strategically placed berries can really elevate the look. color is key, so contrast those reds and whites to make your cake pop!
Storage & make-ahead: Keep It Fresh
Now that we've got the looks down, let’s talk about storage. if you have any leftovers (but, honestly, who does? 😉), store your red velvet cake in an airtight container.
It’ll stay fresh for about three to four days at room temperature. if you're making it ahead of time, you can freeze the cake without frosting.
Just wrap it tightly in plastic wrap and store it in the freezer for up to three months. pop it in the fridge overnight to thaw when you're ready to frost.
Reheating, if you somehow have leftovers, isn't too tricky. just pop a slice in the microwave for about 10-15 seconds to warm it up.
Add a scoop of vanilla ice cream on top, and you’ve got yourself a little piece of heaven.
Creative Variations: Spice It Up!
Feeling wild? let’s talk variations! if you want to give your red velvet cake a twist, you can play around with flavors .
For a seasonal flair, throw in a hint of pumpkin spice during fall, or add some freshly zested lemon in the spring.
If you’re catering to dietary needs, you can make it gluten-free by swapping in a 1:1 gluten-free flour blend. ooh, or even try a vegan version by replacing eggs with applesauce or flax eggs.
Who says you can’t enjoy a scrumptious red velvet cake no matter your diet, right?
Complete Nutrition Guide: Balancing Indulgence
Now, i know those calories can scare some folks. a slice of this beauty packs in about 380 calories . it’s not the healthiest choice, but it’s definitely a treat.
The good news? using buttermilk adds some calcium and protein, making it that much more tempting to share (or not, no judgment here!).
When serving, think about balancing your portions. Believe me, this cake is rich, and a smaller slice goes a long way. Pair it with fruit or a savory dish for some balance.
Final Thoughts
There you have it a breakdown of the ultimate red velvet cake recipe. it can feel a bit daunting, but with these tips , you’ll be the star of your next gathering! just imagine the smiles as folks dig into your stunning creation.
So, grab your apron and get ready to make some magic happen. bake, share, and enjoy every delicious bite! you got this!
Frequently Asked Questions
What is a red velvet cake recipe, and how is it different from regular chocolate cake?
A red velvet cake recipe is known for its striking crimson color and is traditionally flavored with cocoa powder, buttermilk, and a hint of vinegar. Unlike regular chocolate cake, which is darker and chocolate heavy, red velvet combines a subtle cocoa flavor with a tangy richness, enhanced by the cream cheese frosting that typically accompanies it.
Can I make red velvet cake ahead of time?
Absolutely! You can bake the red velvet cake layers a day in advance. Just wrap them tightly in plastic wrap and store in the fridge. Frost the cake on the day you plan to serve it for the best texture and freshness.
Alternatively, you can freeze the layers for up to a month; just ensure they are well wrapped to avoid freezer burn.
What are some variations I can try with this red velvet cake recipe?
There are endless possibilities! You can opt for chocolate frosting instead of cream cheese for a rich twist, or add a layer of raspberry jam for added flavor. For a fun twist, try making red velvet cupcakes or use white chocolate chunks within the batter for an unexpected treat!
How should I store leftover red velvet cake?
Store leftover red velvet cake in an airtight container in the fridge for up to 4-5 days. If you need to keep it longer, you can freeze individual slices. Just wrap them tightly in plastic wrap, then place in a freezer safe bag; they'll stay good for 2-3 months.
Can I make a red velvet cake recipe dairy-free?
Yes, you can easily adapt the recipe! Substitute the buttermilk with almond milk or coconut milk mixed with a tablespoon of vinegar or lemon juice to mimic the acidity. Ensure that the cream cheese is also swapped with a dairy-free alternative for the frosting, if needed.
What’s the best way to achieve a smooth frosting on my red velvet cake?
To get a flawless frosting on your red velvet cake, it's crucial to start with cooled layers. Use an offset spatula or a knife to apply a crumb coat first, which helps trap loose crumbs.
Allow it to chill for about 15 minutes in the fridge before applying the final layer of frosting for a clean, professional looking finish.
Red Velvet Cake With Cream Cheese Frosting A Cla

Ingredients:
Instructions:
Nutrition Facts:
| Calories | 380 |
|---|---|
| Fat | 20g |
| Fiber | 1g |
