Restaurant Style Salsa: the Silky Smooth, Quick Blender Recipe You Need
- The Takeaway Favourite: Silky Smooth Restaurant-Style Salsa (A Quick Blender Recipe)
- Mastering the Depth: The Science Behind Perfect Restaurant Style Salsa
- Essential Components for Authentic Restaurant Style Salsa
- Blended to Perfection: Step-by-Step Directions
- Troubleshooting and Expert Technique Upgrades
- Storing Your Homemade Restaurant Style Salsa for Maximum Freshness
- More Than Just a Dip: Creative Ways to Serve Silky Salsa
- Recipe FAQs
- 📝 Recipe Card
The Takeaway Favourite: Silky Smooth Restaurant Style Salsa (A Quick Blender Recipe)
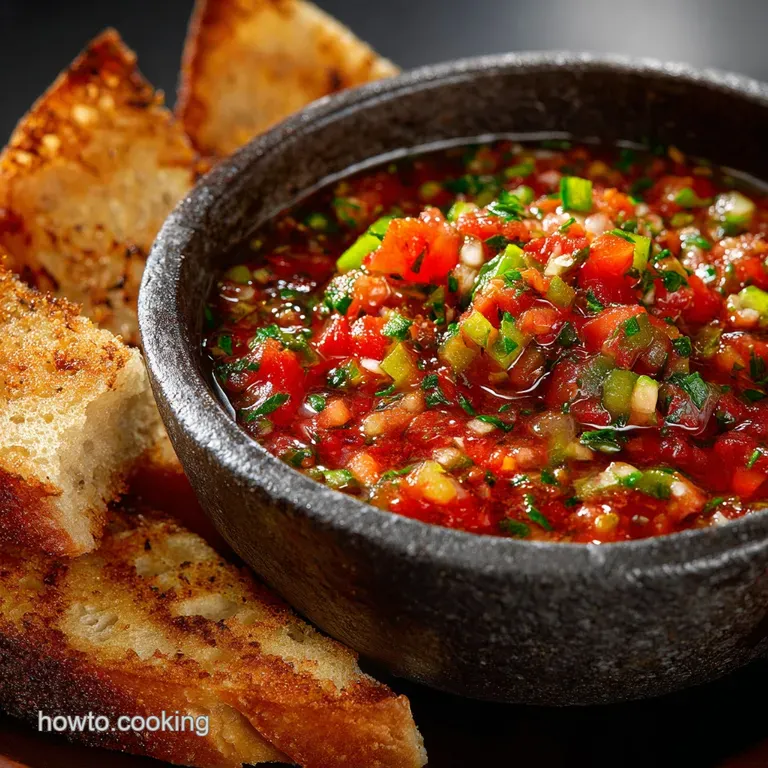
Oh man, that smell. When you walk into a great Tex-Mex spot, you get that intense, vibrant aroma of fire roasted chiles and warm cumin instantly. That’s the feeling we are chasing with this specific [Restaurant Style Salsa Recipe].
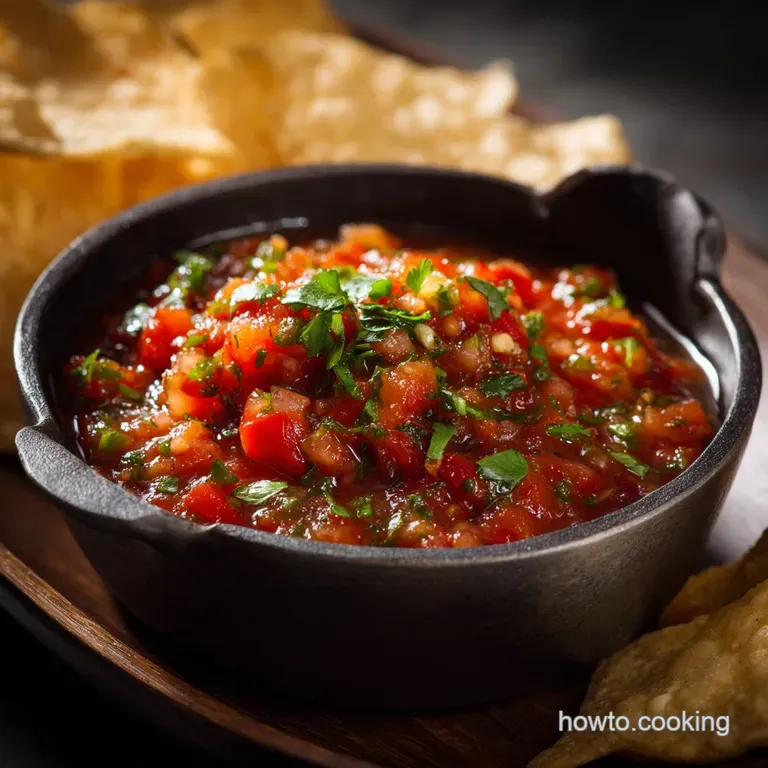
This isn't chunky, pico de gallo territory; this is the deeply flavourful, brick red, velvety dip that guarantees you’ll smash through a whole basket of chips before your main course arrives.
Honestly, buying jarred salsa that tastes this complex is impossible, and paying five bucks for a tiny cup of watery stuff is basically a crime. This easy homemade salsa recipe takes less than an hour from start to dip, it’s dirt cheap to make in huge batches, and it tastes infinitely better than anything store-bought.
It’s a complete lifesaver for fast weeknight meals or when you need a huge spread for a party.
I spent years blending watery messes before I cracked the true secret to restaurant salsa flavor. It isn't about exotic ingredients; it's all about one key technique charring. Ready to dive in and elevate your chip game forever? Let’s make the best Restaurant Style Salsa you've ever had.
Mastering the Depth: The Science Behind Perfect Restaurant Style Salsa
What Separates Smooth Salsa from Chunky Pico de Gallo
The biggest difference comes down to cooking method and texture. Pico de Gallo is fresh, vibrant, and requires serious knife skills for its uniform chunkiness. This easy homemade salsa, however, gets its flavour depth from a heavy char on the fresh ingredients, followed by a quick blend.
We want it perfectly smooth, almost velvety, with a tiny bit of texture left just so you know it was homemade.
Why Charring Your Vegetables Is Non-Negotiable
Charring the tomatoes, onions, and jalapeños under a over high heat broiler concentrates their natural sugars and removes excess moisture. This is absolutely mandatory for deep flavour. Don't skip this step or your salsa will taste flat, metallic, and watery.
It takes 15 minutes and transforms everything.
Equipment Check: Using Your Blender for Silky Results
A food processor will chop your ingredients, but it usually doesn't create the smooth, emulsified texture that defines this style of salsa. You really need a high speed blender here.
It processes the vegetables quickly and evenly, ensuring that beautiful, slightly emulsified consistency that clings perfectly to the chip.
The Maillard Reaction: Unlocking Smoky, Complex Flavour
When you char the veggies, you’re encouraging the Maillard Reaction, which is just a fancy way of saying "creating amazing flavor depth." The black spots on the tomatoes aren’t just burnt; they are little pockets of concentrated, smoky sweetness.
That smoky complexity is the true secret to restaurant salsa flavor.
Balancing Acidity and Heat for Optimal Taste
We need brightness to cut through the depth of the cooked tomatoes. This comes from fresh lime juice, giving it that necessary zing. The small addition of vinegar deepens that acidity, adding a specific tanginess often found in the best restaurant salsa. It's the perfect sweet and sour counterpoint to the heat.
Achieving the Signature Silky Smooth Texture
The key here is using a combination of fresh Roma tomatoes (charred for flavour) and canned tomatoes (for body and color). The canned tomatoes provide a stability and rich, brick red hue that fresh tomatoes alone often can't deliver consistently. When blended, this combination gives us that perfect, lush texture.
Essential Components for Authentic Restaurant Style Salsa
Selecting the Right Canned Tomatoes for Body and Color
For ultimate flavour, I swear by canned fire roasted tomatoes. They add an extra layer of ready-made smokiness that just boosts the char we already created. If you can’t find those, use regular whole peeled canned tomatoes, but be sure to stir in a 1/4 teaspoon of smoked paprika when you blend everything.
| If You Don't Have... | Use Instead... |
|---|---|
| Canned Fire Roasted | Standard whole peeled tomatoes + 1/4 tsp Smoked Paprika |
| Roma Tomatoes | Any thick fleshed, ripe tomato (e.g., vine ripe) |
The Role of Fresh Onion and Garlic in the Charring Process
Charring the onion quarters mellows their harsh bite and brings out a lovely sweetness. The garlic, which we char unpeeled , roasts inside its papery skin, turning deeply sweet and nutty.
Trust me, roasted garlic is the backbone of this whole dish; raw garlic would overwhelm the subtle smoky notes.
Spice Level Control: Working with Jalapeños and Chiles
I always recommend starting with two whole jalapeños, seeds and all, for a medium heat level. If you prefer a milder salsa, slice the peppers and scrape out all the white membrane and seeds before you char them. For serious heat, substitute one jalapeño for a small Serrano pepper.
You control the heat, but don't omit the chile altogether it's essential for flavor.
Blended to Perfection: step-by-step Directions
Stage 1: Preparing and Charring the Aromatics Under the Broiler
- Prep the Broiler: Move the oven rack to the highest position (about 4 6 inches from the heat source) and preheat your grill/broiler to high. Line a sturdy baking sheet with foil for easy clean-up.
- Arrange the Veggies: Halve your Roma tomatoes, roughly quarter the onion, and place the jalapeños and the unpeeled garlic cloves on the sheet pan.
- Char Time: Slide the pan under the broiler. Broil for 10– 15 minutes, using tongs to flip the vegetables once halfway through, until they are blackened and collapsed. The garlic skin should be completely black that means the inside is sweet and creamy.
- Cool and Peel: Remove the pan and let the vegetables sit for five minutes. Squeeze the soft, sweet garlic cloves out of their charred skins and discard the peels.
Stage 2: Combining and Pulsing the Ingredients in the Blender
- Load the Blender: Transfer all your charred vegetables (tomatoes, onion, jalapeños, and peeled garlic) into your high speed blender jug.
- Add the Rest: Add the drained fire roasted canned tomatoes, the can of diced tomatoes (liquid and all), fresh cilantro, lime juice, cumin, oregano, and salt.
- Blend (Crucial Step): Secure the lid and pulse 8 10 times only. We are looking for a smooth texture that still has a hint of body and structure. If you blend too long, it will become foamy and runny.
- Final Seasoning: Taste the salsa now. Add the optional sugar if the tomatoes taste too acidic, and adjust the salt levels. If it seems too thick, add a tablespoon of water or extra tomato juice from the canned tomatoes.
Stage 3: Simmering for Flavor Fusion and Optimal Consistency
Chef’s Note: While some cooks skip this step, heating the salsa for 5 minutes after blending transforms it. It allows the spices (like cumin) to bloom properly and helps the acidity settle down, resulting in a more integrated, rounded flavour.
Just bring it to a gentle simmer on the stove and stir occasionally.
Troubleshooting and Expert Technique Upgrades
Mistake 1: Blending for Too Long (The Foamy Salsa Problem)
If your salsa comes out looking suspiciously pale pink or foamy, you blended it for too long. Excessive blending incorporates air and oxidizes the tomatoes, making the texture light and airy, not rich and dense. The Fix: Don’t panic.
Let the salsa rest in the fridge for several hours; the foam usually settles down and dissipates.
Tip for Texture: Adjusting Water or Tomato Juice for Desired Thickness
The water content in fresh tomatoes varies drastically. If your salsa is too thick after blending, add a tablespoon of water or the reserved liquid from the canned tomatoes until it reaches the desired consistency.
If it's too thin, let it simmer on the stove for an extra 5 minutes to reduce some of the liquid.
Enhancing Depth: Adding a Splash of Vinegar Post Blend
I always add a small tablespoon of vinegar, usually apple cider vinegar, right into the blender. This little bit of concentrated acid provides a deeper, cooked acidity that lime alone can't replicate. It’s a cheap trick that dramatically enhances the overall flavor profile of your easy homemade salsa.
Storing Your Homemade Restaurant Style Salsa for Maximum Freshness
Shelf Life: Refrigerating Leftovers Safely
Store your finished, cooled salsa in an airtight container in the fridge. Because of the cooked and acidic ingredients, it will safely last for 4 to 5 days. Remember: The flavour peaks on day two!
How to Freeze Large Batches of Salsa (And Why You Should)
You bet this stuff freezes well! I often double the batch just for freezing. Simply transfer the cooled salsa into freezer safe containers or heavy duty freezer bags, leaving about an inch of headspace for expansion. It holds its flavour beautifully for up to 3 months.
When you’re craving a fast snack, pull it out the night before.
Reheating & Revitalizing Chilled Salsa
Salsa is traditionally served slightly warm or room temperature, especially in restaurants. When you pull it from the fridge, allow it to sit on the counter for 20 minutes before serving.
If you froze it, thaw it completely and give it a vigorous stir; the texture can sometimes separate slightly but blending for two quick pulses fixes it immediately.
More Than Just a Dip: Creative Ways to Serve Silky Salsa
The Ultimate Pairing: Choosing the Right Tortilla Chip
For this smooth, rich restaurant style salsa, you need a sturdy, slightly thicker corn chip that can handle the weight and cling. Avoid the thin, flimsy ones they will shatter under the pressure. Look for a chip labeled "cantina style."
Salsa as a Base: Upgrading Tacos and Enchiladas
This salsa is so much more than a dip; it's a fantastic cooking base. Use it instead of canned sauce to simmer shredded pork or chicken, or spread it generously on tortillas before assembling your enchiladas. If you want something brighter for a dipping snack, however, try my Pineapple Mango Salsa Fresh Tropical and Ready in Just 20 Minutes for a sharp, fruity contrast.
Using Salsa in Breakfast and Brunch Dishes (E.g., Huevos Rancheros)
Drowning your eggs in this salsa is mandatory. Spoon it hot over soft scrambled eggs, serve it with crispy potatoes, or use it as the foundational sauce for perfect Huevos Rancheros. The depth of flavor from the charred tomatoes really makes breakfast sing.

Recipe FAQs
How do I achieve that silky smooth texture without the salsa becoming watery or thin?
Over blending the salsa breaks down the tomato cell walls, which releases excess water and makes the texture thin. To prevent this, use the pulse setting on your blender or food processor, stopping immediately once the desired smooth consistency is achieved.
If your salsa is still too thin, gently simmer it on the stove for 5 10 minutes to allow the excess moisture to evaporate.
My salsa tastes very acidic or metallic. How can I fix the flavor balance?
A high acidity level is common when relying heavily on canned tomatoes. To correct this, stir in a very small amount (about 1/4 teaspoon) of sugar or honey to neutralize the acid without making the salsa sweet.
Ensure you have properly seasoned the batch with sufficient salt, as salt is essential for rounding out the deep savory flavors.
Why is charring or roasting the vegetables (peppers, onion, garlic) essential for this recipe?
Charring is the foundational technique that gives restaurant salsa its signature depth and complexity a flavor you cannot achieve with raw ingredients. The high heat caramelizes the natural sugars in the vegetables and creates a rich, smoky, umami flavor profile.
This process transforms simple ingredients into the deeply savory base required for authentic Mexican salsa.
How can I adjust the heat level of the salsa without sacrificing the flavor?
The majority of the heat is concentrated in the seeds and white membrane of the chiles. For precise control, start by using only the flesh of the pepper, adding small amounts of the seeds gradually while tasting in between pulses.
Alternatively, use a milder chile variety like New Mexico or Anaheim pepper in conjunction with a small amount of adobo sauce from a can of chipotles for pure flavor.
Can I use fresh, uncooked tomatoes instead of canned or fire roasted varieties?
You can use fresh tomatoes, but they must be roasted or boiled first to soften them and concentrate their flavor, otherwise your salsa will be thin and excessively bright. Using raw tomatoes will result in a very different product, leaning towards a chunky, crisp pico de gallo rather than the smooth, deep flavor of restaurant style salsa.
If using fresh, make sure to roast them thoroughly alongside your peppers and onions.
Does homemade salsa freeze well, and what is the best way to store it long term?
Yes, homemade salsa freezes excellently. Pour the cooled salsa into airtight, freezer safe containers, leaving about an inch of headspace because the liquid will expand when frozen. When thawing, do so overnight in the refrigerator; you may notice some water separation, but a quick stir will reintegrate the components.
I charred my vegetables but the final product tastes bitter or too smoky. What went wrong?
Bitterness often occurs if the vegetables (especially the garlic) were charred too deeply or burnt black, releasing bitter compounds. If the issue is smokiness, you may have used too much chipotle or smoked paprika.
To counter excessive bitterness, try blending in a small amount of extra fresh lime juice and a handful of fresh cilantro to brighten the flavor profile.
Restaurant Style Salsa Blender Recipe
Ingredients:
Instructions:
Nutrition Facts:
| Calories | 40 kcal |
|---|---|
| Fat | 0.5 g |
| Fiber | 2 g |
