Scooby-Doo Shot Glass Treats
- Shaping Childhood Memories with Scooby-Doo Shot Glass Treats
- Diving into the Delightful Treat
- Sweet Benefits of Scooby-Doo Shot Glass Treats
- The Essential Ingredients Guide: Building Blocks for Your Kitchen
- Mastering the Art of Professional Cooking
- Additional Recipe Information for Scooby-Doo Shot Glass Treats
- 📝 Recipe Card
Shaping Childhood Memories with Scooby Doo Shot Glass Treats
I’ll be honest with you, my love for scooby doo started way back when saturday morning cartoons were basically a national treasure.
It was pure joy, sitting in pajamas, munching on cereal, and cheering on scooby and the gang as they solved mysteries.
Fast forward to now, and you know what? i've decided to bring a little of that magic into my kitchen with scooby doo shot glass treats !
Picture this: it’s a warm afternoon, and you’re about to dive into a dessert that packs a punch of nostalgia and flavor.
If you’ve ever thought, “i wish dessert could be a party in a glass,” then these fun shot glass desserts are for you.
Seriously, each layer looks so good that you wouldn’t even know it’s an easy layered dessert recipe . let’s get into why these treats are the perfect choice for birthday parties, halloween shindigs, or just a casual hangout!
Diving into the Delightful Treat
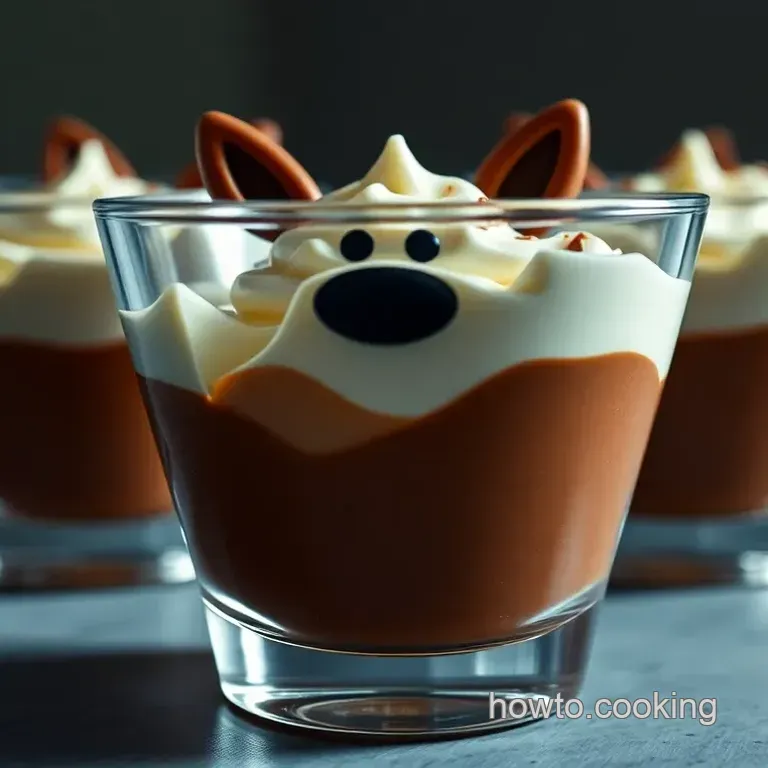
These scooby doo shot glass treats are not just any ordinary dessert, they’re a whimsical tribute to the iconic show that we all loved growing up.
Think about it where did we first see spooky ghosts and creepy monsters? right! and that nostalgia’s gonna taste even better when layered beneath some rich chocolate pudding , fluffy whipped cream treats , and crunchy graham cracker crumbs.
Now, let’s sprinkle in some history. these little gems aren’t just a recent fad. they've been popping up at parties for years reaching their peak in the no-bake dessert era.
It’s all about those effortless yet creative desserts that let our inner chefs shine without overwhelming us. who even has time to bake when you can whip up quick dessert recipes in 45 minutes total?
And here’s the kicker the cost. honestly, you can whip up six servings of these layered delights for a rock bottom price.
Just grab some chocolate pudding shots , heavy cream, and graham crackers, and boom! you have yourself the perfect scoop of storytelling goodness.
Sweet Benefits of Scooby Doo Shot Glass Treats
Now, let’s chat about the good stuff. these aren’t just cute they're loaded with benefits. first off, we’ve got health benefits! okay, maybe it’s not exactly kale, but let’s remember the magic of whipped cream.
It’s a beloved comfort food!
These treats are also a total crowd pleaser. regardless of age, whether you’re serving kids at a birthday bash or your adult pals for tequila shots, they’re kid-friendly dessert ideas that everyone will adore.
Think about those themed parties; hello, scooby parties are the best!
One more fun fact: these are so much more than just your average dessert. with their beautiful layered presentations, they beat out those fancy desserts for gatherings hands down.
Seriously, who isn’t a sucker for a layered dessert in glasses ? the spectacle itself will have everyone chatting!
Remember how your mom would tell you to eat dessert after dinner? well, picture bringing these to a potluck or a family get-together, and suddenly everyone’s a kid again.
Plus, for any adults that stroll by, they’ll pick up the nostalgic vibe. these desserts are basically a love letter to childhood, and they’re here to stay!
So now that we're all drooling, let’s talk about what you actually need to make these over the-top treats. Gather your ingredients and jump right in!
In the next section, I’ll be serving up the full ingredient list for these Scooby Doo Shot Glass Treats . Trust me, you’re gonna want to start preparing right away!
The Essential Ingredients Guide: Building Blocks for Your Kitchen
So, you’re diving into the world of home cooking, and it can be a bit overwhelming, right? i mean, where do you even start? fear not! this essential ingredients guide is here to help you whip up delicious meals without losing your mind.
Premium Core Components
First off, let’s talk about some premium core components every kitchen should have. These are the staples that can make or break your dish.
Measurements : you’ll want to keep a set of measuring cups handy. for our friends in the metric world, that’s 240 ml for a cup or 480 ml for 2 cups.
Trust me; being precise can save a lot of headaches.
Quality indicators : keep an eye out for fresh ingredients. look for rich colors, good textures, and, oh my gosh , don’t shy away from smelling! a ripe tomato should smell heavenly, while a sad, old one won’t inspire any culinary creativity.
Storage guidelines and shelf life : know how to store your food. most spices last about 2-3 years in a cool, dark place.
Fresh herbs? use them up within a week or two.
Freshness Tips : Always pick seasonal produce when possible. Not only does it taste better, but it’s often cheaper, too! Farmers' markets are like treasure hunts for fresh ingredients.
Spice it Up: Signature Seasoning Blend
Now that you’ve got your base, let’s spice things up! A signature seasoning blend can elevate any dish from bleh to wow.
Essential Spice Combinations : Think salt, pepper, garlic powder, and maybe a hint of paprika.
Herb Selections : Basil and oregano are like peanut butter and jelly for Italian dishes. Thyme and rosemary? Perfect for grilled meats.
Flavor Enhancers : Don’t underestimate the power of citrus zest or a splash of good vinegar. They’re game changers.
Regional Variations : From Southern BBQ rubs to Italian herb blends, try different combos to see what tickles your fancy.
Smart Substitutions
We all cook with what we have, right? Smart substitutions are lifesavers when the recipe calls for something you don’t have.
Common Alternatives : No buttermilk? Mix regular milk with a splash of vinegar, and bam! You’re good to go.
Dietary Modifications : Lactose intolerant? Reach for almond milk. Vegan? Swap out dairy for coconut cream in your whipped toppings.
Emergency Replacements : If you run out of baking soda, baking powder can often do the trick (but double check the ratios!).
Seasonal Options : Use pumpkin in the fall and fresh berries in the summer for fun twists.
Kitchen Equipment Essentials
Alright, let’s get real about kitchen equipment essentials .
Must Have Tools : A good chef's knife, cutting board, and a mixing bowl can take you far. Oh! And don’t forget a set of mixing spoons!
Alternative Equipment : Don’t have a whisk? You can use two forks in a pinch.
Preparation Tips : Always prep your ingredients first. It smooths out the cooking process and makes you look like a pro!
Storage Solutions : Invest in quality containers for leftovers. This keeps your food fresh and your fridge organized.
So, whether you’re making scooby doo shot glass treats for a birthday bash or creative dessert presentations for a halloween party, these essential ingredients and tools will give you the confidence to get it done.
Speaking of treats, let’s dive into that fun, easy layered dessert recipe in shot glasses. Trust me; your friends are gonna love these cute little desserts that just scream “party time!” Keep reading down below for those super simple instructions to get you layering like a pro!
Mastering the Art of Professional Cooking
Alright friends, let’s dive into the world of professional cooking! whether you're a newbie or a seasoned chef, nailing the essential preparation steps is key to whipping up flavorful dishes.
It's kinda like getting ready for a big scooby doo binge; you want everything at your fingertips. so, let’s break it down!
Essential Preparation Steps
Mise en place: this fancy french term just means “everything in its place.” seriously, if you prep all your ingredients chop those veggies, measure out your spices before heating things up, you're golden.
It saves time and keeps things less chaotic. imagine trying to find your scooby doo shot glass while cooking! that’s not gonna happen.
Time management tips: use timers! i swear by them. set a timer for each step if you need to. this is especially helpful when you’re juggling multiple dishes.
It’s like keeping track of scooby and shaggy in their goofy adventures chaos managed!
Organization strategies: keep your workspace tidy. i’m talking about a clean counter, a well stocked pantry, and using proper dish placements.
It’s much easier to whip things up when you aren’t elbow deep in dish confusion.
Safety considerations: always wash your hands and make sure to handle knives with care. cooking should be fun, not a scary episode of scooby doo! keep that first aid kit handy, just in case.
step-by-step Process
Here's where we get into the nitty gritty:
Prepare Ingredients First: Always read through your recipe completely, and gather your ingredients. Cuts down on surprises!
Temperature Control Points: Keep an eye on those temperatures! Meat should be cooked to at least 165° F ( 74° C) and stove temperatures? Start low and adjust as needed.
Timing Precision: Cooking is an art form. A minute too long and that beautiful chocolate soufflé can flip into a sad pancake.
Visual Cues for Doneness: Learn to trust your eyes! Look for that golden crust or bubbling sauce these are the signs you’re on the right track.
Expert Techniques
Now let’s jazz things up a bit. Here’s the lowdown on some expert techniques to elevate your cooking game:
Professional Methods: Master the sauté technique for veggies. It gives them that perfect char, without becoming mushy.
Critical Steps Explained: Let your meat rest after cooking. Don’t slice right away! This helps juices redistribute. It’s the culinary version of binge watching don’t rush to the good part!
Quality Checkpoints: Always taste your food as you go. It’s all about finding that perfect balance.
Troubleshooting Tips: If a sauce is too thick, add a splash of broth or wine keeps things rolling smoothly!
Success Strategies
We’ve all made rookie mistakes in the kitchen. Here’s how to avoid them:
Common Mistakes to Avoid: Don’t overcrowd the pan it leads to steaming instead of searing.
Quality Assurance Tips: Use fresh ingredients whenever possible. You won’t believe how a sprig of fresh basil can jazz up a dish!
Perfect Results Guide: Practice makes perfect! The more you cook, the more confidence you'll have. And remember, even the pros have off days.
make-ahead Options: Always prepare sauces and marinades in advance they get better with time. It's like how Scooby’s adventures get better with every episode!
And if you're feeling particularly inspired, why not whip up those scooby doo shot glass treats ? these mini dessert cups are awesome for parties, and the kids will go nuts for those layers of chocolate pudding and whipped cream.
You can prep them in no time and chill while the flavors meld together talk about a quick dessert recipe !
Finally, if you're new to this whole cooking thing, don’t sweat it. everyone starts somewhere. these tips will help you nail that easy layered dessert recipe or any meal you choose.
The kitchen is your playground; feel free to experiment!
Stay tuned for the next section, where we’ll dive into more additional information for becoming the home chef you’ve always dreamed of being!
Additional Recipe Information for Scooby Doo Shot Glass Treats
Pro Tips & Secrets
Oh my gosh, let me tell you, making these scooby doo shot glass treats is a total blast! here’s some of my personal insights to make the process smoother.
Chill your tools whip your cream in a chilled bowl! it really helps make those fluffy peaks without a struggle.
Also, when layering, pack down each layer slightly. this not only looks better but helps prevent overflow.
And don’t skip the taste test! adjust the sweetness in your whipped cream. i usually go for just enough sugar to balance out that rich chocolate pudding.
Trust me, it makes a world of difference!
Perfect Presentation
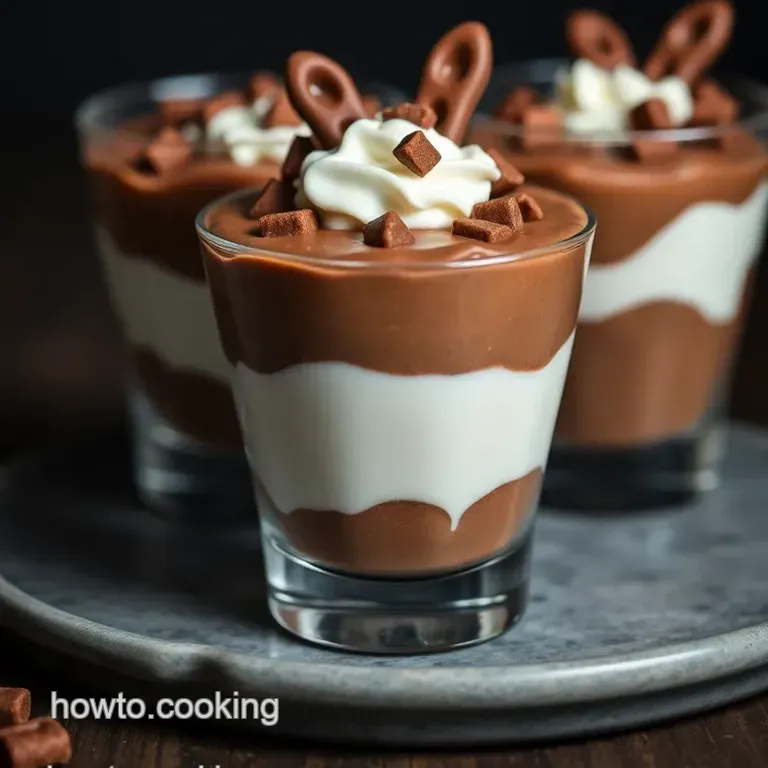
Now, let's talk presentation. everyone knows that we eat with our eyes first! use colorful mini chocolate chips or bright sprinkles atop your whipped cream.
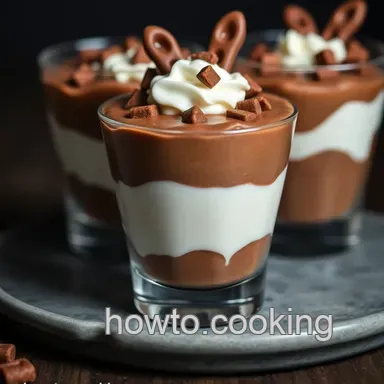
This adds that pop of color and makes your treats ultra festive. layered desserts look fabulous in glasses, so stack those pudding, cream, and crumbs evenly.
If you want to take it a notch higher, drizzle some chocolate syrup down the sides of the glass before layering.
Wow, right?
Don’t be shy with your creativity. ever thought about using a fun shot glass with scooby doo graphics? it doubles the fun, especially for kids! kids and adults alike will adore these themed party desserts.
Storage & make-ahead
Wondering about storage? great news! these treats are super easy to chill. just cover them and pop them in the fridge for up to two days.
They might even get a little better, as the flavors meld together perfectly! if you're making them ahead of time, stick to the fridge till you’re ready to serve.
Just remember don’t freeze them! the whipped cream won't hold up well.
When it’s time to dig in, it’s best to enjoy them cold that thick chocolate and fluffy whipped cream combo is like a hug in a shot glass.
Creative Variations
You can totally get creative with this easy layered dessert recipe . mix it up! try a banana cream pudding instead of chocolate for a fruity fusion.
If you’re crafting these treats for a halloween party, toss in some crushed oreos for a spooky look. and for those going the health route, use dairy-free whipped cream for a lactose free spin.
Keep year round fun in mind too; think about seasonal twists! Pumpkin spice pudding can take center stage during fall. You might even try integrating some kid-approved treats as fillings gotta keep those little ones happy!
Complete Nutrition Guide
Alright, let’s keep it real with some numbers. Each serving of these treats is about 210 calories . Not too shabby, right? You get about 3g of protein but mind the sugar 12g per serving can sneak up on you, especially when you’re munching away mindlessly!
These no-bake dessert recipes not only tickle your taste buds but also pack some fun into any gathering. Just keep portions in check, especially if you're whipping them up for a big crowd!
Expert FAQ Solutions
You might have a few questions swirling in your mind, like how do i stop my whipped cream from deflating? well, try mixing it on high speed at the end to lock in that fluff.
And if your layers are oozing over the sides? pack them down a little more next time. it’s all about success tips learned from experience!
Conclusion
So, there you have it scooby doo shot glass treats are not just about taste; they're all about creating fun experiences.
Get your favorite shot glasses ready and dive into making these whimsical desserts that appeal to kids and adult fans alike.
I promise they'll disappear faster than you can say "mystery machine!" whether it’s a birthday party , halloween bash, or just a casual get-together, these treats will guarantee smiles all around.
So go ahead, have fun with it, and enjoy every tasty layer of these delightful creations!
Scooby Doo Shot Glass Treats
Ingredients:
Instructions:
Nutrition Facts:
| Calories | 210 |
|---|---|
| Protein | 3g |
| Fat | 12g |
| Carbs | 25g |
| Fiber | 1g |
| Sugar | 12g |
| Sodium | 120mg |
