Strawberry Earthquake Cake
- Is There Anything Better Than the Perfect Dessert?
- The Ultimate Guide to Mastering Strawberry Earthquake Cake
- Your New Favorite Strawberry Earthquake Cake
- Health and Nutrition Highlights
- Recipe at a Glance
- Master Ingredient List
- Kitchen Equipment Essentials
- Foolproof Cooking Steps for Strawberry Earthquake Cake
- Success Guaranteed Tips
- Perfect Presentation
- Storage and Make-Ahead
- Creative Variations
- Complete Nutrition Guide
- Expert FAQ Solutions
- 📝 Recipe Card
Is There Anything Better Than the Perfect Dessert?
Ever had a dessert that seemed like it could just break the scale? you know, that oh wow, did i just eat all of that? kind of feeling? today, we're diving into something that's deliciously dangerous: strawberry earthquake cake .
Trust me when i say this cake isn't just a pretty face. with its layers of strawberry goodness and rich cream cheese, it's a celebration of flavors, textures, and, oh yes, pure indulgence!
this recipe is moderately easy to whip up (i'll give it a solid medium on the difficulty scale), taking you about an hour and ten minutes from start to finish.
Perfect for gatherings or just a cozy weekend treat at home.
The Ultimate Guide to Mastering Strawberry Earthquake Cake
The history of earthquake cake dates back to the southern kitchens of yesteryear, where desserts were never just an afterthought they were the highlight, often served alongside tall tales and big laughs.
Fond memories like gathering around the table on a lazy sunday with a slice of sweet cake and a cup of tea live on every time i bake this dish.
Shoes off, laughter ringing through the kitchen, and the smell of something wonderful wafting in from the oven… that’s the real magic.
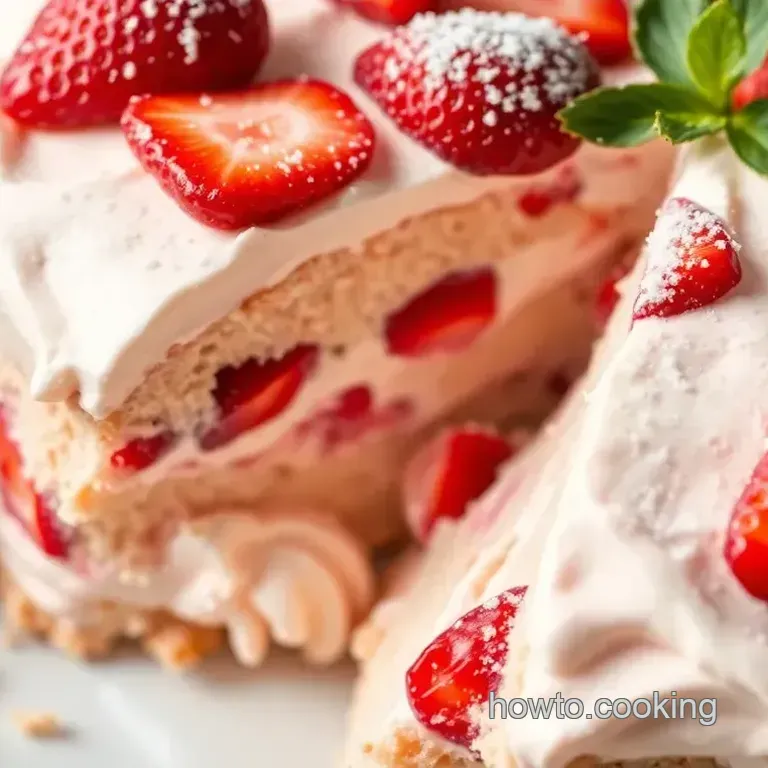
What sets strawberry earthquake cake apart from your average fare is its unique flavor combinations. you’ll find bursts of juicy strawberries mingling with the dreamy richness of cream cheese, while the coconut and nuts add texture.
It's got that nostalgic, homey feel to it, but with a twist that's unmistakably modern much like wearing your favorite old jeans with a fresh graphic tee.
Your New Favorite Strawberry Earthquake Cake
Let's talk layers! one of the reasons this cake holds a special place in my heart is the way it foils cake fatigue you know, when you’re mentally ready for dessert but started wondering if cake in itself has got a bit boring.
The cream cheese layer creates a delightful surprise, making every bite an adventure. and if you're like me and often find yourself juggling between recipes, don’t worry! i’ve turned this earthquake cake into a foolproof delight with expert tested methods you'll find easy to follow.
Plus, i’ve got time saving tips up my sleeve that’ll make you look like a baking pro in no time.
Health and Nutrition Highlights
Alright, let’s chat about health because, even though this is a dessert, we should still strike that balance. each slice has about 290 calories, which means you can enjoy a piece without too much guilt gnawing at you.
Just hold the whipped cream if you want to keep it on the lighter side! and while there’s a hearty amount of sugar (it’s a dessert after all!), it’s made up for with some whole ingredients like fresh strawberries and nuts, giving you a bit of fiber along with your sweet fix.
Plus, you can mix in some nut-free options if you're cooking for allergies, keeping everyone safe at the gathering.
Recipe at a Glance
- Total Preparation Time : 20 minutes
- Cooking Time : 50 minutes
- Total Time : 1 hour 10 minutes
- Skill Level Required : Medium
- Serving Size : 12 servings
Before we get to the juicy details of the ingredients you'll need, keep in mind that this recipe is incredibly flexible.
You can play around by adding different fruits or even using a chocolate cake mix if you're feeling adventurous. want to create a nutty cake topping? go for it!
So grab your apron, and let's get to the fun part the ingredients! you’ll be amazed at how simple these items are.
Remember, even the novice bakers among us can make this scrumptious strawberry earthquake cake without breaking a sweat. i promise you, this delightful cake will have your friends and family begging for seconds, and maybe even third just like i did at my first family dinner when i brought this gem along!
Master Ingredient List
Premium Core Ingredients
Let’s talk about your foundation here, the base ingredients —all the goodies you’re going to need for our showstopper, the strawberry earthquake cake . Make sure you grab:
- 1 box (15.25 oz) strawberry cake mix : Opt for a reputable brand; trust me, you’ll taste the difference. I usually go for one where the ingredients look less like a chemistry experiment.
- 1 cup water : Just plain ol’ tap water works, but if you have filtered water, that’s even better.
- 1/3 cup vegetable oil : This ensures the cake stays moist. I like canola oil, but any neutral oil does the trick. Stay away from olive oil though; it’ll weirdly alter the taste.
- 3 large eggs : Room temperature is best here for a fluffier cake. My last batch was a bit dense because I was impatient and used cold eggs. Whoops!
- 1 cup fresh strawberries, chopped : You want ripe, juicy ones! Look for ones that are a lovely shade of red without those pesky white tips. If strawberries aren’t in season, frozen works, just make sure they’re thawed and drained.
Signature Seasoning Blend
Okay, now let’s add some personality to our cake. This signature cream cheese layer is the magic carpet ride of flavors.
- 8 oz cream cheese, softened : Makes everything better! Schedule a little “softening” time or zap it in the microwave for about 10-15 seconds. But don’t get it too melty!
- 1/2 cup powdered sugar : Sweetness is life. Check the label to avoid those lumpy little inconsistencies.
- 1/2 teaspoon vanilla extract : Pure vanilla gives this cake soul. Don’t even think about those imitation versions. You’ll regret it!
And if you want to jazz it up a bit more, here’s the toppings section— the cherry on top :
- 1 cup shredded coconut : Unsweetened or sweetened, depending on your personal preference. I’m a coconut fanatic, so I lean toward sweetened!
- 1/2 cup chopped pecans or walnuts (optional) : Toss these in if you're feeling nutty. They bring some crunch, but don’t sweat it if you’re not a nut person.
- 1/2 cup chocolate chips (optional) : Because who doesn’t want a little chocolate, right?
Smart Substitutions
If you’re in a pinch or want to shake things up, here are some quick swaps :
- Swap out the strawberry cake mix for vanilla or chocolate if you’re feeling adventurous. Sometimes the kitchen gods lead us down unexpected paths!
- For a medley of flavors, substitute the strawberries with blueberries or raspberries. I once accidentally used blueberries totally eye-opening experience.
- If you need a nut-free zone , just skip them or replace with sunflower seeds. They provide a nice crunch without the nut allergy worries.
Kitchen Equipment Essentials
Now we can't bake without some handy tools! Here’s your short shopping list for success:
- Mixing bowls : I swear by at least two sturdy bowls. One for cake batter and another for your cream cheese mix. Chopped strawberries live here too!
- Electric mixer : Makes your life so much easier. Honestly, beating egg whites by hand is for the brave and foolish don’t be either!
- 9x13 inch baking pan : This is what will house your disaster cake (in a good way!). You can also use a glass dish; just let it heat up for a few minutes before pouring in your batter.
- Spatula : For getting every last bit of batter from the bowl; it’s a must!
Pro Ingredient Tips
Here’s where I spill the tea and share some golden nuggets I’ve learned the hard way:
- Always go for fresh strawberries over frozen if possible. Nothing beats that fresh flavor, especially during summer when they’re bursting with sweetness.
- For cream cheese, room temperature is non-negotiable. I once threw cold cream cheese into the mix and was left with lumpy sadness.
- Don't be a hero— don’t overmix . A gentle fold is all you need to keep those strawberries intact and the cake light. Trust me, I’ve learned!
Got all that? fantastic! you’re on your way to a delicious adventure with this gorgeous strawberry earthquake cake . just wait until you see how beautifully it comes together.
Next up, i'll guide you through the simple yet joyful process of bringing it all to life!
Foolproof Cooking Steps for Strawberry Earthquake Cake
Alright, grab your apron and let’s dive into making this delicious strawberry earthquake cake! i promise it’s straight-up foolproof and a real crowd pleaser, ideal for summer gatherings or just a cozy night in.
Let me share the nitty gritty on how to whip it up without breaking a sweat.
Essential Preparation Steps
Before you even think about turning on that oven, let’s get organized.
Mise en place : this fancy term just means having everything in its place. so, gather all your ingredients: strawberry cake mix, fresh strawberries, cream cheese, and those optional toppings like coconut and nuts.
It’ll save you from scrambling around like a headless chicken later on!
Prep techniques : for the strawberries, i like to dice them into bite sized pieces. make sure you wash and pat them dry first nobody likes soggy strawberries in their cake.
For the cream cheese layer, make sure it’s softened; this makes mixing a breeze.
Time management : the whole process takes about 1 hour and 10 minutes, so keep an eye on that clock.
Prep your ingredients, mostly for about 20 minutes, and then you’ll be baking for 50 minutes.
Organization tips : keep a clean workspace! it helps to have bowls for mixing and a few spatulas at hand.
Also, don’t forget to preheat your oven to 350°f (175°c) right at the start so it’s hot and ready when you are.
Professional Cooking Method
Now, let’s get our hands dirty and bake this cake!
Prepare your cake batter : in a large mixing bowl, whisk together 1 box of strawberry cake mix, 1 cup of water, 1/3 cup of vegetable oil, and 3 large eggs.
Beat it well on medium speed for about 2 minutes. you want it velvety smooth no lumps!
Incorporate the Strawberries : Using a spatula, gently fold in your chopped strawberries. Remember, be gentle! You don’t want to turn those lovely berries into mushy bits.
Craft the cream cheese layer : in another bowl, beat together 8 oz of softened cream cheese, 1/2 cup of powdered sugar, and 1/2 teaspoon of vanilla extract.
Keep mixing until it’s smooth as a jazz tune.
Layer it up : pour half of the cake batter into a greased 9x13 inch baking pan. then, dolop spoonfuls of that delectable cream cheese mixture over the batter.
Follow this by topping it with the rest of the cake batter. it’s gonna look a bit chaotic, but trust the process.
Add toppings : this is where it gets fun! sprinkle 1 cup of shredded coconut, and toss in some chopped pecans or walnuts if you’re feeling nutty.
Oh, and don’t forget the chocolate chips if you have a sweet tooth!
Bake to perfection : slide your cake into the preheated oven and bake for 40 to 50 minutes. a toothpick inserted into the center should come out clean as long as you don’t poke into the cream cheese layer (that would be tricky).
Cool and serve : after baking, let the cake cool in the pan for about 15 to 20 minutes. then cut it into lovely squares.
You can serve this warm or let it reach room temperature either way, it’s delicious !
Expert Techniques
Okay, so you’re not a pro baker yet, huh? No worries! Here are some critical steps to keep in mind:
Precision points : make sure your oven is actually at 350°f; an oven thermometer can be your best friend here.
Ovens can be sneaky, and you don’t want to end up with burnt edges or gooey centers!
Quality Checks : As soon as that toothpick comes out clean, your cake is done. But give it a little bounce test too! If it springs back, you’re golden.
Storage Tips : You can store leftover cake in an airtight container for about 2 days (if it lasts that long!). For longer freshness, pop it in the fridge.
Success Strategies
Now, I know sometimes things can go sideways in the kitchen, but let’s tackle these potential hiccups!
Troubleshooting Tips : If your cake seems too dense or wasn’t rising well, make sure your baking powder is fresh.
Quality Assurance : Always taste! If you think it needs more coconut or won’t hurt to throw in a bit more chocolate, do it. Cooking is all about personal touches.
Perfect results guide : you’ll know you’ve nailed it when your kitchen smells like a lovely bakery and the cake has a golden hue.
Presentation is key, so don’t be shy plate it up nicely!
If you need more ideas like creative cake toppings or other strawberry dessert recipes stick around! i’ve got plenty more sweet bites and baking tips to share in the next part of the article.
Your kitchen is about to become a dessert paradise!
Success Guaranteed Tips
When it comes to mastering the art of baking, i’ve learned a few tricks over the years that have ultimately juiced up the success of my strawberry earthquake cake .
Here are my tried and-true insights for anyone looking to bake with confidence.
Professional Insights
First things first, don’t skip the prep work. i used to get overly excited and dive right in, but taking the time to measure and prep your ingredients makes all the difference.
Having everything organized helps the baking go smoothly. trust me, there's nothing worse than realizing you left out the cream cheese layer halfway through baking!
Expert Techniques
While mixing your ingredients, i learned the hard way that overmixing can turn a fluffy cake into a brick. the key is to mix just until everything is incorporated and no dry bits remain.
Use a gentle folding motion when incorporating those luscious strawberries.
Kitchen Wisdom
Make sure your cream cheese is at room temperature before mixing. i once tried to hurry things along with cold cream cheese, and let’s just say my frosting turned out chunky, not smooth.
It’s all about those little details that make the big difference in the end.
Success Guarantees
And if you’re really anxious about baking maybe even sweating a little set a timer and check in. it’s a good way to keep from burning your masterpiece.
Ovens can be tricky, but you’ll get there!
Perfect Presentation
Okay, let's talk about how to make this cake not just tasty, but absolutely beautiful to behold. A cake that looks good is half the battle!
Plating Techniques
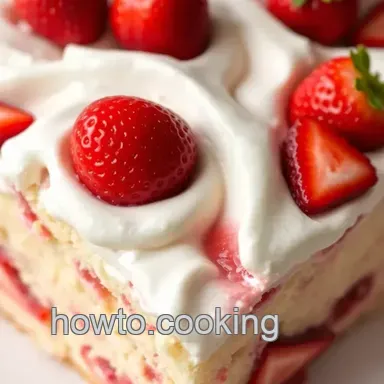
While your cake cools, you can think about how to serve it. use a large plate for that elegant touch and try to make sure each slice has some of that gooey cream cheese center.
Garnish Ideas
Don’t underestimate the power of garnish. a sprinkle of toasted coconut flakes on top can elevate it into the realm of professional pastries.
Plus, it adds a nice texture. i’ve been known to throw on a few edible flowers for whimsy!
Serving Suggestions
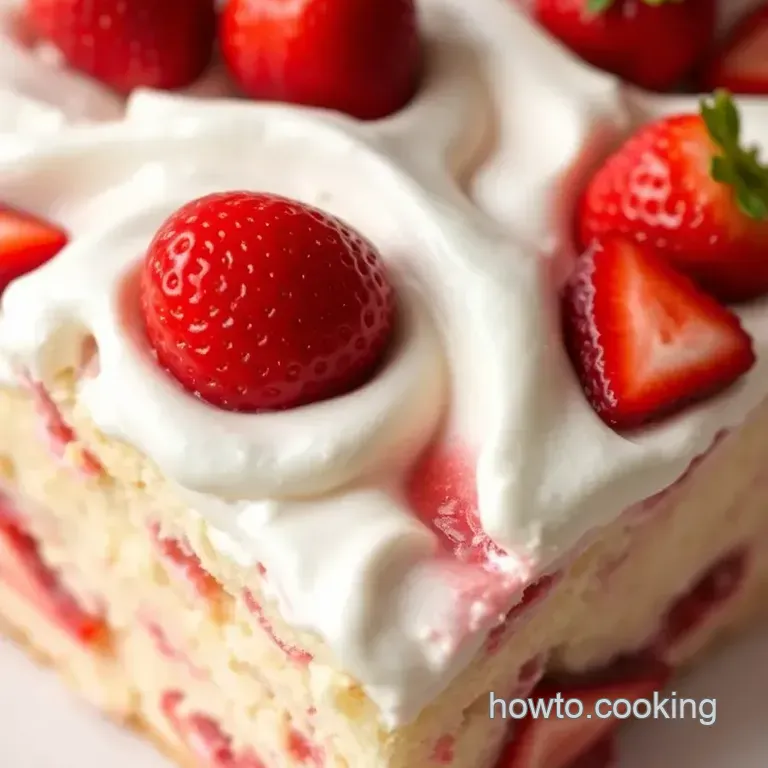
Serve your Strawberry Earthquake Cake warm, with a dollop of whipped cream and maybe a drizzle of chocolate sauce. Trust me, your guests will be swooning!
Visual Appeal Tips
The goal here is to make your cake so pretty that people want to take pictures of it because we all know a good dessert deserves an #insta moment.
Layer your whipped cream and fresh strawberries on the side, and watch as your cake steals the show.
Storage and make-ahead
So, you baked an extra cake, eh? No worries, I’ve got you covered on how to store and keep it fresh.
Storage Guidelines
If you have any leftovers (and i mean if, because this cake is so good ), wrap it tightly in plastic wrap or store it in an airtight container.
It can last about five days at room temperature.
Preservation Methods
You could also freeze this beauty! Just make sure it’s completely cooled. Wrap it up and it’ll be good for about three months. Perfect for those spontaneous dessert cravings.
Reheating Instructions
When you’re ready to serve, thaw it in the fridge overnight. pop a piece in the microwave for about 20 seconds, and you’ll have a warm slice reminiscent of how it tasted on day one.
Freshness Tips
To keep it extra fresh, try to store any whipped cream separately and add it right before serving.
Creative Variations
This cake is like a blank canvas perfect for getting creative!
Flavor Adaptations
Why not swap the strawberries for blueberries or raspberries? You could even use a chocolate cake mix instead of strawberry. The possibilities are endless!
Dietary Modifications
For a gluten-free version, opt for a gluten-free cake mix. It’s worked wonders for friends of mine who are gluten sensitive!
Seasonal Twists
Think about adding a dash of cinnamon or nutmeg in the fall. If you have some pears lying around, you could toss those in for a fun twist!
Regional Variations
Depending on where you live, you might be able to incorporate regional flavors like perhaps using local honey instead of sugar for a unique flavor profile.
Complete Nutrition Guide
Getting down to the nitty gritty, here’s all you need to know about what’s in each slice of this delicious Strawberry Earthquake Cake.
Detailed Breakdown
Each serving clocks in at around 290 calories. Not the worst for a comfort food dessert , huh?
Health Benefits
Of course, strawberries are loaded with vitamin C! Plus, this cake has a bit of protein thanks to the eggs and cream cheese.
Dietary Information
There’s a fair amount of fat in this beauty, but it’s all in moderation. Baking is about balance, right?
Portion Guidance
Although it serves 12, I’ve definitely seen some generous portions my friends are not shy about going back for a second slice!
Expert FAQ Solutions
Let’s tackle some common confusions when it comes to baking this delightful creation, shall we?
Common Concerns
“Why did my cake sink?” Ahh, the dreaded sink. This often happens if you open the oven door too soon. Be patient; give it some time!
Expert Answers
If you’re unsure about the texture of the cream cheese layer, just keep beating! The goal is a silky smooth batter.
Troubleshooting Guide
If your cake is too dry, next time try reducing the baking time a bit. Or, add a bit more oil.
Success Tips
Always trust your gut if something doesn’t feel right (like your cake batter looking too thick), adjust a little and keep going.
To wrap it all up, baking the strawberry earthquake cake can be a joyous experience when armed with these tips and insights.
Whether it’s for a summer gathering or a cozy night in, this cake embodies comfort and sweetness. i hope you all give it a try and make it your own.
Happy baking!
Strawberry Earthquake Cake
Ingredients:
Instructions:
Nutrition Facts:
| Calories | 290 |
|---|---|
| Protein | 3g |
| Fat | 16g |
| Carbs | 37g |
| Fiber | 1g |
| Sugar | 23g |
| Sodium | 175mg |
