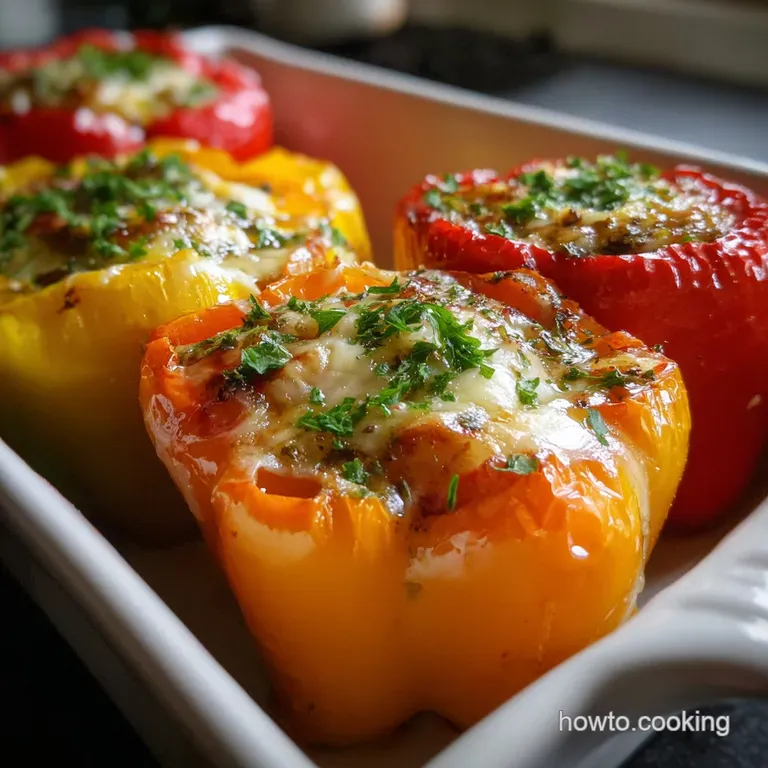
Stuffed Bell Peppers: Tender Crisp Shell
- Time: Active 15 minutes, Passive 25 minutes, Total 40 minutes
- Flavor/Texture Hook: Savory beef and melted cheese inside a tender crisp pepper shell.
- Perfect for: Wholesome family dinners or high protein meal prep.
- Create Savory Stuffed Bell Peppers Today
- Why This Flavor Profile Works
- Essential Recipe Specifications and Details
- Choosing Your Best Elements
- Tools for a Seamless Process
- Clear Steps for Success
- Solving Common Cooking Obstacles
- Flexible Choices for Everyone
- Scaling Advice
- Keeping Your Leftovers Fresh
- Creative Ways to Serve
- Kitchen Myths Debunked
- Recipe FAQs
- 📝 Recipe Card
Create Savory Stuffed Bell Peppers Today
Nothing beats the sweet, earthy aroma of roasting vegetables filling your home on a weeknight. I used to struggle with this dish because the peppers would either stay too crunchy or turn into a watery mess, but I’ve finally figured out the balance.
By lightly steaming the peppers before they even touch the filling, we ensure they reach that velvety texture without losing their structural integrity. It is the kind of meal that feels fancy but comes together with minimal fuss in the kitchen.
We’ve all had those stuffed peppers where the rice is grainy and the meat feels disconnected from the vegetable shell. Trust me, I have made those mistakes so you don't have to. The secret lies in the moisture management and the way we layer the flavors.
This version uses lean ground beef and a hit of smoked paprika to create a filling that is both nutritious and incredibly flavorful. You will love how the melted cheese forms a golden crust on top, locking in all those juices.
This recipe is designed for busy cooks who want reliability without spending hours over a stove. We are focusing on simple tools, a single skillet for the filling, and a baking dish that does the heavy lifting.
Whether you are cooking for a hungry family or prepping lunches for the week, these peppers hold up beautifully and reheat like a dream. Let’s get into the details so you can cook with total confidence tonight.
Why This Flavor Profile Works
The success of this dish comes down to how we handle the chemistry of the ingredients. By understanding a few basic principles, you can ensure the texture is always spot on.
- Pectin Breakdown: Pre steaming the peppers with a small amount of water weakens the pectin in the vegetable cell walls, allowing them to soften at the same rate as the meat filling.
- Maillard Reaction: Sautéing the ground beef and onions over medium high heat creates complex flavor compounds through the browning process, which provides that deep, savory base.
- Starch Retrogradation: Using pre cooked rice prevents the filling from becoming a gummy paste, as the rice grains have already stabilized and can absorb the tomato sauce without breaking down.
- Protein Denaturation: The lean ground beef provides structure, and adding the tomato sauce keeps the proteins from tightening too much and becoming tough during the final roast.
| Method | Time | Texture | Best For |
|---|---|---|---|
| Standard Oven | 25 minutes | Tender crisp peppers with a bubbly, golden cheese crust | Classic family dinners |
| Air Fryer | 15 minutes | Charred pepper edges and a very concentrated flavor | Quick meals for two |
| Dutch Oven | 35 minutes | Ultra soft, almost braised vegetables | Those who prefer a very soft texture |
Choosing the right method depends on how much time you have and how you like your vegetables. If you are looking for a more "casserole" style experience, you might enjoy my Stuffed Bell Pepper recipe which breaks everything down into a single dish. However, for the classic presentation, the oven method listed here is the gold standard for achieving that balanced bite.
Essential Recipe Specifications and Details
Before we start chopping, let's look at what makes these ingredients tick. Understanding the role of each component helps you become a more intuitive cook.
| Ingredient | Science Role | Pro Secret |
|---|---|---|
| Bell Peppers | Structural vessel | Choose peppers with four bumps on the bottom so they stand upright easily. |
| 90/10 Ground Beef | Protein base | Using lean beef prevents the peppers from sitting in a pool of excess grease. |
| Cooked Rice | Moisture absorber | Cold, day old rice works best because it stays separate and fluffy in the filling. |
| Tomato Sauce | Emulsifier | The acidity cuts through the fat of the beef and balances the sweetness of the peppers. |
The interaction between the acidic tomato sauce and the savory beef is what gives the filling its depth. When the peppers roast, they release their natural sugars, which caramelize slightly against the edges of the filling. This creates a harmony of flavors that you just can't get from a quick sauté alone.
Choosing Your Best Elements
You don't need a pantry full of rare items to make this work. Here is exactly what you need to gather, along with some smart swaps if you are missing something.
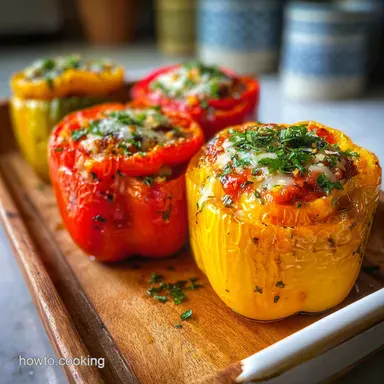
- 6 large bell peppers: About 1.2kg total. Any color works, but red and orange are naturally sweeter than green. Why this? Provides the essential sweetness and structural cup for the savory filling.
- 1 lb lean ground beef (90/10): Lean meat is key here. Why this? Offers high protein with minimal grease runoff during the baking process.
- 2 cups cooked rice: White or brown rice both work. Why this? Adds bulk and absorbs the seasoned tomato sauce for a cohesive texture.
- 1 cup yellow onion: Finely diced. Why this? Releases sulfur compounds that mellow into sweetness when cooked.
- 3 cloves garlic: Minced fresh. Why this? Provides an aromatic punch that deepens the overall savory profile.
- 1 can (15 oz) tomato sauce: Plain sauce is best. Why this? Acts as the binding agent and provides essential moisture for the rice.
- 1.5 cups shredded cheese: Mozzarella or sharp cheddar. Why this? Creates a fatty, salty lid that prevents the filling from drying out.
| Original Ingredient | Substitute | Why It Works |
|---|---|---|
| Ground Beef | Ground Turkey | Leaner profile. Note: Add 1 tsp olive oil to prevent dryness. |
| Cooked Rice | Quinoa | Higher protein and fiber. Adds a nutty flavor to the filling. |
| Tomato Sauce | Crushed Tomatoes | Creates a chunkier, more rustic texture in the filling. |
| Mozzarella | Monterey Jack | Melts beautifully with a slightly more buttery finish. |
If you find yourself wanting a lower carb option, many people swap the rice for cauliflower rice. It changes the texture slightly, making it more velvety and less chewy, but it absorbs the spices just as well. It’s a great way to keep the meal light while still feeling satisfied.
Tools for a Seamless Process
I am a big fan of using as few dishes as possible. For this recipe, you really only need a large skillet for the filling and a 9x13 inch baking dish for the roasting. A sharp chef's knife is non negotiable for cleaning out the peppers without tearing the walls.
If you don't have a baking dish that fits all six peppers snugly, you can use a large cast iron skillet. The heavy metal holds heat exceptionally well, which can actually help brown the bottoms of the peppers. Just make sure whatever you use has a lid or can be tightly covered with foil for that initial steam phase.
Clear Steps for Success

Let's get cooking. Follow these steps closely, and pay attention to the visual cues I've noted to ensure everything is progressing perfectly.
- Prep the peppers. Slice the tops off your bell peppers and remove the seeds and membranes. Rinse them well. Note: Keep the tops and dice the usable bits to add to your filling later for zero waste.
- Start the steam. Place the peppers upright in a baking dish. Pour 1/4 cup water into the bottom of the dish. Cover tightly with foil and bake at 375°F for 10 minutes until they are slightly softened but still hold their shape.
- Brown the beef. While the peppers steam, heat a large skillet over medium high. Add the ground beef and diced onion. Cook 5-7 minutes until the beef is browned and the onions are translucent.
- Add aromatics. Stir in the minced garlic, Italian seasoning, smoked paprika, salt, and black pepper. Cook for 1 minute until the garlic smells fragrant and the spices are toasted.
- Build the filling. Stir in the tomato sauce and the cooked rice. Let it simmer for 2-3 minutes until the sauce has thickened and the rice is evenly coated.
- Stuff the peppers. Carefully remove the peppers from the oven and drain any excess water from the dish. Spoon the beef mixture into each pepper, packing it down gently.
- Add the cheese. Top each pepper with a generous amount of shredded mozzarella or cheddar.
- Final roast. Return the peppers to the oven, uncovered. Bake for 15-20 minutes until the cheese is melted, bubbly, and shows golden brown spots.
- Garnish and rest. Sprinkle with fresh chopped parsley. Let them sit for 5 minutes until the juices settle and the filling firms up.
Solving Common Cooking Obstacles
Even with a reliable recipe, things can go sideways. Here is how to fix the most common issues people run into when making this dish.
Why Your Peppers Are Still Crunchy
If the peppers are still too firm after the total cook time, it usually means the steam phase was skipped or the peppers were particularly thick walled. You can fix this by adding a splash more water to the dish, covering it with foil, and popping it back in the oven for 5-10 minutes.
The trapped steam will finish the job without burning the cheese.
How Do I Fix a Watery Filling?
Watery filling usually happens if the onions weren't cooked long enough or if the rice was very wet. If you notice liquid pooling at the bottom of your peppers, you can sprinkle a tablespoon of breadcrumbs on top of the filling before adding the cheese next time.
For now, just let them rest a bit longer; the rice will continue to absorb liquid as it cools.
| Problem | Root Cause | Solution |
|---|---|---|
| Peppers falling over | Uneven bottom surface | Slice a tiny sliver off the bottom bumps to level them. |
| Dry meat filling | Beef was too lean or overcooked | Increase the tomato sauce by 1/4 cup or add a splash of beef broth. |
| Cheese burning | Oven rack is too high | Move the dish to the middle rack and tent with foil if needed. |
Common Mistakes Checklist: ✓ Always pre steam the peppers to avoid the "raw crunch" in the middle of your meal. ✓ Drain the grease from your beef before adding the rice to keep the filling light.
✓ Don't overfill the dish; leave a little space between peppers so heat can circulate. ✓ Let the peppers rest for at least 5 minutes before serving so they don't fall apart on the plate.
Flexible Choices for Everyone
This recipe is incredibly versatile. If you want to change things up, it is very easy to adapt the filling to different cuisines. For a different twist on the stuffed vegetable concept, you might want to try my Lasagna Stuffed Peppers recipe which brings those classic Italian pasta flavors into a low carb format.
For a vegetarian version, simply swap the ground beef for a mix of black beans and corn, or use a plant based meat crumble. If you go the bean route, add an extra teaspoon of smoked paprika and maybe some cumin to keep that savory depth.
You can also make these in an air fryer by following the same prep steps but "frying" at 360°F for about 12-15 minutes.
Scaling Advice
When cooking for a larger crowd, you can easily double this recipe. Just be aware that you will need two baking dishes. Don't try to cram 12 peppers into one dish, or they will steam rather than roast, and you'll miss out on that lovely charred flavor.
- Halving the recipe: Use 3 peppers and cut all filling ingredients in half. Since you'll use half an egg (if you were using one for binding, though we aren't here), just whisk it and measure out 2 tablespoons.
- Doubling the recipe: Use 12 peppers. Keep the spices to 1.5x the original amount first, then taste and adjust. Too much dried seasoning can become bitter if simply doubled.
Keeping Your Leftovers Fresh
Storage: These peppers stay fresh in the fridge for up to 4 days. Store them in an airtight container once they have cooled completely. To reheat, I recommend the oven or an air fryer to keep the pepper from getting too soft.
If you use a microwave, cut the pepper in half first so the center heats through evenly.
Freezing: You can freeze these for up to 3 months. Wrap each individual pepper tightly in plastic wrap and then foil. To eat, thaw them in the fridge overnight before reheating.
Zero Waste: Don't throw away those pepper tops! Dice them up and sauté them with the onions for the filling. If you have extra filling but no peppers, it makes a fantastic "deconstructed" bowl the next day over a bed of spinach or with some tortilla chips.
Creative Ways to Serve
I love serving these with a crisp side salad or some garlic bread to soak up any extra tomato sauce. If you want to go in a more southwestern direction, top them with a dollop of sour cream and some sliced avocado. For a truly impressive spread, you could serve these alongside my Smoky Poblano Queso recipe to give your guests a variety of stuffed vegetable options.
Kitchen Myths Debunked
One common myth is that you must boil your peppers in a big pot of water before stuffing them. This is messy and often leads to peppers that are waterlogged and flavorless. Steaming them directly in the baking dish is much more efficient and preserves the vegetable's natural sweetness.
Another misconception is that the meat must be raw when it goes into the pepper. While some older recipes do this, browning the meat first allows you to drain the excess fat and ensures the onions and garlic are fully softened and flavorful.
It also significantly reduces the total baking time, which is a win for anyone cooking on a weeknight.

Recipe FAQs
Should I cook my bell peppers before stuffing them?
Yes, lightly steam them first. This ensures they become tender without becoming mushy, while the filling cooks through.
What goes inside stuffed bell peppers?
A savory mixture of cooked meat, rice, onions, garlic, and seasonings. Common additions include tomato sauce for moisture and binding, and shredded cheese for a delicious topping.
What are some common mistakes when making stuffed peppers?
Skipping the pre-steaming step and not draining excess grease from the meat. Pre-steaming ensures tender peppers, and draining grease prevents a greasy filling and overly soft peppers.
What fillings go well in bell peppers?
Classic beef and rice is always a hit, but you can get creative. Consider Italian inspired fillings like those in our Stuffed Pepper Casserole, or go for a Tex-Mex blend with beans and corn.
Can I use different types of peppers?
Yes, any bell pepper color works, and even other firm peppers. While red, yellow, and orange peppers are naturally sweeter, green peppers are a bit more robust. For a spicier kick, consider using poblano peppers if you enjoy bold flavors, similar to the profile in our Smoky Poblano Queso.
How do I prevent the filling from being watery?
Ensure your onions are well sautéed and use pre-cooked, slightly drier rice. If the filling is still a bit wet, you can add a tablespoon of breadcrumbs or some shredded cheese directly into the mix before stuffing.
Can I make stuffed peppers vegetarian?
Absolutely, a vegetarian filling is very easy to achieve. Swap the meat for black beans, corn, lentils, or a plant based crumble, and add extra spices like cumin or chili powder for a robust flavor, similar to the seasonings in our Speedy Crescent Roll Taco Cups.
Stuffed Bell Peppers
Ingredients:
Instructions:
Nutrition Facts:
| Calories | 348 kcal |
|---|---|
| Protein | 25.2 g |
| Fat | 12.8 g |
| Carbs | 32.4 g |
| Fiber | 4.1 g |
| Sugar | 6.2 g |
| Sodium | 585 mg |
