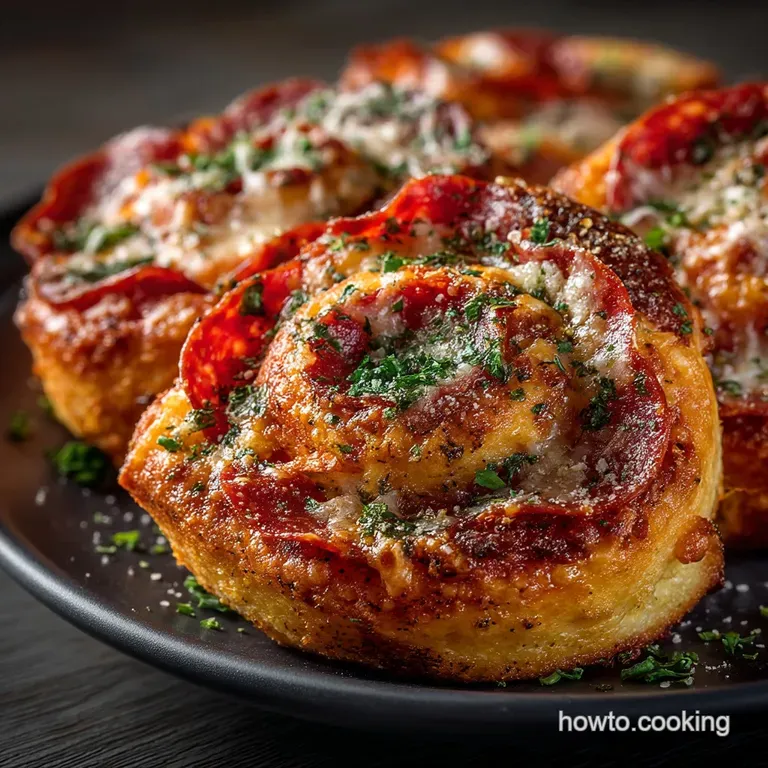
The Italian Job Cheesy Pepperoni Pinwheels
- The Evolution of the Pepperoni Roll: From Appalachian Snack to Appetizer Star
- Why These Italian Pepperoni Roll Ups Beat the Competition
- Essential Building Blocks for Authentic Italian Pepperoni Roll Ups
- Selecting the Right Dough and Cheese for Optimal Melt
- The Hands-On Guide to Assembling Perfect Pinwheels
- Baking Time and Temperature: Achieving Golden Perfection
- Prep Ahead Strategies and Long-Term Storage Solutions
- Creative Twists and Flavor Variations on the Classic Italian Appetizer
- Recipe FAQs
- 📝 Recipe Card
The Evolution of the Pepperoni Roll: From Appalachian Snack to Appetizer Star
The beloved pepperoni roll holds a significant place in American food history, originating as a staple, portable lunch for Italian coal miners in West Virginia during the 20th century.
Traditionally, these rolls featured simple white yeast dough baked or fried with sticks of pepperoni inside, providing fuel and sustenance. While the original Italian Pepperoni Roll Recipe is satisfyingly rustic, modern gastronomy demands a sleeker, more sophisticated presentation suitable for gatherings.
This recipe transforms that hearty, singular experience into elegant, bite sized Italian Pepperoni Roll Ups —perfectly coiled and deeply flavoured appetizers that have rocketed this simple concept from the lunch pail onto the finest party platters.
We’ve maintained the spirit of rich Italian American flavour while embracing the precision of a high end appetizer.
Why These Italian Pepperoni Roll Ups Beat the Competition
Many recipes for baked dough rolls fall flat, either resulting in a soggy bottom or a sparse filling. Our rendition of the Italian Pizza Roll Ups overcomes these common hurdles by focusing on technique and quality ingredients, ensuring a crisp exterior, tight coil, and flavour consistency in every bite.
This is not just a snack; it's a meticulously crafted appetizer designed to impress.
Defining the Difference: Pinwheels vs. Traditional Rolls
The key distinction lies in the shape and ratio. Traditional rolls encase the filling entirely, often resulting in an uneven distribution of cheese and meat. Italian Pepperoni Pinwheels , conversely, rely on rolling the dough into a thin rectangle (about 10 x 14 inches) before layering the ingredients and coiling them tightly.
When sliced into 1 inch segments, the filling is fully exposed and beautifully visible meaning maximum surface area for the cheese to melt, the pepperoni to crisp, and the crust to brown, yielding superior texture.
The Secret to a Perfectly Crispy Crust
Achieving that gorgeous, golden crunch requires two crucial steps that are often overlooked in lesser recipes. First, we use a touch of Extra Virgin Olive Oil (1 Tbsp, or 15 ml) brushed onto the dough before layering the filling; this prevents the dough from sticking to itself and aids in even browning.
Second, the generous application of an egg wash (one large egg whisked with 1 Tbsp of cold water) just before baking locks in moisture, creates a glossy finish, and accelerates the Maillard reaction, yielding a perfectly crispy crust at the required 400° F ( 200° C) baking temperature.
Maximizing Flavor with high-quality Fillings
We move beyond basic mozzarella by combining 1 cup (120 g) of low-moisture mozzarella with 1/4 cup (25 g) of freshly grated Parmesan. The mozzarella provides the essential melt and stretch, while the Parmesan contributes a crucial salty, umami depth.
This is elevated by a simple seasoning blend of 1 tsp of dried oregano and 1/2 tsp of garlic powder, ensuring that the flavour of the 5 oz (140 g) of thinly sliced pepperoni permeates the entire roll.
What Makes This Recipe Ideal for Entertaining?
These Best Pinwheel Appetizers are inherently suited for hosting. They can be fully assembled and refrigerated ahead of time, minimizing stress on the day of your event.
With a yield of 12 14 pieces, they are easily scalable and serve as excellent Christmas Party Food Ideas For A Crowd , requiring only 18– 20 minutes in the oven.
They are designed to be substantial yet neat no plates or forks required making them the ultimate finger food for game days, celebrations, or sophisticated snacking.
Essential Building Blocks for Authentic Italian Pepperoni Roll Ups
Before tackling the rolling process, proper preparation of your ingredients is non-negotiable. Success hinges on starting with materials that are ready to cooperate. This means ensuring your 1 lb (450g) of pizza dough is fresh, your cheese is freshly shredded, and all seasonings are measured precisely.
Selecting the Right Dough and Cheese for Optimal Melt
The quality of your dough dictates the final texture of the roll up. Whether you opt for homemade or high-quality store-bought dough, it must be proofed and allowed to come fully to room temperature.
Cold dough will be too elastic and spring back when rolled, making it difficult to achieve the necessary 1/8 inch thickness. Regarding cheese, always choose low-moisture mozzarella.
High moisture varieties (like fresh balls packed in water) release too much steam and liquid during baking, leading to a doughy, greasy interior.
Procurement Checklist: The Best Pepperoni Brands
The defining flavour comes from the pepperoni, so quality matters. Look for brands known for robust spice and medium diameter slices that are thinly cut. We use 5 oz (140 g) of high-quality pepperoni, distributing it evenly but not excessively.
Too much meat makes it difficult to roll tightly and can increase the grease factor.
Pantry Staples and Required Kitchen Tools
Beyond the main filling ingredients, you will need a small amount of all-purpose flour for dusting, Extra Virgin Olive Oil, and the egg wash components (egg and cold water). Essential equipment includes a standard half sheet baking pan, which must be lined with parchment paper for a non-stick base, a rolling pin, a pastry brush, and crucially, either a very sharp chef’s knife or unflavoured dental floss/kitchen string for clean slicing.
Troubleshooting Common Dough Issues Before Rolling
If your dough is fighting you snapping back every time you try to roll it it simply needs more rest. Allow it to relax on the floured surface for an additional 10 minutes.
This resting time allows the gluten strands to loosen, making the dough pliable and easy to stretch into the required 10 x 14 inch rectangle without tearing.
The Ultimate Dipping Sauce Pairings
While delicious on their own, the Italian Pinwheels truly shine when dipped. The classic pairing is a bowl of warm, rustic Marinara Sauce the acidity cuts through the richness of the cheese and meat perfectly.
For a more adventurous flavour profile, a creamy Pesto Aioli offers a lovely herbal contrast that elevates this simple snack.
Related Recipes Worth Trying
- Easy Philly Cheesesteak Sliders Recipe on Hawaiian Rolls — These easy Philly Cheesesteak sliders pack all the iconic flavour into soft buttery Hawaiian rolls Perfect football party food Get the foolproof recipe now
- Mamas Marvelous Golabki Tender Polish Stuffed Cabbage Rolls — Make authentic Golabki Polish Stuffed Cabbage Rolls Our easy method ensures tender leaves and rich tomato sauceperfect traditional comfort food
- Elegant Black Forest Roll Cake Recipe Chocolate Roulade — Ditch the towering layer cake This Black Forest Roll Cake recipe offers rich chocolate sponge tart cherries and Kirsch cream in an easytoslice format Get...
The Hands-On Guide to Assembling Perfect Pinwheels
This recipe requires approximately 15 minutes of active preparation time, focusing entirely on meticulous layering and precise rolling. These Meat Pinwheels Roll Ups are an exercise in precision; a tight roll is the difference between a pinwheel that holds its shape and one that unravels during baking.
Baking Time and Temperature: Achieving Golden Perfection
Ensure your oven is fully preheated to 400° F ( 200° C) before the pinwheels enter. The high heat is critical for flash baking the dough, yielding a light, airy, yet crispy texture in a short period.
The total cook time is 18– 20 minutes.
step-by-step 1-3: Prepping the Base and Layering the Filling
After the dough has rested, roll it out gently on a lightly floured surface into the designated 10 x 14 inch rectangle. Brush the dough with the measured olive oil, ensuring coverage over the main body but reserving a clean, 1 inch border along one of the long edges this dry edge will serve as the crucial sealing seam.
Next, evenly sprinkle the mozzarella, Parmesan, oregano, and garlic powder. Finally, distribute the pepperoni slices across the cheese, ensuring the layer is thin enough to coil tightly.
Achieving the Tight Coil: Mastering the Rolling Technique
Starting from the long edge opposite the reserved clean border, begin rolling the dough tightly toward the seam. This is the most important step for the integrity of the Lunch Rollups . Roll slowly and maintain constant, even pressure to prevent gaps from forming inside the coil.
Once you reach the reserved seam, pinch the edge firmly onto the log to seal it securely. Rotate the roll so the seam rests face down.
Handling the Rolls: Cutting and Spacing on the Tray
To maintain perfect circular integrity and prevent the delicate dough from squashing, use unflavoured dental floss or strong kitchen string instead of a knife. Slide the string underneath the log, position it to mark a 1 inch slice, cross the string ends over the top, and pull quickly.
Repeat this process until you have 12 14 uniform slices. Arrange the pinwheels, cut-side up, on the parchment lined baking sheet, ensuring there is at least 1 inch of space between each piece to allow for expansion and even browning.
Finish by brushing the tops and sides generously with the egg wash and sprinkling with dried parsley or flaky salt, if desired.
Knowing When They Are Done: Visual Cues for Doneness
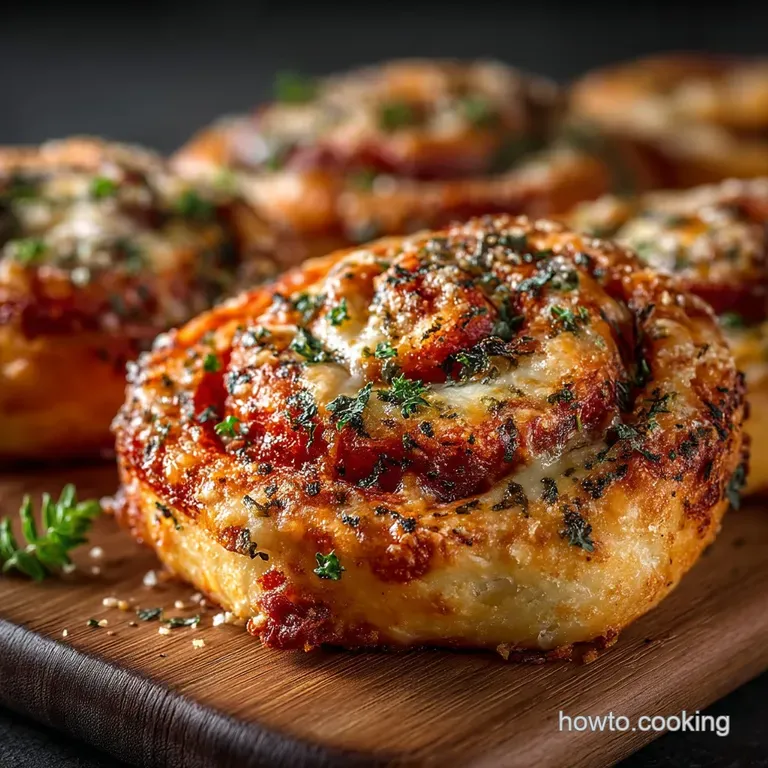
The Italian Pepperoni Pinwheels are finished when the dough is visibly puffed, richly golden brown, and the exposed cheese is melted and bubbling gently. If your oven tends to brown too quickly, consider rotating the tray halfway through baking.
Once removed from the oven, allow the pinwheels to cool on the tray for 5 minutes. This vital resting period allows the piping hot cheese filling to set slightly, ensuring the roll ups retain their structure when transferred and served.
Prep Ahead Strategies and Long Term Storage Solutions
The beauty of this Italian Pepperoni Roll Ups recipe is its flexibility. They transition seamlessly from a last minute snack to a professionally prepared appetizer due to excellent make-ahead potential.
Creative Twists and Flavor Variations on the Classic Italian Appetizer
While the classic pepperoni and cheese combination is unmatched, these pizza dough rolls are incredibly adaptable.
How to Make Italian Pepperoni Roll Ups 24 Hours in Advance
You can complete all steps up to the baking stage. Once the pinwheels are cut, placed on the tray, and egg-washed, cover the tray tightly with plastic wrap. Refrigerate for up to 24 hours.
When ready to bake, remove them directly from the refrigerator and place them in the preheated 400° F oven, adding an extra 2– 3 minutes to the total baking time to compensate for the chilled dough.
Reheating Frozen Pinwheels for Maximum Freshness
If you want to freeze the baked rolls, allow them to cool completely, then place them in a freezer safe bag or airtight container. To reheat, arrange the frozen pinwheels on a baking sheet and bake at 350° F ( 175° C) for about 10– 12 minutes, or until the cheese is melted and the crust is crisp again.
Avoid microwave reheating, as it results in a rubbery texture.
Ingredient Swaps: gluten-free and Vegetarian Options
For those avoiding gluten, simply substitute the standard pizza dough with a high-quality gluten-free pizza dough. The process remains the same. To create a beautiful vegetarian alternative, replace the pepperoni with sautéed spinach (ensuring it is very well drained to prevent sogginess) and switch the mozzarella and Parmesan for a blend of creamy goat cheese and sun-dried tomatoes, making for an equally impressive Italian Pinwheels presentation.
Frequently Asked Questions About Pizza Dough Rolls
Q: Why did my filling leak out during baking? A: This usually means the dough was either rolled too loosely, or the sealing edge was not pinched tightly enough. The olive oil layer can sometimes interfere with sealing; ensure you press the seam firmly together.
Q: Can I use different cheeses? A: Absolutely. Provolone or fontina work well for their excellent melting properties, but remember that hard cheeses like cheddar will not stretch as nicely as mozzarella.
Q: How many servings does this recipe yield? A: This recipe yields 12 14 pinwheels, serving approximately 4 people as a substantial snack or appetizer.

Recipe FAQs
How long will these keep, and can I prep the rolls the night before?
Yes, you can be a total domestic goddess and prep ahead! You can roll the dough, fill it, and slice the pinwheels, then cover them tightly and refrigerate for up to 12 hours. Just remember to let them come up to room temperature for about 20 minutes before baking, or they won't puff up properly.
Help! My pinwheels unwound in the oven. What went wrong?
That’s a right old shame! Structural integrity relies on two things: rolling the dough as tightly as a Swiss bank vault and ensuring you firmly pinch that final seam shut. Also, resist the urge to overfill; too much cheese or pepperoni will prevent a tight seal and cause the filling to spill out during the high heat of the oven.
These Italian Pepperoni Roll Ups seem a bit salty. Are there any healthier alternatives for the filling?
It’s true, pepperoni and cheese can certainly push the sodium count up. If you're watching your salt intake, switch to low-sodium turkey pepperoni or reduce the quantity you use by half.
For a really lovely, flavourful reduction, swap the meat for roasted red peppers, sautéed mushrooms, and fresh basil you won't even miss the pepperoni!
What’s the best dipping sauce for these cheesy pinwheels?
You simply must serve these with a bowl of warm, rustic Marinara Sauce it's the bee's knees for any pizza adjacent snack. If you’re feeling a bit cheeky, a homemade garlic aioli or a cool ranch dressing offers a brilliant contrast to the warm, spicy filling.
Don't forget a sprinkle of Parmesan on top just before serving!
Can I use puff pastry instead of pizza dough for a flakier texture?
Go for it! Using puff pastry is a fantastic alternative if you prefer a lighter, flakier bite rather than the chewier bread texture of the pizza dough. Make sure your puff pastry is fully thawed and rolled thinly; the filling method remains exactly the same.
Keep an eye on the oven, though, as puff pastry tends to brown a little quicker than regular dough.
Cheesy Italian Pepperoni Roll Ups
Ingredients:
Instructions:
Nutrition Facts:
| Calories | 2156 kcal |
|---|---|
| Protein | 41.0 g |
| Fat | 57.7 g |
| Carbs | 85.4 g |
| Fiber | 21.1 g |
| Sodium | 1246 mg |
