Chocolate Truffles: Silky and Rich
- Time: Active 15 minutes, Passive 4 hours 5 mins, Total 4 hours 20 minutes
- Flavor/Texture Hook: Silky, melt in-the mouth center with a sharp, cocoa dusted snap.
- Perfect for: Holiday gifting, low stress dinner parties, or beginner friendly edible gifts.
- Master the Art of Handmade Chocolate Truffles
- The Science of Why it Works
- Analyzing the Elements for Successful Results
- Ingredients and Potential Substitutes
- Minimal Tools for Maximum Impact
- Creating the Perfect Truffle Base
- Fixing Common Texture and Mixing Issues
- Adjusting for Different Batch Sizes
- Debunking Common Preparation Misconceptions
- Storage Guidelines and Zero Waste Ideas
- Presentation and Serving Ideas
- Recipe FAQs
- 📝 Recipe Card
Master the Art of Handmade Chocolate Truffles
Have you ever wondered why some sweets feel like a chore while others feel like a secret? I remember the first time I tried making these. I thought I could just toss everything in a bowl and hope for the best. Big mistake.
I ended up with a greasy, separated mess that looked more like a kitchen disaster than a gourmet treat. But after a few trials, I realized that these little gems are all about temperature and patience.
Right then, let's talk about the magic of the "snap" and the "melt." There is something incredibly satisfying about biting through a firm outer shell into a velvety, rich center. This isn't just candy, it is a way to show off your kitchen confidence without needing fancy molds or expensive tempering machines.
You'll find that these Easy Christmas Chocolate Truffles are actually quite forgiving once you understand the basic physics of the ganache.
We've all been there, standing over a pot, praying the cream doesn't boil over. Trust me on this, the minimalist approach is almost always better. We are going to use basic tools, a few high-quality ingredients, and a lot of chilled out waiting time.
By the end of this, you’ll be rolling out truffles that look like they came from a high end boutique, but with that wholesome, homemade soul we love.
The Science of Why it Works
Fat Phase Emulsification: The heavy cream acts as a bridge between the water based solids and the fats in the butter and chocolate, creating a stable, suspended mixture. This prevents the fats from "leaking" out, ensuring a silky rather than greasy mouthfeel.
Crystalline Stabilization: Chilling the mixture slowly allows the cocoa butter to form stable crystals. This process, known as tempering via cooling, gives the Chocolate Truffles their structure and prevents them from melting the moment they touch your fingertips.
Chef Tip: Freeze your butter for 10 minutes before adding it to the warm ganache. This rapid temperature drop helps "shock" the emulsion into staying together, resulting in a much smoother texture.
| Method | Time | Texture | Best For |
|---|---|---|---|
| Stovetop | 10 minutes | Maximum Control | High cocoa dark chocolate |
| Microwave | 3 minutes | Quick but Risky | Milk or white chocolate |
| Double Boiler | 15 minutes | Ultra Smooth | Professional grade finishes |
Choosing the stovetop method is my go to because it allows you to see the bubbles forming. If you use a microwave, you risk "hot spots" that can scorch the delicate cocoa solids before the rest of the bowl even begins to soften.
Analyzing the Elements for Successful Results
| Component | Science Role | Pro Secret |
|---|---|---|
| Bittersweet Chocolate | Structural Base | Use 60% cocoa for the ideal balance of snap and melt. |
| Heavy Whipping Cream | Emulsifier | Never let it reach a rolling boil or the fat will separate. |
| Unsalted Butter | Mouthfeel | Adds a glossy sheen and a luxurious "slip" on the tongue. |
| Sea Salt | Flavor Enhancer | Sharpens the cocoa notes and cuts through the heavy fat. |
Ingredients and Potential Substitutes
- 8 oz bittersweet chocolate (60% cocoa solids or higher), finely chopped. Why this? Higher cocoa content ensures the truffle sets firmly at room temperature.
- Substitute: Semi sweet chocolate chips (note: will be significantly sweeter and softer).
- 1/2 cup heavy whipping cream (minimum 36% milk fat). Why this? The fat content is crucial for the emulsion stability.
- Substitute: Full fat coconut milk (adds a subtle tropical nuttiness).
- 1 tbsp unsalted butter, room temperature. Why this? Provides the "gloss" and prevents the center from being too brittle.
- Substitute: Coconut oil (refined for no flavor, unrefined for extra scent).
- 1/2 tsp sea salt. Why this? Essential for balancing the sugar and dairy richness.
- Substitute: Kosher salt (use 3/4 tsp for similar impact).
- 1/4 cup Dutch processed cocoa powder. Why this? Less acidic than natural cocoa, providing a darker, smoother coating.
- Substitute: Powdered sugar (for a much sweeter, "snowy" finish).
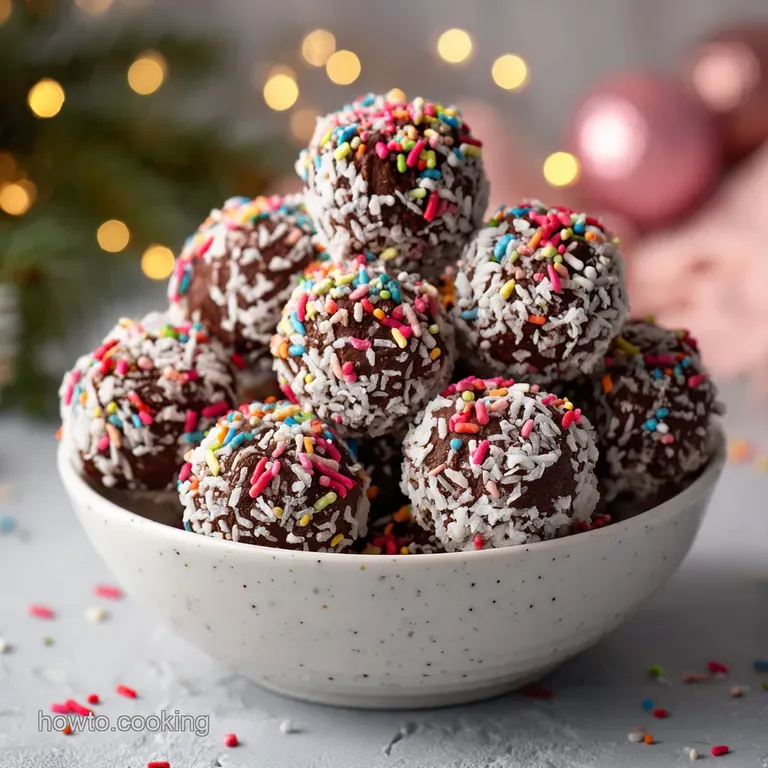
- 1/2 cup crushed candy canes.
- Substitute: Toasted crushed hazelnuts (adds a sophisticated crunch).
- 2 tbsp edible gold dust or sprinkles.
- Substitute: A few grains of flaky sea salt on top.
Minimal Tools for Maximum Impact
You don't need a pantry full of gadgets to make a stunning festive chocolate truffle recipe. I prefer using a simple glass heat proof bowl and a small saucepan. A balloon whisk is helpful, but honestly, a sturdy silicone spatula works even better because it doesn't incorporate too much air into the ganache.
For the shaping, a small melon baller or a simple teaspoon is all you need. If you want to get fancy, you can use a small cookie scoop, but your hands are often the best tool for the final rounding.
Creating the Perfect Truffle Base
- Chop 8 oz bittersweet chocolate into very fine, uniform pieces. Note: Smaller pieces melt more evenly and prevent the cream from cooling too fast.
- Heat 1/2 cup heavy whipping cream in a small saucepan over medium heat until small bubbles appear around the edges.
- Pour the hot cream over the chopped chocolate in a heat proof bowl. Note: Let it sit for 5 minutes without touching it to allow the heat to penetrate.
- Add 1 tbsp unsalted butter and 1/2 tsp sea salt to the mixture.
- Gently stir the mixture starting from the center and moving outward until the liquid is glossy and dark.
- Cover the surface with plastic wrap (touching the ganache) and chill for 4 hours until firm to the touch.
- Scoop the chilled ganache into 2.5 cm balls using a spoon or scoop.
- Roll the balls quickly between your palms until they are smooth and round.
- Dredge the truffles in 1/4 cup cocoa powder, crushed candy canes, or gold dust.
- Store in the fridge or serve immediately until the coating is set and matte.
Fixing Common Texture and Mixing Issues
Why Your Ganache Separated
If your mixture looks curdled or oily, the cream was likely too hot, or you stirred it too vigorously. When the fat separates from the liquid, it looks grainy. To fix this, you can try adding a teaspoon of cold cream and whisking gently.
It's a common hurdle when making a Christmas chocolate truffle recipe, so don't panic.
If the Center Stays Liquid
Sometimes the ganache just won't set. This usually happens if the chocolate didn't have enough cocoa butter (low percentage) or if the cream ratio was slightly too high. In this case, you can gently re melt it over a double boiler and add another ounce of chopped chocolate.
| Problem | Root Cause | Solution |
|---|---|---|
| Greasy surface | Over stirring while hot | Let it sit undisturbed longer before stirring. |
| Grainy texture | Chocolate scorched | Melt over lower heat next time; add a drop of warm cream now. |
| Won't hold shape | High humidity or low cocoa % | Add more chocolate or chill in the freezer for 20 mins. |
If you find yourself struggling with the base, you might find some extra guidance in my How to Make recipe which breaks down the melting process even further.
Common Mistakes Checklist ✓ Never use "mock" chocolate or compound chips; they lack the cocoa butter needed to set. ✓ Ensure your bowl is bone dry; a single drop of water can cause the chocolate to "seize." ✓ Don't skip the resting period after pouring the cream; patience prevents lumps.
✓ Work in a cool kitchen; if it's too warm, the Christmas Chocolate Truffles will melt in your hands. ✓ Use a kitchen scale for the chocolate if possible; volume measurements can be deceptive.
Adjusting for Different Batch Sizes
When you want to make a massive batch for a party, you can double the recipe easily, but I recommend not going beyond a triple batch in one bowl. The center of a large mass of ganache takes a very long time to cool, which can lead to uneven crystallization.
For a double batch, use 16 oz of chocolate and 1 cup of cream, but keep the butter to about 1.5 tablespoons to avoid over softening.
If you are scaling down for a small personal treat, use 4 oz of chocolate and 1/4 cup of cream. When working with smaller amounts, be extra careful not to boil the cream away, as the evaporation rate is higher in a small pan. For more creative ways to use small amounts of chocolate, check out my Rich Chocolate Cherry recipe for inspiration.
| Servings | Chocolate Amount | Cream Amount | Best Pan Size |
|---|---|---|---|
| 12 Truffles | 4 oz (113g) | 1/4 cup (60ml) | Small Butter Warmer |
| 24 Truffles | 8 oz (226g) | 1/2 cup (120ml) | 1 Quart Saucepan |
| 48 Truffles | 16 oz (452g) | 1 cup (240ml) | 2 Quart Saucepan |
Debunking Common Preparation Misconceptions
One major myth is that you must use a double boiler to melt the chocolate. In reality, pouring hot cream over chopped chocolate is much safer and more efficient for quick christmas truffles.
The residual heat is plenty to melt the solids without the risk of steam entering the bowl and seizing the mixture.
Another common belief is that you need "truffle oil" to make these. Truffles (the candy) are named after the fungus because they look like dirty little tubers from the earth. They have nothing to do with the savory mushroom flavor. Finally,, many think you can't use condensed milk.
While a christmas truffles condensed milk version exists, it results in a much chewier, fudge like texture rather than the classic melt away ganache we are making here.
Storage Guidelines and Zero Waste Ideas
Storage: These homemade christmas truffles will keep in the refrigerator for up to 2 weeks in an airtight container. If you want to keep them longer, they freeze beautifully for up to 3 months.
Just make sure to thaw them in the fridge overnight before serving so the cocoa powder doesn't get soggy from condensation.
Zero Waste: If you have leftover ganache that's too soft to roll, don't throw it out! It makes an incredible base for a hot chocolate or a decadent topping for ice cream. You can also thin it out with a little extra warm milk to create a glaze for cakes.
Any leftover crushed candy canes can be stirred into your morning coffee or saved for a batch of peppermint cookies.
Presentation and Serving Ideas
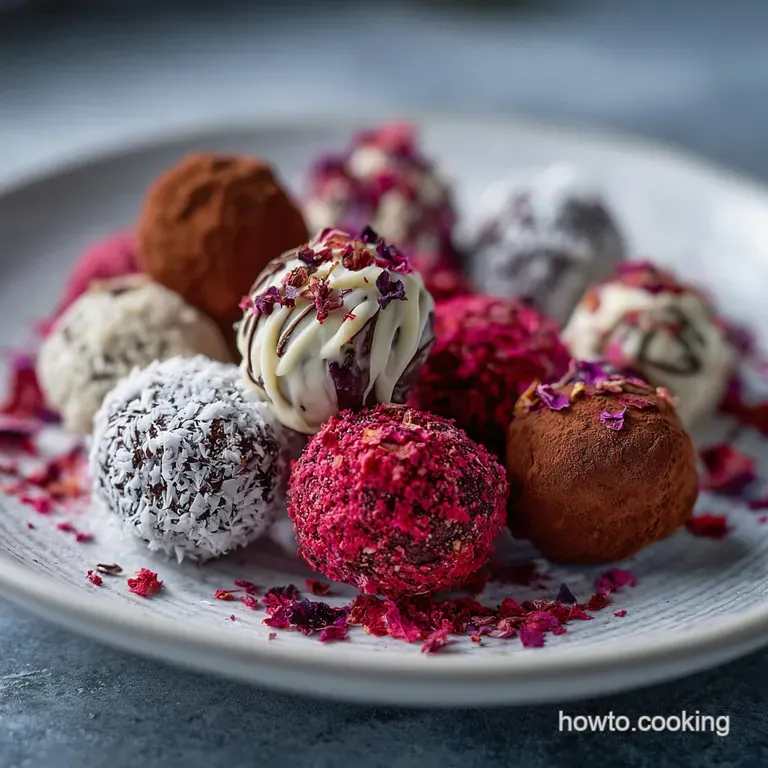
For a truly festive chocolate truffle recipe experience, try rolling half in cocoa and the other half in the gold dust. Placing them in small paper liners makes them feel like a professional gift.
If you're feeling adventurous, you can explore holiday chocolate truffle ideas like dipping them in melted white chocolate for a "snowball" effect.
I love serving these alongside a sharp espresso or a glass of port. The bitterness of the coffee or the sweetness of the wine plays perfectly with the salt and dark cocoa. For a different flavor profile, you might enjoy my Sunshine Citrus orange recipe which uses a similar technique but with a bright, fruity twist. Whether you are making no bake christmas truffles for a swap or just a quiet night in, the key is the quality of your chocolate. Enjoy the process, and don't worry if they aren't perfectly round the "rustic" look just proves they were made with love.

Recipe FAQs
Can I substitute milk chocolate for bittersweet chocolate in truffles?
No, it's not recommended for the classic texture. Milk chocolate has more sugar and less cocoa solids, leading to a softer, sweeter truffle that may not set properly.
How do I get a smooth, glossy truffle coating?
Ensure your ganache is well chilled and your hands are cool. Work quickly to prevent the ganache from warming too much. If it gets soft, pop it back in the fridge for 10 minutes.
My ganache looks oily. What went wrong?
This usually means the emulsion broke. It likely happened if the cream was too hot when added, or if you stirred too vigorously. Try gently whisking in a teaspoon of cold cream to see if it can be revived.
How long do chocolate truffles need to chill before rolling?
At least 4 hours, or until firm to the touch. Proper chilling allows the fat and cocoa butter to crystallize, giving the ganache the structure needed for shaping.
Can I add flavorings to my truffle ganache?
Yes, add extracts or liqueurs after the ganache is smooth. Be mindful not to add too much liquid, as it can break the emulsion. For inspiration on flavor pairings, explore techniques similar to those used in our Sunshine Citrus orange recipe.
What's the best way to store homemade chocolate truffles?
In an airtight container in the refrigerator for up to 2 weeks. For longer storage, they freeze well for up to 3 months; thaw them slowly in the fridge to prevent condensation.
Is it true that I need special equipment to make truffles?
No, basic kitchen tools are sufficient. You can use a heatproof bowl, a small saucepan, and a spatula or whisk. If you master the stable emulsion here, you can apply that skill to other recipes like Ridiculously Rich Chocolate Sauce for Ice Cream.
Chocolate Truffles

Ingredients:
Instructions:
Nutrition Facts:
| Calories | 84 kcal |
|---|---|
| Protein | 1.0 g |
| Fat | 5.9 g |
| Carbs | 7.5 g |
| Fiber | 0.5 g |
| Sugar | 5.6 g |
| Sodium | 55 mg |
