Corn on the Cob with Garlic Butter: Snappy Kernels
- Time: Active 10 mins, Passive 10 mins, Total 20 mins
- Flavor/Texture Hook: Sweet, buttery, and snappy kernels with a garlicky, herbaceous finish.
- Perfect for: Family barbecues, wholesome weeknight sides, or beginner meal prep.
- Best Corn on the Cob with Garlic Butter
- Science Behind The Sweetness and Snap
- Component Analysis and Flavor Profiles
- Simple Kitchen Tools for Success
- Step-By-Step Guide for Home Cooks
- Solving Texture and Flavor Issues
- Flexible Adjustments for Every Table
- Smart Storage and Zero Waste
- Flavorful Pairings for Family Meals
- Busting Common Cooking Fallacies
- Recipe FAQs
- 📝 Recipe Card
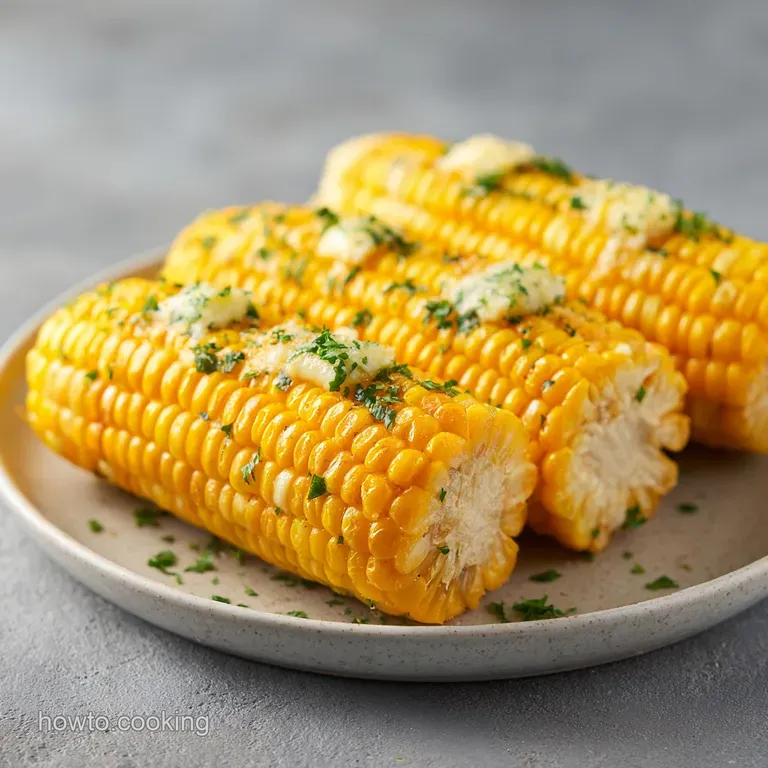
Best Corn on the Cob with Garlic Butter
There is a specific sound that defines summer in my kitchen: the snap of a fresh green husk being pulled away to reveal rows of bright, sun yellow kernels. I remember one July afternoon when I tried to boil a dozen ears for a family gathering, only to end up with something that tasted like wet cardboard because I left them in the rolling boil for far too long.
It was a frustrating waste of fresh produce, but it taught me that corn is far more delicate than we give it credit for. Learn how to make incredibly flavorful corn on the cob with this easy garlic butter recipe.
We are moving away from the old school method of boiling the life out of our vegetables. Instead, we are using a gentle steeping technique that preserves the natural sugars while the residual heat does all the heavy lifting.
By the time you sit down to eat, you will have corn that practically pops in your mouth, topped with a garlic herb compound that makes the whole house smell like a professional bistro. It is a simple, confident way to treat ingredients with the respect they deserve.
This recipe is about finding that balance between a wholesome side dish and a decadent treat. We use a hint of sugar in the water to enhance the corn's natural sweetness, but we strictly avoid salt until the very end. It sounds counterintuitive, but trust me on this, it is the secret to keeping the skins tender.
You’ll find that these small, smart adjustments lead to much more flavorful results without needing any fancy equipment or expensive additions.
Science Behind The Sweetness and Snap
Osmotic Balance: Adding sugar to the water prevents the corn's natural sugars from leaching out into the liquid during the cooking process.
Tenderization Inhibition: Adding salt to the boiling water actually toughens the cell walls (pericarp) of the kernels, resulting in a chewy, "thick skinned" texture.
Residual Heat Transfer: Turning off the heat and letting the corn sit in hot water allows the starch to gelatinize slowly without over cooking the delicate proteins.
| Method | Total Time | Texture | Best For |
|---|---|---|---|
| Steeping (This Recipe) | 20 mins | Snappy & Juicy | Maximum tenderness and sweetness |
| Rolling Boil | 12 mins | Soft but Mushy | Large batches where texture matters less |
| oven-roasted | 35 mins | Toasty & Dry | Concentrated flavor and smoky notes |
Choosing the right method depends on your schedule, but the steeping method provides the most consistent results for a family meal. It keeps the kitchen cool and ensures the corn stays warm until you are ready to serve. If you are looking for more buttery inspiration, you might enjoy my Garlic Butter Bread Rolls recipe which uses a similar infusion technique.
Component Analysis and Flavor Profiles
| Ingredient | Science Role | Pro Secret |
|---|---|---|
| Sweet Corn | Primary starch and sugar source | Look for bright green, moist husks to ensure freshness. |
| Granulated Sugar | Regulates osmotic pressure | This maintains the internal sweetness of each kernel. |
| Unsalted Butter | Fat carrier for aromatics | Soften at room temperature; never melt it in the microwave. |
| Garlic Paste | Sulfur based flavor depth | Mashing garlic with salt creates a velvety emulsion that sticks. |
For the corn, 6 ears of fresh sweet corn (husks and silk removed) are the foundation of this dish. I highly recommend using 1 tbsp granulated sugar in the 4 liters (4 quarts) of water to help the corn keep its vibrant flavor.
While some people use milk, sugar is a more budget friendly way to achieve that same wholesome result.
The topping requires 115g (0.5 cup) of unsalted butter, softened until it is easily whipped. You'll need 3 cloves of garlic, which we will turn into a paste. To finish, use 1 tsp kosher salt, 0.5 tsp coarsely ground black pepper, 1 tbsp finely chopped fresh parsley, and 0.25 tsp smoked paprika for a hint of warmth.
| Original Ingredient | Substitute | Why It Works |
|---|---|---|
| Unsalted Butter | Salted Butter | Works well, just reduce the added kosher salt to a pinch. |
| Fresh Parsley | Dried Chives | Adds a mild onion note. Note: Flavor is sharper and less "green." |
| Granulated Sugar | Honey | Similar sweetness. Note: May add a floral undertone to the water. |
Simple Kitchen Tools for Success
You don't need a pantry full of gadgets to make this work, but a few specific items make the process much smoother. A large stockpot (at least 6 liters) is essential for holding the 4 quarts of water and the 6 ears of corn without overcrowding.
If the ears are too crowded, the water temperature will drop too quickly, and the corn won't cook through during the steeping phase.
For the garlic butter, a small mixing bowl and a sturdy fork or a small whisk are your best friends. I like to use a Microplane or a fine grater for the garlic, but a chef's knife works just as well if you use the flat of the blade to mash the minced garlic into a paste with the salt.
A set of sturdy tongs is also a must have for retrieving the hot corn from the water safely.
Chef's Tip: Freeze your butter for exactly 10 minutes before grating it if you forgot to take it out of the fridge. This creates small shards that soften almost instantly when mixed with the garlic.
step-by-step Guide for Home Cooks
1. Prepare the corn
Remove the husks and every strand of silk from the 6 ears of corn. Note: Running a damp paper towel down the ear helps catch those stubborn silk threads.
2. Prepare the cooking liquid
Fill a large stockpot with 4 quarts of water and add 1 tbsp of granulated sugar. Bring this to a rolling boil until the sugar is fully dissolved and the water is bubbly.
3. Start the steep
Carefully drop the corn into the boiling water using tongs. Immediately turn off the heat and cover the pot with a tight fitting lid.
4. Time the process
Let the corn sit in the hot water for 10 minutes. Wait until the kernels look plump and turn an opaque, vibrant yellow.
5. Create the garlic paste
While the corn steeps, mince 3 cloves of garlic finely. Sprinkle the 1 tsp of kosher salt over the garlic and use the side of your knife to mash it into a smooth paste.
6. Whip the flavored butter
In a small bowl, combine the 0.5 cup of softened unsalted butter with the garlic paste, 0.5 tsp black pepper, 1 tbsp parsley, and 0.25 tsp smoked paprika.
7. Emulsify the mixture
Stir the butter vigorously until it becomes velvety and uniform in color.
8. Drain the corn
Remove the ears from the pot and pat them dry with a clean kitchen towel. Note: Removing surface moisture ensures the garlic butter actually sticks rather than sliding off.
9. Finish the dish
Slather each warm ear with a generous tablespoon of the garlic butter. Watch as the butter melts into the crevices, releasing a fragrant aroma.
Solving Texture and Flavor Issues
Why is my corn tough and chewy?
This usually happens because salt was added to the boiling water or the corn was left in a rolling boil for too long. High heat for extended periods breaks down the delicate cell walls too aggressively. Next time, ensure the heat is turned off as soon as the corn hits the water.
Why is the garlic butter sliding right off the cob?
If the corn is too wet, the fat in the butter can't grip the surface of the kernels. It's like trying to paint a wet wall. Always pat the corn dry before applying the butter. Also, ensure your butter is softened, not melted, as melted butter has no structural integrity to hold the garlic in place.
| Problem | Root Cause | Solution |
|---|---|---|
| Bland flavor | Water was too diluted | Ensure you use the full tbsp of sugar to season the kernels from within. |
| Raw garlic "bite" | Garlic pieces too large | Mince into a paste so the salt "cooks" the garlic slightly via maceration. |
| Shriveled kernels | Overcooking | Stick strictly to the 10 minute steep time; don't leave it in the pot longer. |
Common Mistakes Checklist
- ✓ Never add salt to the boiling water; it toughens the corn skins.
- ✓ Don't peek under the lid during the 10 minute steep; you'll lose the necessary heat.
- ✓ Pat the corn completely dry before buttering to ensure the flavor sticks.
- ✓ Use fresh garlic rather than the jarred kind for a cleaner, more nutritious flavor.
- ✓ Soften the butter naturally on the counter for the best spreadable texture.
Flexible Adjustments for Every Table
If you need to feed a larger crowd, scaling this recipe is quite simple. When doubling the recipe to 12 ears, you don't need to double the water entirely; 6 quarts is usually enough as long as the corn is submerged. However, you should increase the sugar to 1.5 tbsp to maintain the flavor balance.
For the butter, you can double the quantities exactly, but I find that 1.5x the salt and spices is usually sufficient to keep the flavors from becoming overwhelming.
If you're cooking for just one or two people, you can cut the recipe in half. Use a smaller pot with 2 quarts of water and still use the full 10 minute steep time. For the butter, since using half an egg isn't an issue here, you can just mix a smaller batch. If you find yourself with extra garlic butter, it works beautifully on my Garlic Butter Green Beans recipe.
- If you want it spicy
- Add 0.5 tsp of red chili flakes to the butter mixture.
- If you want it cheesy
- Roll the buttered corn in freshly grated Parmesan or Cotija.
- If you want it vegan
- Use a high-quality plant based butter stick with the same garlic paste.
Smart Storage and Zero Waste
Fresh corn is always best eaten immediately, but life happens. You can store leftover buttered corn in the fridge for up to 3 days. I recommend wrapping each ear tightly in foil to keep the kernels from drying out. When you're ready to eat, don't microwave it on high or it will turn rubbery.
Instead, reheat it in a 180°C (350°F) oven for about 10 minutes until warmed through.
For zero waste, don't throw away those corn cobs! Even after the kernels are gone, the cobs hold a massive amount of flavor. You can simmer them with onion scraps and carrot ends to make a nutritious "corn silk" stock for chowders or risotto.
If you have leftover garlic butter, it can be frozen in an ice cube tray for up to 3 months and dropped into sautéed vegetables later for a quick flavor boost.
Flavorful Pairings for Family Meals
To make this a complete, wholesome meal, I like to serve this corn alongside a lean protein like grilled chicken or a bean based salad. The sweetness of the corn balances out charred flavors perfectly. If you are doing a full spread, consider adding some light, acidic sides to cut through the richness of the butter.
A simple cucumber salad or a tangy slaw works wonders for keeping the palate fresh.
| Serving Size | Corn Amount | Water Needed | Steep Time |
|---|---|---|---|
| 2 People | 2 Ears | 2 Liters | 10 mins |
| 6 People | 6 Ears | 4 Liters | 10 mins |
| 12 People | 12 Ears | 8 Liters | 12 mins |
Cooking for your family should be an empowering experience, not a stressful one. By understanding these simple principles of heat and seasoning, you can turn a basic ear of corn into a centerpiece that everyone asks for. It’s about building confidence in the kitchen, one snap of the husk at a time.
Busting Common Cooking Fallacies
One of the biggest misconceptions is that you need to boil corn for 20 minutes to make it "safe" or "done." In reality, corn is at its most nutritious and flavorful when it is just barely cooked through. Over boiling simply turns the starch into glue and kills the vibrant color.
Another myth is that you must use milk and sugar to get "restaurant style" corn. While milk adds fat, the sugar alone does 90% of the work in keeping those kernels sweet and plump, making it a much more budget friendly choice.
Finally,, many people believe that "corn is just sugar." While it does have natural sugars, it also provides fiber and essential antioxidants. When prepared with fresh garlic and real butter, it is a wholesome addition to any family dinner.
Using the steeping method ensures you aren't washing all those nutrients down the drain with boiling water. Trust the process, keep the lid on, and enjoy the most tender corn you've ever made.

Recipe FAQs
How to make garlic butter sweet corn?
Steep the corn briefly, then toss with compound butter. Bring water with 1 tbsp sugar to a boil, add shucked corn, turn off heat immediately, cover, and steep for 10 minutes. Whip softened butter with minced garlic paste, salt, pepper, and parsley until smooth.
What is the most flavorful way to cook corn on the cob?
The residual heat steeping method is the most flavorful way. Adding sugar to the cooking water prevents kernel sweetness from leaching out, while the quick, gentle cook keeps them snappy. This preserves the natural sugars beautifully, which is the key to a truly sweet bite.
What are the common mistakes in garlic butter?
The most common mistake is using melted butter or not patting the corn dry. Melted butter slides off, preventing the garlic flavor from adhering properly to the kernels. Ensure your butter is softened enough to whip but not liquid, and always dry the hot corn well first.
Can you put garlic in when you cook corn on the cob?
No, do not add raw garlic to the boiling water. Adding aromatics to the steep water muddies the clean corn flavor and can create an unpleasant sulfuric taste as the garlic cooks too long. Save the garlic for a compound butter applied after cooking for maximum aromatic impact.
Why is my corn tough and chewy after cooking?
This is almost always caused by adding salt to the cooking water. Salt toughens the pericarp (the outer skin) of the kernel, making it chewier than it should be. Stick to adding sugar to the water and salting only in the finished garlic butter.
Is it true that I should never salt the water when boiling corn?
Yes, this is factually correct for tenderness. Adding salt to the boiling water negatively impacts the corn's texture by drawing out moisture too quickly, leading to a tough exterior. If you are looking for other techniques to manage ingredient structure, mastering emulsion stability is key, similar to what we use in our Peanut Butter Satay recipe.
Can I prepare the garlic butter ahead of time?
Yes, the garlic butter can be made up to three days in advance. Store it tightly wrapped in plastic wrap in the refrigerator to prevent oxidation. If you are looking for a rich, buttery side dish to pair this with, check out the technique used for the crust in the Thanksgiving Stuffing recipe.
Garlic Butter Corn On The Cob

Ingredients:
Instructions:
Nutrition Facts:
| Calories | 232 kcal |
|---|---|
| Protein | 3.4 g |
| Fat | 16.1 g |
| Carbs | 21.4 g |
| Fiber | 2.1 g |
| Sugar | 7.2 g |
| Sodium | 392 mg |
