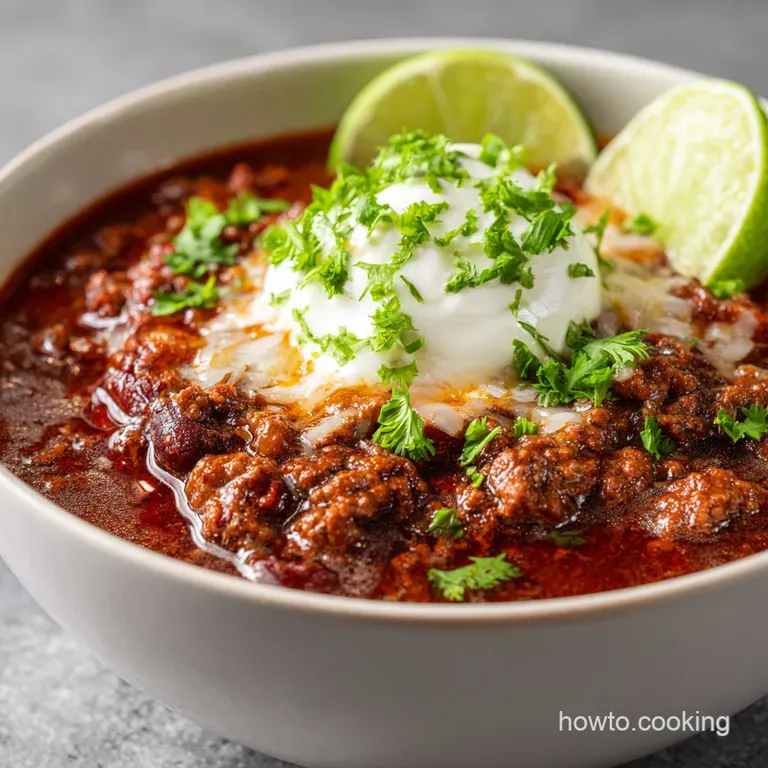
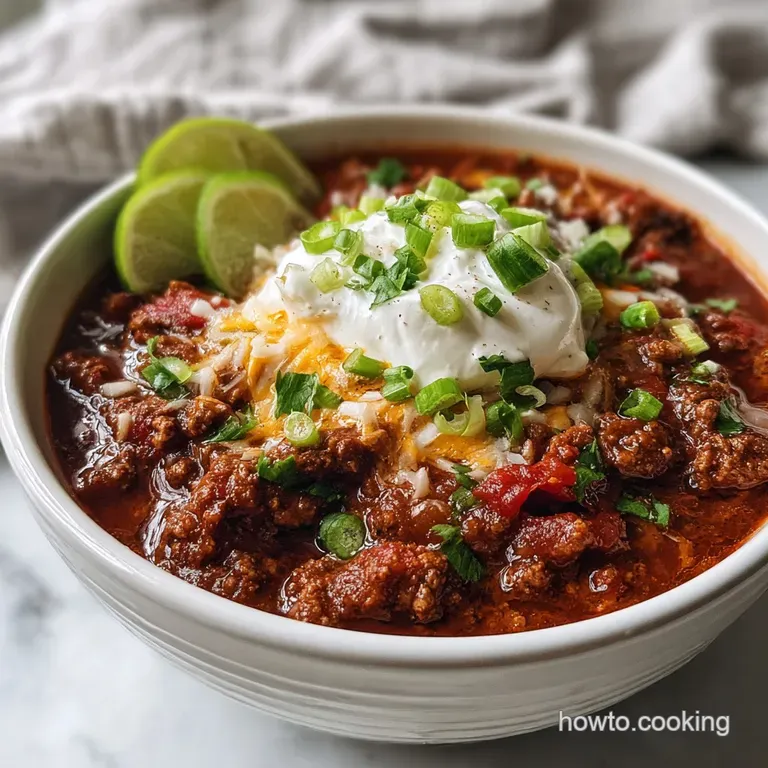
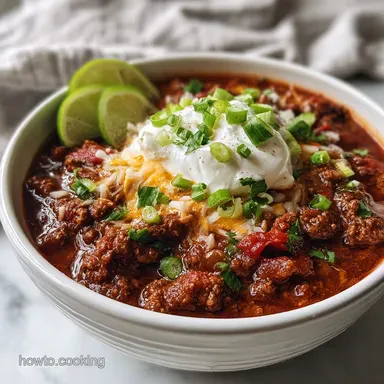
Chili Recipe: Hearty & Savory
- Time: Active 15 minutes, Passive 45 minutes, Total 1 hour
- Flavor/Texture Hook: Rich, velvety beef with a smoky, complex finish
- Perfect for: Nourishing family dinners or stress free weekend meal prep
- A Wholesome Family Chili Recipe for Confidence
- Science Principles for Deep Flavor
- Building Blocks for Savory Depth
- Essential Pantry Components and Swaps
- Systematic Cooking Steps for Success
- Fixing Common Texture Mistakes
- Adjusting Ratios for Large Groups
- Smart Budget Alternative Options
- Debunking Traditional Cooking Myths
- Storage Guidelines and Zero Waste
- High in Sodium
- Recipe FAQs
- 📝 Recipe Card
A Wholesome Family Chili Recipe for Confidence
You know that feeling when you crave a bowl of something warm, but every recipe you try ends up as a watery, bland mess? I've been there, staring at a pot of gray meat and thin liquid, wondering where I went wrong.
It usually happens when we rush the browning or dump everything in at once without letting the flavors develop. This chili recipe is my answer to that frustration. It focuses on building layers of flavor using affordable ingredients like ground beef and canned beans, ensuring every spoonful is thick and satisfying.
We are going to focus on techniques that transform basic pantry items into something truly special. By understanding how to properly sear meat and "bloom" your spices, you'll gain the confidence to cook without needing expensive gourmet jars. This isn't just about feeding the family; it's about mastering a classic that tastes even better the next day. This wholesome approach reminds me of my Classic Comfort recipe which also focuses on one pot efficiency.
I promise you that by the time the timer dings, your kitchen will smell incredible, and you'll have a pot of chili that looks like it's been simmering for eight hours. We’re using a mix of kidney and black beans for texture and a tiny bit of cocoa powder to mimic the complexity of professional slow cooked versions.
Let's get into the mechanics of why this method works so well every single time.
Science Principles for Deep Flavor
Building a better bowl of chili isn't magic; it is simply about managing moisture and heat to unlock hidden flavors. When we treat each ingredient with a little respect, the chemistry of the pot changes entirely.
- Maillard Reaction: Browning the beef at high heat creates hundreds of new flavor compounds that provide the signature "meaty" depth.
- Lipid Solubility: Sautéing spices in oil before adding liquid releases aromatic compounds that are fat soluble, making the chili significantly more fragrant.
- Enzymatic Breakdown: The gentle simmering of tomatoes and beans allows starches to release, naturally thickening the sauce without needing flour or cornstarch.
- Umami Synergy: Combining beef bone broth with tomato paste and cocoa powder creates a powerhouse of savory notes that hit every part of the palate.
Stovetop Versus Oven Comparison
| Method | Time | Texture | Best For |
|---|---|---|---|
| Stovetop | 45 minutes | Uniformly tender | Quick weeknight meals and frequent stirring |
| Oven (325°F) | 1 hour 15 mins | Caramelized edges | Hands off cooking and superior thickness |
| Slow Cooker | 6 hours | Very soft beans | Busy mornings when you want to prep early |
Choosing between these methods usually comes down to how much time you have to stand over the stove. I personally love the stovetop method for this specific chili recipe because I enjoy watching the liquid reduce into that perfect, velvety consistency.
However, if you have the time, the oven method provides a unique "crust" around the edges of the pot that adds a wonderful toasted flavor.
Building Blocks for Savory Depth
Understanding your ingredients helps you make smarter choices at the grocery store. You don't need the most expensive cuts of meat to make a world class meal; you just need to know how each component behaves in the pot.
| Ingredient | Science Role | Pro Secret |
|---|---|---|
| Ground Beef (80/20) | Provides fat for flavor | Don't drain all the fat; it carries the spice notes |
| Tomato Paste | Concentrated acidity | Sauté until it turns brick red for maximum sweetness |
| Chili Powder | Base aromatic | Use a fresh jar; old spices lose their volatile oils |
| Cocoa Powder | Color and depth | It mimics long aged peppers without the extra heat |
This ingredient deep dive shows that even the smallest addition, like cocoa, serves a structural purpose. The cocoa isn't there to make it taste like dessert - it provides a bitter backbone that balances the sweetness of the tomatoes and the richness of the beef.
Essential Pantry Components and Swaps
For this recipe, we are using a balanced mix of proteins and fibers to keep everyone full. If you find yourself missing an item, don't panic. This dish is incredibly forgiving, and smart substitutions can often lead to a result that is just as nutritious.
- 2 tbsp neutral oil: Use avocado or grapeseed oil. Why this? High smoke points prevent the oil from burning during the initial sear.
- 2 lbs ground beef (80/20): Substitute with ground turkey or chicken. Why this? The 20% fat ratio ensures the meat stays succulent during the simmer.
- 28 oz crushed tomatoes: Use diced tomatoes if you prefer chunks. Why this? Crushed tomatoes create a smoother, more cohesive sauce base.
- 15 oz kidney beans: Swap for pinto beans or Great Northern beans. Why this? Kidney beans hold their shape well under long heat.
- 1 cup beef bone broth: Use vegetable broth or even water in a pinch. Why this? Bone broth adds gelatin, giving the sauce a silkier mouthfeel.
If you are looking for a plant based alternative, the techniques here apply perfectly to my Homemade Vegan Chili recipe, which swaps the beef for hearty lentils or extra beans.
Systematic Cooking Steps for Success
Prepare the Aromatic Base
Heat the 2 tbsp neutral oil in a large heavy bottomed pot over medium high heat. Add the 1 large diced yellow onion and 1 diced green bell pepper. Sauté for about 5 to 7 minutes until the onions are translucent and slightly golden.
Note: This creates the foundational sweetness for the entire dish.
Brown Meat and Bloom Spices
Add the 2 lbs ground beef to the pot, breaking it up with a wooden spoon. Cook for 8 minutes until no pink remains and the meat is deeply browned. Once browned, stir in the 4 cloves minced garlic and 1 minced jalapeño.
Immediately add the 3 tbsp chili powder, 1 tbsp cumin, 1 tsp smoked paprika, 1 tsp oregano, and 1/2 tsp cayenne. Note: Sautéing the spices in the meat fat for 60 seconds "blooms" their flavor.
Combine Liquids and Simmer
Stir in the 1 tbsp tomato paste, coating the meat and vegetables. Pour in the 28 oz crushed tomatoes, the 15 oz kidney beans, 15 oz black beans, and 1 cup beef bone broth. Add the 1 tsp cocoa powder and 1 tsp sea salt. Stir well to combine all ingredients.
Note: Scraping the bottom of the pot (deglazing) releases the browned bits of meat which are packed with flavor.
The Final Reduction Phase
Bring the mixture to a gentle boil, then reduce the heat to low. Simmer uncovered for 45 minutes until the liquid has thickened and the flavors are fused. Stir occasionally to prevent the bottom from scorching.
Note: Simmering without a lid allows excess moisture to evaporate, concentrating the savory notes.
Fixing Common Texture Mistakes
Even the best cooks run into issues when the heat is a bit too high or the ingredients have more moisture than expected. Most chili problems are easily fixed with a few simple adjustments during the final stages of cooking.
Correcting Watery Texture Issues
If your chili looks more like a soup than a thick stew, it's likely because the vegetables released too much water or the simmer wasn't long enough. You can fix this by taking a potato masher and crushing about a quarter of the beans directly in the pot. The released starches act as a natural thickener.
Reviving Flat Flavor Profiles
Sometimes you taste the pot and it just feels... boring. This usually happens when the acidity is too low. A splash of apple cider vinegar or a squeeze of lime juice at the very end can brighten the entire dish. Salt is also often the culprit; add it in small increments until the spices "pop."
Managing Excess Surface Oil
Depending on the beef you used, you might see a layer of orange oil floating on top. While that fat holds flavor, too much of it can feel heavy.
| Problem | Root Cause | Solution |
|---|---|---|
| Excessive Greasiness | High fat meat ratio | Use a large spoon to skim oil from the surface |
| Bitter Aftertaste | Burned garlic or spices | Add a pinch of brown sugar to balance the bitterness |
| Tough Meat | Meat boiled too hard | Reduce heat and simmer longer to break down connective tissue |
Common Mistakes Checklist
- ✓ Always pat the meat dry if it seems wet before browning (prevents steaming).
- ✓ Do not drain the beans without rinsing them first to remove excess metallic flavor.
- ✓ Preheat your pot for at least 3 minutes before adding the oil and vegetables.
- ✓ Avoid covering the pot during the final simmer if you want a thick consistency.
- ✓ Let the chili rest for 10 minutes off the heat before serving to let the sauce set.
Adjusting Ratios for Large Groups
Feeding a crowd is where this chili recipe really shines. It is one of the most cost effective ways to feed ten or twenty people without spending all day in the kitchen.
Scaling Down (Half Recipe) Use a smaller Dutch oven or a deep saucepan. Reduce the cook time by about 10 minutes since the smaller volume will reach the desired thickness faster.
For the spices, use the full amount of smoked paprika but half of the cayenne to ensure the heat doesn't become overwhelming in a smaller pot.
Scaling Up (Double or Triple) When doubling, do not double the salt or cayenne immediately. Start with 1.5 times the amount and taste as you go. You will need a very large stockpot (at least 12 quarts for a double batch).
Brown the meat in batches to ensure it actually sears rather than just boiling in its own juices. You may need to add an extra 15 minutes to the total simmer time to account for the larger volume of liquid.
Chef's Note: If you're doubling the recipe for a party, consider adding the beans during the last 20 minutes of simmering. This prevents them from becoming too mushy when held at a warm temperature for several hours in a serving pot.
Smart Budget Alternative Options
| Premium | Budget | Flavor Impact | Savings |
|---|---|---|---|
| Beef Bone Broth | Bouillon Cube + Water | Slightly less body, same saltiness | Save $3.50 |
| Fresh Jalapeños | Canned Green Chilis | Milder heat, more tangy | Save $1.00 |
| Fancy Chili Blend | Bulk Chili Powder | Less complexity, very reliable | Save $5.00 |
A great decision shortcut for your next meal: If you want a smoky finish, add an extra teaspoon of smoked paprika or a chopped chipotle in adobo. If you want a leaner meal, replace 1 lb of beef with an extra can of beans and finely chopped mushrooms.
If you want a sweeter profile, add one diced red bell pepper in addition to the green one.
Debunking Traditional Cooking Myths
Many people believe that you must sear meat to "seal in the juices." In reality, searing is all about the Maillard reaction and creating flavor on the surface of the meat. Moisture loss actually increases at higher temperatures, but we accept that trade off for the massive boost in taste.
Another common misconception is that chili must be spicy to be authentic. Real depth comes from the combination of earthy cumin, sweet tomatoes, and savory beef. Heat is just an accessory. If you prefer a mild version, simply remove the seeds from the jalapeño or skip the cayenne entirely.
The "dark" color of great chili doesn't come from hours of cooking alone; it often comes from blooming the spices and using a touch of tomato paste or cocoa.
Storage Guidelines and Zero Waste
This chili is a meal prep superstar. In the fridge, it will stay fresh for up to 4 days. In fact, most people agree that it tastes better on day two because the flavors have had time to fully meld and the starches in the beans have further thickened the sauce.
For long term storage, you can freeze it in airtight containers for up to 3 months. When reheating, add a splash of water or broth to loosen the sauce back up.
To practice zero waste, save your onion skins and pepper scraps in a bag in the freezer to make a vegetable scrap broth later. If you find yourself with just a small bowl of leftover chili, don't throw it out!
It makes a fantastic topping for baked potatoes, or you can stir it into some cooked elbow macaroni for a quick "Chili Mac" lunch. Even the leftover liquid is packed with flavor and can be used as a base for a spicy tomato soup or a braising liquid for chicken.

High in Sodium
845 mg mg of sodium per serving (37% % of daily value)
The American Heart Association recommends limiting sodium intake to about 2,300mg per day for overall cardiovascular health.
Sodium Reduction Strategies for Your Chili Recipe
-
Low-Sodium Broth-30%
Swap regular beef bone broth for a low-sodium or no-salt added version. This simple change can significantly decrease the sodium content without sacrificing flavor.
-
Reduce Added Salt-25%
Eliminate or drastically reduce the added sea salt. Taste the chili before adding any salt, as other ingredients contribute sodium.
-
No-Salt Added Tomatoes-20%
Use no-salt added crushed tomatoes. Standard canned tomatoes often contain added salt; opting for the no-salt added variety will reduce sodium intake.
-
Rinse Beans Thoroughly-15%
Even though you're already rinsing the beans, ensure they are rinsed very thoroughly. This helps to remove excess sodium that may be present in the canned liquid.
-
Leaner Ground Beef-10%
Choose a leaner ground beef (e.g., 90/10) or ground turkey/chicken. While this has a smaller impact on sodium, it improves the overall nutritional profile by reducing fat content.
-
Spice It Up!
Enhance flavor with sodium free spices like different types of chili powder, garlic powder, onion powder, cumin, and herbs. Experiment with various blends to create a richer flavor profile without added salt.
Recipe FAQs
What is the secret to really good chili?
Properly browning the meat and blooming the spices. Browning creates deep, savory flavor through the Maillard reaction, while blooming spices in fat releases their aromatic oils for a more intense taste.
What are the basic ingredients for chili?
Ground meat, onions, garlic, tomatoes, beans, and chili powder. These form the foundational flavor and texture of most chili recipes, providing a savory, slightly spicy, and hearty base.
What's the secret ingredient to add to chili?
A small amount of unsweetened cocoa powder. It adds incredible depth and complexity without making the chili taste like chocolate, balancing the acidity and richness.
Do you need to peel tomatoes for chili?
No, you don't need to peel them. Canned crushed or diced tomatoes have their skins removed during processing, and any small skins in fresh tomatoes will soften and break down during cooking.
How do I thicken watery chili?
Mash some of the beans directly in the pot. The starches released from the mashed beans act as a natural thickener, turning a watery consistency into a rich, velvety texture.
Can I make chili ahead of time?
Yes, chili is even better the next day. Flavors meld and deepen overnight, and the sauce naturally thickens, making it ideal for meal prep or serving at gatherings.
What pairs well with chili?
Cornbread or crusty bread. A Southern Comfort: My Go-To Homemade Cornbread provides a perfect starchy counterpoint to the rich, savory chili.
Hearty Chili Recipe
Ingredients:
Instructions:
Nutrition Facts:
| Calories | 398 kcal |
|---|---|
| Protein | 29.6 g |
| Fat | 20.5 g |
| Carbs | 24.8 g |
| Fiber | 8.4 g |
| Sugar | 5.9 g |
| Sodium | 845 mg |
