Homemade Buttermilk: a Simple Recipe for Creamy Delight
- The Charm of Homemade Buttermilk: Your Go-To Guide
- What is Buttermilk, Anyway?
- Why Buttermilk? The Perks!
- The Not-So-Secret Secret to How to Make Buttermilk
- The Final Touch
- Essential Ingredients Guide for Your Cooking Journey
- Leveling Up Your Cooking with Professional Methods
- Unlocking the Magic of Homemade Buttermilk
- Frequently Asked Questions
- 📝 Recipe Card
The Charm of Homemade Buttermilk: Your Go-To Guide
Ever found yourself in the middle of a recipe, only to realize you’re out of buttermilk? yeah, it’s happened to the best of us! one sunday morning, i was all set for some fluffy pancakes sunday brunch, right? but surprise! no buttermilk left in the fridge.
I scrambled online for how to make buttermilk , and let me tell you, i was shocked at just how easy it is to whip up your own.
If you’ve ever faced that same panic, i’ve got you covered.
What is Buttermilk, Anyway?
Buttermilk isn’t just a tangy liquid. it's a versatile ingredient with roots that trace back to the good ol’ days of butter churning.
Originally a by-product of making butter, buttermilk is now a cherished staple in many american households. these days, it's the secret weapon in everything from kitchenaid stand mixer recipes to orange scones recipe and even easy cornbread.
Seriously, this magical elixir has found its way into our hearts and kitchens!
When it comes to making buttermilk, the process is a breeze. you can go from zero to hero in just five minutes .
Plus, it’s a total money saver! why buy a carton when you can make your own buttermilk with just a couple of ingredients?
Why Buttermilk? The Perks!
So, why bother with making buttermilk? Well, let me break it down for you.
First off, it’s super creamy and adds moisture. you know those cakes and muffins, soft and delicious? that's thanks to the buttermilk! plus, it provides a slight acidity that reacts beautifully with baking soda, giving your baked goods that lift we all crave.
Health wise, buttermilk has a nice nutrient profile. it’s lower in fat than regular milk and packed with probiotics, which is a fancy term for good gut bacteria.
Ideal for those post holiday meals or celebrations where everyone’s indulged a bit too much!
And let’s not forget special occasions! Whether it's a casual hangout or a festive family gathering, nothing says comfort like buttermilk fried chicken or a colossal stack of pancakes.
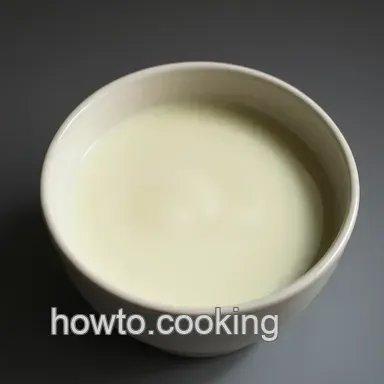
The Not-So-Secret Secret to How to Make Buttermilk
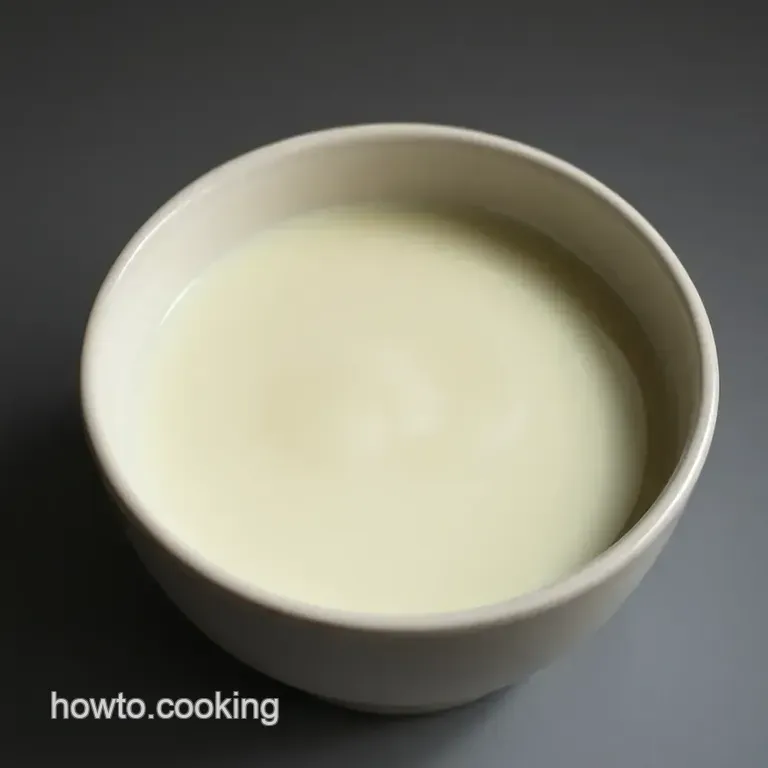
Alright, let’s get to the good stuff. Here’s how to make buttermilk:
- Grab 1 cup of whole milk (or low-fat, whatever you have).
- Add in 1 tablespoon of white vinegar or lemon juice . Yup, just one!
- Give it a little stir, and let it sit for about 5- 10 minutes . Magic happens you’ll see it thicken and curdle.
That’s it, folks! You've just tackled a classic cooking substitute. Perfect for when a recipe calls for buttermilk and you’re totally out of it.
Easy peasy, right? trust me, you'll feel like a kitchen wizard when you pour this creamy goodness into your recipes, whether you’re making fluffy pancakes, or looking for a simple twist in your favorite kitchenaid recipes .
The Final Touch
The beauty of buttermilk extends beyond just pancakes and cakes. you can brew up a delightful dressing for a side salad or refresh a classic coleslaw.
Oh, and let’s not forget the most important use: pouring it over fried chicken. seriously, the flavors just dance!
Now, if you’re feeling inspired, let’s dive right into the ingredients you’ll need to whip up this creamy delight. so grab your mixing bowl and get ready! cooking doesn’t have to be complicated sometimes, it just takes a splash of creativity and a little love.
Happy cooking, friends!
Essential Ingredients Guide for Your Cooking Journey
So, you’re diving into the wonderful world of cooking? Awesome! Anyone can whip up a meal, but it’s all about having the essential ingredients to make your dishes pop! Let’s break it down, shall we?
Premium Core Components
First off, let's talk about measurements because nobody wants to ruin a recipe just because they used a cup instead of a teaspoon.
In the good ol’ us, we’re big on cups, tablespoons, and teaspoons, but i get it sometimes you need the metric system to keep things straight.
Here’s how it breaks down:
- 1 cup = 240 ml
- 1 tablespoon = 15 ml
- 1 teaspoon = 5 ml
Quality Indicators and Freshness Tips
Next up, quality indicators . when you shop for ingredients, you want to look for the freshest options. think bright colors for greens and a good fragrance for herbs.
Plus, storage is key keep your spices in a cool, dark place to maintain their zest.
A little pro tip? Always do a smell test! If that cinnamon jar doesn’t knock your socks off, it’s time to replace it!
Signature Seasoning Blend
Now, let’s spice things up. a good meal revolves around a signature seasoning blend . i’m talking about essentials like oregano , cumin , and paprika .
They’re your culinary best friends! for herbs, consider some fresh parsley or basil to lift your dishes.
Ever tried to mix up regional spices? Think about how Southern cuisine loves its Cajun seasoning , while Italian food just sings with Italy’s finest herbs .
Smart Substitutions
You ever find a recipe and then realize you don't have a key ingredient? No sweat! Here are some smart substitutions for you:
- Buttermilk uses are endless, but if you’re out, simply make your own buttermilk ! Mix a cup of whole milk (or low-fat) with a tablespoon of vinegar or lemon juice it’s a lifesaver!
- Craving baking substitutions ? If a recipe calls for sour cream, but you only have yogurt, go for it!
Kitchen Equipment Essentials
Let’s get into some kitchen equipment essentials next. if you’re serious about cooking, invest in a good kitchenaid stand mixer .
It’s not just for baking bread, friend. you can crush it with kitchenaid mixer recipes for everything from cookies to meatloaf, and don't forget the delightful orange scones recipe !
If you're feeling strapped for cash, it’s okay! You can use a whisk instead of a stand mixer. Just keep mixing until your arms feel like jelly.
Wrapping It Up
Alright, let’s talk about the finishing touches! crafting meals is all about confidence and creativity . with the right ingredients at your fingertips like some homemade easy cornbread recipes you can tackle any dish.
Feel free to swap things as you like! remember, cooking should be enjoyable don’t stress.
Before you know it, you'll be sharing your butter recipes homemade and swapping food substitutes with friends like it’s second nature.
And for those looking to dive deeper, get ready for the upcoming section where i’ll guide you step-by-step on how to make buttermilk ! you won't want to miss this it’s going to elevate your dishes to a whole new level!
So, grab your ingredients, prep your space, and let's get mixing! Your culinary adventure is just getting started.
Leveling Up Your Cooking with Professional Methods
When it comes to professional cooking methods , attention to detail is what separates a good meal from a great one.
It's like that moment during a road trip when the playlist shifts from good vibes to killer bangers . you know, the kind of cooking that just hits different? let’s dive into some essential preparation steps to help you get there, stepping up your kitchen game like a pro!
Essential Preparation Steps
First off, mise en place . this fancy french term means everything in its place , but honestly, it’s really just about being organized before you start cooking.
Picture this: you’re halfway into your orange scones recipe, and suddenly you’re rummaging through the pantry for flour. ugh. so, take a little time to set out all your ingredients measured and prepped.
Now, time management? oh boy, this is everything. if you’re cooking a large meal, think about how long each dish takes.
For example, maybe your easy cornbread recipe takes 30 minutes to bake while your chicken stews need a good 1.
5 hours . start the longer items first so everything comes out at the same time. serious chef vibes right there!
Don’t forget about safety. Keep a clean workspace, wash your hands, and keep raw meat away from your veggies. Trust me, food poisoning is SO not the vibe.
step-by-step Process
Alright, let’s break it down. Here's some step-by-step goodness whenever you're in the kitchen:
Prep First : Have everything within reach think bowls of diced onions and minced garlic.
Temperature Check : Always use a reliable food thermometer. Meat should hit 165° F for safety. No one wants to bite into a rare chicken, y’know?
Timing is Key : Stick to the timer! Perfect fish might need just 8 minutes on one side, or your cornbread needs a perfect 30 minutes in the oven.
Visual Cues : This might sound basic, but trust your eyes. Golden brown scones, for example, tell you they’re on point!
Expert Techniques
Now for some expert techniques. if you want to impress your friends, consider using a kitchenaid stand mixer for whipping that butter or kneading dough.
Such a game changer! just make sure you don’t overmix no one likes tough bread or cakes. aim for a mix until just combined!
Quality checkpoints? Make sure your ingredients are fresh. Don’t use expired milk in that Buttermilk Substitute. If you’re unsure, look for the expiration date. Trust me, I’ve made that mistake before!
And let’s talk troubleshooting. your batter might seem too thick? add a splash of milk. no buttermilk? you can easily do a quick make your own buttermilk with just milk and lemon juice.
It's like magic!
Success Strategies
Now, let’s discuss how to avoid common pitfalls. Firstly, don’t skip tasting! Sample as you cook and adjust seasonings like salt and pepper, which can make or break your dish.
And those quality assurance tips? Sniff your ingredients. If it doesn’t smell right, don’t use it. Always better safe than sorry.
Also, ever thought about make-ahead options? you can cook certain components a day before, saving you time and stress. people appreciate that, and trust me, your dinner guests will be none the wiser that you didn’t cook it all on the same night.
In a nutshell, great cooking isn’t just about the recipe it’s about planning, prepping, and managing your time like a boss.
And before we wrap up, if you’re curious about how to create that luscious buttermilk at home, stick with us.
I greet you with my famous homemade buttermilk recipe next! get ready to whip up something delicious!
Unlocking the Magic of Homemade Buttermilk
Oh my gosh, making your own buttermilk is a total game changer for your kitchen! seriously, it’s so simple that even if you can’t boil water, you can manage this.
I mean, who doesn’t love a little creamy indulgence in their recipes, right? let’s dive into some additional recipe information that'll snag you the ultimate buttermilk experience.
Pro Tips & Secrets
First things first, make your own buttermilk with just two ingredients! grab that kitchenaid stand mixer if you have one it’s a lifesaver.
When mixing, here's a pro tip: stir just until combined. over mixing can lead to a thick mess instead of that lusciously creamy buttermilk.
And here’s a little secret i learned the hard way: don’t skimp on letting it sit for 5- 10 minutes after mixing.
This waiting game is where the magic happens. the tangy flavor develops more, and your buttermilk becomes a star player in recipes, making everything from an easy cornbread recipe to fluffy pancakes just pop!
Perfect Presentation
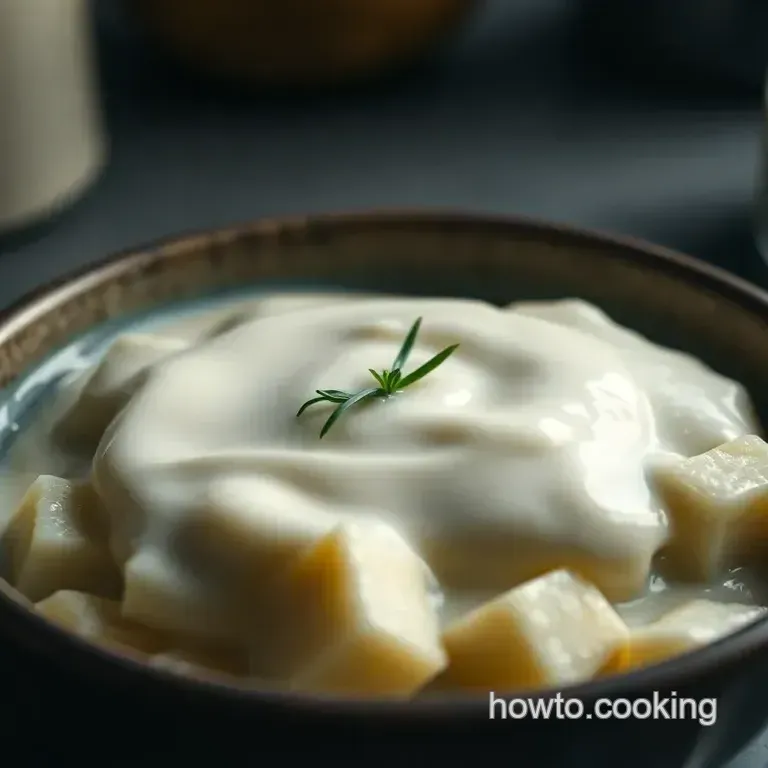
Now let’s talk about presentation. once your buttermilk is ready, it’s time to showcase it! if you're whipping up something like an orange scones recipe , think about pouring the buttermilk into a clear glass jar.
Rustic is in, my friends. add a sprig of mint or even a slice of citrus on top for a pop of color.
A visually appealing dish can make all the difference trust me, people eat with their eyes first!
Storage & make-ahead
Making buttermilk ahead of time is not only smart but also a huge time saver. you can store this magical mix in the fridge for up to a week.
Just make sure you seal it tight in a container, and check for freshness before use. to reheat, just give it a little whisk; no need to stress over complex reheating methods.
Creative Variations
Let's get creative! did you know you can adapt buttermilk for seasonal or dietary needs? for the vegetarians in your life, feel free to swap regular milk with a non-dairy alternative like almond or oat milk and still get that tangy goodness.
For something exotic, why not stir in some herbs? a pinch of thyme or dill can make your buttermilk dressing stand out at picnics.
And here’s a neat idea: create a spiced buttermilk by adding paprika or cayenne for a fiery touch. your fried chicken will never be the same.
By experimenting with flavor adaptations , you might discover your new favorite combo!
Complete Nutrition Guide
Here’s a quick breakdown of what you’re getting from your homemade buttermilk: about 100 calories per cup, with 6 grams of protein and a healthy dose of calcium.
The health benefits are solid, particularly for those looking to boost their dairy intake without the heaviness of cream.
When it comes to portion guidance, about half a cup is perfect for most recipes, so feel free to double or halve based on your meal size! oh, and don’t forget the dietary considerations while it’s creamy, it’s also flexible enough to fit into most diets when made with the right substitutes.
Wrapping It Up
So, there you have it making buttermilk can be a breeze, and it opens up a world of possibilities in your cooking.
Every time i whip up a batch, i feel like a kitchen wizard conjuring scrumptious spells. just imagine biting into fluffy pancakes or moist cornbread infused with that signature buttermilk tang delish!
Now it’s your turn! get in that kitchen, roll up your sleeves, and remember, the best part is sharing what you make.
You’ve got this now you know how to make buttermilk like a pro. happy cooking!
Frequently Asked Questions
How to make buttermilk quickly without running to the store?
If you find yourself in need of buttermilk but don't have any on hand, it's super easy to make! Simply combine 1 cup of whole milk with 1 tablespoon of vinegar or lemon juice. Let it sit for about 5 to 10 minutes, and you'll have a homemade buttermilk substitute ready to go!
Can I use non-dairy milk to make buttermilk?
Absolutely! You can use non-dairy milk alternatives, such as almond or soy milk, to make buttermilk. Just mix 1 cup of your preferred non-dairy milk with 1 tablespoon of vinegar or lemon juice, and let it sit for the same amount of time as traditional buttermilk.
What are some common uses for buttermilk in cooking?
Buttermilk is incredibly versatile! It’s often used in pancakes, biscuits, and cakes to impart moisture and a delightful tangy flavor. Additionally, it makes a fantastic base for salad dressings and can even be used as a marinade for fried chicken, giving it that Southern charm.
How long can I store homemade buttermilk?
You can store homemade buttermilk in a sealed container in the fridge for up to a week. Just give it a good shake before using it again, as it may separate slightly over time. If it smells off or looks strange, it's best to toss it and start fresh!
Could I use buttermilk in savory dishes?
Definitely! Buttermilk isn’t just for sweet recipes; it’s a delightful addition to savory dishes too. You can use it in marinades for meats or incorporate it into creamy soups and sauces for added richness and tang.
Are there any health benefits to using buttermilk compared to regular milk?
Yes, buttermilk can be lower in fat compared to regular milk, especially if you opt for low-fat versions. It’s also a good source of probiotics, which are beneficial for gut health. Plus, its tangy flavor can make it a delightful ingredient that helps balance out richer dishes!
Homemade Buttermilk A Simple Recipe For Creamy D
Ingredients:
Instructions:
Nutrition Facts:
| Calories | 100 |
|---|---|
| Fat | 5g |
| Fiber | 0g |
