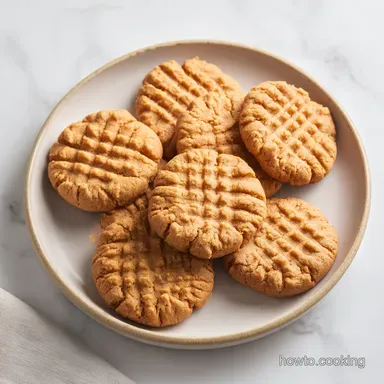
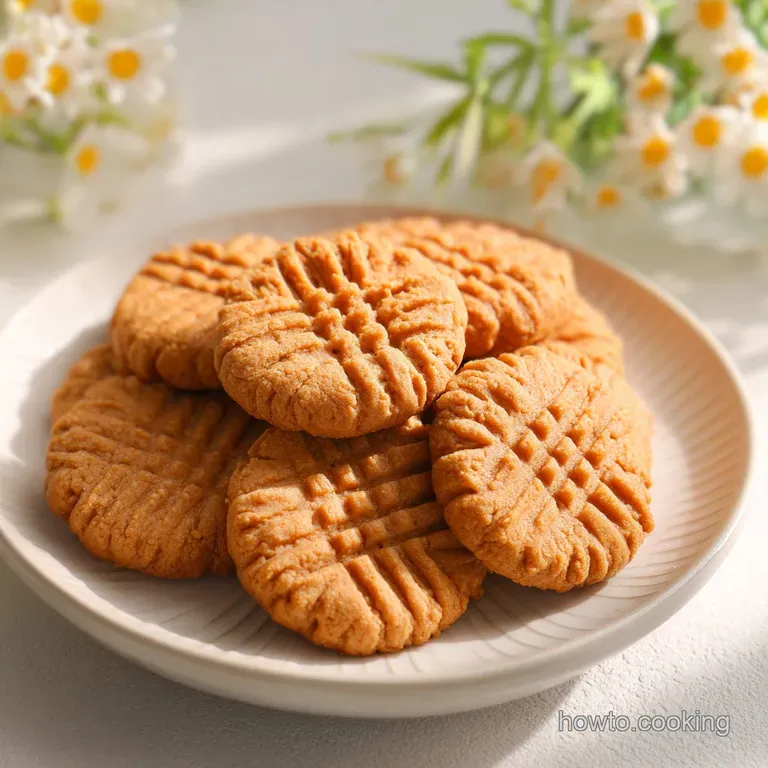
My Favorite Peanut Butter Cookies: Soft and Chewy
- Time: 10 min active + 41 min bake/cool = Total 51 mins
- Flavor/Texture Hook: Velvety centers with a sparkly, sugary crust
- Perfect for: Quick weeknight cravings or a family treat
That smell hits you the second the oven door opens - that deep, roasted aroma of toasted peanuts mixed with caramelized sugar and warm vanilla. It fills every corner of the house and immediately makes everything feel cozy.
I remember the first time I tried to swap out the commercial creamy peanut butter for the "natural" kind that you have to stir for ten minutes. It was a disaster. The cookies didn't hold their shape, they leaked oil onto the pan, and they came out looking like sad, greasy puddles.
That's when I realized that the stabilizers in standard creamy peanut butter are actually the secret weapon here. They provide the structural support needed to keep the cookie from collapsing.
Once I leaned into the classic creamy stuff, these became my favorite peanut butter cookies because they have that specific, nostalgic chew that you just can't get with fancy organic alternatives.
You can expect a cookie that is soft in the middle but has a distinct, sparkly crunch on the outside thanks to the sugar roll. They aren't overly sweet, but they have that rich, salty sweet punch that makes you want to eat three before you've even poured a glass of milk.
Let's get into how to actually make them without any stress.
What Makes This So Good
The secret to this texture is all in how the fats and sugars interact during the bake. It's not just about throwing things in a bowl, but about creating a specific structure that resists spreading.
Air Incorporation: Beating the butter and sugars for a full few minutes creates tiny air pockets. This ensures the cookies are light and not just dense lumps of peanut butter.
Sugar Synergy: Using both white and brown sugar is key. The brown sugar adds moisture and a hint of molasses, which keeps the center velvety and "bendy" rather than brittle.
Fat Stability: According to the creaming method explained by Serious Eats, the combination of butter and peanut butter creates a stable emulsion. This prevents the cookies from flattening out too much in the oven.
Leavening Balance: The baking soda reacts with the slight acidity in the brown sugar to give just enough lift, preventing the cookies from becoming too heavy.
| Method | Time | Texture | Best For |
|---|---|---|---|
| 3 Ingredient | 15 mins | Denser/Fudgy | Ultra fast cravings |
| This Classic | 51 mins | Soft & Chewy | The gold standard |
| Chilled Dough | 120 mins | Thicker/Higher | Maximum chewiness |
Component Analysis
Before we start mixing, it's helpful to see what each part of this recipe is actually doing. It's not just about flavor, but about the mechanics of the bake.
| Ingredient | Science Role | Pro Secret |
|---|---|---|
| Unsalted Butter | Fat/Tenderizer | Softened, not melted, to keep air bubbles |
| Creamy PB | Flavor/Structure | Commercial brands provide better stability |
| Brown Sugar | Moisture/Color | Packed tightly to ensure a chewy center |
| Baking Soda | Lift/Browning | Provides the classic "cookie" rise and color |
What You'll Need
I've kept this list simple because you don't need fancy ingredients to get a great result. Just make sure your butter and eggs are at room temperature, or you'll end up with a lumpy batter.
- 1/2 cup (115g) unsalted butter, softened Why this? Provides the creamy base and richness
- 1/2 cup (125g) creamy peanut butter Why this? Adds stability and the main flavor
- 1/2 cup (100g) white granulated sugar Why this? Creates the crisp edges
- 1/2 cup (100g) packed dark brown sugar Why this? Keeps the center soft and chewy
- 1 large (50g) egg, room temperature Why this? Binds everything together
- 1 tsp (5ml) vanilla extract Why this? Rounds out the peanut flavor
- 1 1/2 cups (190g) all purpose flour Why this? Provides the necessary structure
- 3/4 tsp (4g) baking soda Why this? Helps the cookies rise
- 1/2 tsp (3g) sea salt Why this? Balances the sweetness
- 2 tbsp (25g) granulated sugar Why this? For the sparkly coating
Quick Substitutions
| Original Ingredient | Substitute | Why It Works |
|---|---|---|
| Unsalted Butter | Margarine | Similar fat content. Note: Less rich flavor |
| Creamy PB | Almond Butter | Nutty alternative. Note: Cookies may spread more |
| All Purpose Flour | 1:1 GF Flour | gluten-free option. Note: Slightly grittier crumb |
| White Sugar | Coconut Sugar | Lower glycemic. Note: Darker color and earthy taste |
Equipment Needed
You don't need a professional kitchen for this. A few basics will do the trick. If you have a stand mixer like a KitchenAid, use it, but a hand mixer or even a sturdy whisk and some elbow grease will work too.
- Large mixing bowl (for the wet ingredients)
- Medium mixing bowl (for the dry ingredients)
- Hand mixer or stand mixer
- Baking sheet (cookie sheet)
- Parchment paper or silicone mats
- Small bowl (for the coating sugar)
- Wire cooling rack
- Fork (for the classic cross hatch)
- Tablespoon or cookie scoop
From Prep to Plate

Right then, let's get baking. The key here is not to overwork the dough once the flour goes in. If you mix too much, you'll develop too much gluten, and your cookies will be tough instead of tender.
- Beat the softened butter, peanut butter, white sugar, and brown sugar together on medium high speed for 2 to 3 minutes until the mixture is pale, fluffy, and uniform. Note: This creates the air pockets for a lighter cookie.
- Mix in the egg and vanilla extract until fully incorporated and smooth.
- In a separate bowl, whisk together the flour, baking soda, and salt.
- Turn the mixer to low and slowly add the flour mixture, mixing just until no streaks of white remain. Note: Stop immediately to avoid a cakey texture.
- Preheat your oven to 350°F (175°C).
- Scoop approximately 1.5 tablespoons of dough and roll into a ball.
- Roll the dough ball in the coating sugar until evenly covered and place it on a baking sheet.
- Use a fork to press a cross hatch pattern into the top of each cookie. Note: Don't press too deep or they'll flatten too much.
- Bake for 10–12 minutes until the edges are just golden but the centers still look slightly soft.
- Allow to cool on a wire rack for at least 10 minutes before eating.
Chef's Tip: If your kitchen is really warm, pop the rolled dough balls in the fridge for 10 minutes before baking. This prevents them from spreading too thin and keeps the centers extra gooey.
Troubleshooting Guide
Even the best recipes can go sideways if the environment isn't right. Most cookie issues come down to temperature or measurement.
| Issue | Solution |
|---|---|
| Why Your Cookies Spread Too Thin | This usually happens because the butter was too soft (almost melted) or you used natural peanut butter. When the fat melts too quickly in the oven, the structure collapses before the flour can set. |
| Why Your Cookies Are Dry or Cakey | Overmixing is the most common culprit here. When you beat the flour too much, you create a bread like structure. Also, check your flour measurement; if you scoop directly with the cup, you might be pa |
| Why the Fork Marks Disappeared | If the dough is too wet or the oven temperature is too low, the cookies will flow outward and "heal" the cross hatch marks. Make sure your oven is fully preheated before the first batch goes in. |
Common Mistakes Checklist
- ✓ Used room temperature eggs to prevent batter splitting.
- ✓ Measured flour by weight or using the spoon and level method.
- ✓ Stopped mixing the moment the flour disappeared.
- ✓ Avoided using "natural" oil separating peanut butter.
- ✓ Let the cookies rest on the pan for 5 minutes before moving to the rack.
Adjusting the Batch
Whether you're baking for just yourself or a whole neighborhood, you can tweak this. Just remember that baking is chemistry, so don't just double everything blindly.
Scaling Down (Half Batch) If you only want about 13 cookies, cut everything in half. For the egg, crack one into a bowl, whisk it well, and then use exactly 25g (about half).
Use a smaller baking sheet to ensure the heat circulates properly, and check for doneness about 2 minutes earlier than usual.
Scaling Up (Double Batch) When doubling this recipe, I suggest working in batches. If you crowd your mixer, the butter and sugar won't cream as efficiently. For the seasonings (salt and baking soda), only increase them to 1.5x instead of a full 2x to avoid a metallic taste.
Lower your oven temp to 325°F (160°C) if you are baking multiple sheets at once, and extend the time by 2-3 minutes.
Custom Variations If you're feeling adventurous, you can turn these into peanut butter chocolate chip cookies by folding in 1/2 cup of mini chocolate chips. For those who want a slightly different treat, these pair well with other buttery desserts like raspberry thumbprint cookies. If you're too impatient to wait for the oven, you can always make a batch of safe edible cookie dough to snack on while these bake.
Common Baking Myths
There's a lot of old school advice out there that doesn't actually hold up in a modern kitchen. Let's clear a few things up.
Myth: You must use chilled butter for all cookies. Actually, for my favorite peanut butter cookies, softened butter is essential. Chilled butter doesn't trap air during the creaming process, which would leave you with a dense, heavy cookie instead of a soft one.
Myth: Using a "natural" peanut butter is always healthier and better. While it might have fewer additives, the lack of stabilizers makes the dough unstable. Natural PB causes the cookies to spread and become oily.
If you insist on using it, you'll need to add an extra 2-3 tablespoons of flour to compensate.
Storage and Zero Waste
You don't want these to go stale, and you certainly don't want to waste a single crumb.
Storage Guidelines Keep your baked cookies in an airtight container at room temperature for up to 5 days. If you want them to stay soft, put a small piece of white bread in the container; the cookies will absorb the moisture from the bread. In the fridge, they'll last 10 days, though they'll be firmer.
Freezing Tips You can freeze the baked cookies for up to 3 months. Wrap them individually in parchment paper and place them in a freezer bag. To eat, just let them thaw for 20 minutes or pop them in a 300°F (150°C) oven for 3 minutes to get that "freshly baked" warmth back.
Zero Waste Kitchen Don't throw away the leftover coating sugar! Since it's just granulated sugar, you can put it back in the jar. If you have a bit of peanut butter left in the jar that's too small to scoop, add a teaspoon of hot water or oil, shake it up, and use it as a glaze for a banana.
Presentation Tips
Since these are my favorite peanut butter cookies, I like them to look as good as they taste. The cross hatch is classic, but there are ways to make them pop.
For a professional look, use a consistent scoop size. A small cookie scoop ensures every single cookie is the exact same diameter, which means they all finish baking at the exact same time. If some are smaller than others, the small ones will overbake while the big ones stay raw.
When doing the fork marks, dip your fork in a little bit of flour or sugar first. This prevents the dough from sticking to the tines, giving you those sharp, clean lines instead of a smeared look.
Once they're cooled, stack them in a pyramid on a platter with a few whole roasted peanuts scattered around the base for a rustic, home cooked vibe.
Recipe FAQs
How long can I store these peanut butter cookies?
Up to 5 days at room temperature. Keep them in an airtight container to maintain freshness. They also last 10 days in the refrigerator or 3 months in the freezer.
Why did my cookies spread too thin?
Your butter was likely too soft or you used natural peanut butter. When the fat melts too quickly in the oven, the cookie structure collapses before the flour can set.
Why are my peanut butter cookies dry or cakey?
Overmixing the dough is the most common culprit. Beating the flour too much creates a bread like structure instead of a tender cookie crumb.
How to create the classic cross hatch pattern?
Press a fork into the top of the sugar coated dough ball. Use a crisscross motion to create the signature indented lines before placing them in the oven.
Is it true that natural peanut butter is the best choice for these cookies?
No, this is a common misconception. Natural peanut butter often causes the cookies to spread too thin because the oil separates more easily.
How to avoid over developing the gluten in the dough?
Turn the mixer to low when adding the flour mixture. Mix only until no streaks of white remain. If you enjoyed mastering dough texture here, see how the same principle works in these chewy chocolate chip cookies.
Can I freeze these cookies?
Yes, for up to 3 months. Wrap baked cookies individually in parchment paper and store them in a freezer bag to prevent freezer burn.
My Favorite Peanut Butter Cookies